Uizard Review: Can It Really Generate a Usable UI?
Looking for a reliable Uizard review? You just found it!
I used this platform to transform sketches into fully functional UI designs. It also supports a prompt-to-design feature, and so much more.
If this seems a bit complex, I’ve also prepared a short tutorial to help you get started, so keep reading and discover if Uizard is a good fit for your needs.
What is Uizard?
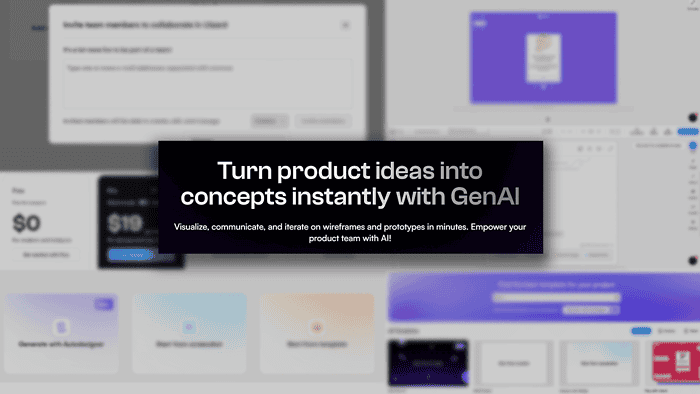
Uizard is an AI-powered platform that lets you create User Interface (UI) designs as fast as possible. As input, you can use various options and templates, as well as your ideas (formulated in prompts).
Now, let me break this all down to show you how the platform works in practice:
Features
Below are Uizard’s top features and my experience with them:
Creation Options
When you start with Uizard the first question is how do you want the AI to support your design?
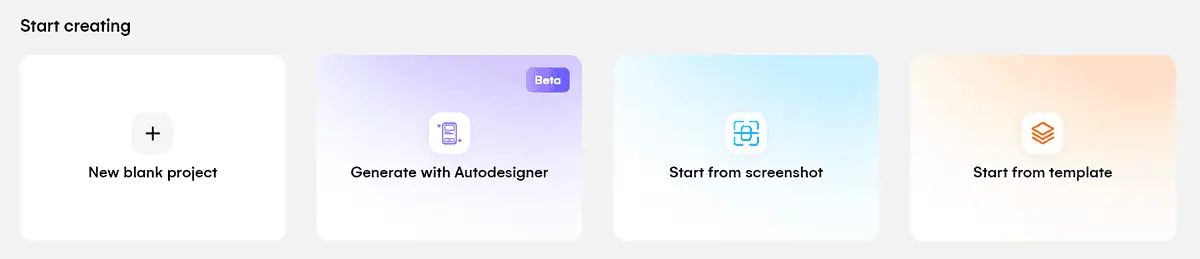
There are four paths you can take:
- Blank project – start with nothing and have the AI fully under your control.
- Autodesigner – fill in a few prompts and get a 100% generated AI design.
- Screenshot – upload an image and turn it into an editable design.
- Template – choose an already existing design and rework it.
Regardless of your choice the main reason one would go with Uizard instead of Miro, for example, is the AI features. That’s why I’ll also focus more on these.
Fun fact: Uizard started in 2018 and in 2024 became part of Miro Labs.
A Blank project will take you directly to the editor. No AI setup and prompts. In the following section, I’ll talk more about the editor itself since it’s the destination regardless of the path one takes.
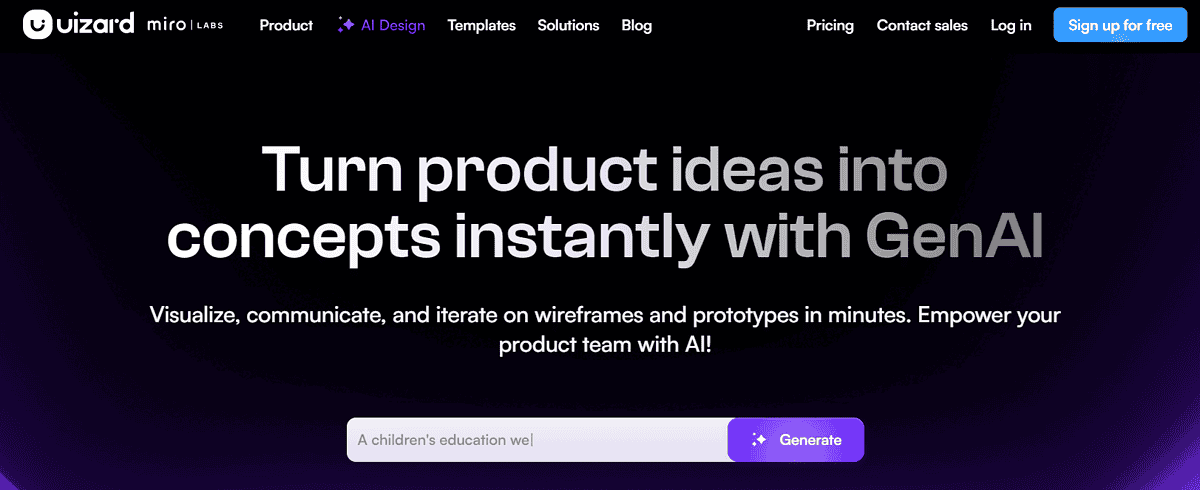
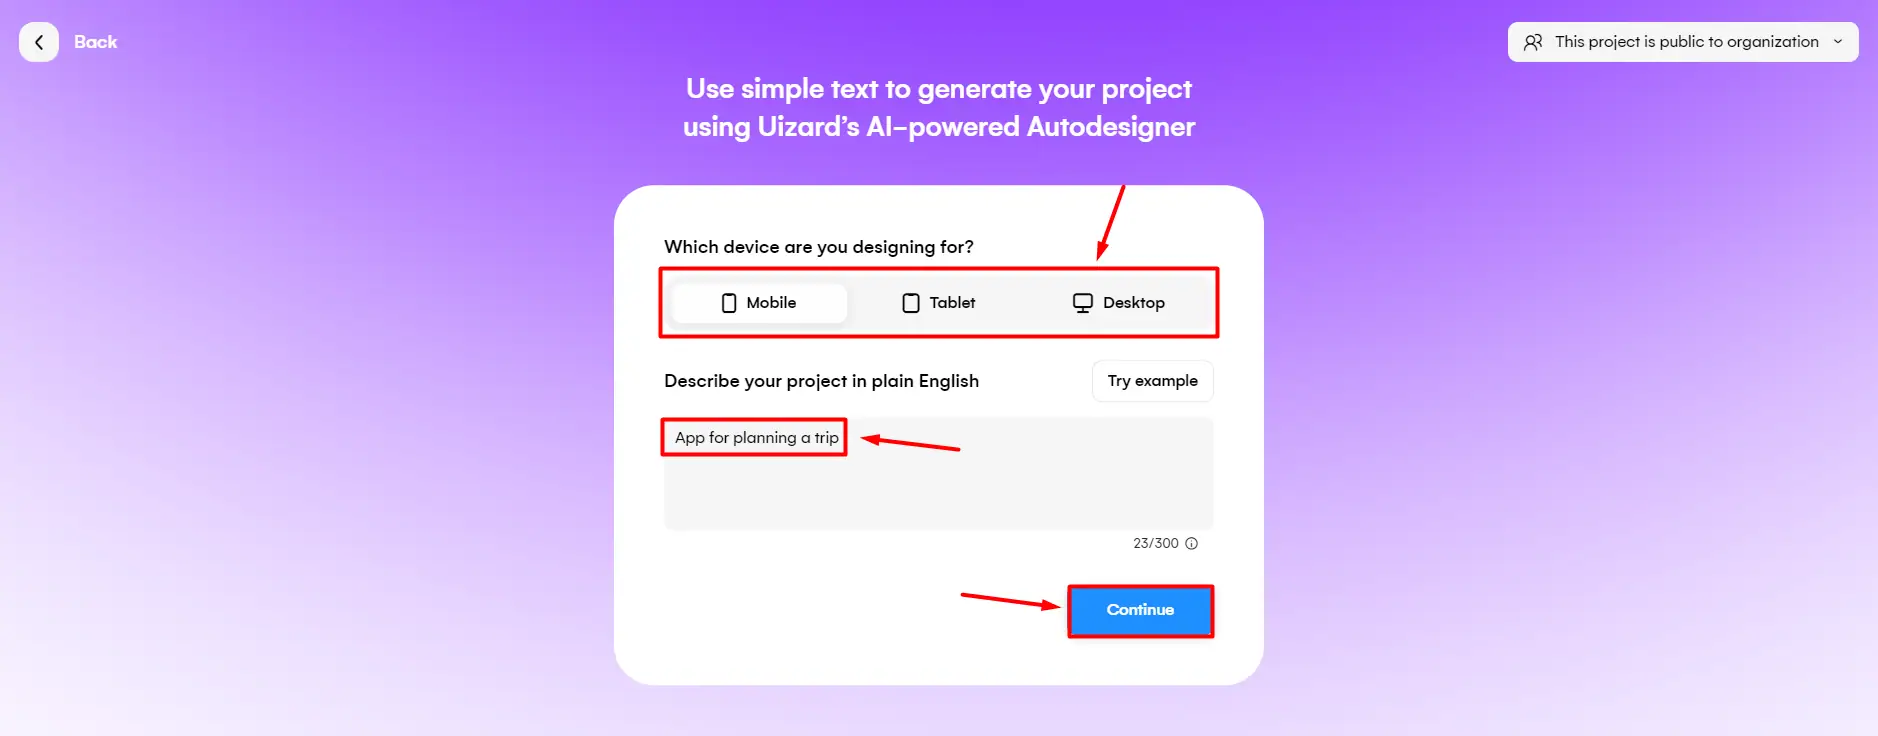
The Autodesigner experience starts with providing (an up to 300-character) description of your project. Here, it’s important to not be too specific (thus the character limit) since this option works best when it has liberty. There are prompt examples that can help you navigate it.
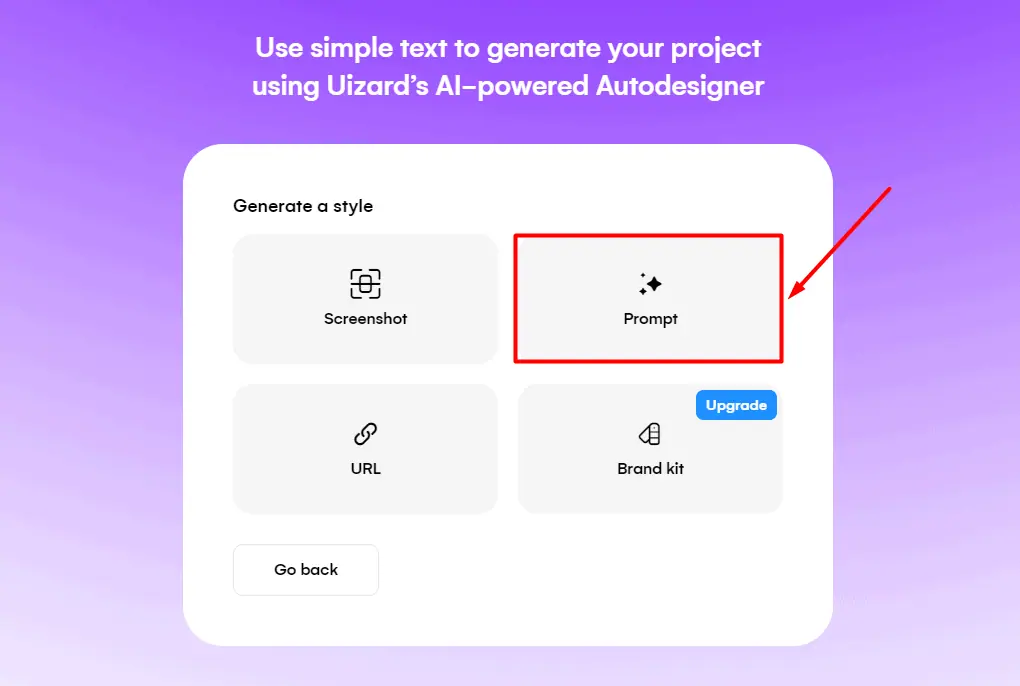
After you’re done, you’ll have to select between the following methods for generating the design:
- Screenshot
- Prompt
- URL
- Brand Kit
The Screenshot is one of the options you have, in combination with the Autodesigner or without it.
With Autodesigner you can continue with the textual prompt, but also provide a URL for your project. If you want a repetitive design and brand recognition you can go with Brand Kit.
Finally, starting with a Template gives you a head advantage and takes you to the editor.
Advanced Editor
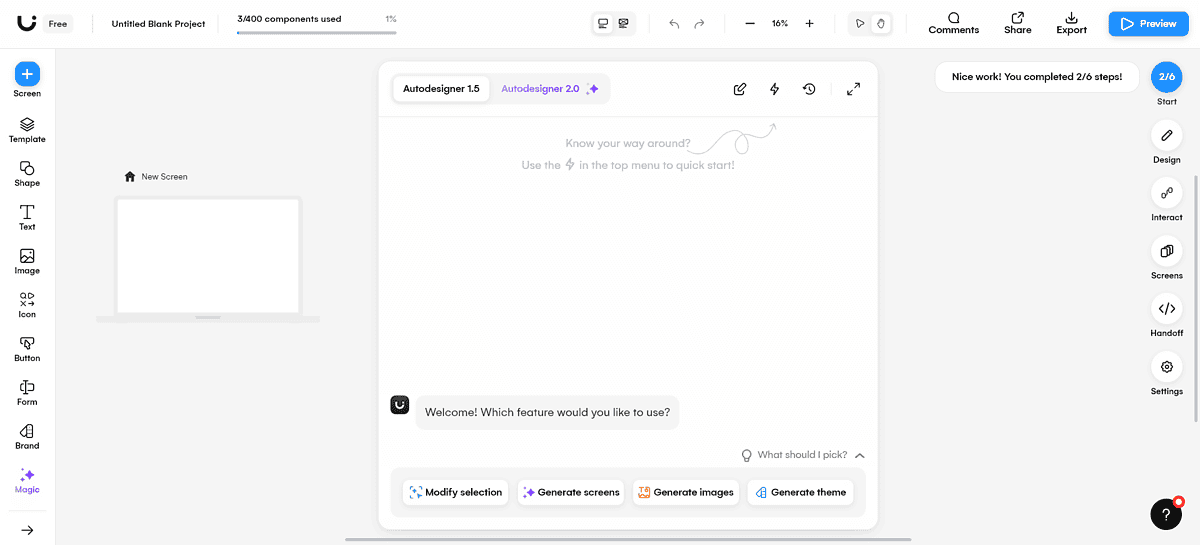
Finally, we reached the point that truly matters – Uizard Editor. Although it can be overwhelming at first sight, it’s very beginner-friendly.
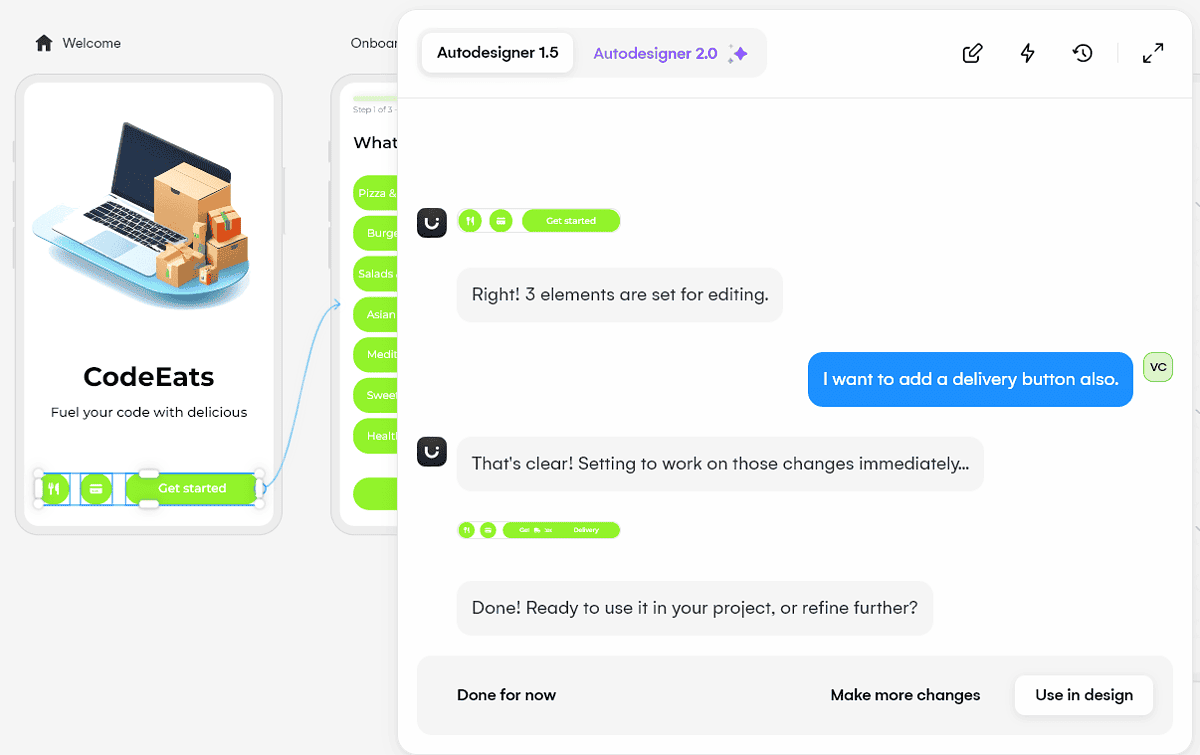
Regardless of the approach you pick while creating the initial design, chances are you’ll want to change something. Here the Autodesigner chat comes under the spotlight.
After having three buttons on the screen, I asked the bot to add one more. A moment later I got the preview, and I was able to directly replace it on the app interface. How cool is that?
As I noted earlier, the focus is on AI features, but I’ll still mention some handy extras.
These include templates for various elements (cards, calendars, buttons, etc.), shapes with any icon you can imagine, and various text styles that make designing super easy.
There’s an image gallery that you can include in your designs. Uizard is integrated with Unsplash and Giphy so you can use resources directly from there. Of course, you can upload your own images too.
However, what caught my eye is the AI image generation feature. There are several styles you can choose, and here’s how it went for me:
I chose to generate a logo that’s suitable for the food-delivering mockup app I’m designing.
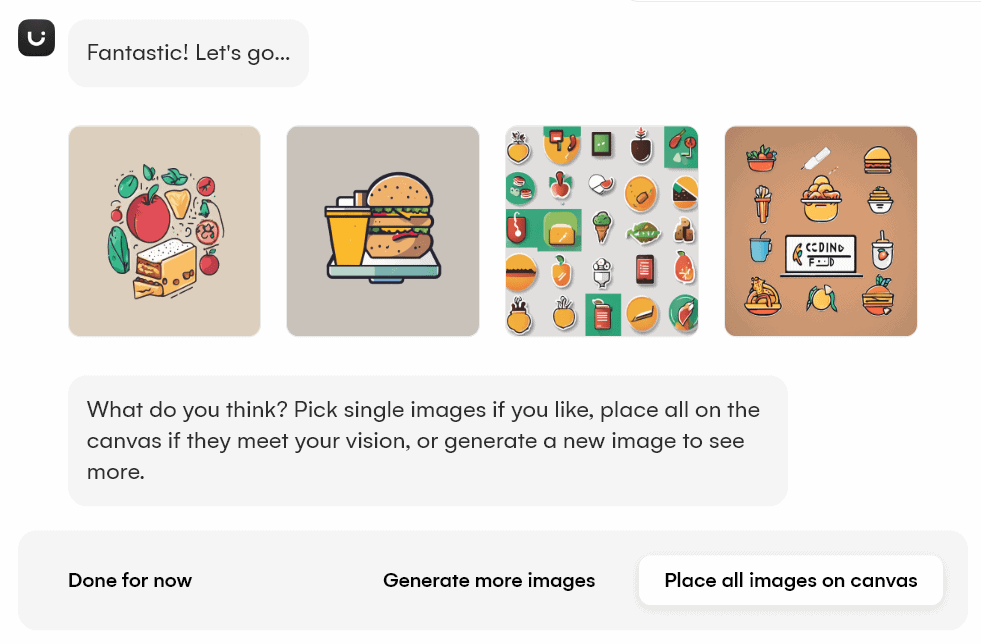
The results were decent, and the fact that I could continue generating and placing results on canvas without leaving the environment was awesome.
If you’re after a logo-oriented AI image generator check out my Logo AI review.
Icons, buttons, and forms are also available in a few clicks. They’re nicely organized in the left sidebar and getting the right visuals is easy.
To re-create similar outlooks across multiple designs you can use the Brand Kit. Colors, fonts, and templates are the basic elements that are later used across projects.
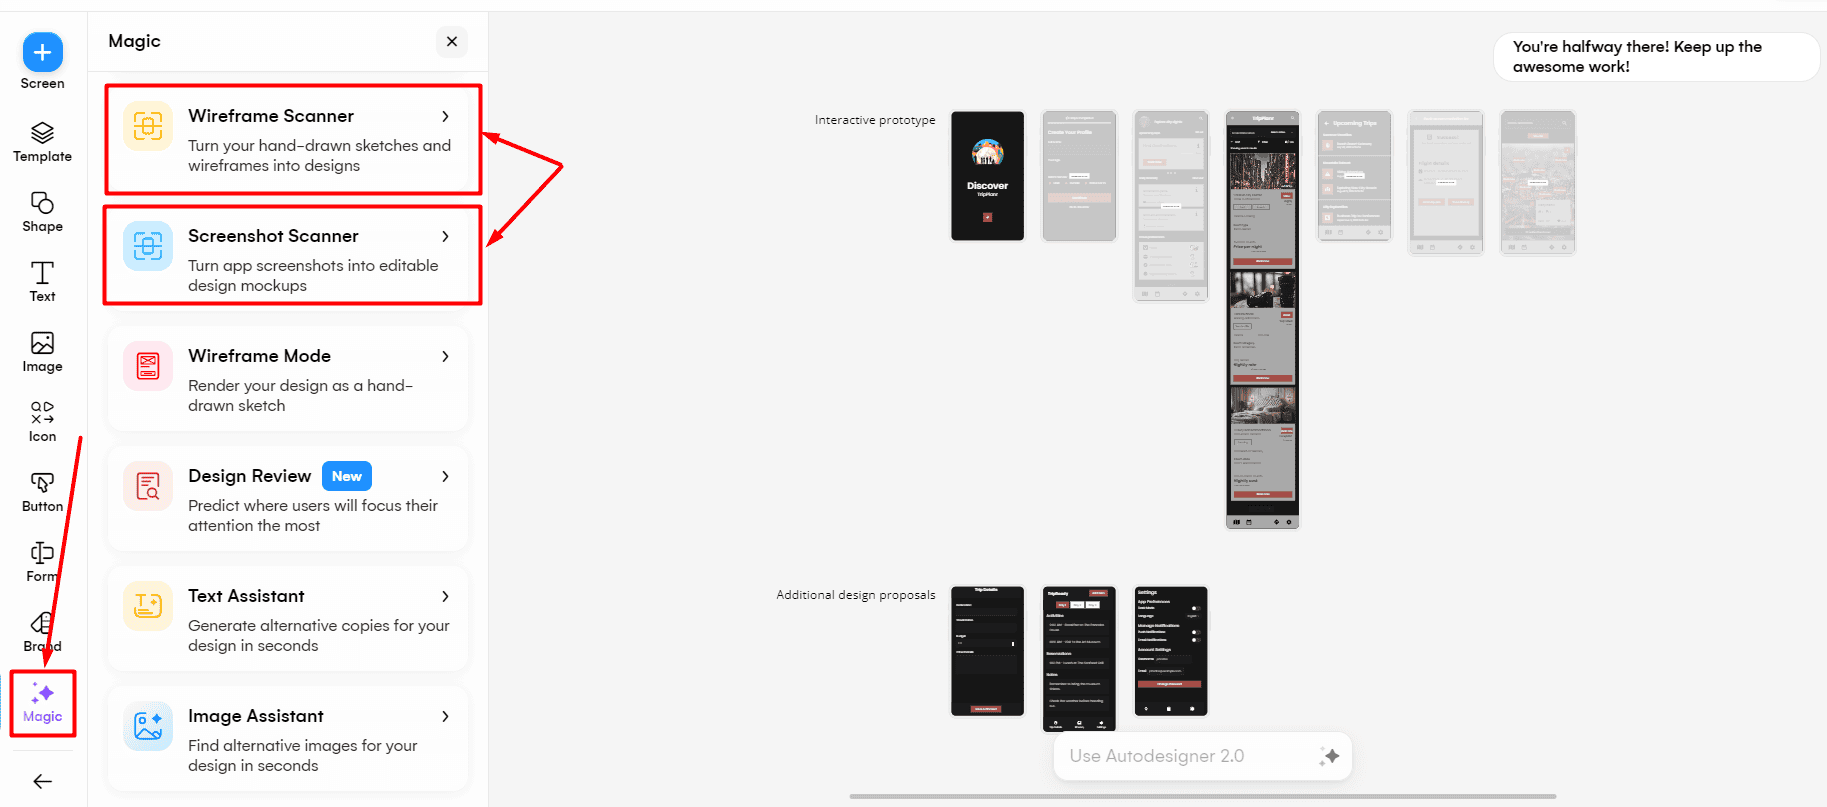
Magic Options
Magic options are the final and the most valuable item one can find in the Uizard editor.
Besides some neatly placed shortcuts for new projects, image generation in the chat, and others, there’s additional value offered there.
The most popular one is the Wireframe Scanner. You draw a sketch of what it should look like, upload a photo of it, and the AI model handles the rest.
After selecting the mobile device option I uploaded the photo by scanning the QR code with my phone.
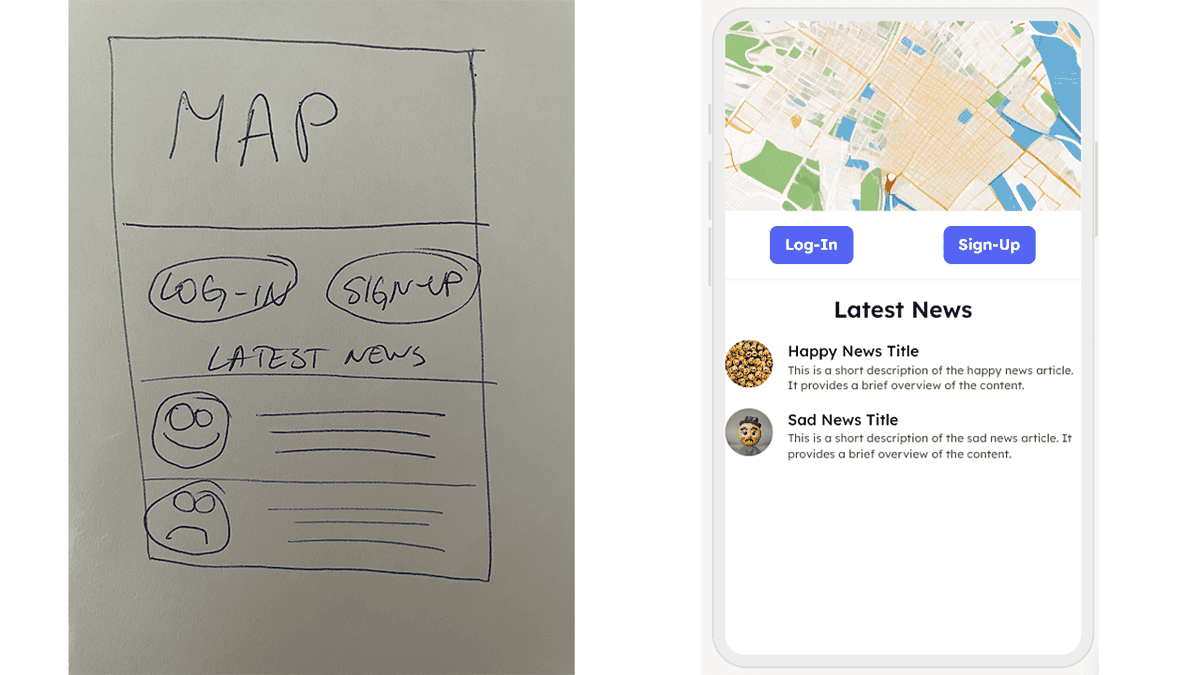
The best part is that my sketch didn’t just become an image of the potential design. Every element exists separately and is fully editable.
Sure, it isn’t perfect, but it’s a great starting point, especially for prototypes. Also, note that my sketch is far from a masterpiece, and it took me less than 30 seconds to create it.
For the ones not comfortable with writing, there’s also a Text Assistant. You can instantly create variations of your copies for CTA, descriptions, and whatever other textual elements you plan to use.
If you want to give a nice presentation about your work, you might also want to use the Wireframe Mode. It turns all elements into ‘hand-drawn‘ illustrations, removing any potential distractions.
Speaking about presentations, something very cool is coming up!
Interactive Prototypes
So far, you’ve seen you can effortlessly create various designs and screens, and even present them as hand-drawn wireframes. Well, what if they could be functional?
This is where Interactive Prototypes jump in!
All elements of your design automatically get assigned some kind of ‘logic.’ When you click the Signup button, you should go to the registration page, for example. Now the complete process can be presented without coding.
This makes brainstorming, ideating, and pitching so much more efficient. You (with the help of AI) can transform ideas and sketches into a design.
Later on, you make any necessary corrections, adjust accordingly, and suddenly you have a prototype for your next big product!
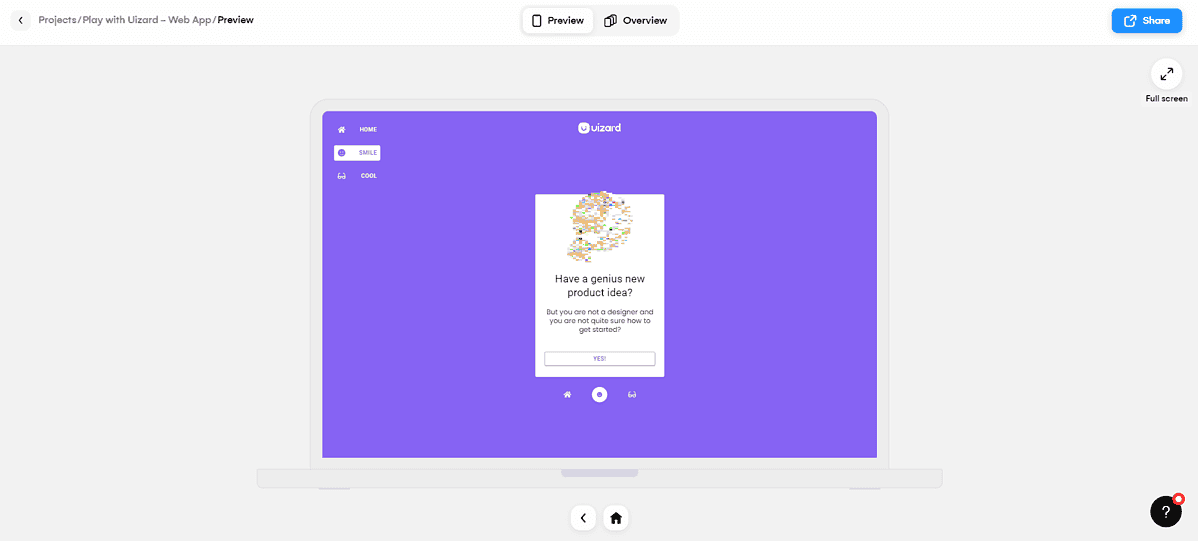
You can view all screens at once in the Overview option. The default Preview option allows for the interactivity I’m so excited to show you. Keep reading as I go through the complete process in the tutorial section of this review!
Templates

If you want to go through the journey from idea to interactive presentation even faster you can make use of Uizard Templates.
There’s an (almost endless) list of templates divided by the device they’re intended for (desktop, mobile, and tablet.)
You can use the search feature to find various pre-made solutions for your next project. All of these are fully editable, just like everything else so far.
If you want even more customizability, you can create your own templates.
There are several free templates you can use, but the majority are paid. Although you can purchase them separately, the better route is subscribing to the Pro plan. More about pricing in a bit.
Collaboration and Exporting Options
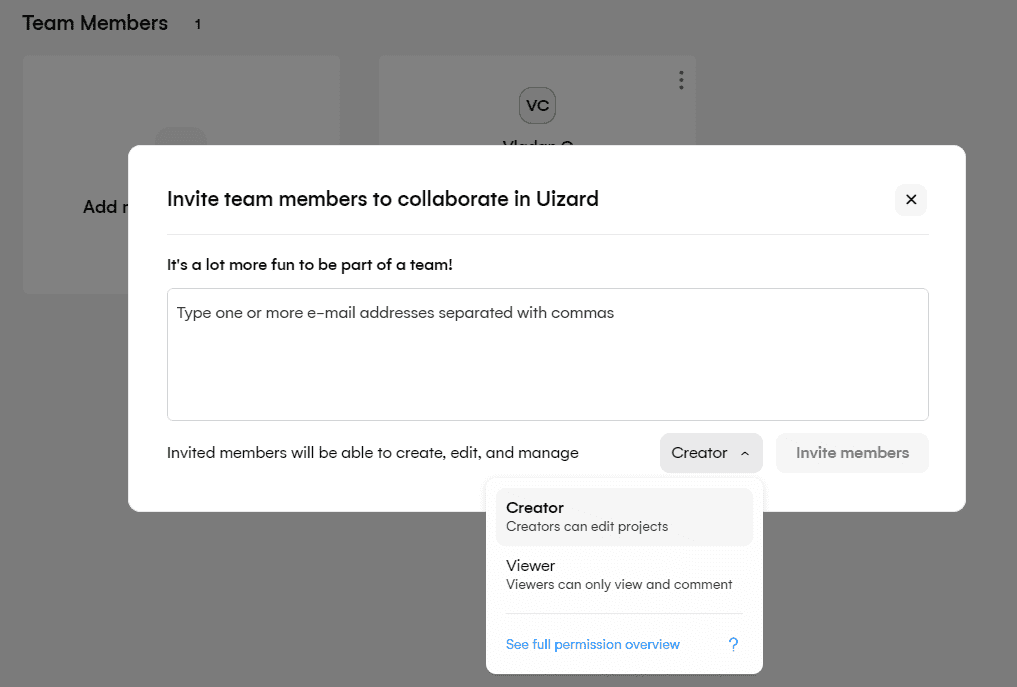
You’d be happy to know you can share any project you create with collaborators. There are two sets of permissions – Creator or Viewer.
Creators can participate in the real-time collaboration, while Viewers can just see without being able to edit.
If you need to export a project (not to use it interactively), you have several options.
You can get images in various resolutions (annoying for developers) or export the code (great for developers.) Uizard currently supports React and CSS as the languages for code.
However, whenever you have the chance you should indeed use the Interactive Prototypes option as the best way to present your work. Read the section below to discover how!
How to Use Uizard
If you’re new to using AI for UI design, I’m here to assist you. Follow the guide below to get started in no time!
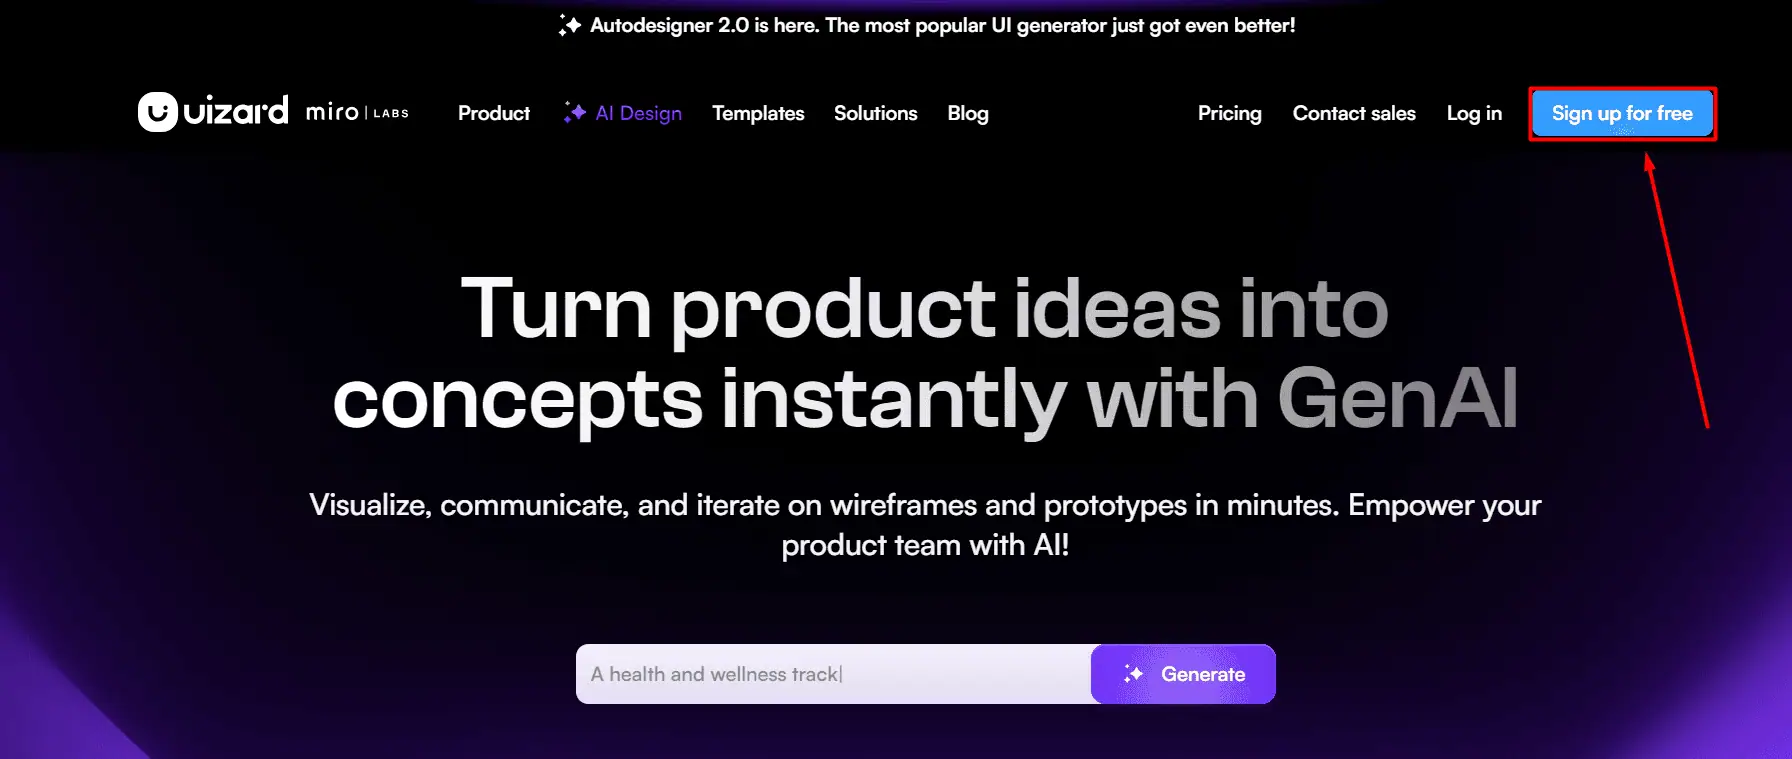
- Head to Uizard and hit the Sign up button.

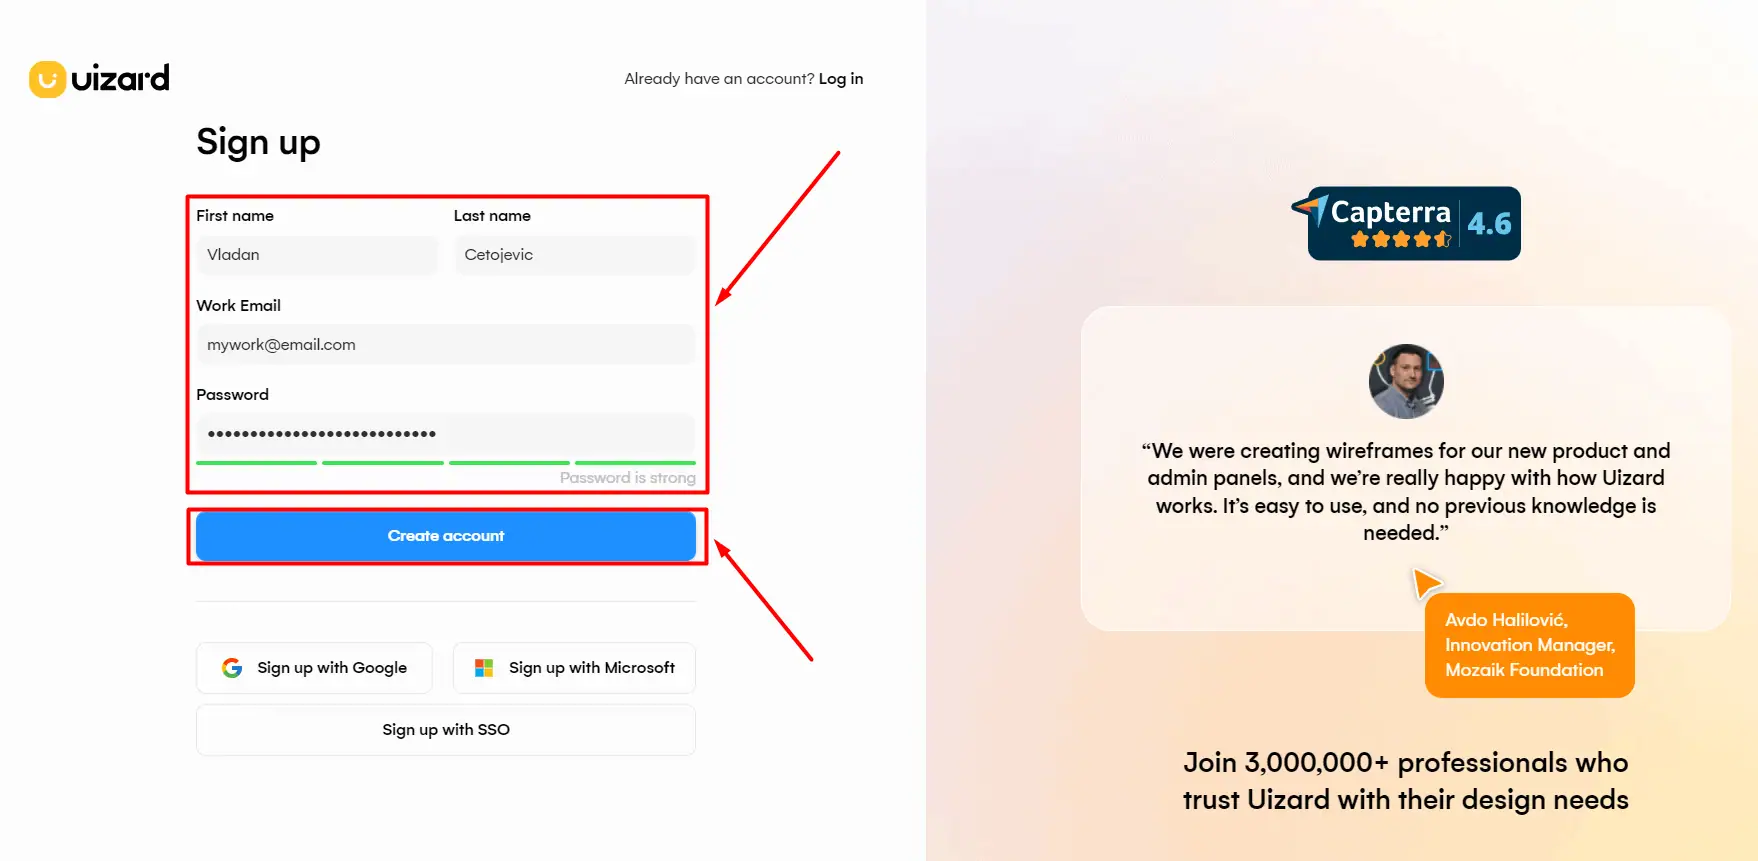
- Fill in the necessary details and hit the Create Account button.
Alternatively, you can use a Google or Microsoft account to register.
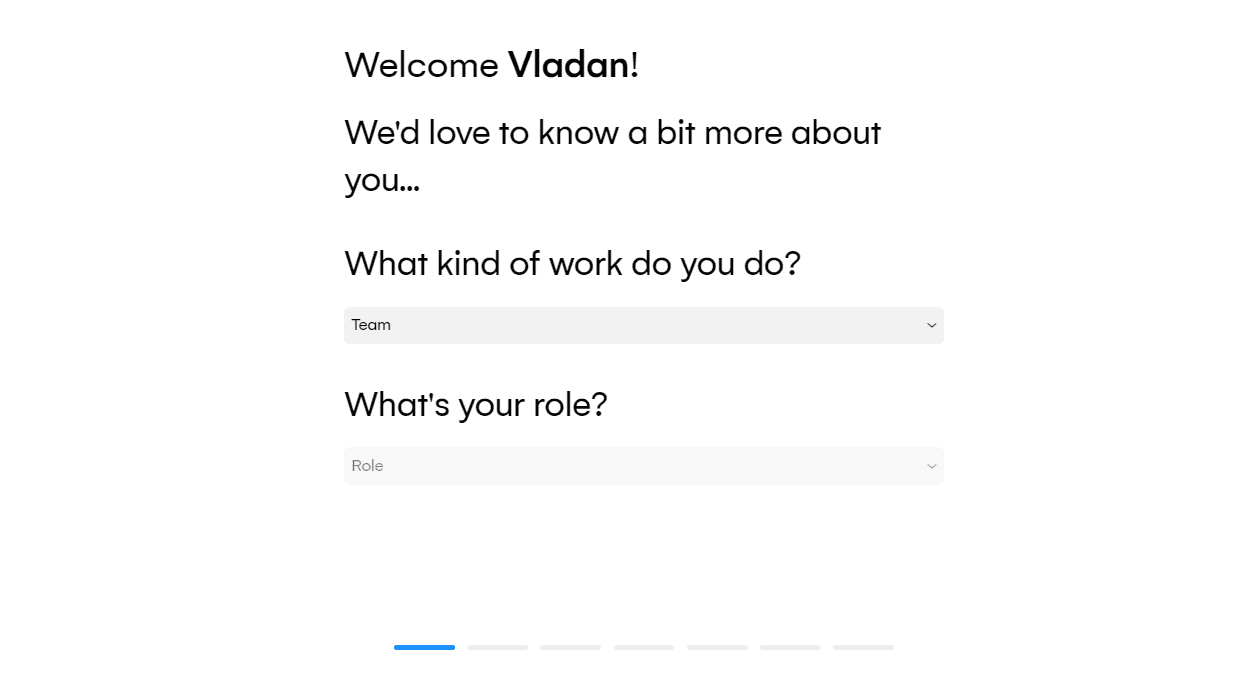
- Accept the terms and complete the short onboarding process.

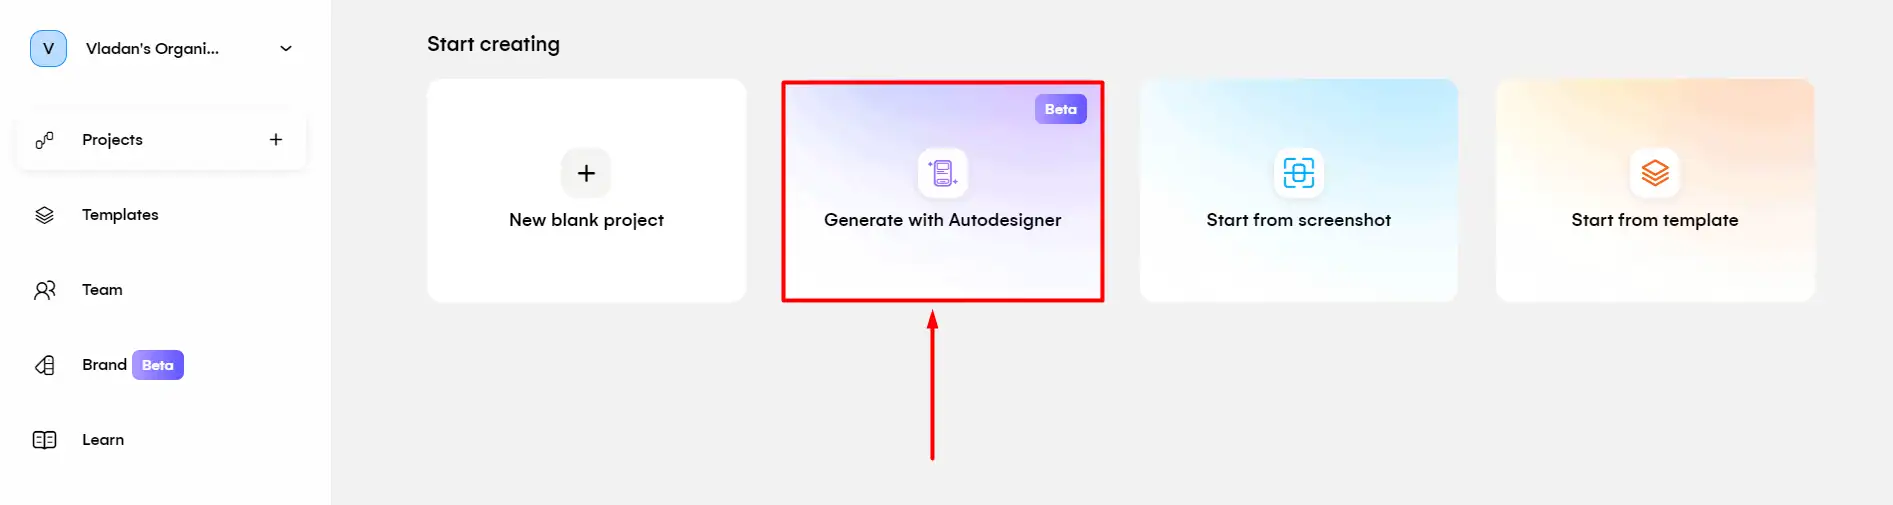
- Select the Generate with Autodesigner option.

- Pick the device, type your prompt, and hit Continue.
The prompt must be simple, clear, and under 300 characters.
- Select the style input method.
I’ll go with Prompt.
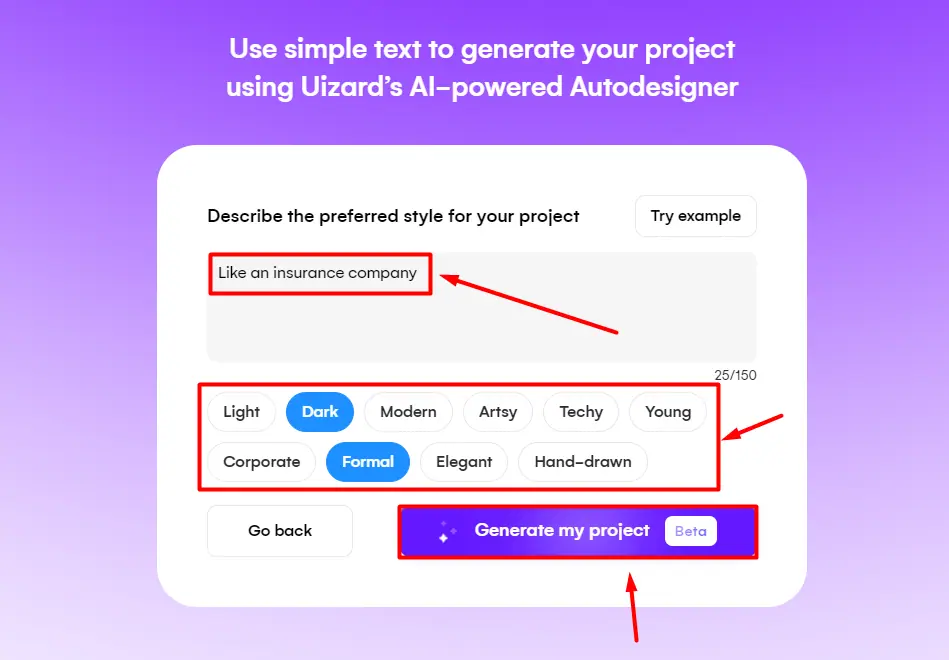
- Now pick from the available options, and hit the Generate My Project button.
I’ve used examples available from the Try Examples button.
- (Optional) Perform any changes you find suitable to the generated design.
- (Optional) To use any of the Magic features, select Magic from the left sidebar and the right option for your projects.

Screenshot and Wireframe scanners are also hidden here! - Hit the Preview button to see the Interactive Prototype of your design!

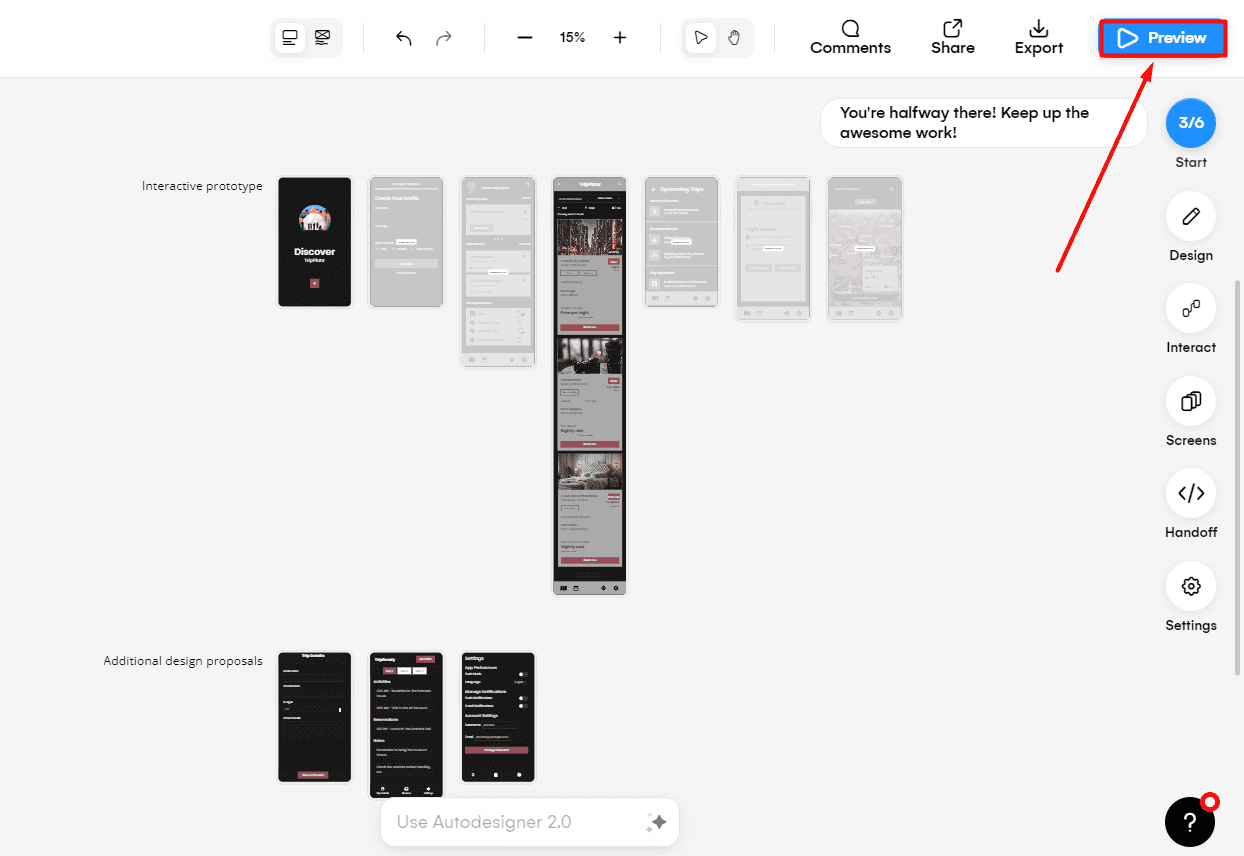
Check out the TripPlanr preview page to see what my output looks like. Maybe, it isn’t fair to call it mine, since I didn’t make any changes, but the point here isn’t the content, but the interactivity of the presentation.
Note: Once again, all elements are editable, and so are the relations between them. To create meaningful results worth presenting, you’ll have to spend some time adjusting it to your needs.
Pricing
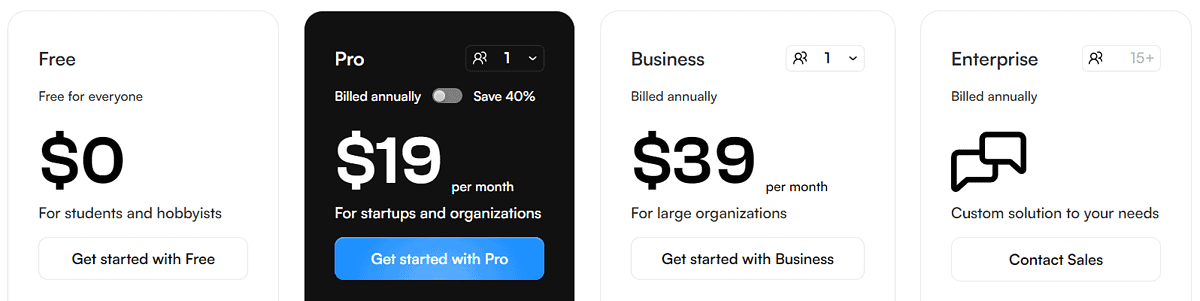
Uizard is a subscription-based platform with four different plans:
- Free ($0)
- Pro (from $19/user/month)*
- Business (from $39/user/month)**
- Enterprise (custom pricing)
*You can save 40% if you choose to be billed annually for the Pro plan.
**The Business plan is only available for annual billing.
The Free plan offers just enough liberty to test all available features. With it, you can have up to 3 AI generations per month. You can have up to 2 public projects and use 10 free templates. For AI tasks, you’ll be able to use only the Autodesigner 1.5 model.
Once you’re done experimenting and testing, it’s time to subscribe to the Pro plan. With it, you can have up to 500 AI generations/month with access to the latest Autodesigner 2.0 model.
You’ll also be able to export designs as React or CSS code and have up to 100 projects (with an option to keep them private.) Pro subscribers get access to all of the templates.
The Business plan gives you all the perks of the Pro plan, with a few upgrades. For starters, you can have 10x more AI generations (5,000) per month. Generations will also be faster.
Custom Brand Kit is available for better brand recognizability of your projects. You’ll also get priority support and unlimited projects on your account.
If you need even more, I’d suggest you contact the Uizard sales team and talk about the Enterprise plan.
There’s a 14-day window for refunds. All you have to do is contact Uizard Support via email to get it done, according to Uizard’s ToS.
No free trial for paid plans is available, which is reasonable considering a fairly generous Free option.
Uizard Review – Verdict
Generally speaking, Uizard can indeed generate a usable UI. That is, of course, if you’re going after minimalistic and simplistic designs (which the majority is doing nowadays anyway.) If your project is complex, you can still use Uizard as a side help, but I wouldn’t recommend it as a primary tool.
I’ll conclude my Uizard review by pointing out that it makes the journey from idea to presentation lightning-fast.
Careful, however! Don’t fire your UI/UX designers just yet. If you want to make meaningful solutions, you’ll need extensive human expertise that no AI tool has (yet.)
Read our disclosure page to find out how can you help MSPoweruser sustain the editorial team Read more
Improve this guide


User forum
0 messages