Roblox Not Launching on Windows 11: 12 Best Fixes
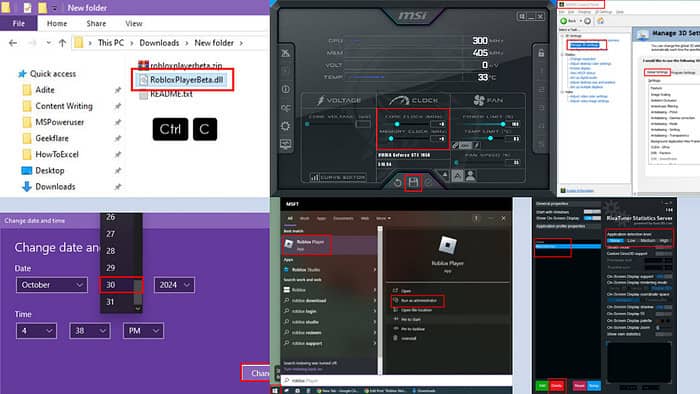
Roblox not launching on Windows 11 can be frustrating, but it’s fixable. Instead of opening the game library interface, you might see a cursor spinning briefly on the screen.
To resolve this issue, I’ve tested multiple Roblox Support and community-suggested troubleshooting tips. I’ve found that the following techniques work like magic!
Basic Troubleshooting Ideas
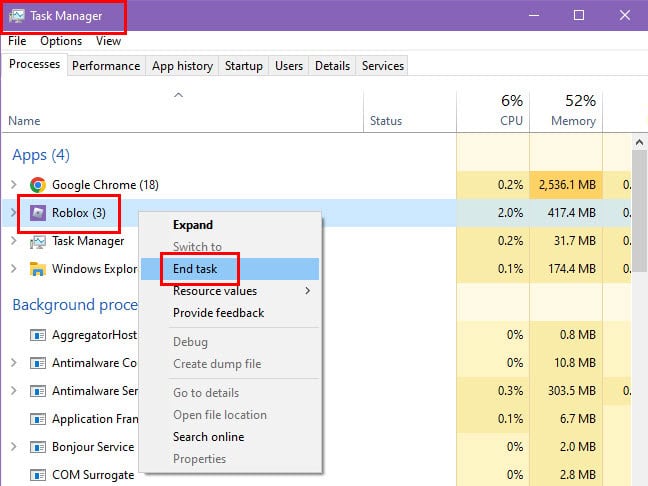
- Press Ctrl + Shift + Esc to launch the Task Manager app. Find the Roblox Player in the Processes column, right-click, and select End task.
- Restart the PC from the Start menu > Power menu > Restart.
- Ensure that the PC is connected to a functional internet network. Roblox requires a reliable internet connection.
- Safely remove all gaming accessories, like racing wheels, game controllers, etc.
Disable RivaTuner
Many expert players and game creators have disclosed that the RivaTuner Statistics Server, a hardware diagnostic tool, often interferes with the app.
So, open RivaTuner and set the Application detection level to None.
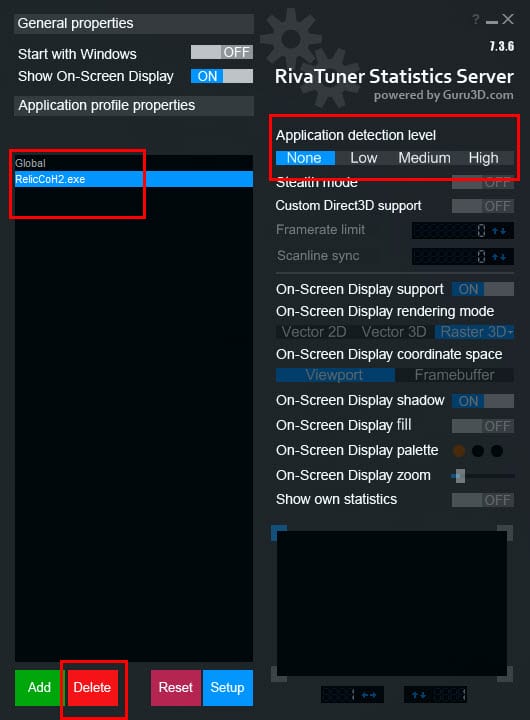
If that doesn’t work, remove the Roblox Player EXE from the Global section. Just select the game app and hit Delete at the bottom.

If none of the above works, simply close the RivaTuner tool. Check the Task Manager app, right-click on the process, and select End task.
Change the System Date Manually
- Bring up the Settings app by pressing the Windows + I keys together.
- Select the Time & Language menu.
- Click on the Date & time menu in the left-side panel.
- Toggle off Set time automatically.
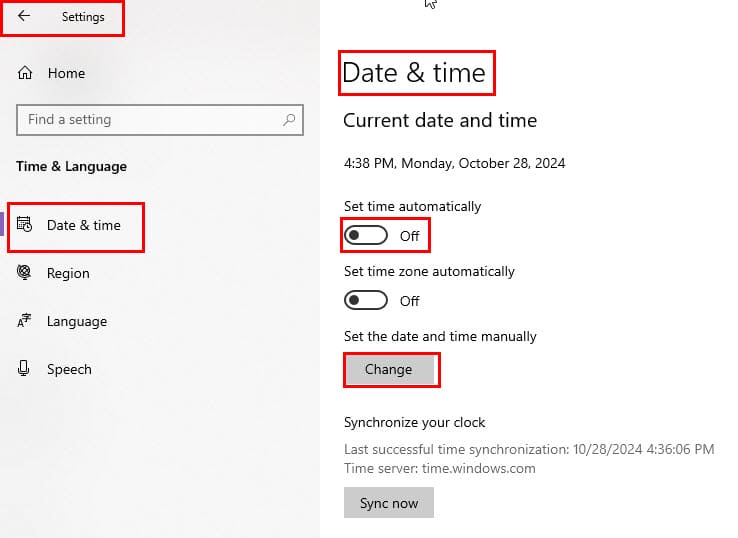
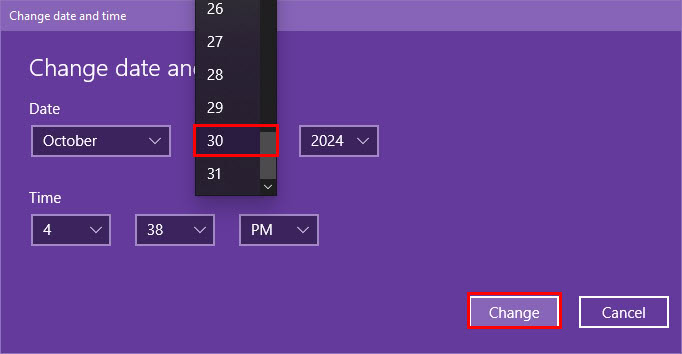
- Click on the Change button below Set the date and time manually section.
- Use the Change date and time dialog box.
- Click the Change button to apply.
Restore GPU Control Panel Settings
If you’ve modified the graphics card control panel settings, it’s high time you undo those customizations. It can lead to the aborted launch of many PC games, including Roblox.
- Right-click on the Windows 11 Desktop.
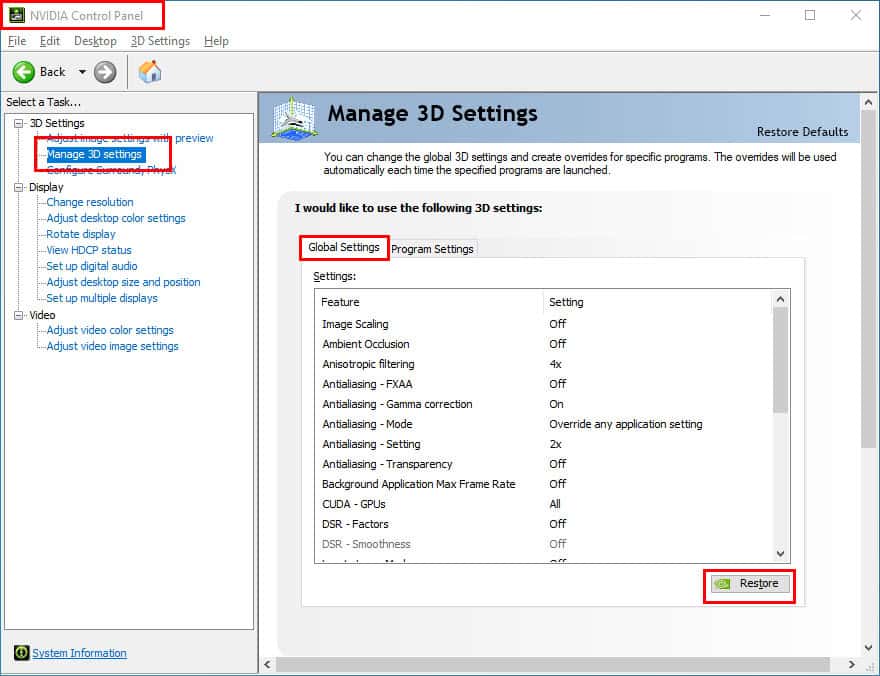
- Click on the GPU console tool, like the NVIDIA Control Panel.
- Go to the Select a Task side panel.
- Click on the Manage 3D Settings option in the 3D Settings tree.
- Hit the Restore button in the Global Settings tab.
- Restart the PC.
Reset Settings in MSI Afterburner
Roll back all overclocking settings in the PC to fix the Roblox not launching on Windows 11 error. Here’s how you can do that on MSI Afterburner:
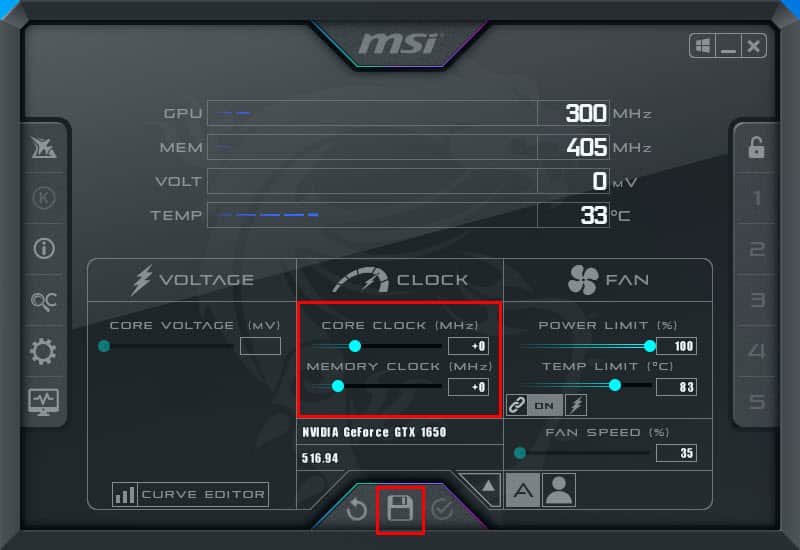
- Open MSI Afterburner.
- Set the Core Clock value to +0.
- Also, set the Memory Clock value to +0.
- Hit the Save button.
- Reboot your PC.
Replace the RobloxPlayerBeta.dll File
A corrupted RobloxPlayerBeta.dll file is often the root cause behind the Roblox not launching on Windows 11 error. Here’s how to fix it:
- Ensure the Roblox Player app is closed and none of its instances are showing up in the Task Manager app.
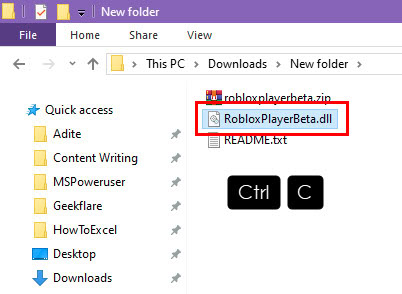
- Visit DLL-files.com and download a fresh copy of the ROBLOXPLAYERBETA.DLL file.
- Extract it using any unzip app for Windows 11.
- Copy the DLL file.
- Go to the following directory on your PC. Replace the user name CtOs with your own Windows 11 account name.
C:\Users\CtOS\AppData\Local\Roblox\Versions\version-4ffdeb3e393e469e- Paste the DLL file.
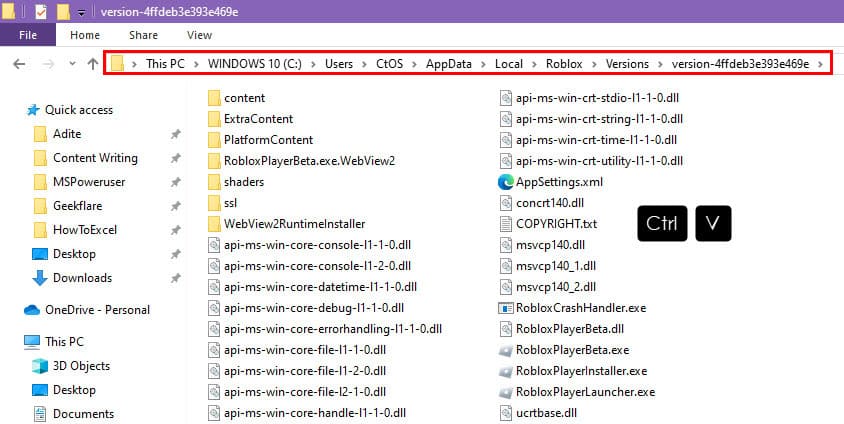
- Launch Roblox Player.
Repair or Reset the App
- Click on the Start menu and type Roblox.
- Right-click on it.
- Click on the App settings option.
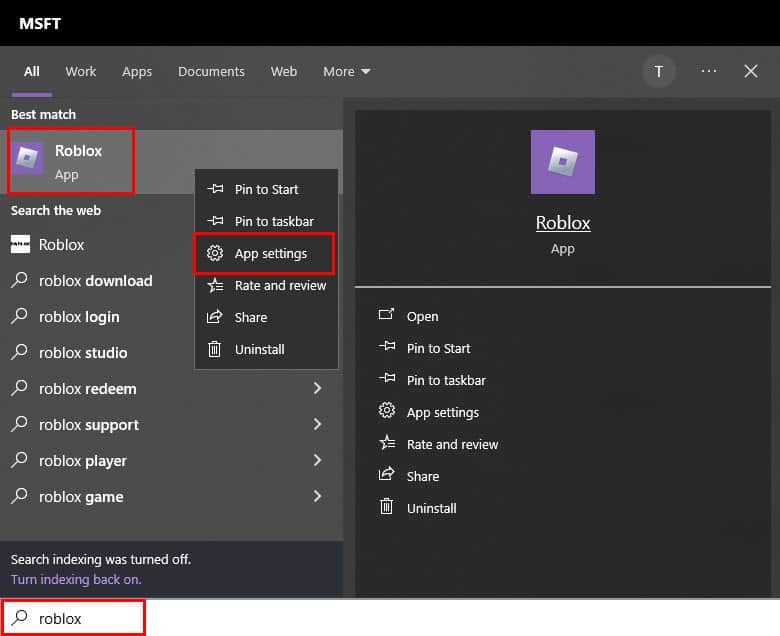
- The Settings will open.
- Scroll down to the Reset section.
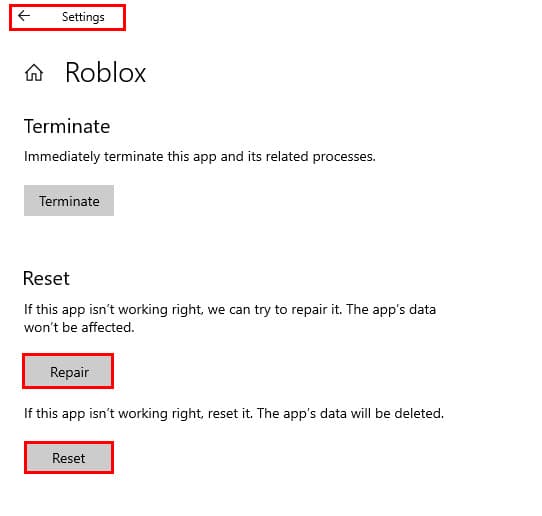
- Click on the Repair button and follow the on-screen guidance.
- Once the app repair is complete, try to launch the game.
- If this doesn’t work, return to the Roblox Settings dialog and click the Reset button.
- Follow the instructions and try opening the game again.
Run Roblox as an Administrator
You can allow the Roblox Player to use more device access rights by running it with elevated privileges. Here’s how:
- Go to the Windows 11 Start menu and look up the Roblox app.
- Click on the Run as administrator button.
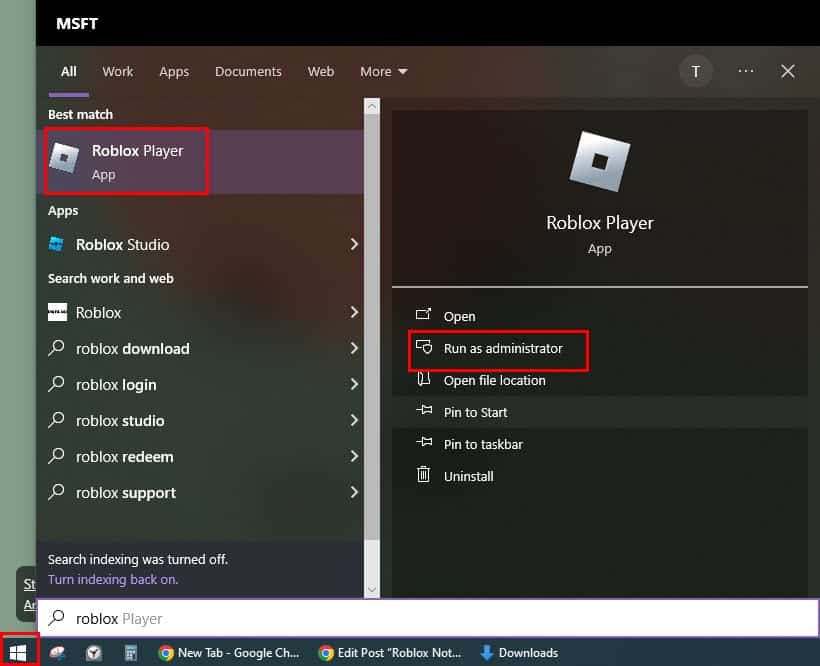
- If there’s any User Account Control authentication dialog box, approve the admin rights request.
Update the Graphics Hardware Driver
- Press Windows + X to launch the Power User menu.
- Click on the Device Manager tool.
- Find and double-click the Display adapters tree.
- Select the GPU you’re using primarily, right-click, and select Update driver.
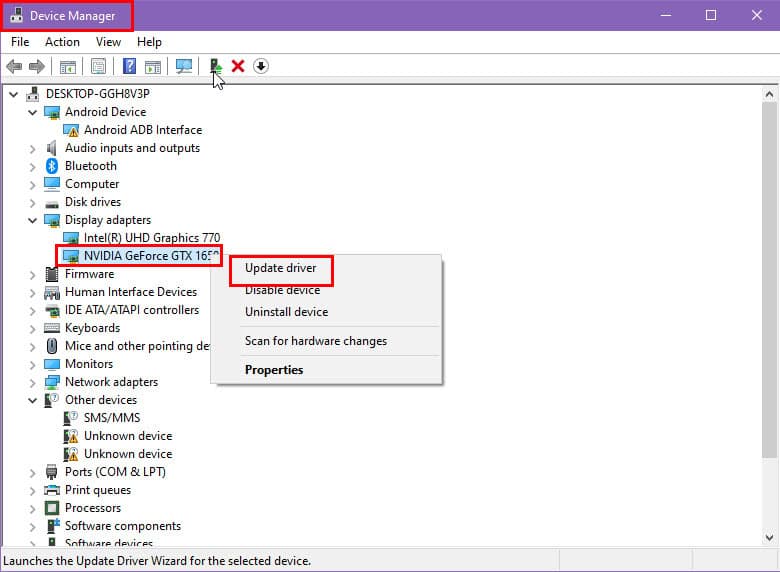
- The driver updating wizard will show up. Select the Search automatically for drivers option.
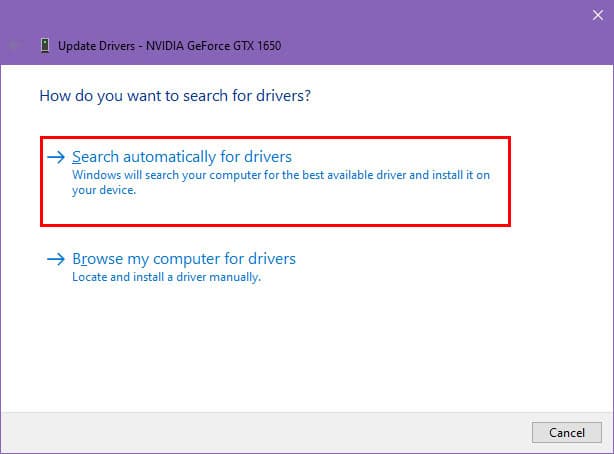
- The dialog box should indicate that the best drivers are already installed if it can’t find the latest ones.
- Select Search for updated drivers… on the next dialog box.
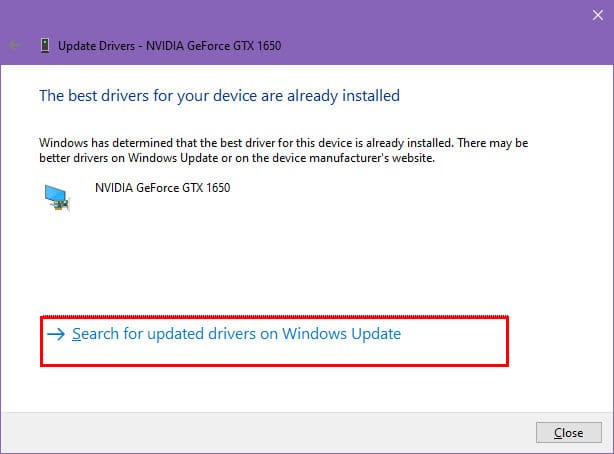
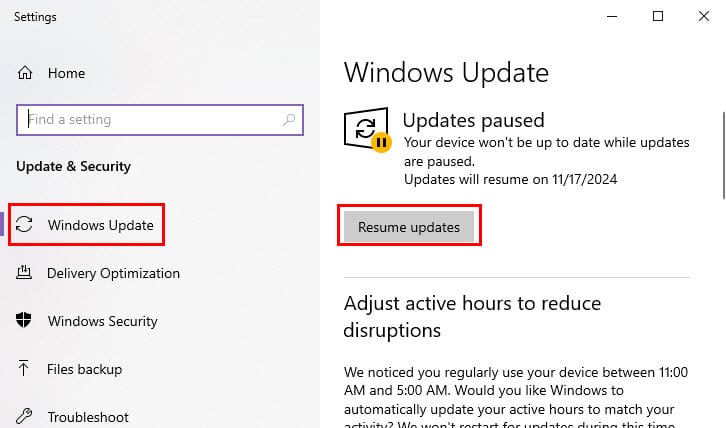
- You’ll now see the Windows Update window.
- Select any of these options:
- Check for updates
- Resume updates
- Download and install updates
Run Roblox in Compatibility Mode
- Find the Roblox Player app icon on the Desktop.
- Select it, right-click, and choose Troubleshoot compatibility.

- Click on the Troubleshoot program option in Program Compatibility Troubleshooter.
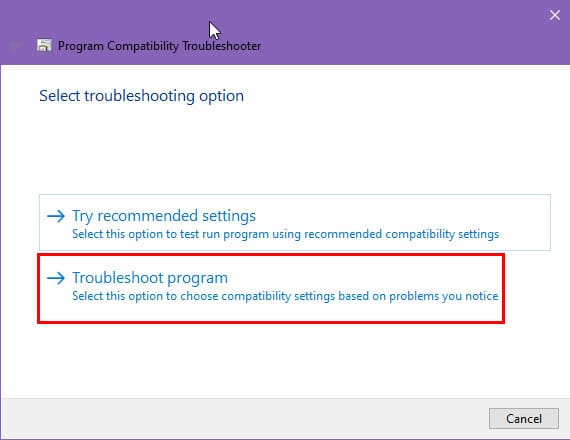
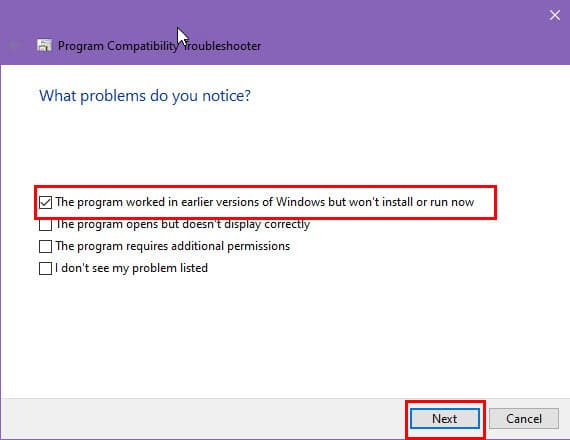
- Checkmark “The program worked in earlier…” on the next dialog box. Hit Next.
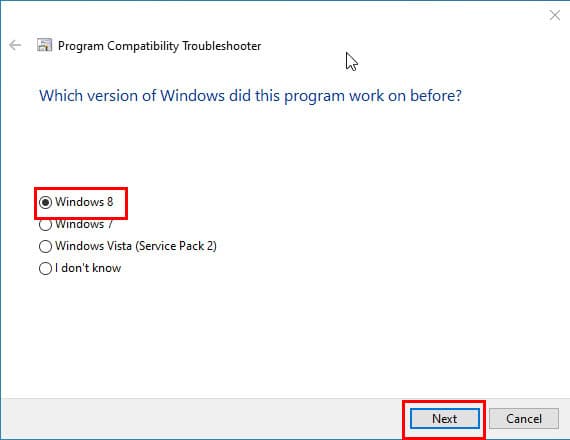
- Choose the Windows 8 option and select Next.
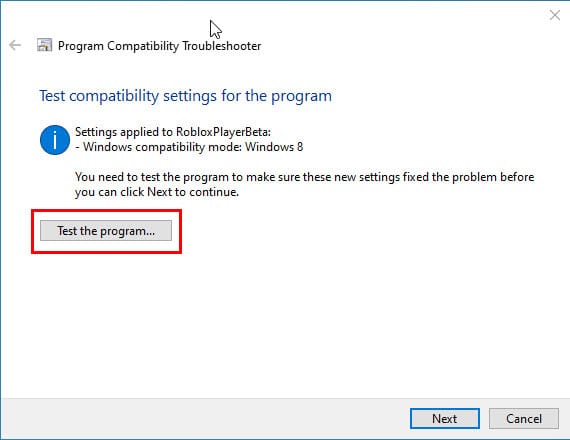
- Click on the Test the program button.
Uninstall Roblox and Reinstall From the Microsoft Store
For Windows 11, the Universal Windows Platform (UWP) is more compatible compared to the standalone package installer. So, do the following to get the supported version:
- Open the Windows Settings and click on Apps.
- Search for Roblox.
- Select the app and hit Uninstall.

- Once the app is gone from your PC, open the Microsoft Store.
- Search and click on the Roblox app.
- Hit the Get or Install button.
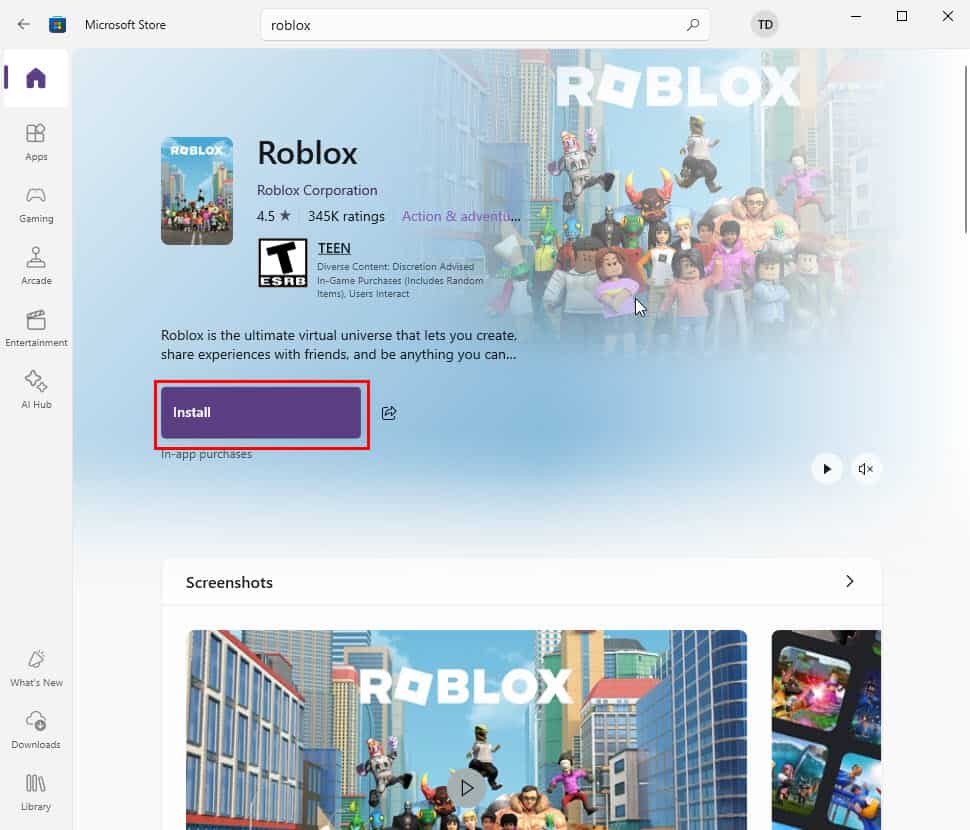
- Microsoft Store will download and install the app.
- Click Open to run it.
Contact Roblox Support
If none of the above works, submit a support ticket by using this Roblox Contact Us form.

Alternatively, visit the Roblox Help Center and look up troubleshooting suggestions.
Now you know what to do the next time Roblox is not launching on your Windows 11 PC.
Did this troubleshooting guide help you? Share your feedback and suggestions in the comment field.
Read our disclosure page to find out how can you help MSPoweruser sustain the editorial team Read more


User forum
0 messages