Outlook Email Signature: How to Create, Add & Change
Because of our ever-expanding interconnectedness, email has become an essential part of our personal and professional life, whether we have a problem we need to solve or want to catch up with friends and family.
As Outlook is one of the best email clients on the market, using a nice Outlook email signature can increase your professionalism considerably, which can, in turn, have wide-encompassing consequences on your personal and professional life.
With the help of this article, you will learn how to create, add, and modify an Outlook email signature, giving you the ability to make a positive impression on your email contacts.
Best practices for Email signatures
To ensure the most-efficient email signature management and practice, there are a few elements that should be considered:
- Keep it short and visually appealing
- Include the necessary contact details
- To persuade readers to act, include a call-to-action (CTA)
- Make sure it works on mobile
- Use social media icons with links
- Respect the Outlook email signature image size (value lower than 650px width and a maximum of 10KB. When it comes to logo usage, a 100x100px size is recommended)
- Use separators and dividers
For Outlook email signatures, the image size should remain within 650 pixels wide. If you don’t want to resize an image in email signature Outlook, ensure your image is no larger than 10KB. A logo size of 100 pixels wide and up to 100 pixels high is suitable for an Outlook email signature.
Tip: If you want to gain access to the Signatures files for this email client, it is important to know where the Outlook email signature location is. To open that folder, press the Win + R key combination, and type the following path:
%userprofile%\AppData\Roaming\Microsoft\Signatures
Now that we’re up to date with the latest practices let’s dive into the steps you need to take.
How to Create an Outlook Email Signature
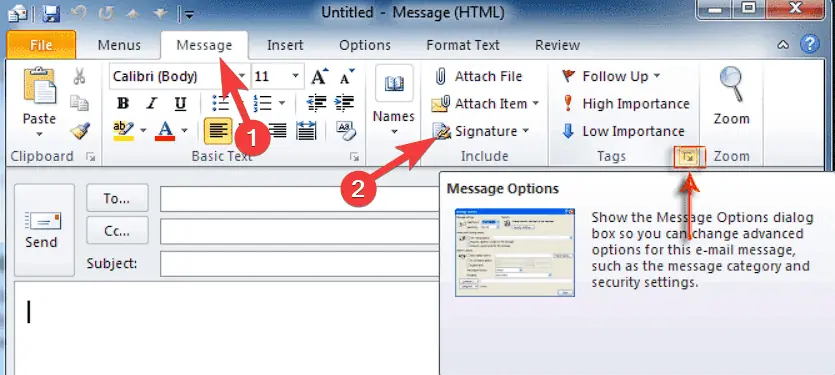
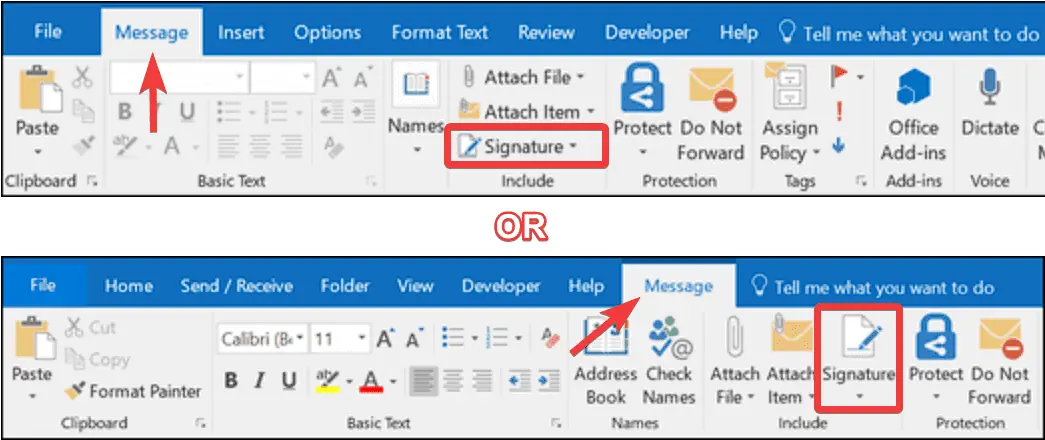
1. Open the Outlook signature options
- Click the Message option from the top toolbar, and choose Signature > Signatures.
- Choose Mail from the left sidebar. The location of the option will vary depending if you are replying or creating a new email.
- Find the Compose Messages section, and click on Signatures.
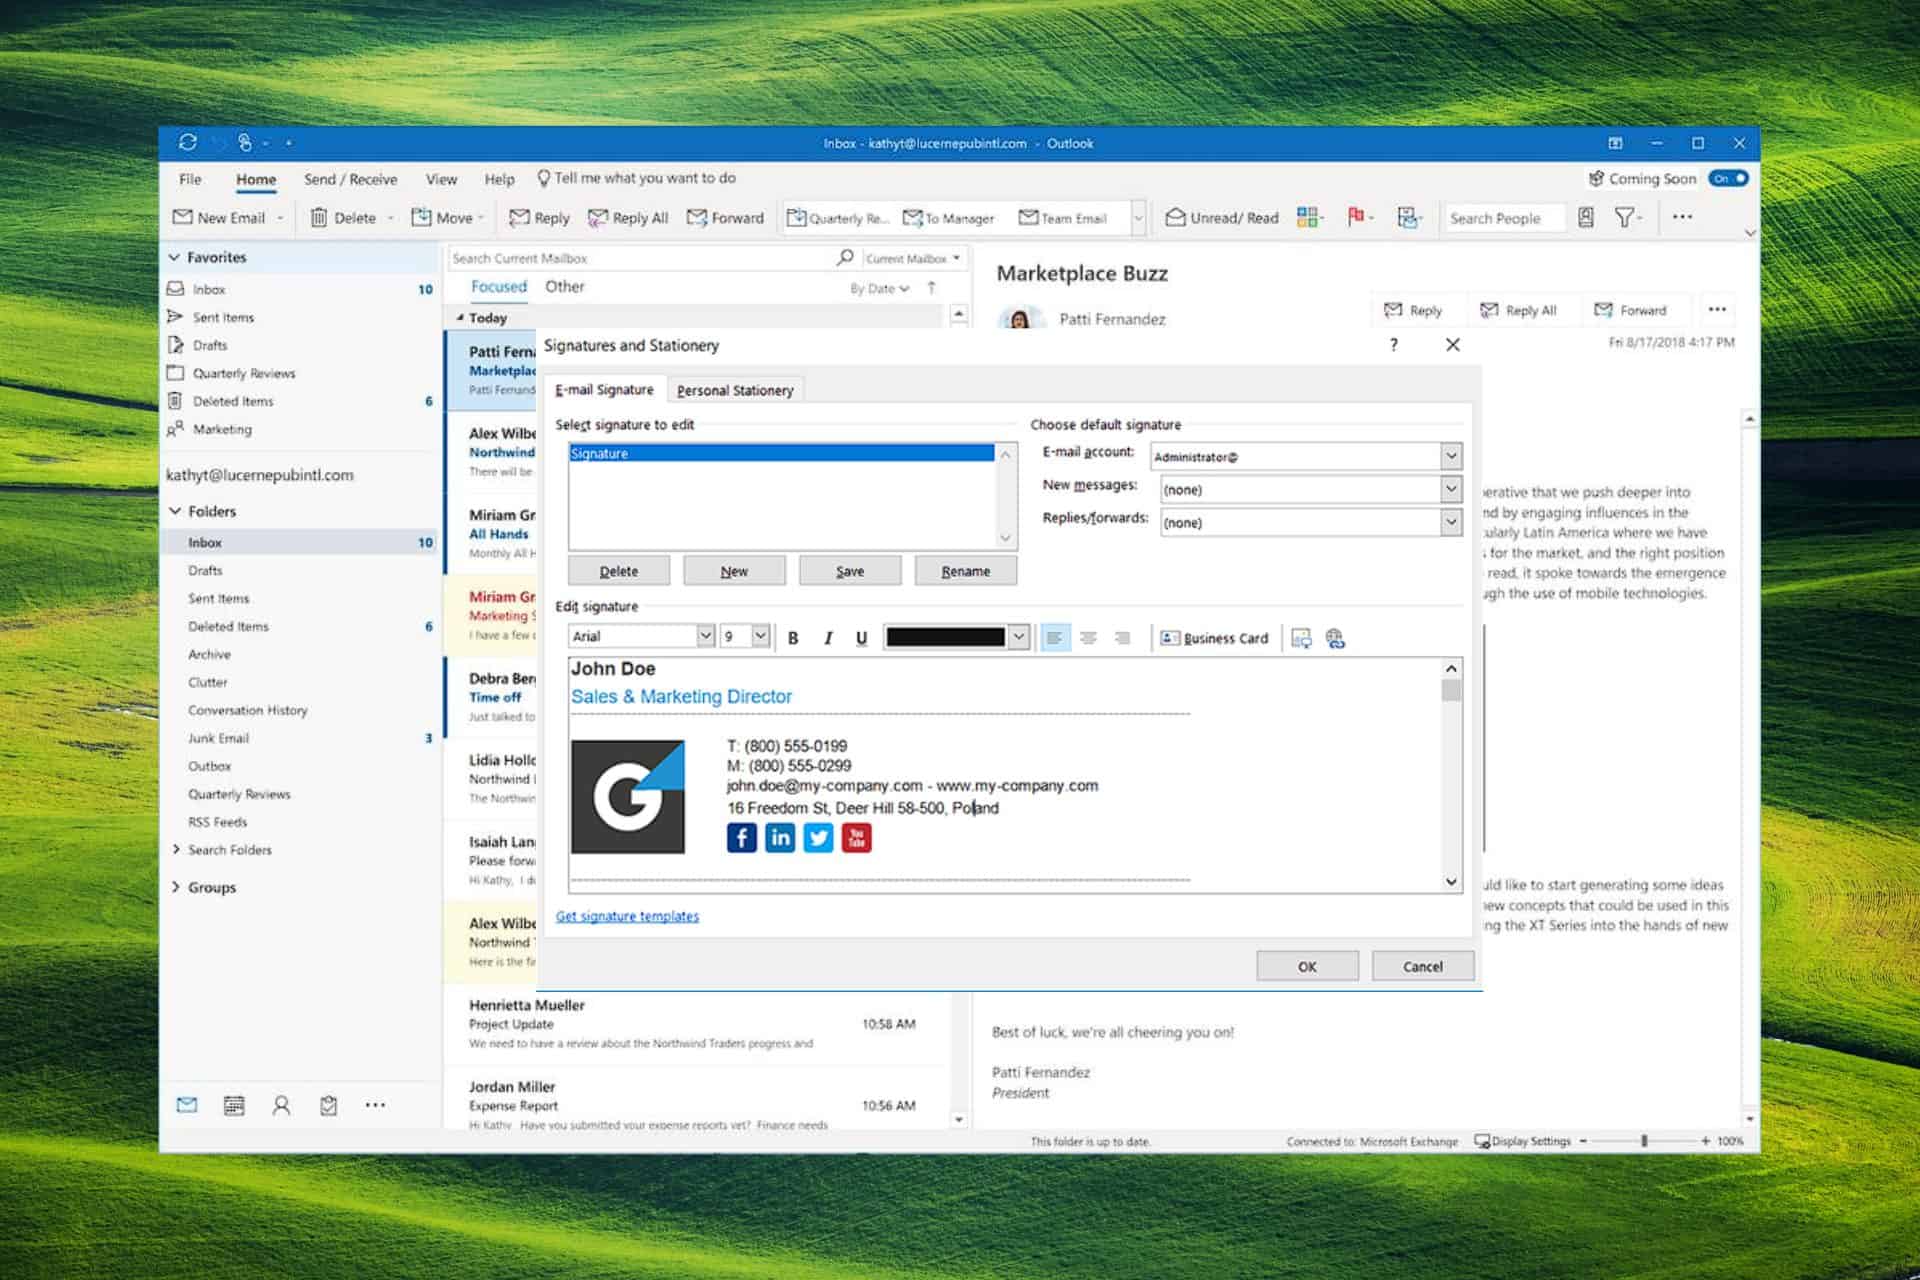
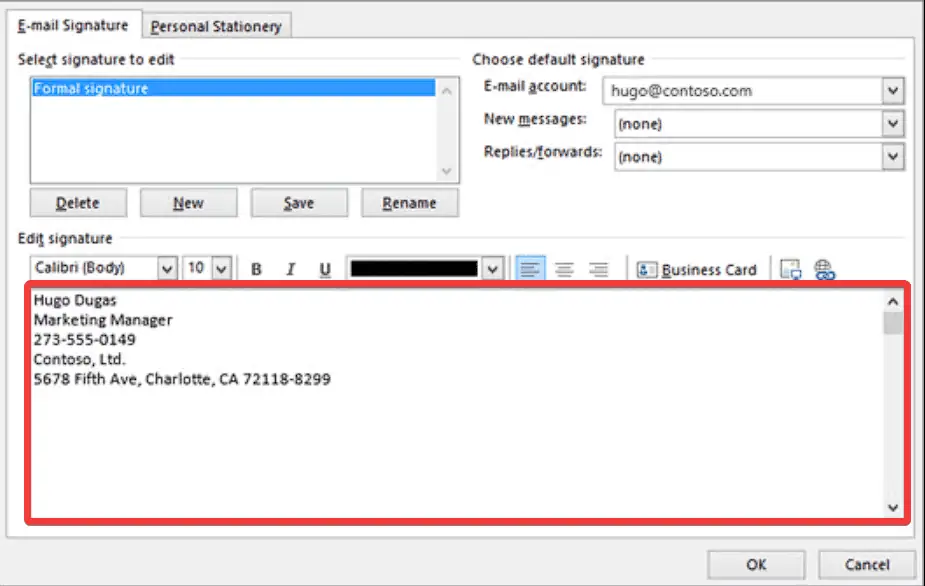
2. Design a new signature and add contact information
Note: You can also explore the Microsoft Outlook email signature templates for inspiration on this topic.
- Click New under the Select Signature to edit section, and type a name for your Signature.
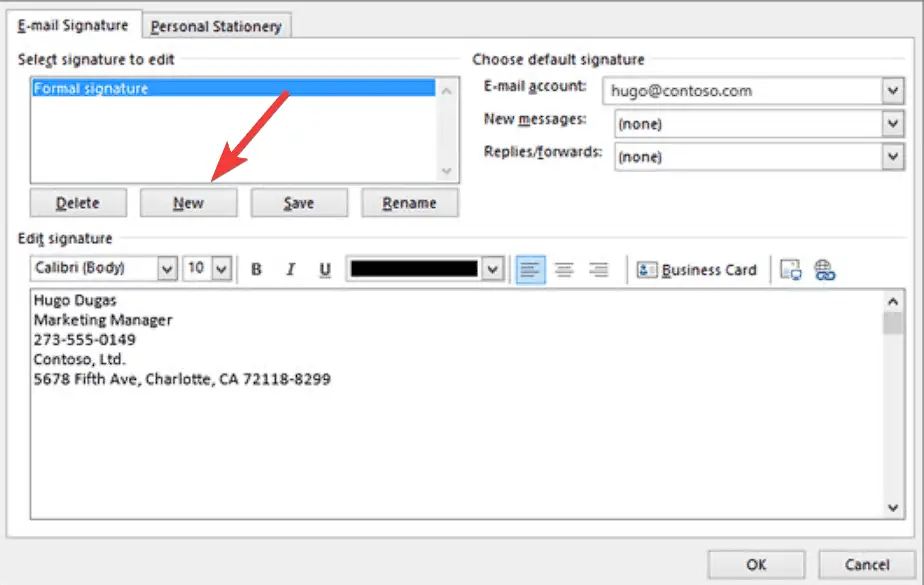
- Create your Signature under the Edit Signature section. Be sure to use the options to change fonts, colors, and sizes, or use Word to customize your Signature by using the email signature gallery and then copy-pasting it in this text box.
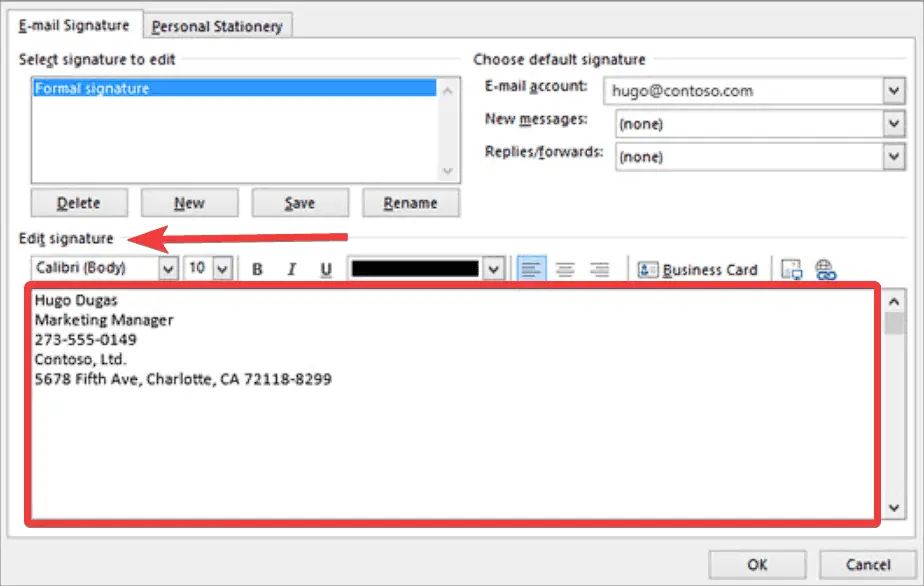
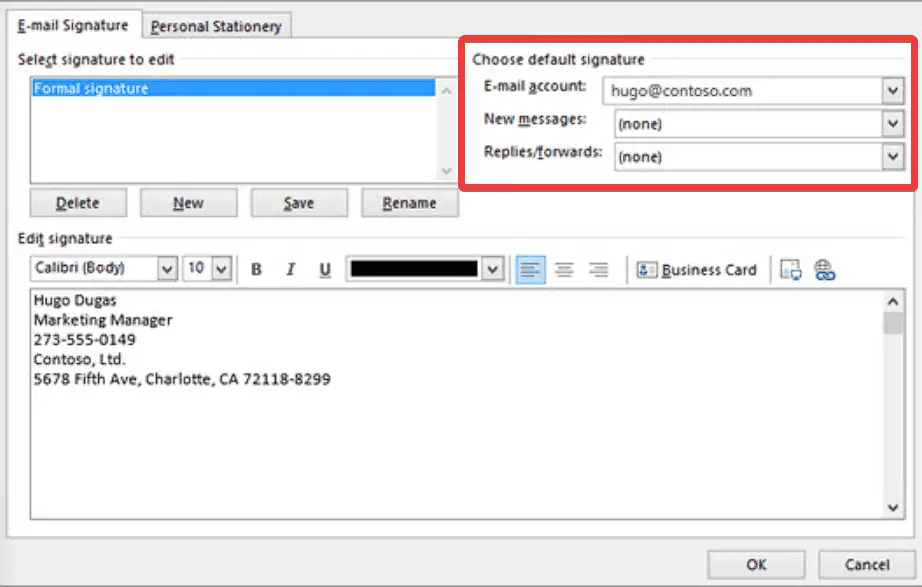
- Complete the information required in the Choose default signature by adding an email account and when to automatically have the Signature appear (replies or forward emails). If you don’t want this activated, leave the (none) value set, and press OK.
3. Include a professional touch
Add a logo or image to the Signature to have your email signature stand out from the crowd.
Follow these steps to do so:
- Create a new message and choose Signature > Signatures.
- Choose the Signature you want to use from the Select Signature to Edit box.
- Please select the image icon, find your image, and select Insert to add it to the signature.
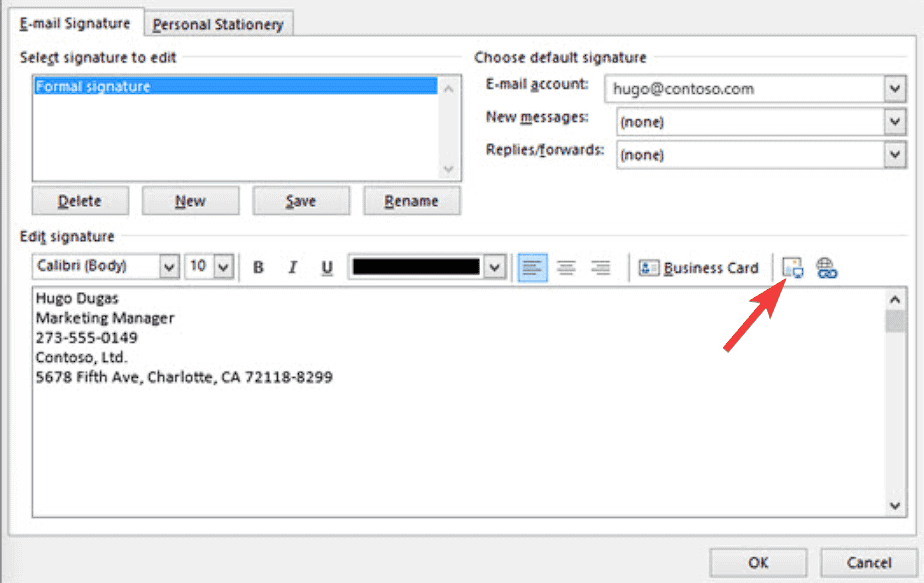
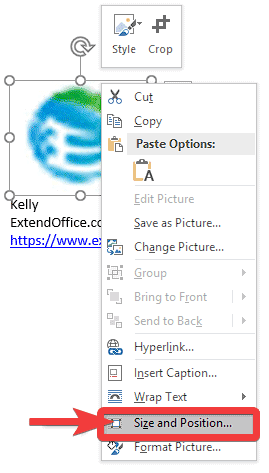
- Resize and crop your image to fit your desires by right-clicking the image and choosing Picture. You can modify its size by using the Size tab. Ensure to enable the Lock aspect ratio option to maintain the file proportions.
- After you’ve completed this process, click OK to save the changes.
How to add a signature in Outlook 365?
Whether you’re wondering how to automatically add a signature in Outlook 365 or if you want to use the signature occasionally, you can find more information below:
Add signature automatically
After creating it, you’ll want to ensure your email signature displays by default on each new email you write.
- Open the Signature options as described in Step 1.
- Under the Choose default signature section, use the drop-down and select the email you want to use it with.
- Choose the newly-created Signature, and click OK to save the settings.
Add signature manually
- Open a new email message.
- Click Signature found on the Message tab.
- Choose the Signature you want to use from the drop-down menu.
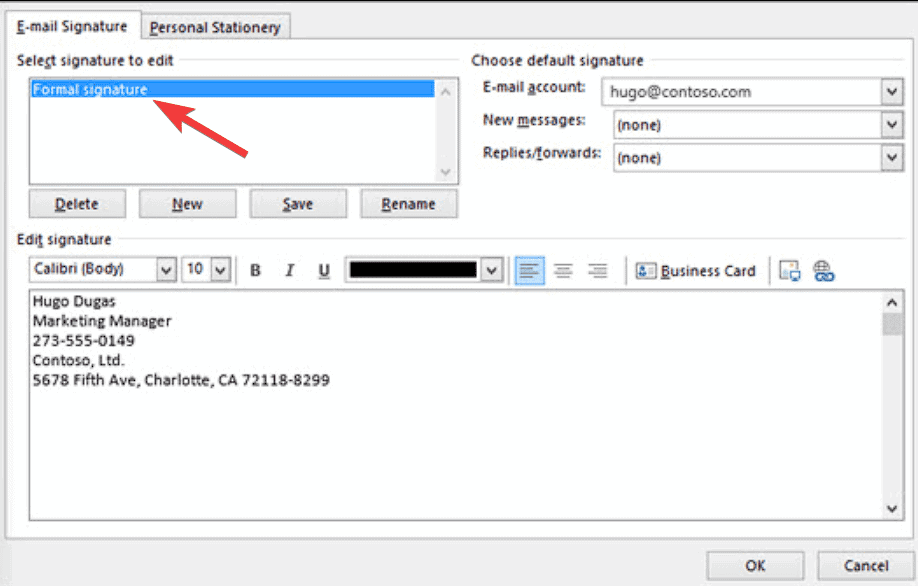
How to Change Your Outlook Email Signature
- Open the Signature Options by following the method in Step 1.
- Choose the Signature you want to edit from the list.
- Edit it by using the displayed options.
- Click Save to have the settings applied.
Customizing Signatures for Different Accounts
You can change the signatures for each Outlook email account if you have multiple setups. This lets you modify your signatures based on the email’s goal or the intended audience.
- Open Signature Options, and choose the email account you want to customize.
- Edit the respective Signature to suit your new needs.
- Click the OK button to save the changes.
- Repeat the same process for all the emails if you want to use more custom signatures.
In conclusion, a robust email signature can help you build your business identity and encourage better communication.
Your Outlook email signature can be easily created, added, and changed by following the instructions in this article. Keep your communication straightforward, professional, and constant across all platforms by following these tips.
Read our disclosure page to find out how can you help MSPoweruser sustain the editorial team Read more


Improve this guide


User forum
0 messages