Fast Fix: ntoskrnl.exe BSoD Error on Windows [Causes & Solutions]
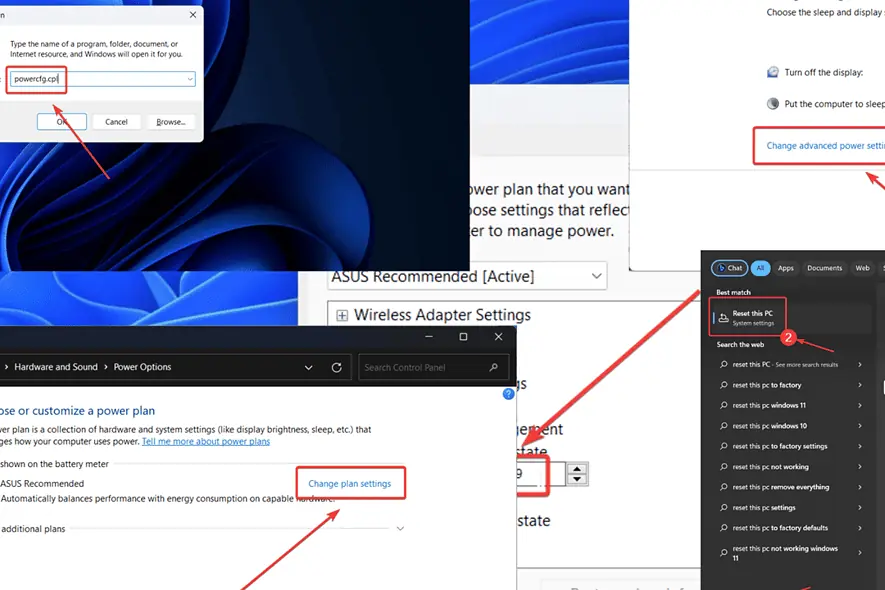
Are you encountering the ntoskrnl.exe BSoD error on your Windows computer? If yes, then please read on for the causes and resolutions.
Note: This article is for Windows 11 and Windows 10 users. These solutions will work on both operating systems.
I saw this Blue Screen of Death error on one of my laptops. Upon checking the dump files, I found ntoskrnl.exe to be the culprit. After researching this topic, I was able to successfully fix the problem.
What Is ntoskrnl.exe in Windows 11/10?
ntoskrnl.exe is the filename for the Windows NT operating system kernel. This is associated with the system RAM and is responsible for the abstraction of hardware, process, and memory management.
Since this file is critical, if it’s missing or corrupt, the system will crash with a Blue Screen of Death.
What Causes ntoskrnl.exe?
The main causes behind the ntoskrnl.exe BSoD error are:
- Faulty RAM: If the files associated with the RAM or the hardware is corrupt, you may encounter the error.
- Missing or corrupt system files: If the ntoskrnl.exe is missing or corrupt, it’ll result in the BSoD error.
- Obsolete drivers: Drivers are important for communication between the hardware and software. Corrupt drivers can cause the problem.
- Overclocking of the system: If the system is overclocked, the issue may occur.
How To Fix ntoskrnl.exe Blue Screen of Death?
Solution 1: Run the Windows Memory Diagnostic tool
The Windows Memory Diagnostic tool checks for errors with the RAM and resolves them if possible.
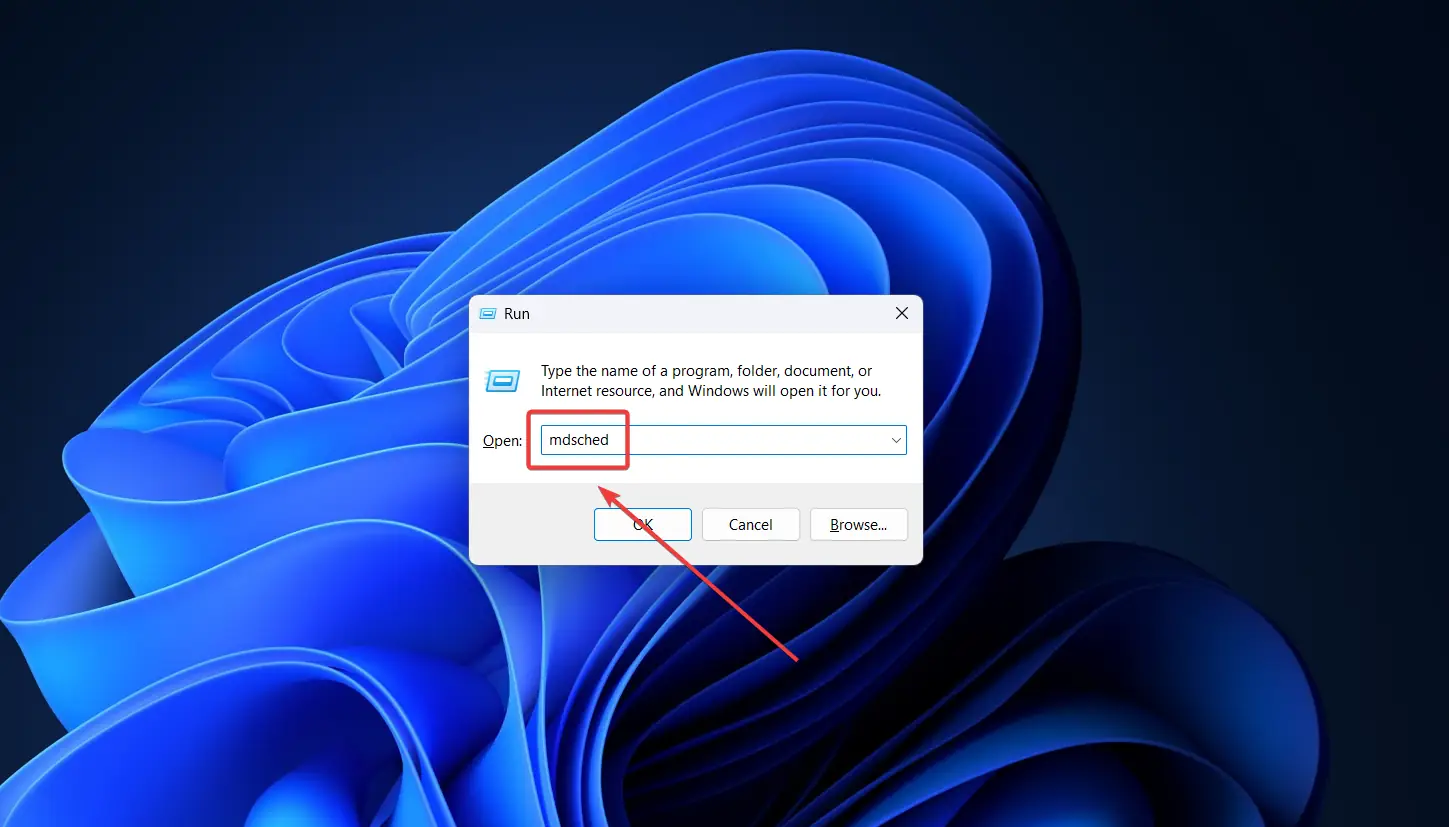
- Press Windows + R to open the Run window.
- Type the following command in the Run window and hit Enter to execute it: MDSCHED
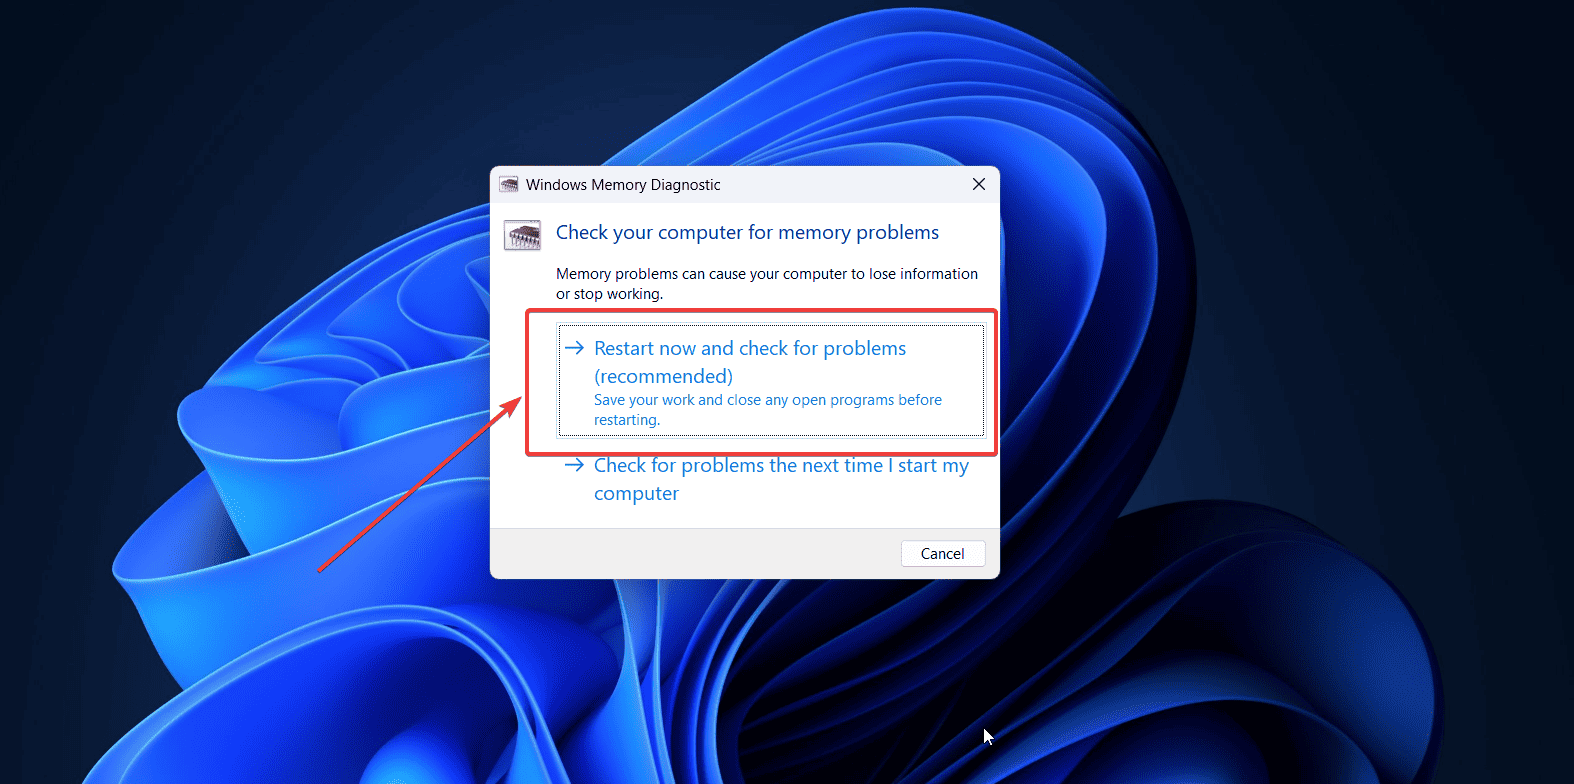
- Select Restart now and check for problems.
Solution 2: Run an SFC Scan
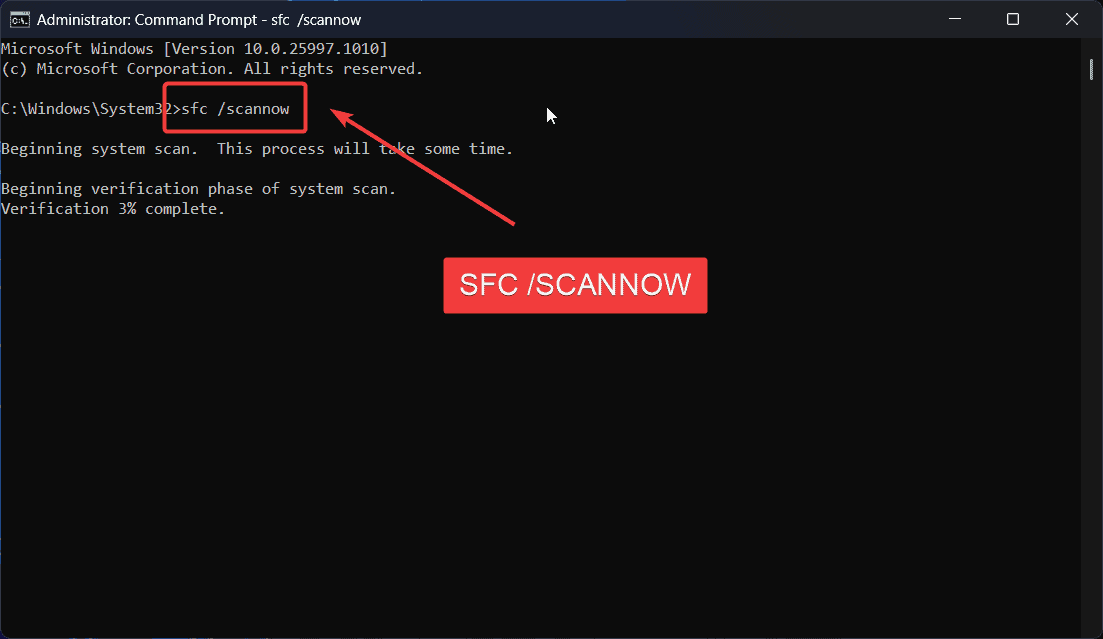
The SFC Scan will check for missing or corrupt system files (like ntoskrnl.exe ) and replace them.
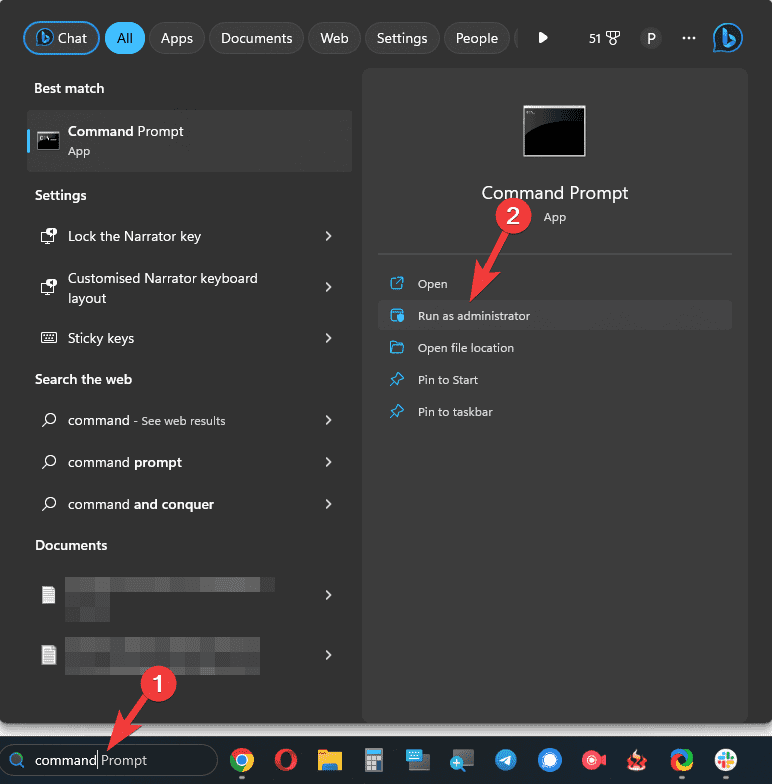
- Search for Command Prompt in the Windows Search bar.
- Select Run as administrator in the right pane to open the Command Prompt window.
- Type the following command and hit Enter to execute it: SFC /SCANNOW
- Reboot your system after the completion of the scan.
Solution 3: Update Windows and Install Optional Updates
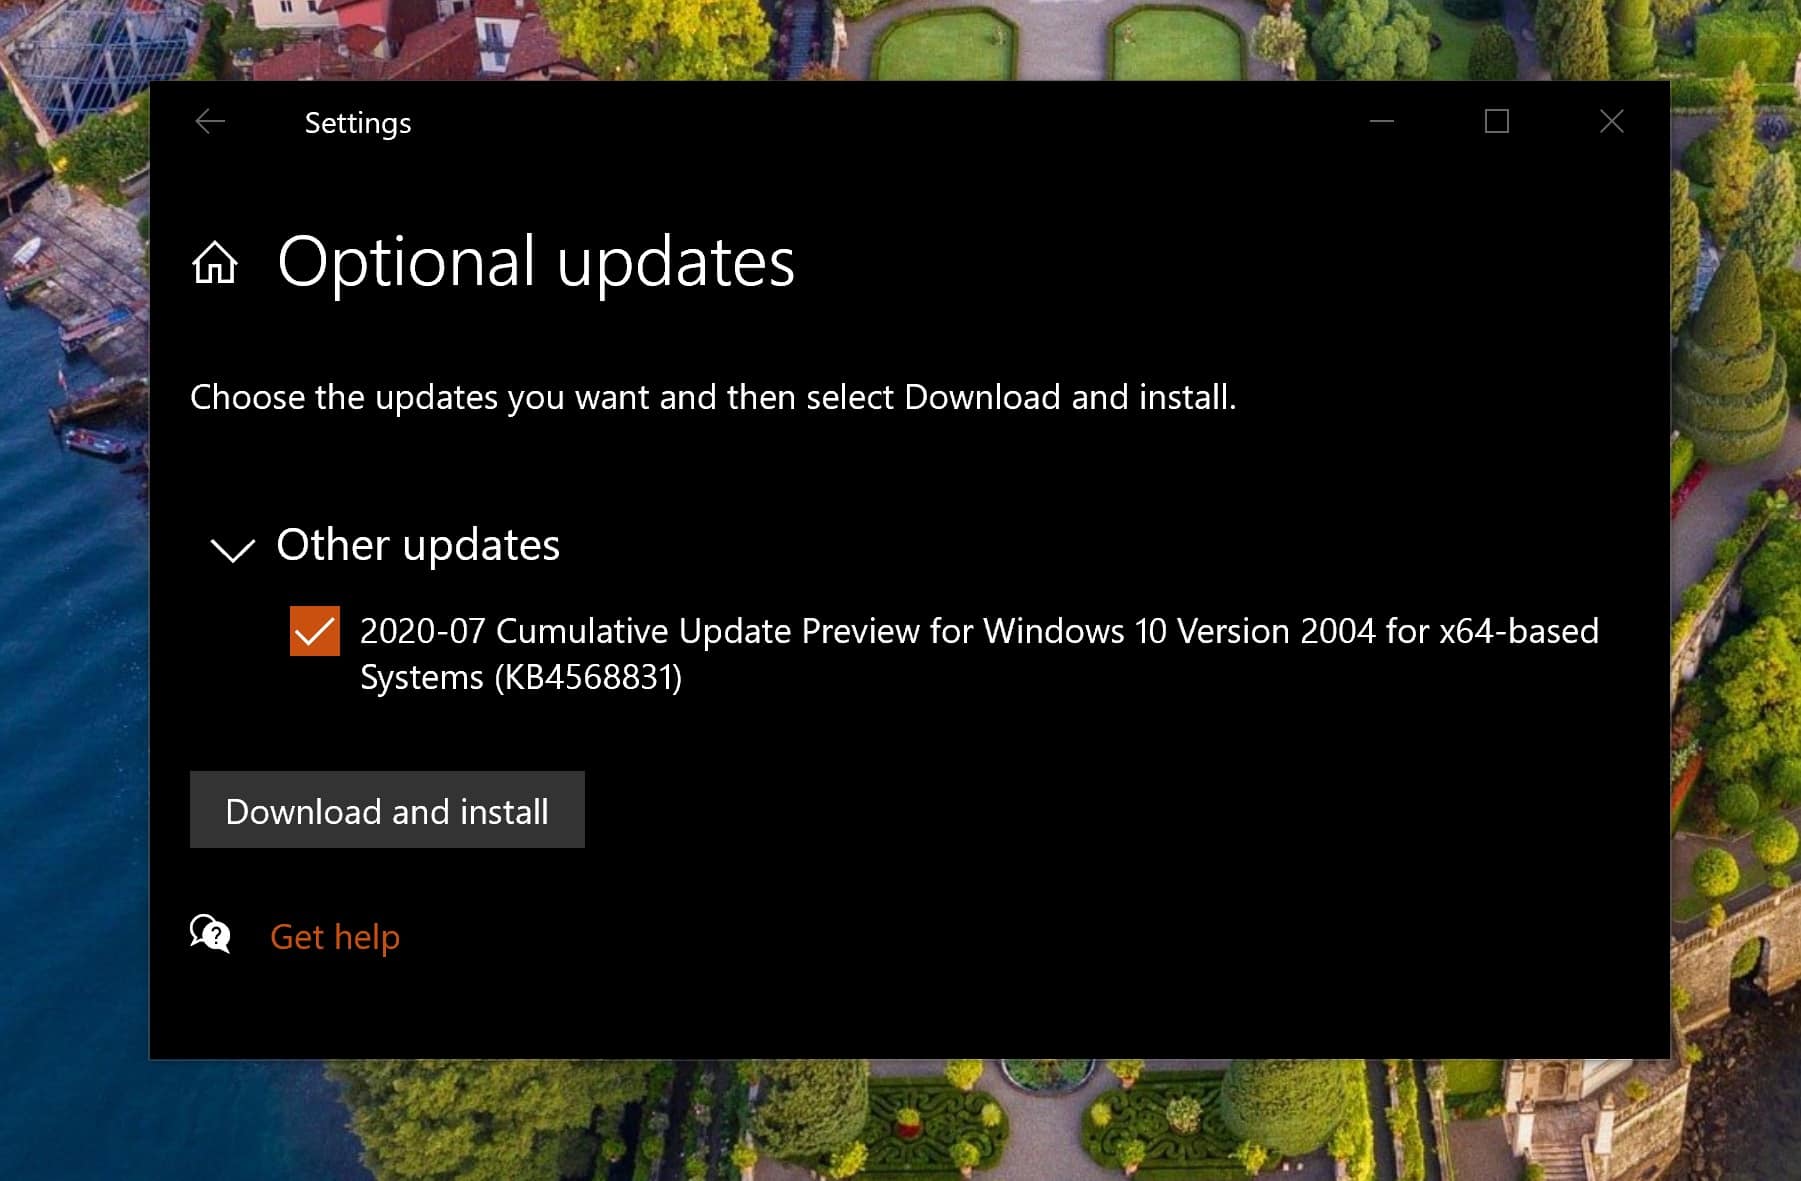
Lately, driver updates are pushed to the system as Optional updates. You can update all drivers at once like this:
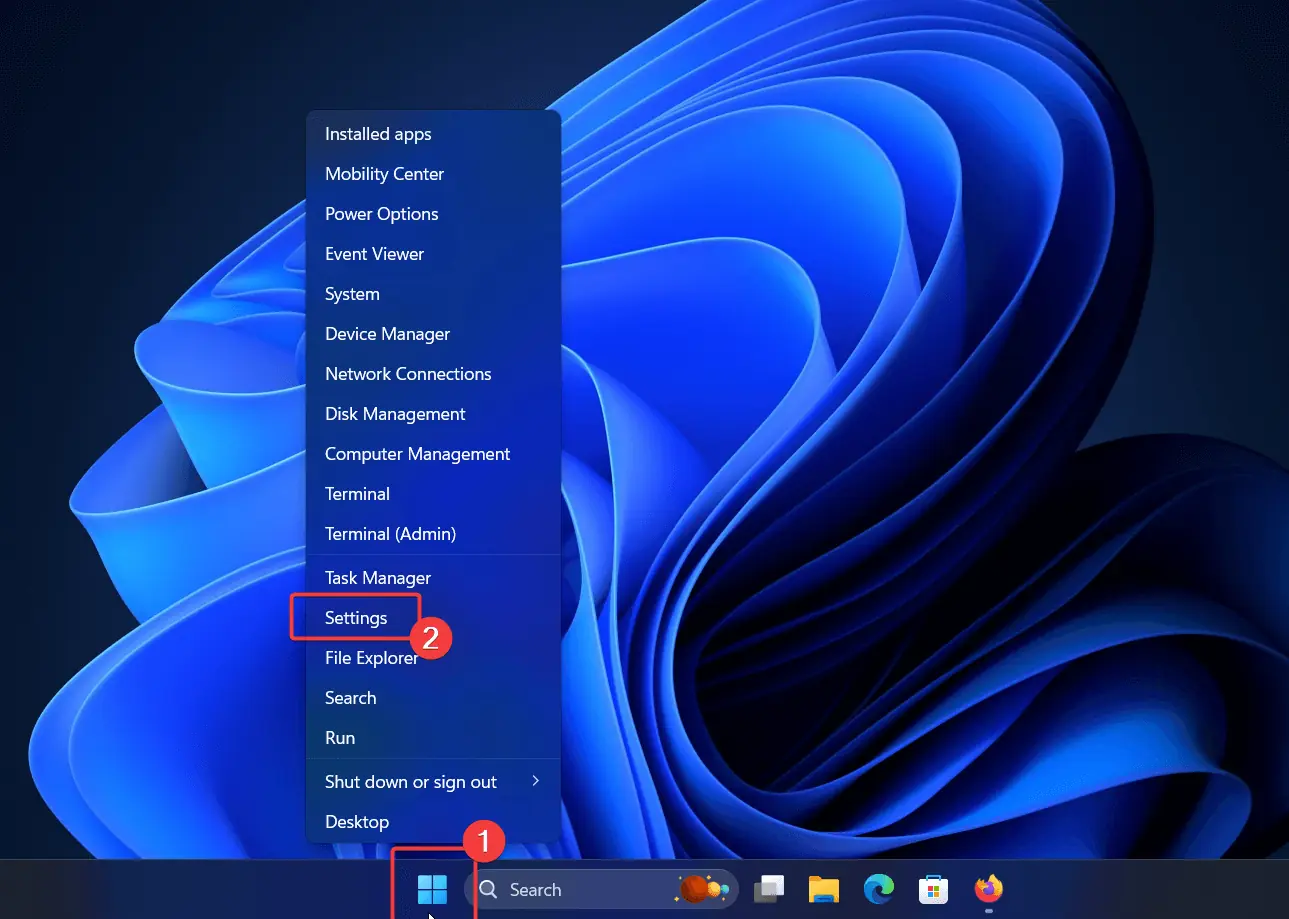
- Right-click on the Start button and select Settings from the menu.
- Go to Windows Update >> Advanced options >> Optional updates.
- Select all Optional updates and install them.
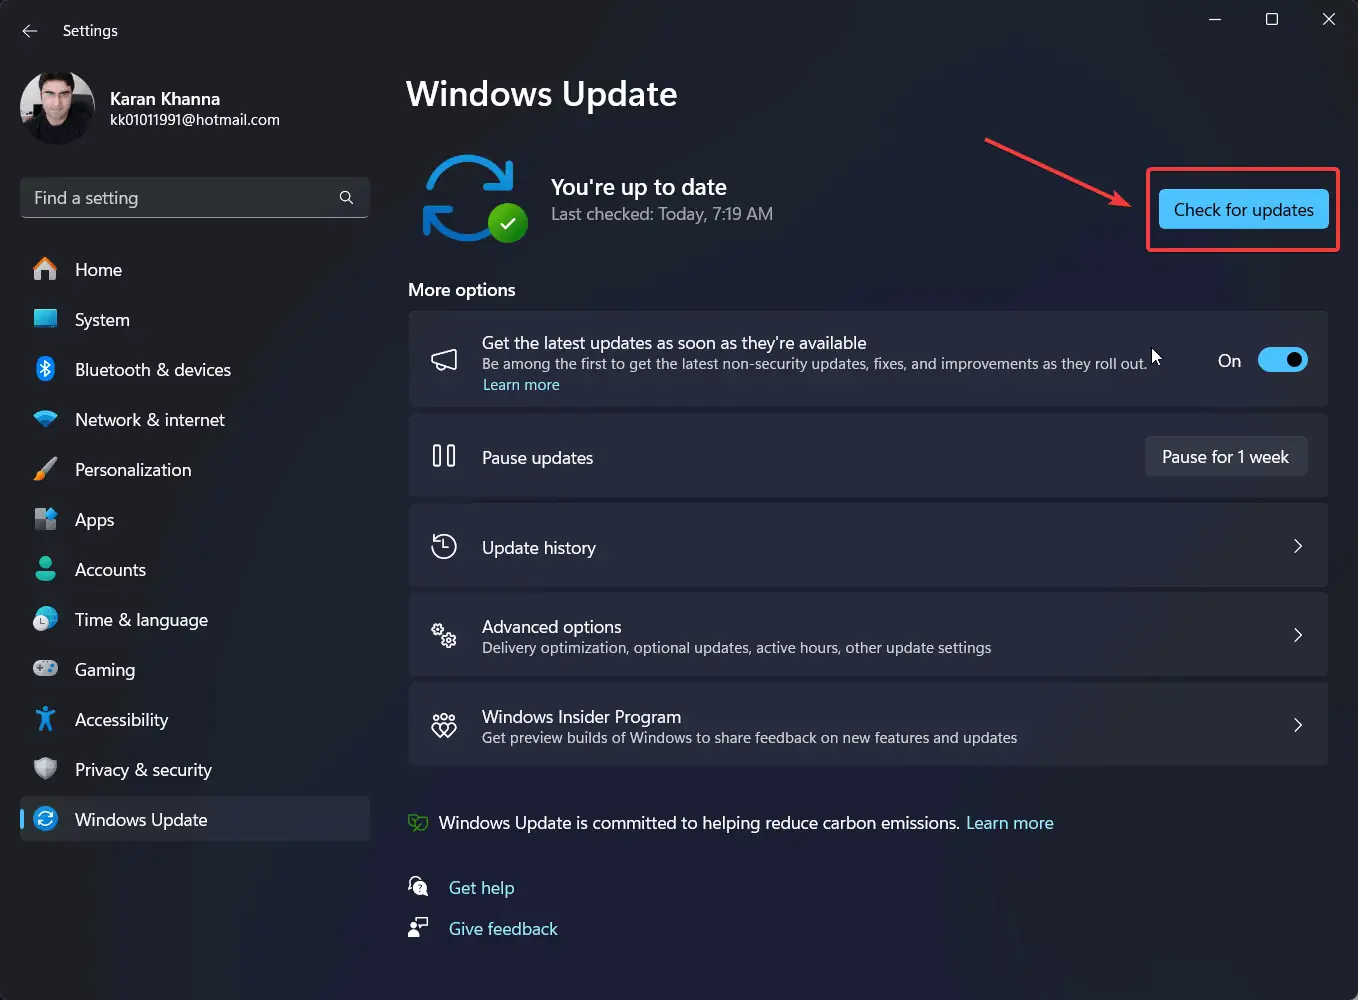
- Now, return to the Windows Update window.
- Click on Check for Updates to install the latest ones.
Solution 4: Change Power Settings to Disable Overclocking
Overclocking is done to push the system beyond its capabilities. To disable it:
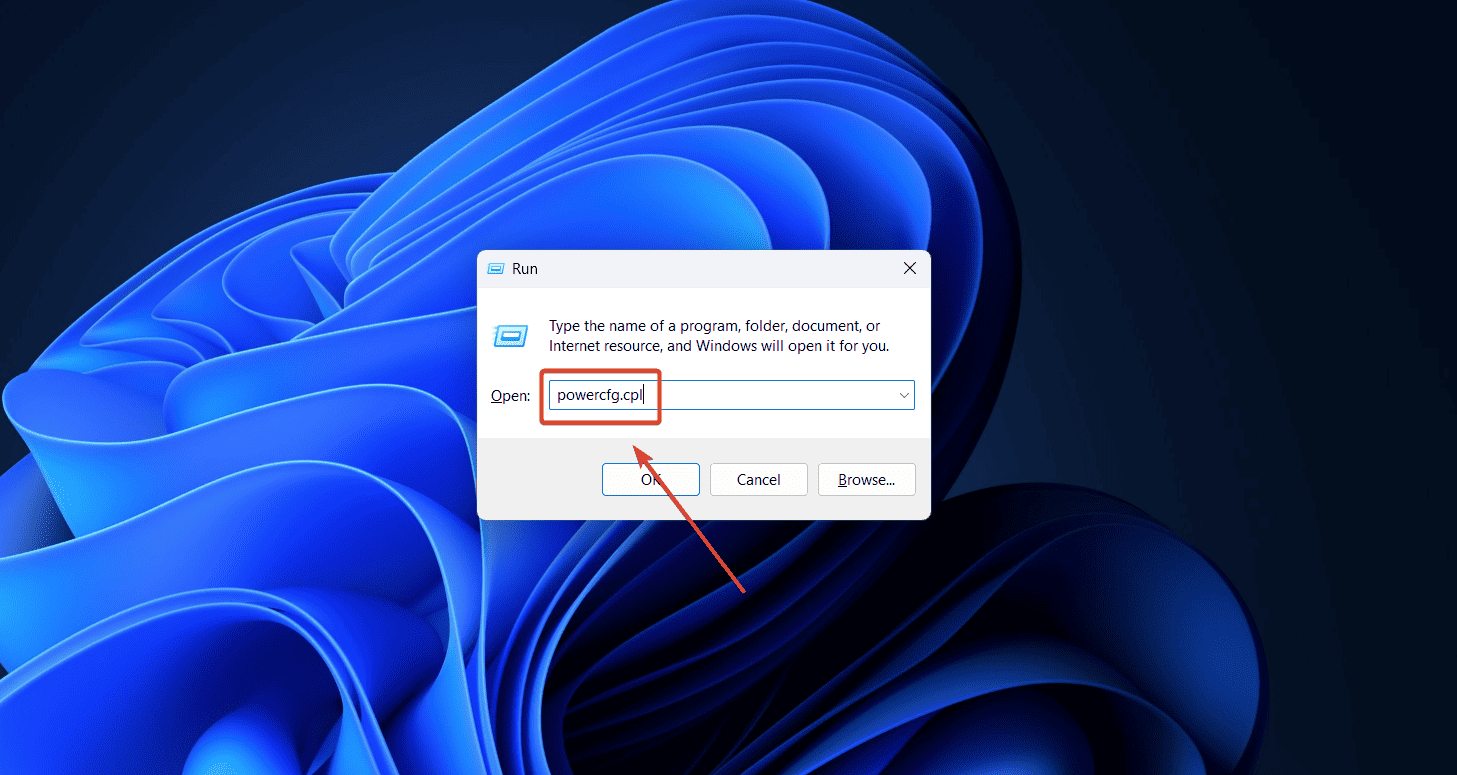
- Press Windows + R to open the Run window.
- Type the following command in the Run window and hit Enter: POWERCFG.CPL
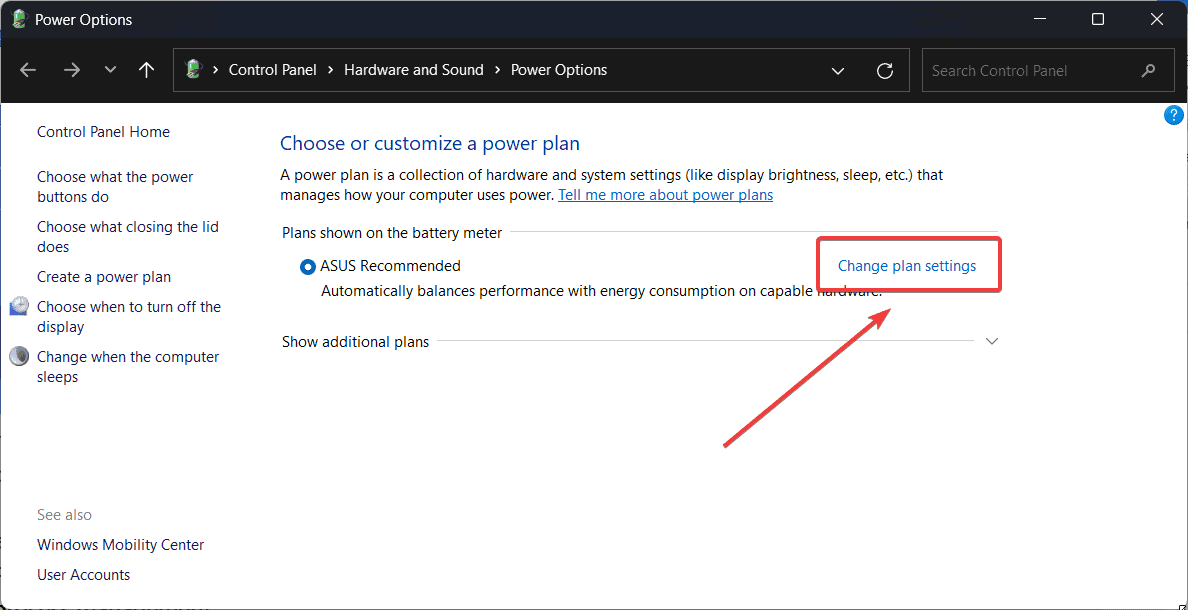
- This will open the Power Options window.
- Click on Change plan settings corresponding to the current power plan.
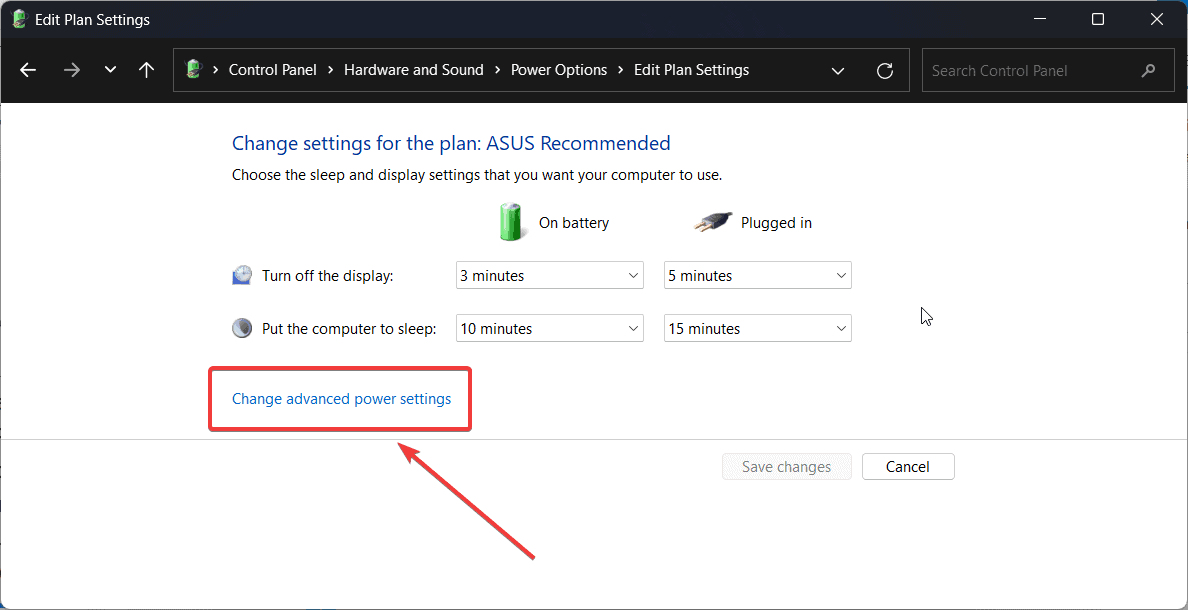
- Select Change advanced power settings.
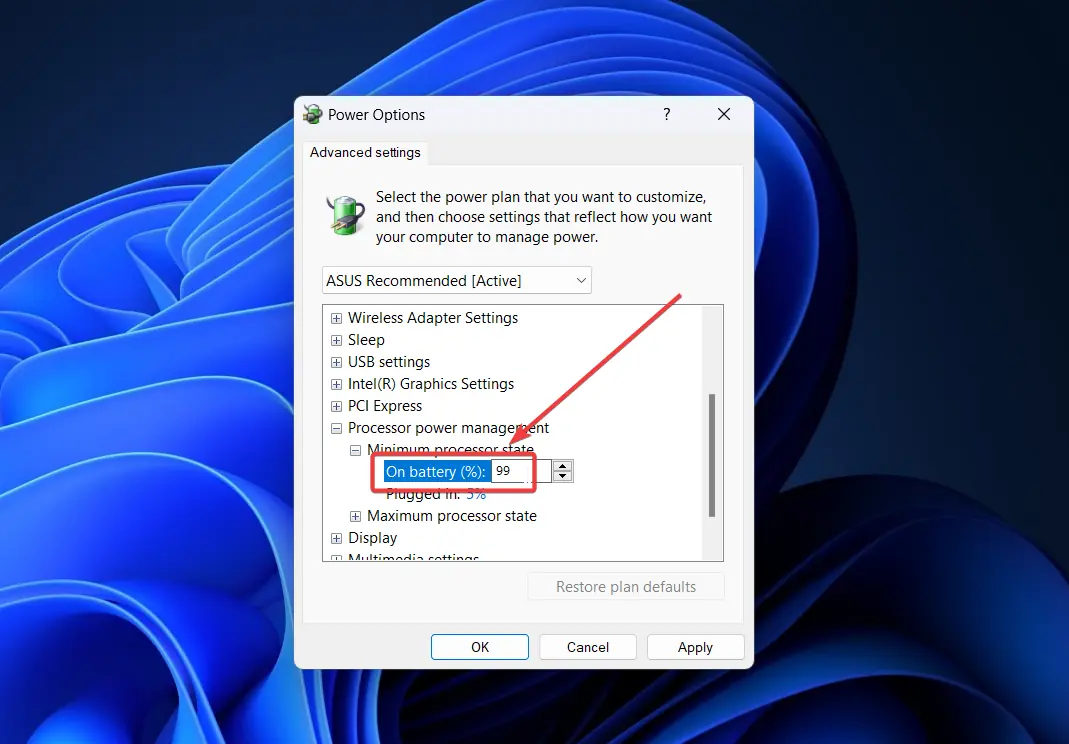
- Scroll down to Processor power management.
- Expand Power process management.
- Expand Minimum processor state.
- Change the value to 99% for both the On battery and Plugged in modes.
- Repeat the same for the Maximum processor state. Change both the values to 99%.
Solution 5: Change or Add RAM
Additionally, if the RAM is insufficient, that may also be the problem. You can try replacing the RAM or adding more if a slot is available.
Solution 6: Scan the System for Viruses and Malware
- Search for Windows Security in the Windows Search bar.
- Open Windows Security.
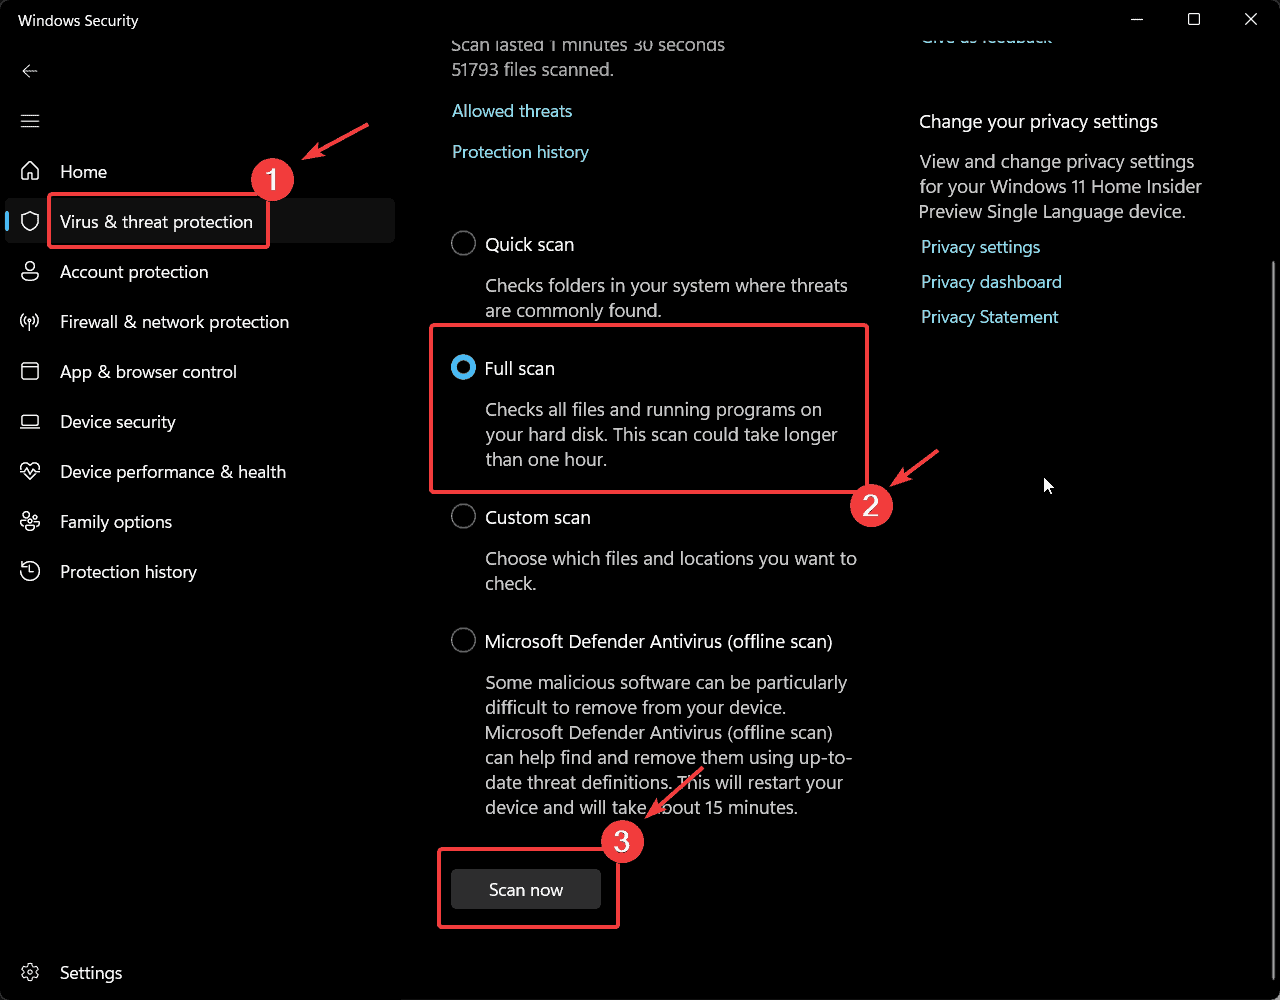
- Go to the Virus and threat protection tab.
- Select Scan options in the right pane.
- Check the radio button at Full scan and then Scan now.
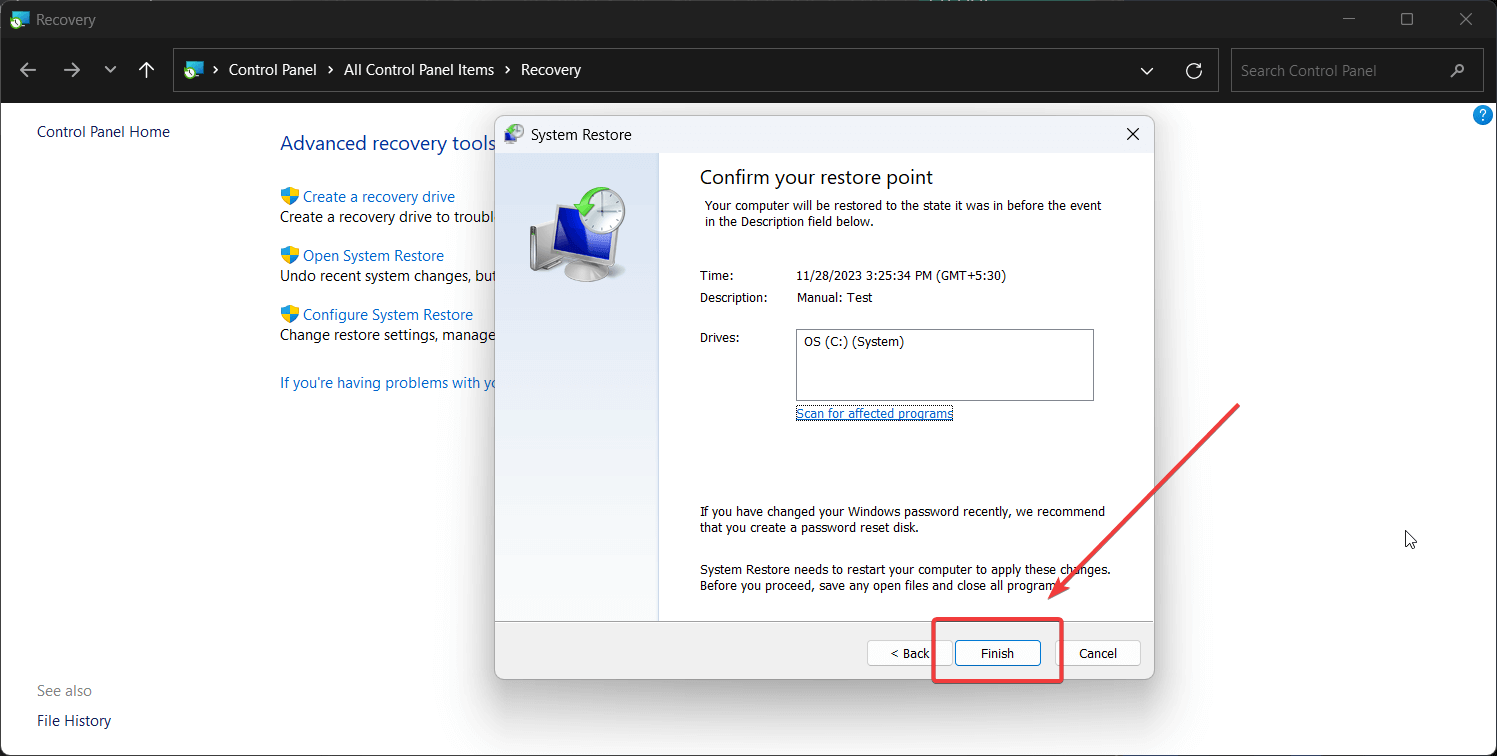
Solution 7: Perform System Restore
Finally, you can try reverting the system to a previously created restore point.
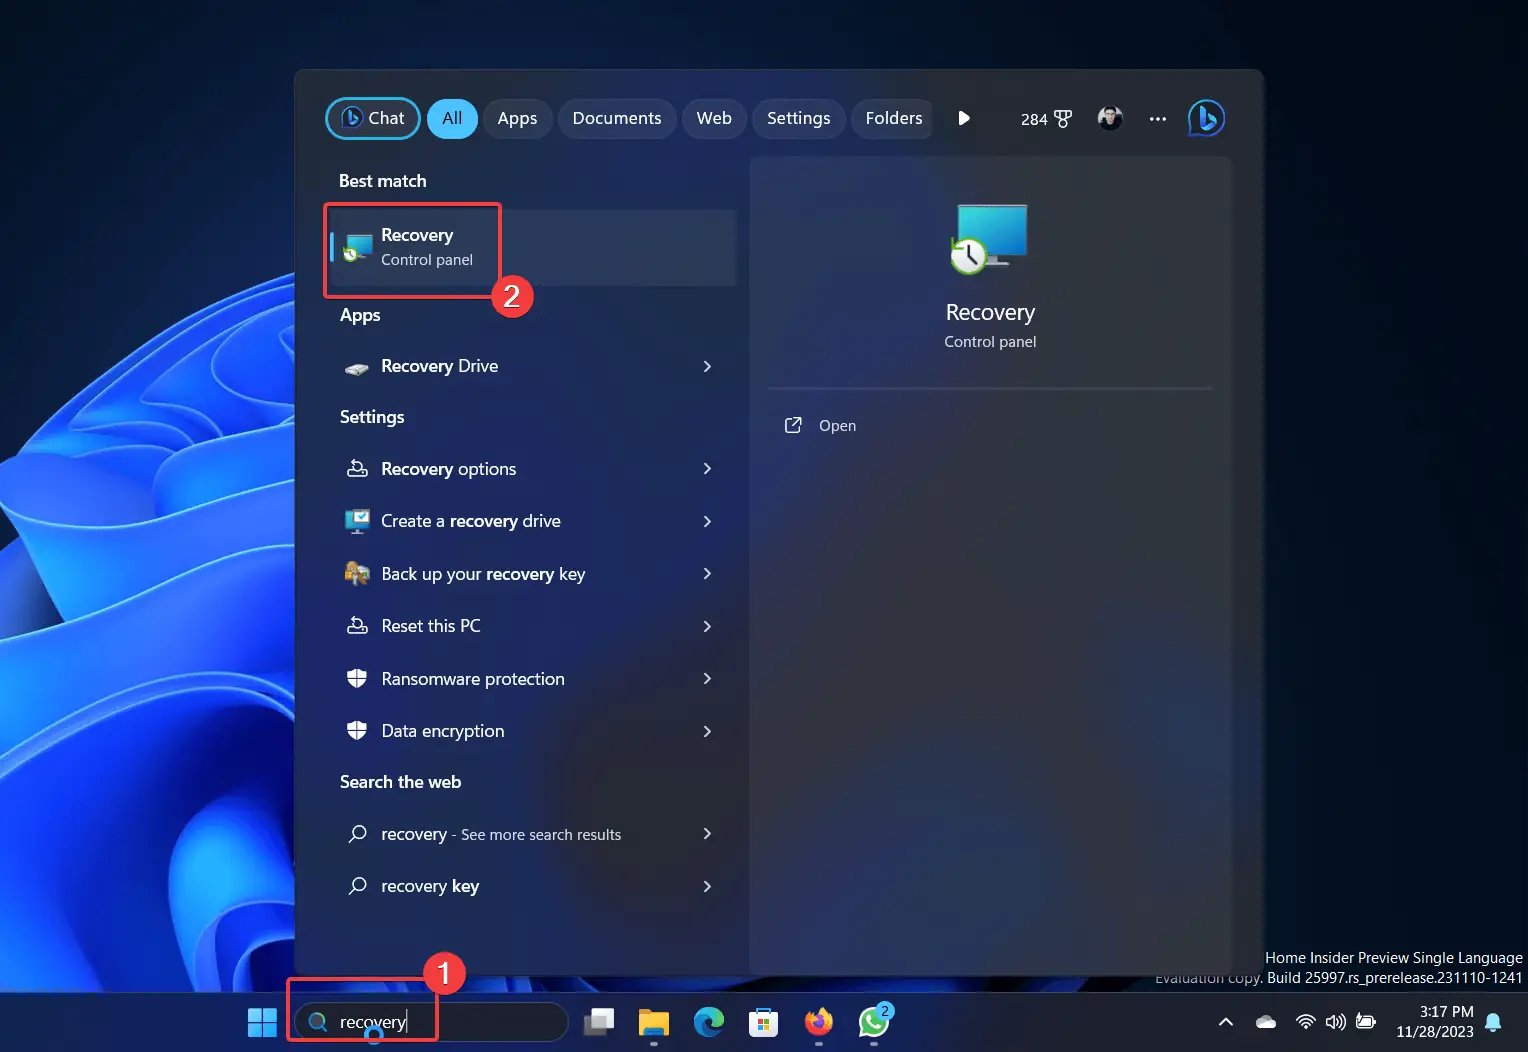
- Search for Recovery in the Windows Search bar and open it.
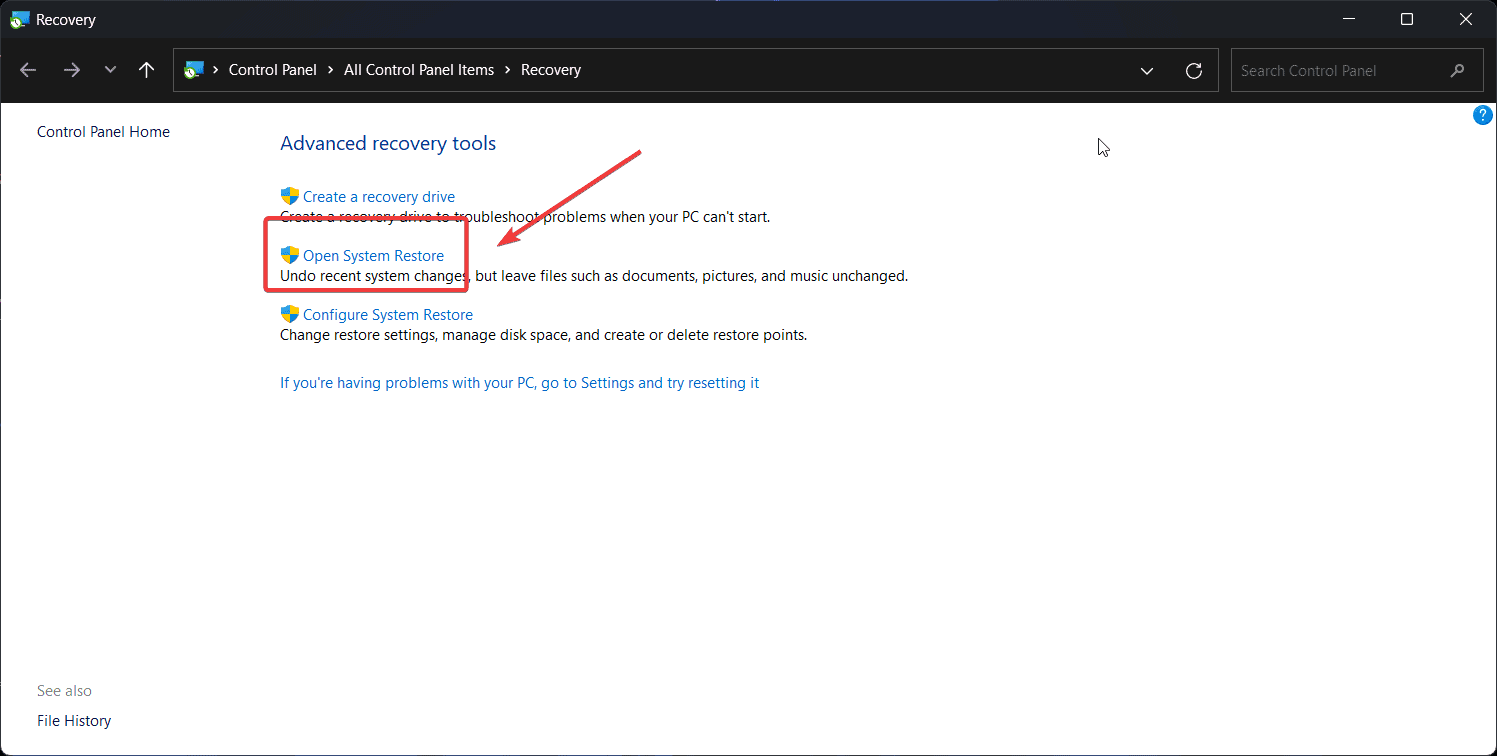
- Select Open System Restore.
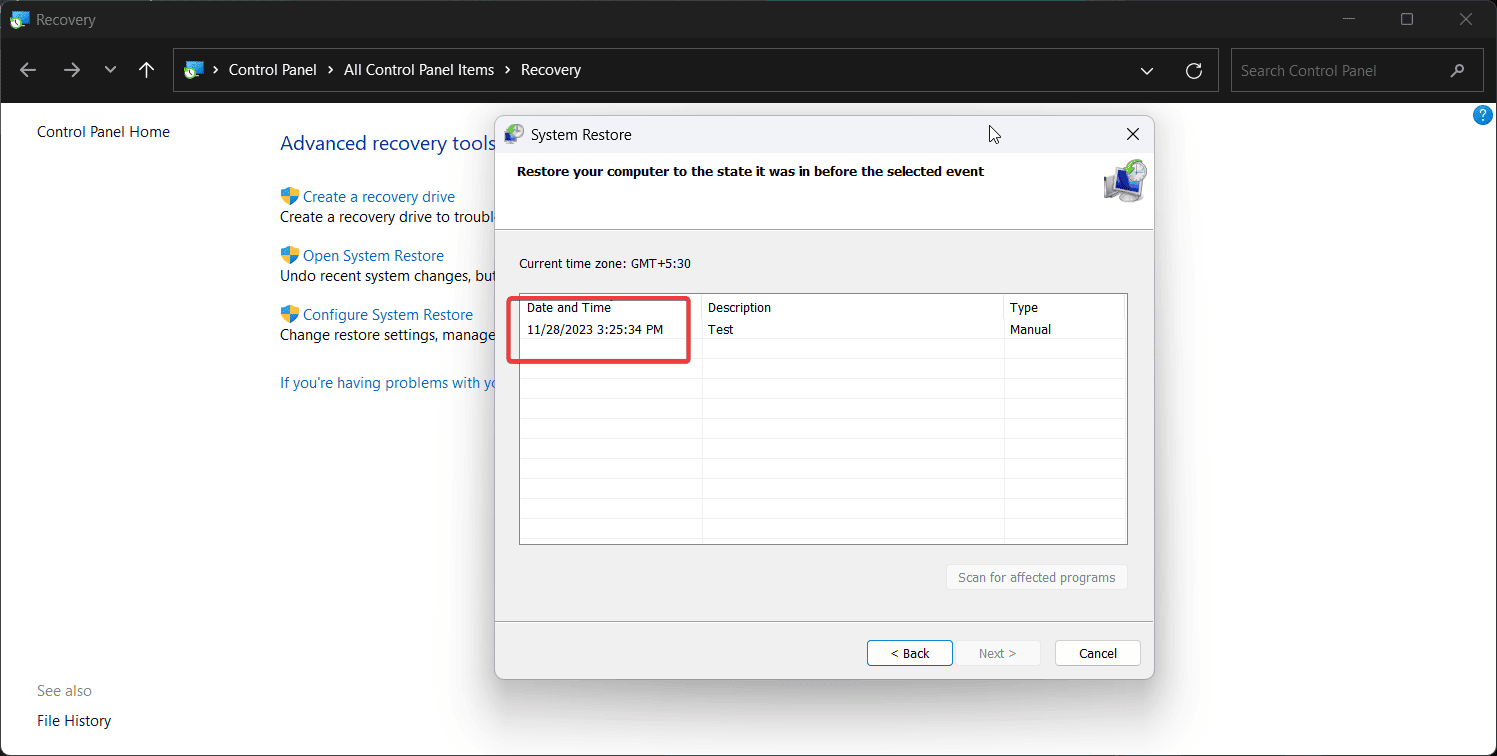
- Click on Next.
- Select the Restore point and click on Next.
- Click on Finish.
You may also be interested in:
Wrap up
The ntoskrnl.exe error is a horror sight for most computer users. Usually, running the Windows Memory Diagnostic tool should fix the problem. Please let me know which solution worked in the comment section below.
Read our disclosure page to find out how can you help MSPoweruser sustain the editorial team Read more



User forum
0 messages