Mouse Cursor Disappeared in Windows 11 - 9 Step-by-Step Fixes
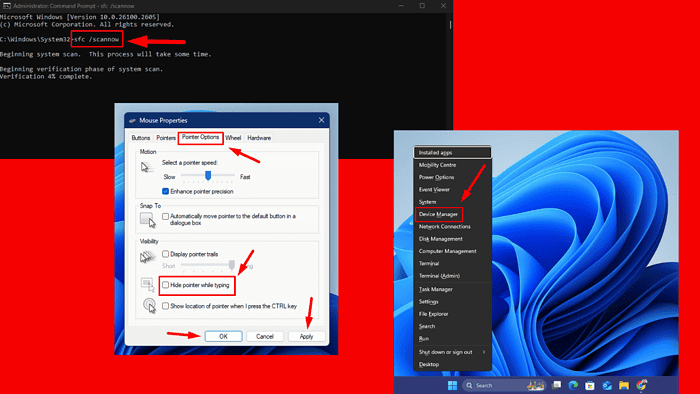
Has your mouse cursor disappeared in Windows 11? This problem could occur for several reasons, including driver or hardware issues and settings conflicts. Thankfully, there are several solutions to help you restore your mouse cursor.
Let’s begin!
Quick Fixes
Try these steps first:
- Plug and unplug the mouse: Unplug it from the USB port, wait a few seconds, and plug it back in to reset the connection.
- Enable it with function keys: Press Fn+F3, Fn+F5, Fn+F9, or Fn+F11 and confirm if the mouse appears.
- Scan for malware: Open Windows Security through the search button > Virus & threat protection > Scan options > Full scan > Scan now.
- Update Windows: Go to Settings > Windows Update, check for updates, and install any pending updates to ensure your system is current.
- Check your mouse batteries: If using a wireless mouse, replace the batteries to ensure they aren’t the cause of the issue.
- Try a different port: Plug it into a different USB port and see if the cursor appears.
- Fully insert the USB into the port: Ensure the USB plug is securely and fully inserted into the port to avoid connection issues.
Uncheck the “Hide Pointer While Typing” Setting
Windows 11 has a feature that hides the mouse pointer while typing to avoid distraction. However, this can sometimes lead to the cursor disappearing unexpectedly. To disable it:
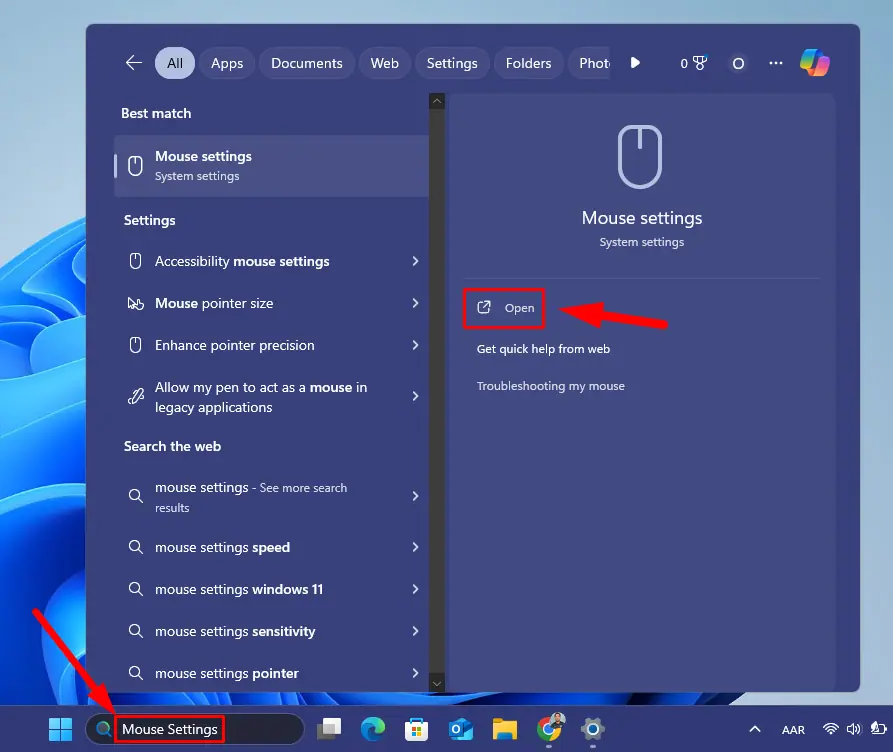
- Press the Windows Key + S, type Mouse Settings, and click Open.
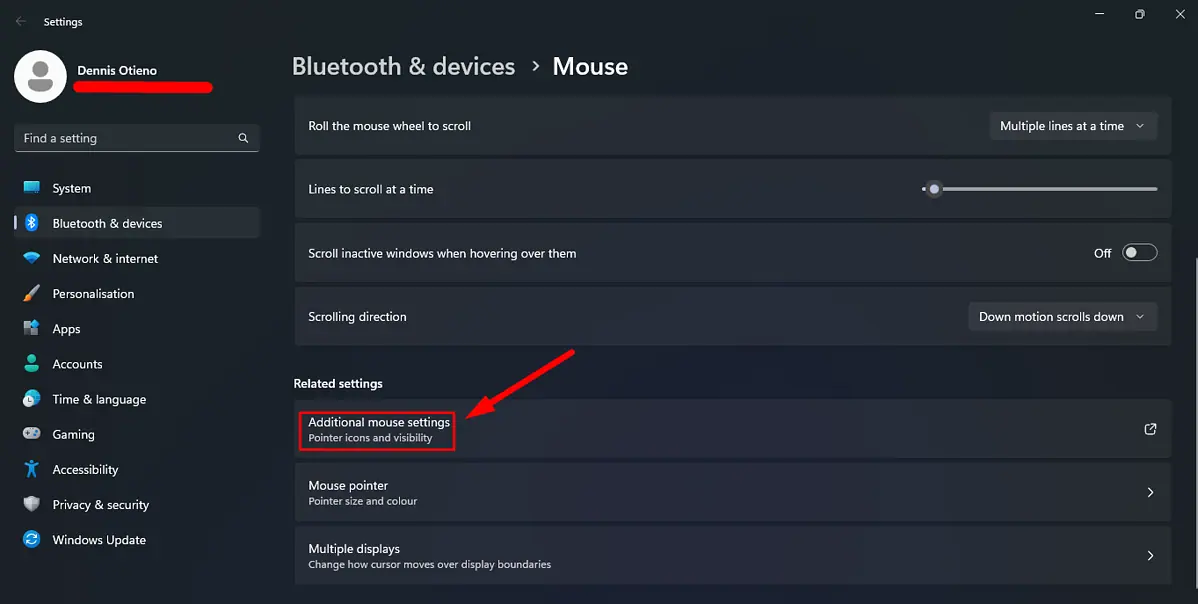
- Click on Additional mouse settings under the Related settings section.
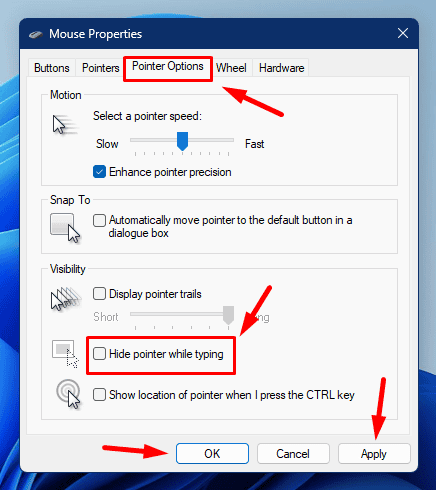
- In the Mouse Properties window, go to the Pointer Options tab. Uncheck the box next to Hide pointer while typing. Click Apply and then OK.
Re-enable the Mouse Driver
Here’s how to check and re-enable it so it works properly again:
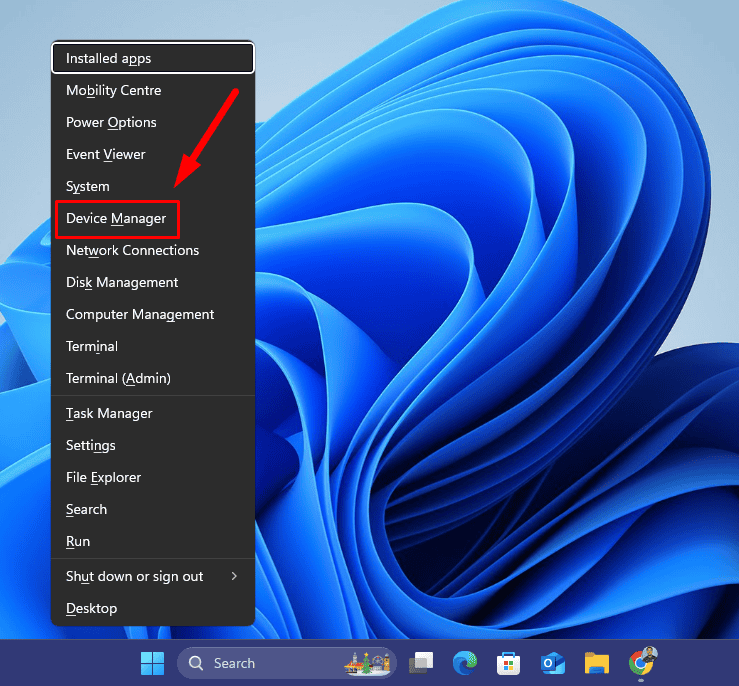
- Press the Windows key + X to open the Quick Access menu. Select Device Manager from the list.
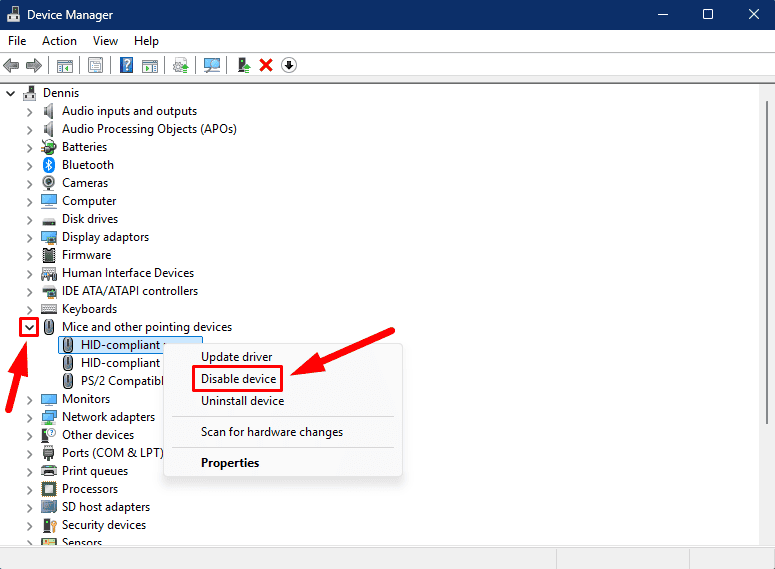
- Scroll down to Mice and other pointing devices, and click on the arrow to expand the section. Right-click on your mouse and select Disable Device.
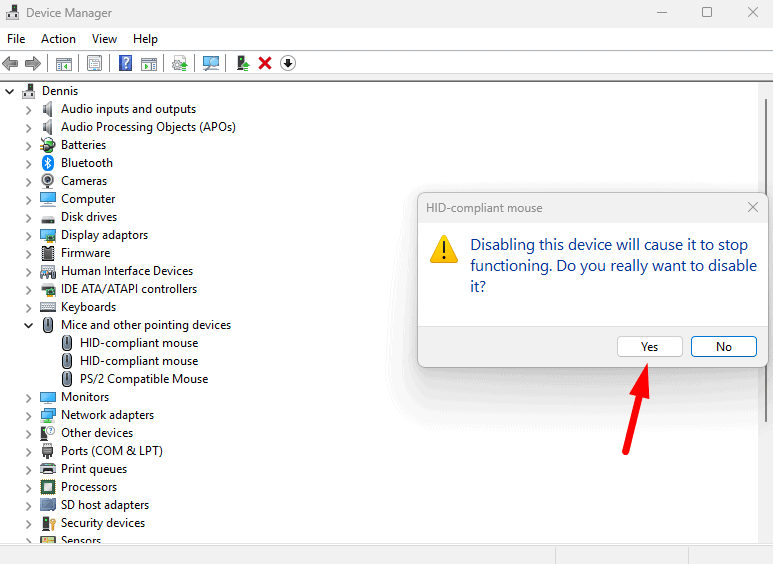
- Confirm you want to disable the device.
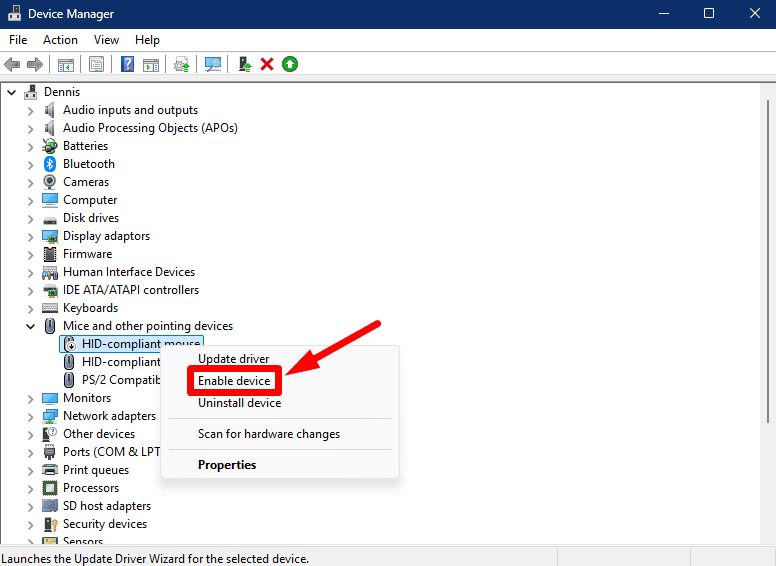
- Wait a few seconds, right-click it again, and tap Enable Device.
Update the Mouse Driver
The cursor could disappear if the mouse driver is outdated or incompatible with your system. Updating it to the latest version can help resolve compatibility issues and improve overall functionality. Here’s how:
- Open Device Manager again (Press Windows + X, then select Device Manager).
- Expand the Mice and other pointing devices section. Right-click on your mouse and choose Update driver.
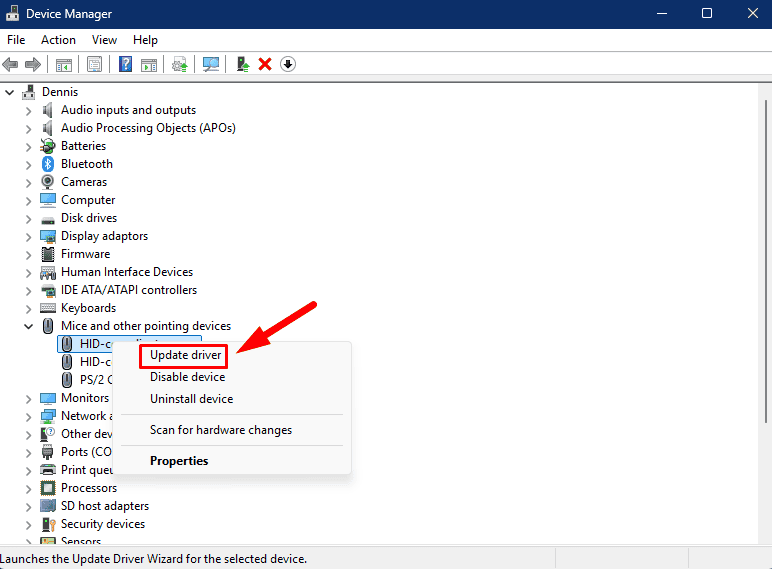
- Select Search automatically for drivers. Windows will look for the latest one and install it if available.
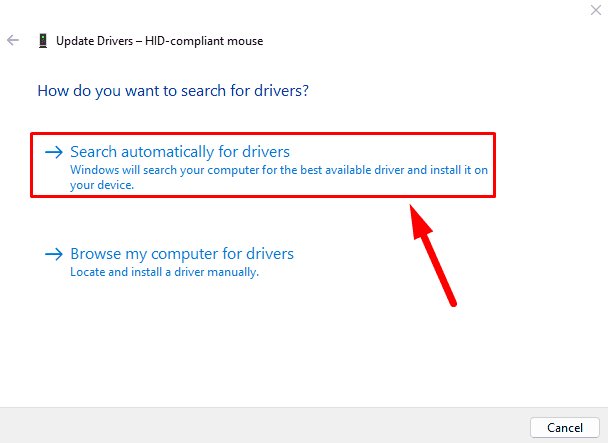
In some cases, you may have to manually visit the manufacturer’s website to download the latest driver.
Another option is to download and install the PC HelpSoft Driver Updater. It simplifies the process by automatically updating your drivers.
Roll Back the Mouse Driver
If you recently updated your mouse driver and the issue started afterward, rolling back to a previous version might help. Follow the steps below:
- Open Device Manager.
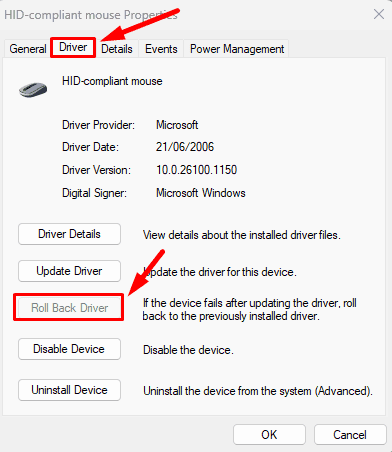
- Locate your mouse under Mice and other pointing devices. Right-click and select Properties.
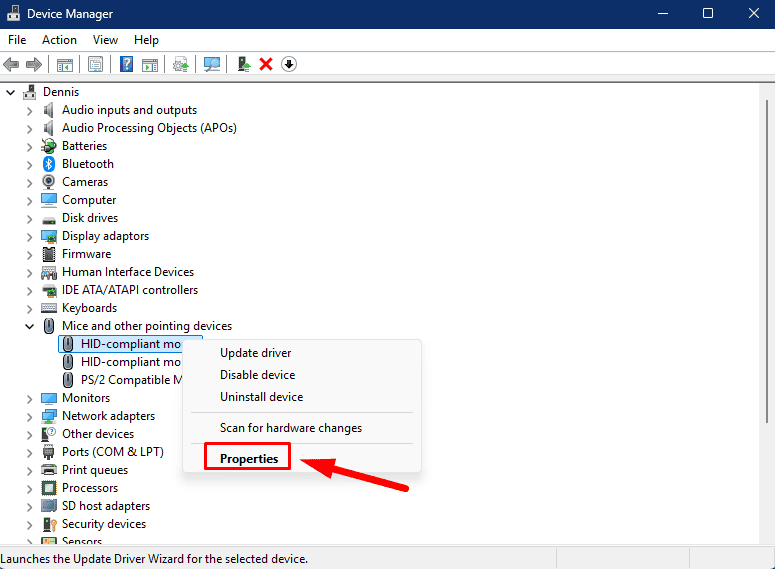
- Go to the Driver tab and select Roll Back Driver. Follow the on-screen instructions and restart your computer.
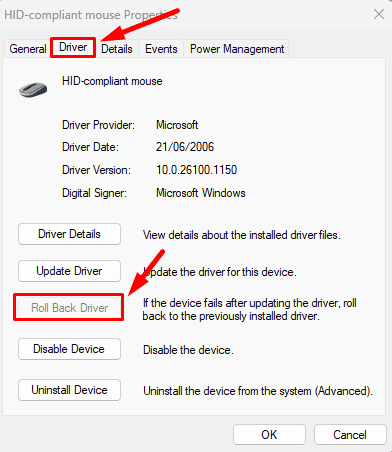
If the Roll Back Driver button is grayed out, it means there’s no previous version.
Uninstall the Mouse Driver
Sometimes, the mouse driver might become corrupted, causing the cursor to disappear. Uninstalling the driver and allowing Windows to reinstall it can solve this problem. Follow the steps below:
- Open Device Manager again.
- Expand the Mice and other pointing devices section. Right-click on your mouse and select Uninstall device.
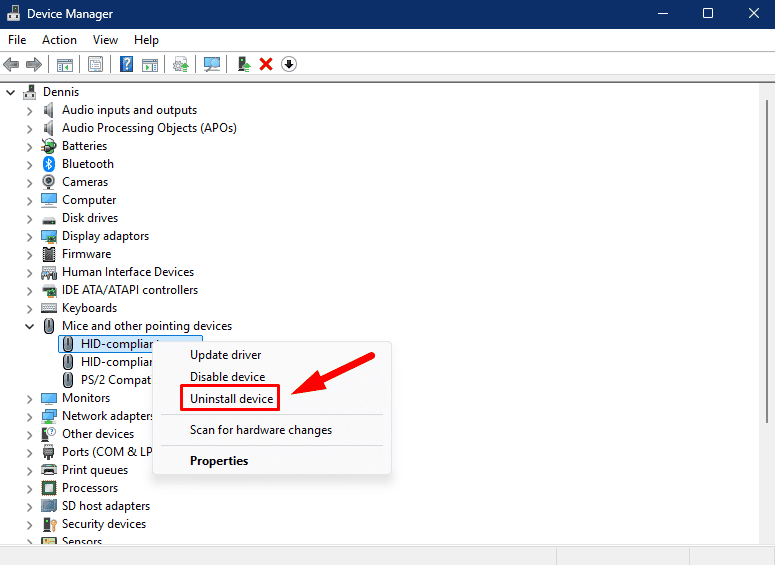
- Confirm the uninstallation.
Restart your computer. Windows will automatically reinstall the driver after the reboot.
Run the Built-In Hardware Troubleshooter
Windows 11 includes a built-in troubleshooter that can help identify and resolve issues related to hardware devices, including the mouse. Here are the steps:
- Right-click the Start Menu, then select Terminal (Admin).
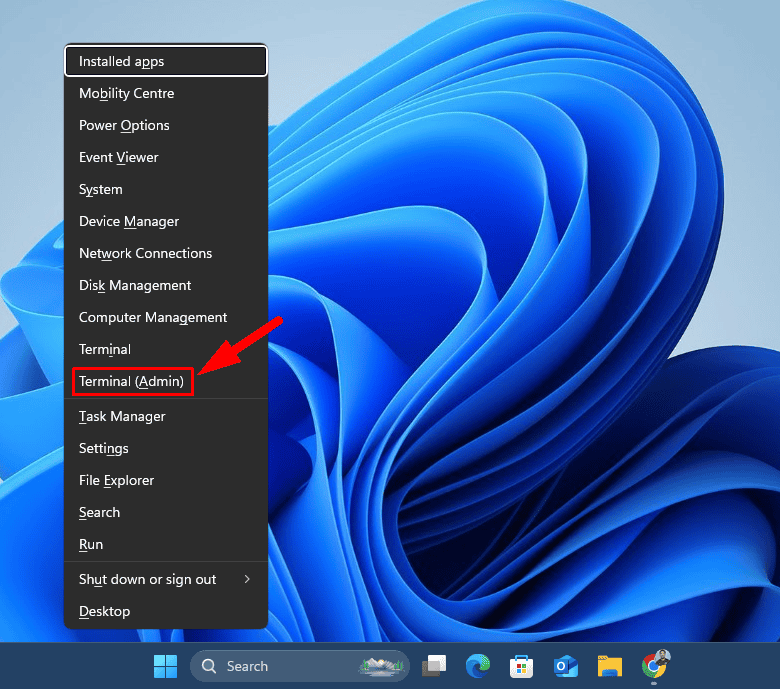
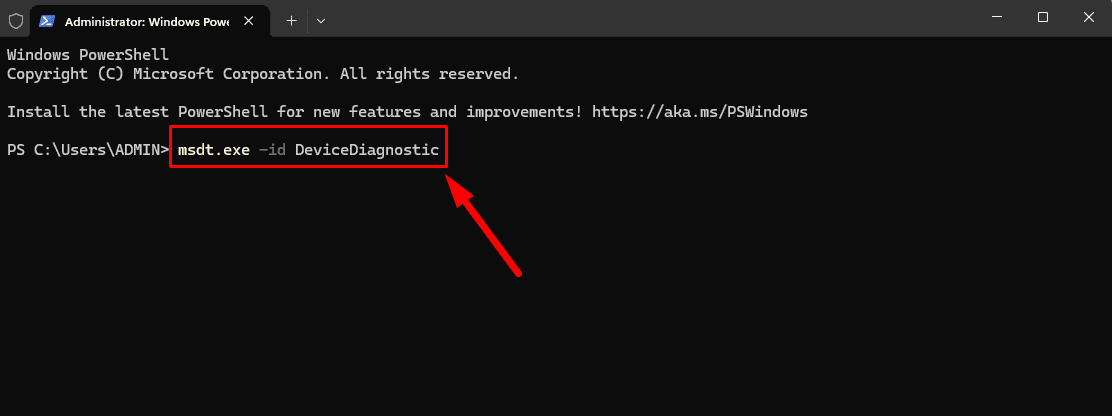
- Type msdt.exe -id DeviceDiagnostic and hit Enter.
- Tap Next on the Hardware and Devices window tab to start troubleshooting.
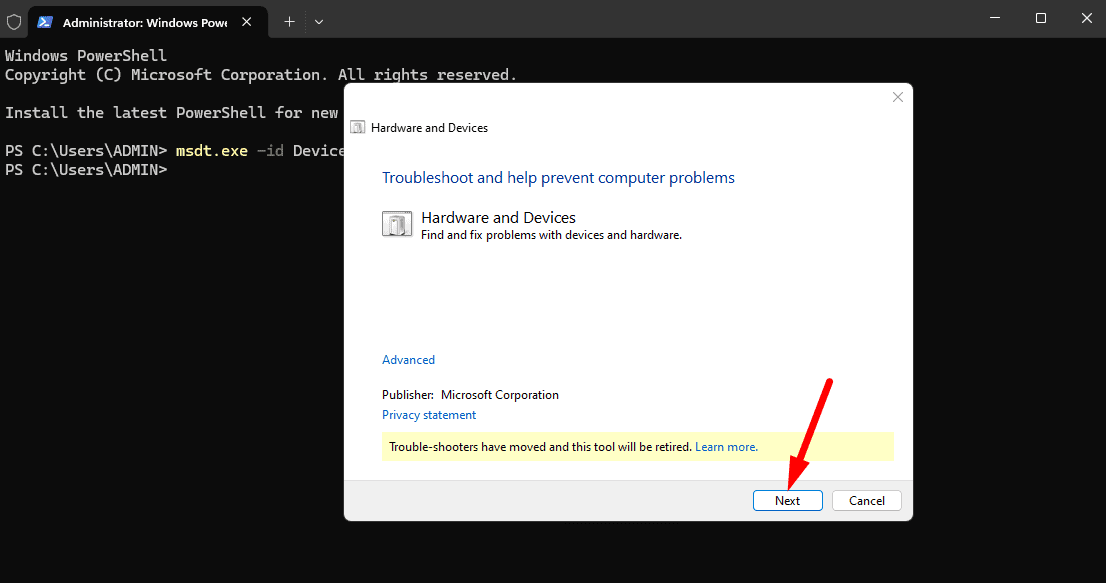
The troubleshooter will attempt to find and fix any problems with your mouse, including cursor-related issues.
Run the SFC Scan
Corrupted system files can cause unexpected behavior, such as a missing mouse cursor. The System File Checker (SFC) tool scans your system for corrupted files and attempts to repair them automatically. Follow the steps below:
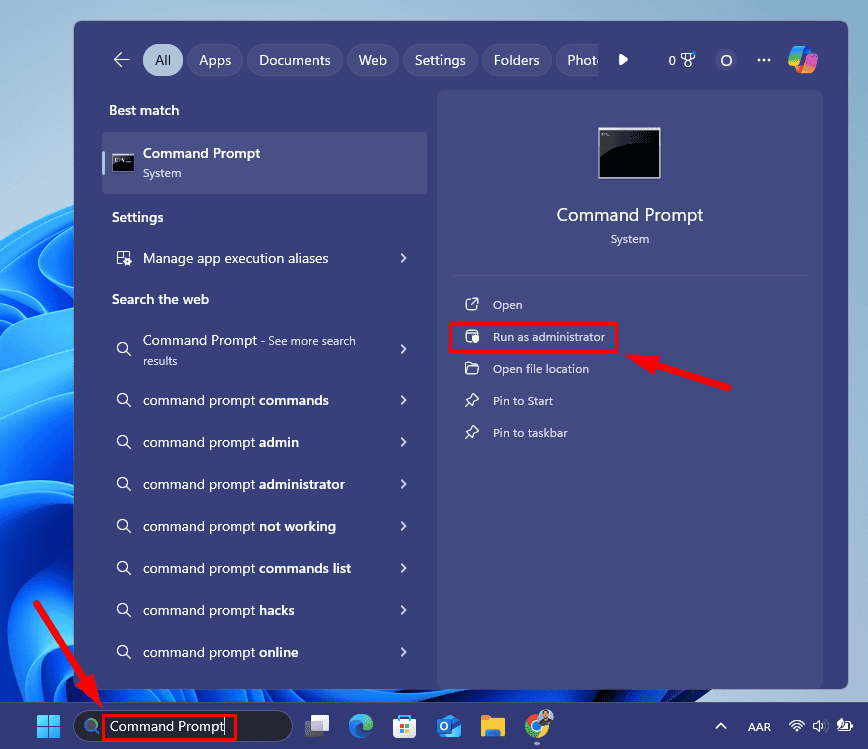
- Press Windows + S to open the search bar, type cmd, and click Run as administrator.
- Type sfc /scannow and press Enter. Wait for the scan to complete. It may take some time, depending on your system’s speed.
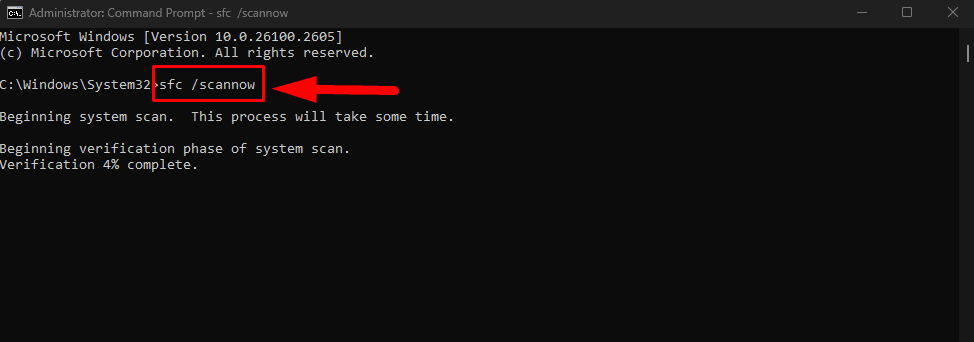
If it finds any issues, SFC will attempt to fix them. Once finished, restart your computer and check if the mouse cursor appears.
Perform a System Restore
If none of the above solutions works, a system restore can revert your computer to a previous state when the mouse cursor worked correctly. This won’t affect your files but will undo recent system settings, drivers, and software changes. Follow the steps below:
- Press Windows + S, search for Create a restore point, and tap Open.
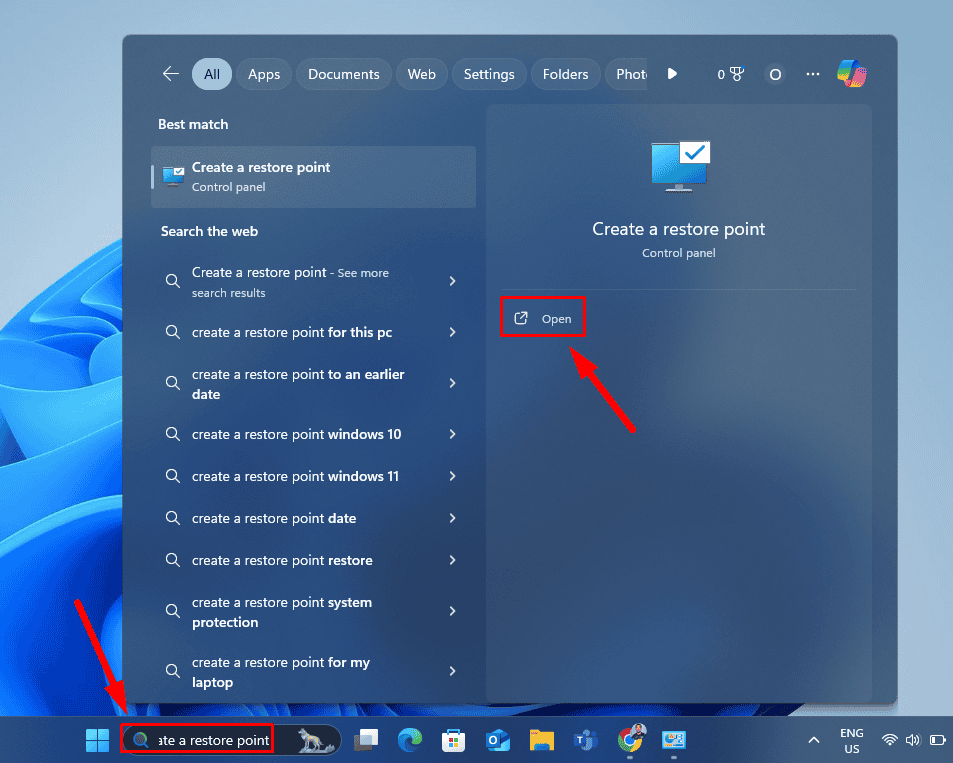
- In the System Properties window, click on System Restore.
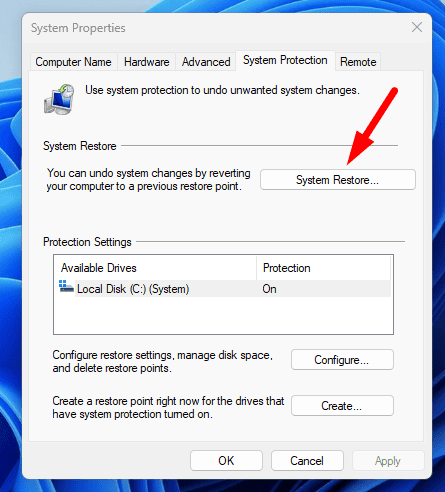
- Choose a restore point from when your mouse cursor was working.
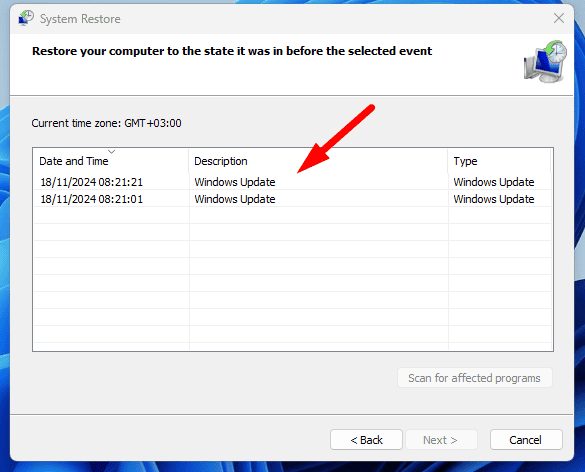
- Click Next and then Finish to initiate it.
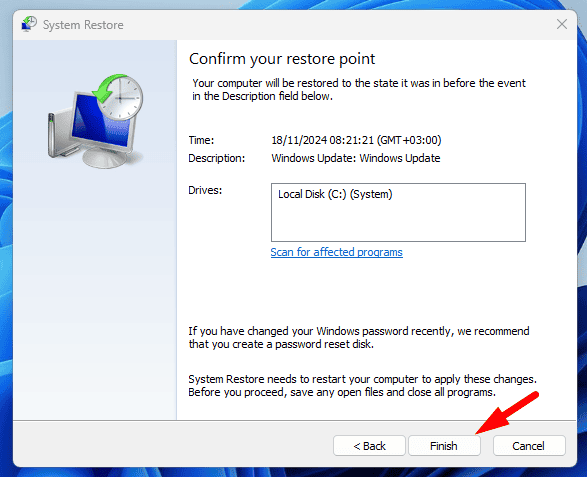
Your computer will restart, and the system will be reverted to the selected restore point.
So, now you know what to do if your mouse cursor disappeared in Windows 11. By following these troubleshooting steps, you can resolve the issue and restore your mouse’s functionality. Start with the quick fixes, then move on to more advanced solutions to regain your cursor and return to a smooth computing experience.
Also, learn to turn off mouse acceleration in Windows 10 and fix a mouse that doesn’t lock to a game in Windows 11.
Read our disclosure page to find out how can you help MSPoweruser sustain the editorial team Read more


User forum
0 messages