Microsoft Teams Microphone Not Working: Why & How To Fix
3 min. read
Published on
Read our disclosure page to find out how can you help MSPoweruser sustain the editorial team Read more
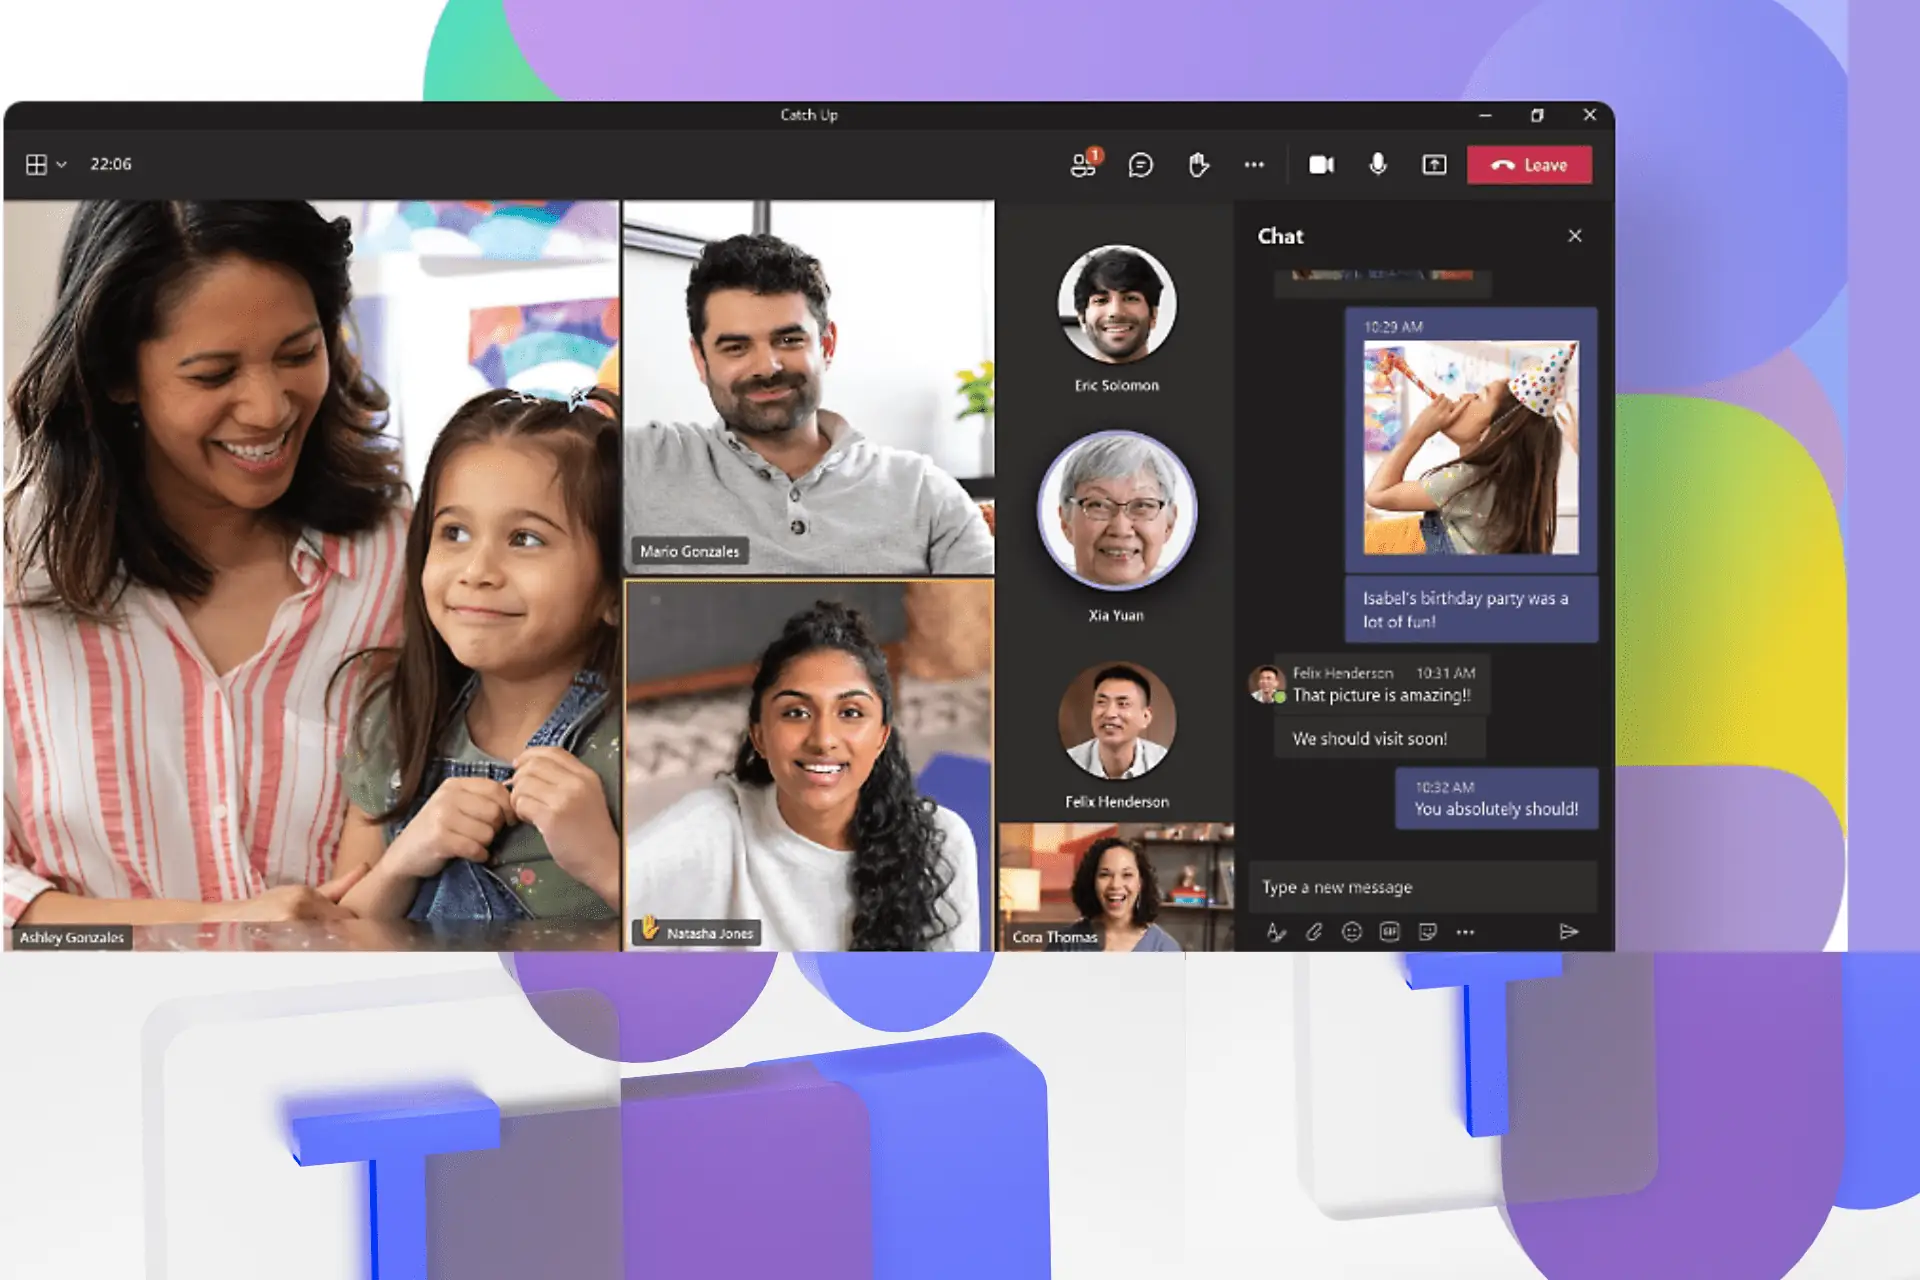
Is your Microsoft Teams microphone not working as it should? The platform allows today’s work-from-home crowd to seamlessly collaborate.
But, what would you do when you’re on a Teams call and the voice signal starts breaking due to the mic issue? I’ll guide you through the steps and show you how to resolve this, so stay tuned.
Why Is My Mic Not Working on Microsoft Teams?
It usually happens due to the following reasons:
- Mic settings: Make sure that your mic volume is set to high and unmuted.
- Outdated audio drivers: Update or reinstall your audio drivers and check if you can hear on the Teams call.
- OS-related issues: Outdated or faulty operating system configurations may cause your mic to malfunction.
- App issues: The bugs or glitches in the Teams app can break the microphone. So, check that it’s up-to-date.
- Device permissions: Restrictions in the device permissions to access the Teams microphone might mute your voice on the call.
- Background apps: Multiple applications running in the background may cause conflicts, preventing the Microsoft Teams microphone from working.
How To Fix Your Microphone Not Working on Microsoft Teams?
Follow these steps in the order they appear in:
Method 1: Restart
Before trying anything else, restart your computer and the Teams app to see if others can hear your microphone.
Method 2: Adjust Your Microphone Settings in the App
Step 1: Open the Microsoft Teams application.
Step 2: Click the three dots in the top right corner for the drop-down menu.

Step 3: Choose Settings.
Step 4: Select Devices from the left pane.
Step 5: Make sure the right device is selected under the Microphone section.
Method 3: Allow App Permissions
Step 1: Open the Microsoft Teams app.
Step 2: Click the three-dotted menu in the top right corner.
Step 3: Choose Settings from the drop-down menu.
Step 4: Select App permissions on the left pane.
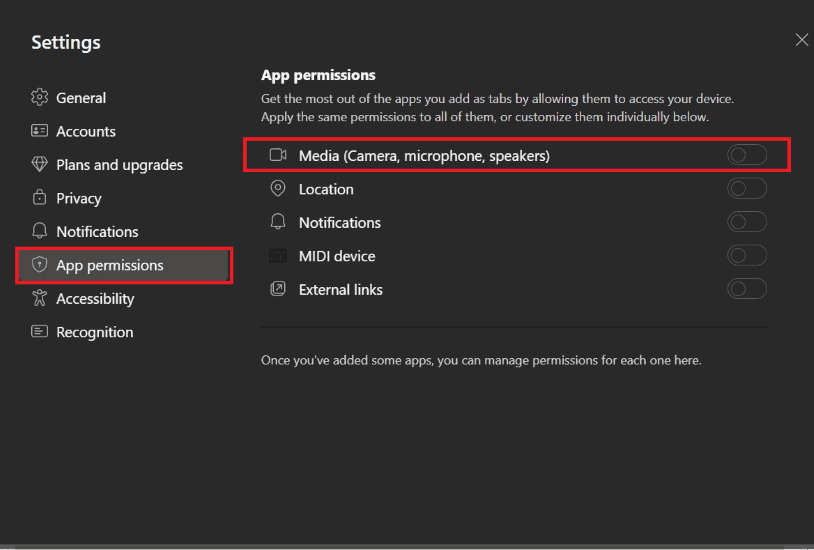
Step 5: Tap the toggle next to the Media.
Method 4: Allow the Teams App To Access the Microphone
Step 1: Open the Settings app.
Step 2: Click on Privacy.
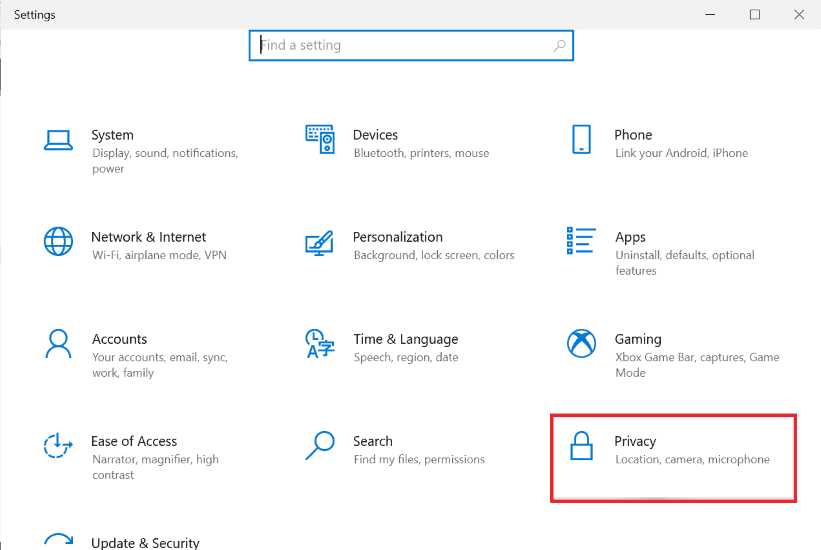
Step 3: Choose the Microphone from the left pane.
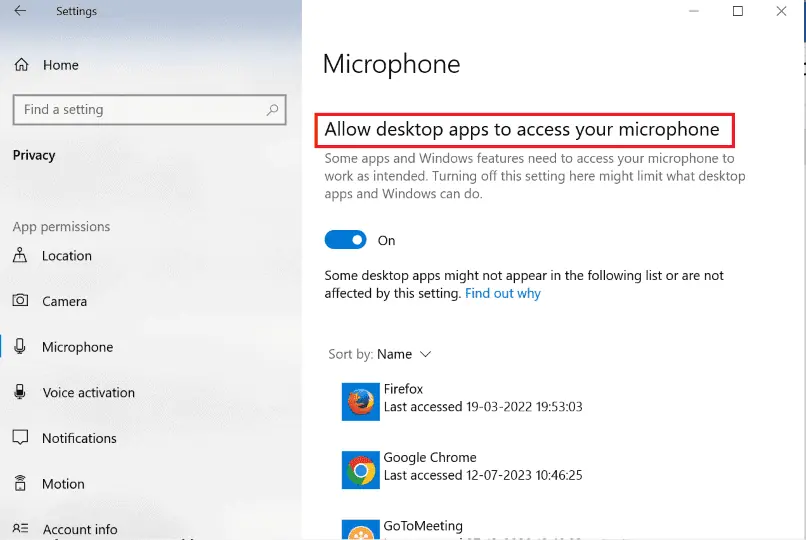
Step 4: Under ‘Allow access to the microphone on this device’ click the change button and toggle it on.
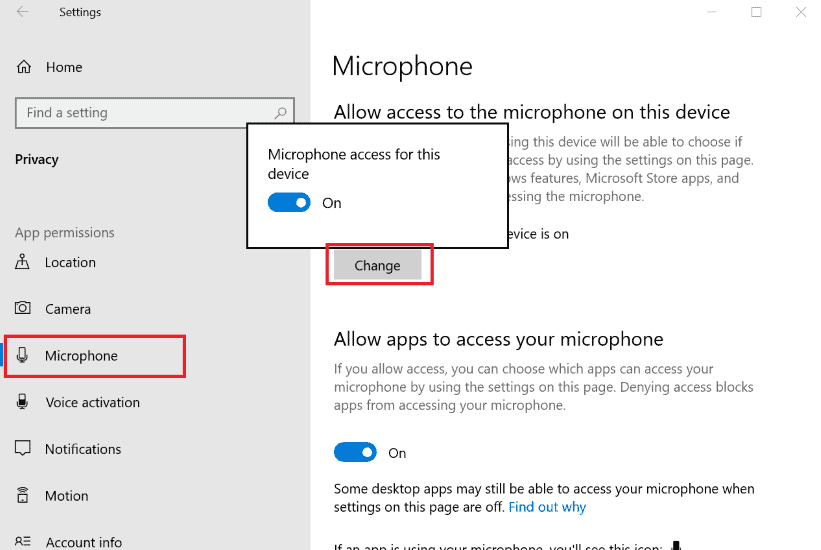
Step 5: Also, turn on the toggle under ‘Allow apps to access your microphone’.
Step 6: Now, scroll down the page to find ‘Allow desktop apps to access your microphone’ and toggle that on as well.
Method 5: Update the Teams App
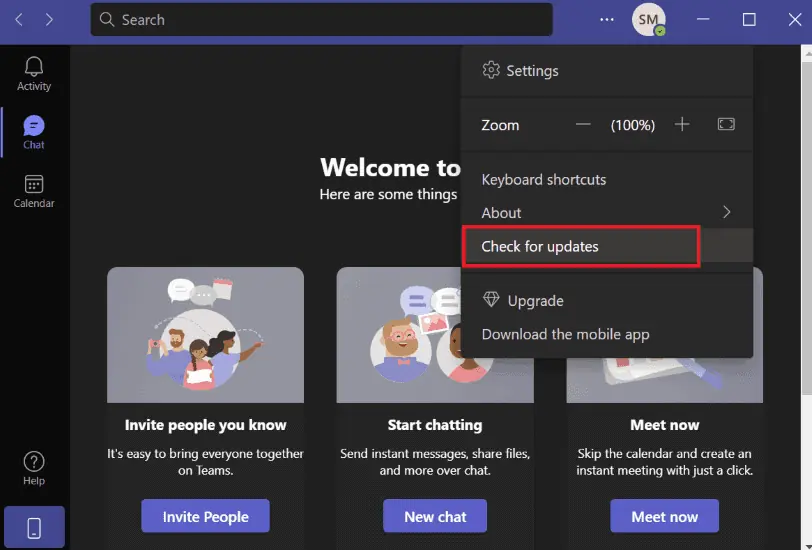
Step 1: Open Microsoft Teams.
Step 2: Click the three-dotted menu in the top right corner.
Step 3: Select Check for updates. This will automatically update the app in the background.
Method 6: Update the Audio Drivers on Windows
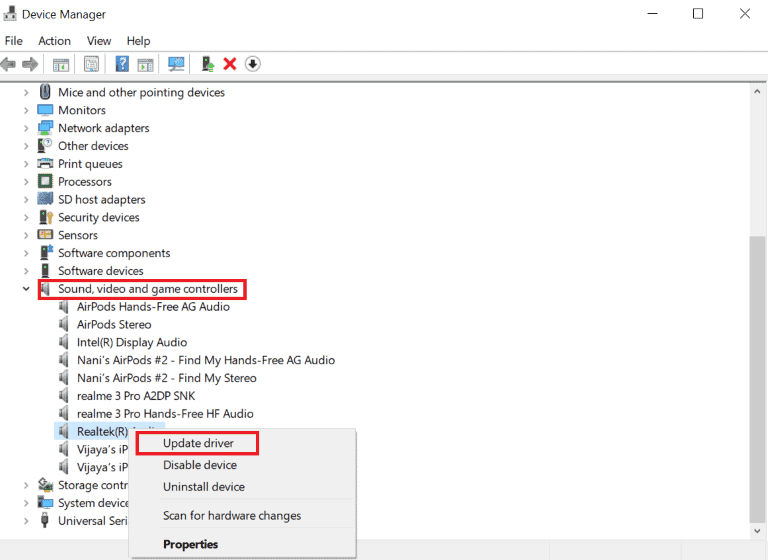
Step 1: Look up Device Manager in the search bar.
Step 2: Scroll down and click on ‘Sound, video, and game controllers‘.
Step 3: Right-click on your audio device in the list and select Update driver.
Method 7: Reinstall the Microsoft Teams App
If none of the above fixes worked for you, try uninstalling and reinstalling the app.
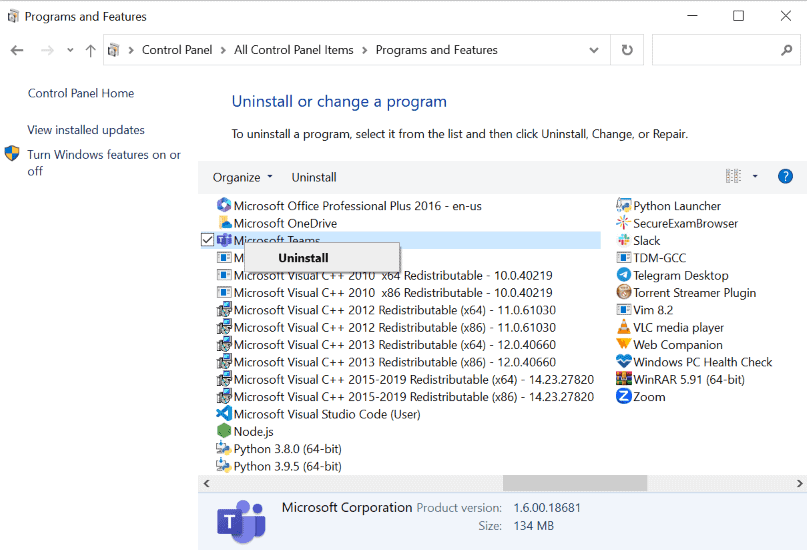
Step 1: Type the Control Panel in the search bar.
Step 2: Select Programs and Features.
Step 3: Look for Teams and right-click on it to uninstall.
Once it’s uninstalled, reinstall it from the official website.
So, there you have it – now you know how to fix the Microsoft Teams microphone not working issue. Hopefully, one of these solutions helps you continue your calls without any interruptions.
Additionally, if your camera stops working or the app quits, we have guides just for that.


User forum
0 messages