Marvel Rivals Server Connection Failed: Quick Step-by-Step Fixes
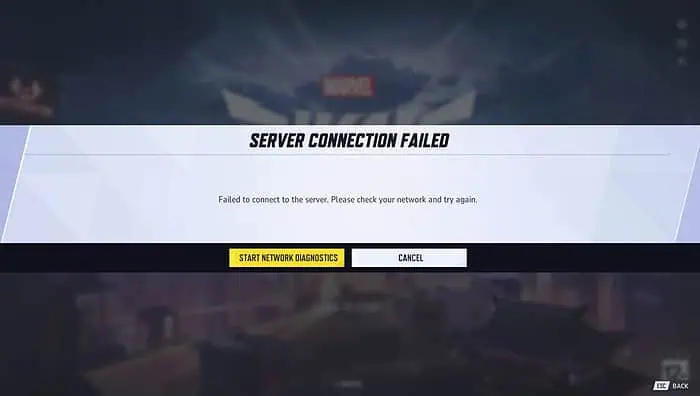
Are you facing the Marvel Rivals server connection failed error on launch?
The beta testing has finally ended and all game fans are rushing to experience it. However, most are facing the same error:
Server Connection Failed: Failed to connect to the server. Please check your network and try again.
The game server is likely facing huge traffic and is unable to cater to all the requests. Or, your internet network isn’t working properly.
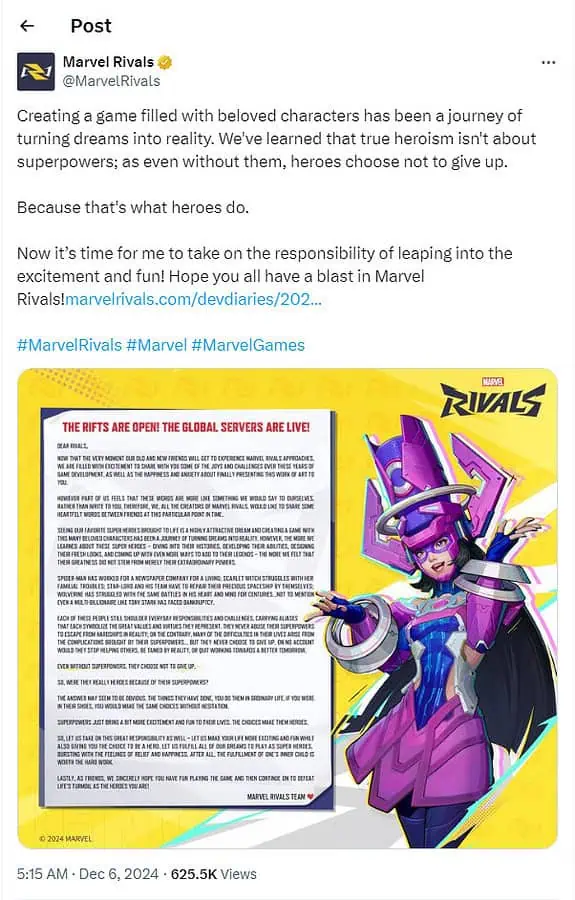
Firstly, follow and visit the Marvel Rivals’ X handle (formerly Twitter) to watch out for any announcements for server statuses.
Also, don’t forget to restart your router or disable bandwidth-hogging programs.
How To Fix Marvel Rivals Server Connection Failed
If none of the above works, try the methods outlined below:
Uninstall and Reinstall the Official Release
If you’ve been playing the Marvel Rivals beta release until today and now see the Server Connection Failed error, it’s working as intended. The beta edition will no longer work since NetEase has released the official and stable version.
You must uninstall the beta edition and install the official release. Here are the steps to follow if you’re using Steam on a Windows PC:
- Start by opening the Steam app on your PC and logging into your account.
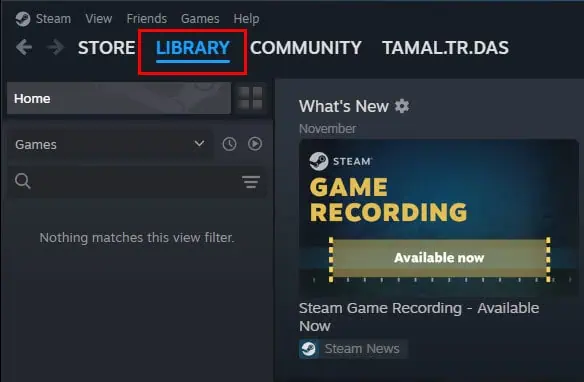
- Go to the Library tab at the top to see a list of all the games you own.
- Scroll through or use the search bar to find the Marvel Rivals game title.
- Right-click the game’s name in the left-hand menu to open a dropdown.
- Hover over Manage, and when another menu appears, select Uninstall.
- A confirmation box will pop up—click Uninstall again to confirm.
Here’s how to install the official release:
- Go to the Steam Store tab.
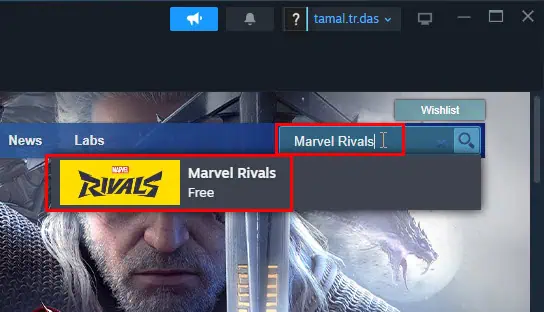
- Click on the Search field and type Marvel Rivals.
- Select the top search result that shows up.
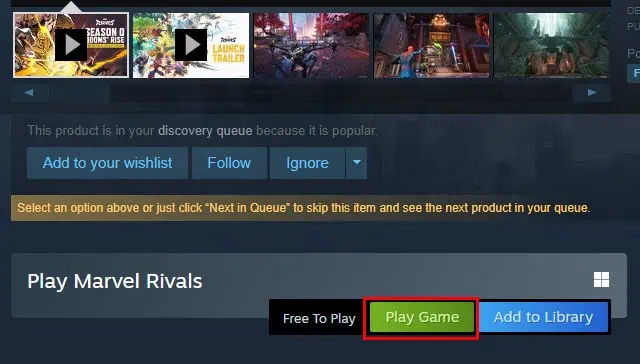
- On the Home screen of the game title, click on the Play Game button.
- Click Install on the Install dialog box.

- Steam will download all the required game files and finish the installation process.
Use a Third-Party Game Booster Tool
A game booster tool will help you fix the Marvel Rivals server connection failed error through priority access to NetEase servers. Here’s how it works using the LagoFast app:
- Download and install LagoFast.
- Launch LagoFast and click on the PC icon in the left-side navigation panel.
- On the right, find the Search field in the top panel, and type Marvel Rivals.
- Hit Enter.
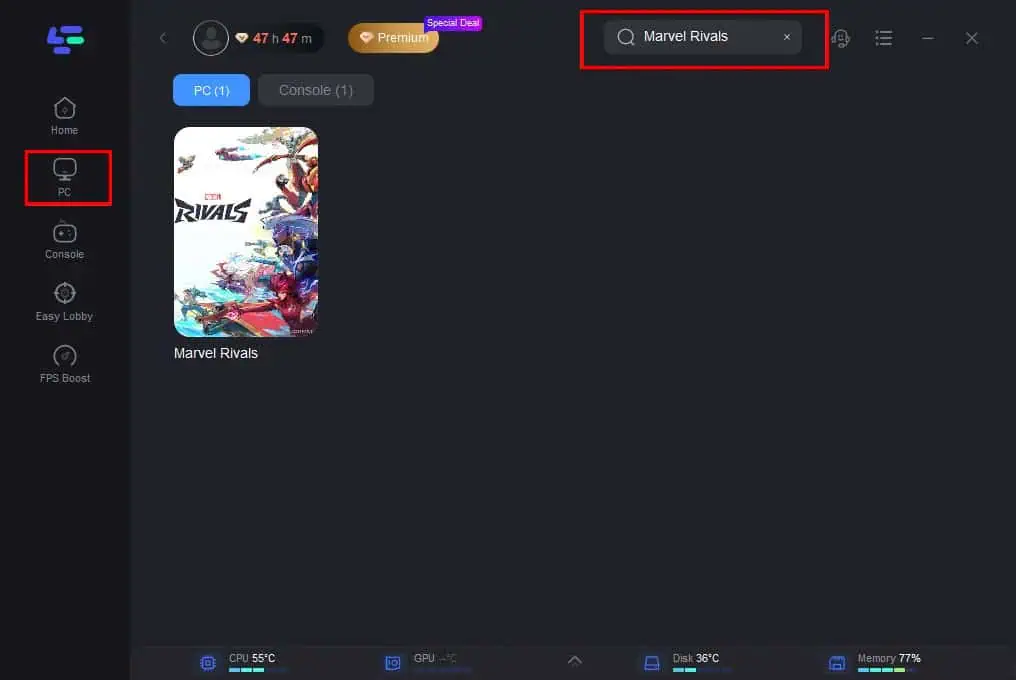
- The server dialog box will open.
- Expand the region drop-down menus, like US West, US East, EU, Japan, etc., and choose a server near your area.
- Now, click on the Node tab on the top and choose a suitable node.
- Hit the Smart Boost button at the bottom.
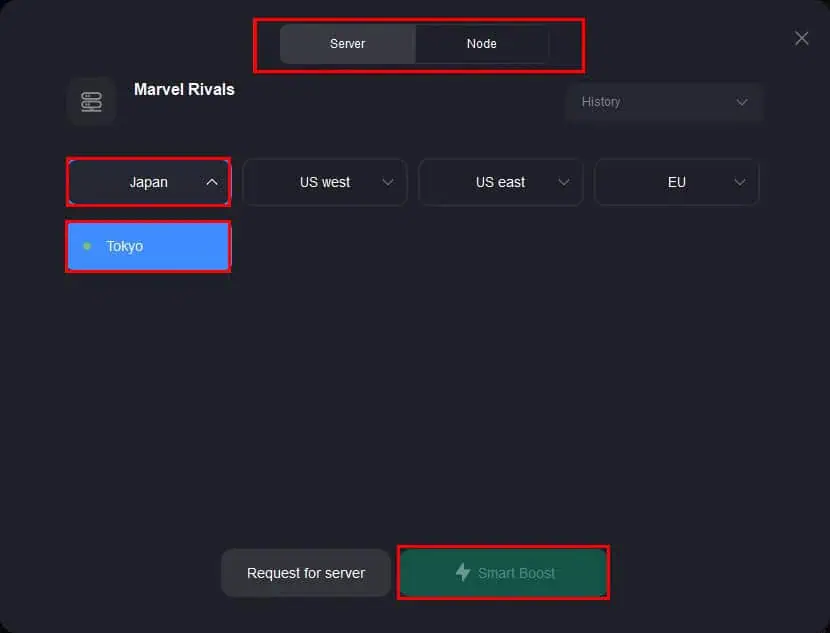
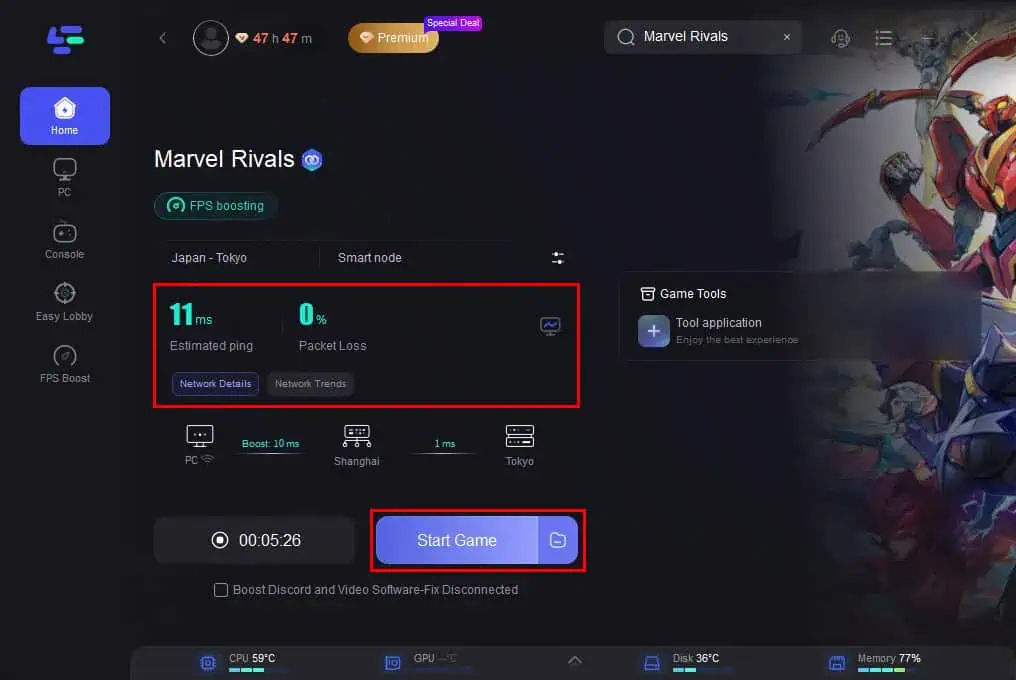
- You’ll see performance metrics for the selected server or its node, like Estimated ping, Packet Loss, and more.
- If you like the parameters, hit the Start Game button.
Change the Default DNS
- Click the Start menu and open Settings by clicking the gear icon.
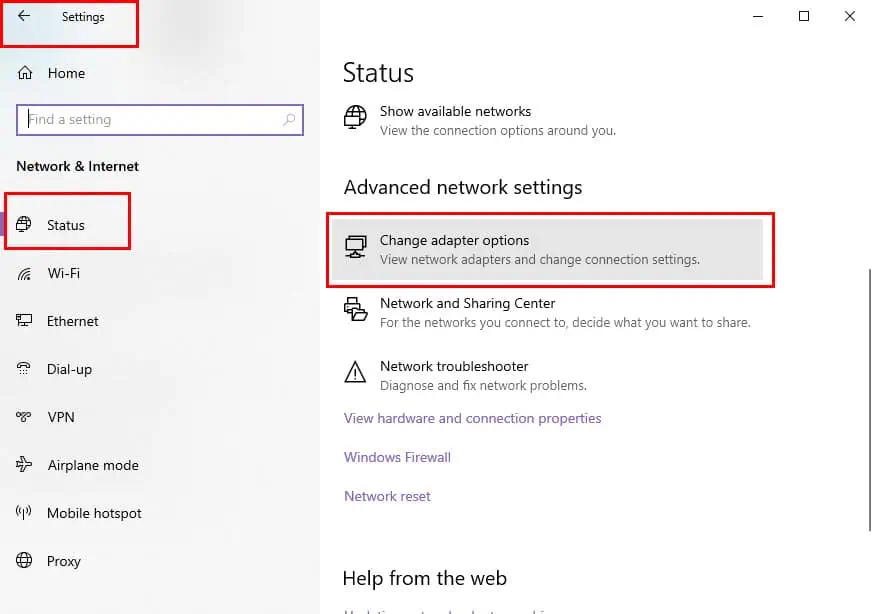
- Go to Network & Internet and choose Change adapter options under the Status section.
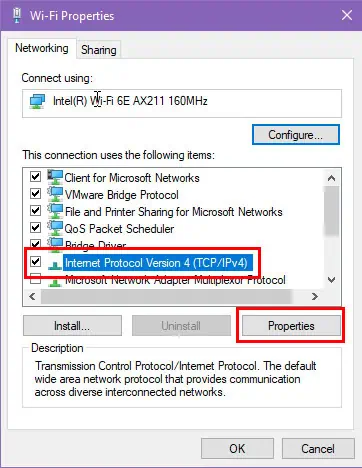
- Right-click your active network connection (Wi-Fi or Ethernet) and select Properties.
- Find Internet Protocol Version 4 (TCP/IPv4) in the list, click it, and then hit Properties.
- In the new window, choose Use the following DNS server addresses.
- Enter your preferred DNS servers (e.g., 1.1.1.1 for Cloudfare’s DNS in the Preferred field and 8.8.8.8 for Google’s DNS in the Alternate field).
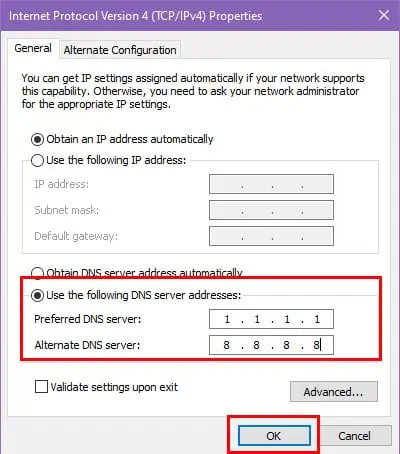
- Click OK to save your changes, then close all windows.
Use a VPN
Some users on Reddit have reported that they can access the game server after switching to a VPN service. This technique helped them navigate around the Marvel Rivals server connection failed error.
You can use any of the best VPNs for Windows that offer high-speed and optimized internet browsing, like ExpressVPN.
Once you’ve subscribed to a plan, download the desktop app, choose any North American server, and start the VPN. You must get a system-wide VPN for gameplay purposes.
Enable Internet Protocol Version 6 (IPv6)
This method has two steps. First, you need to enable IPv6 in your Wi-Fi or Ethernet router and then enable the same from your Windows PC. Let me show you how:
Enable IPv6 on the Router
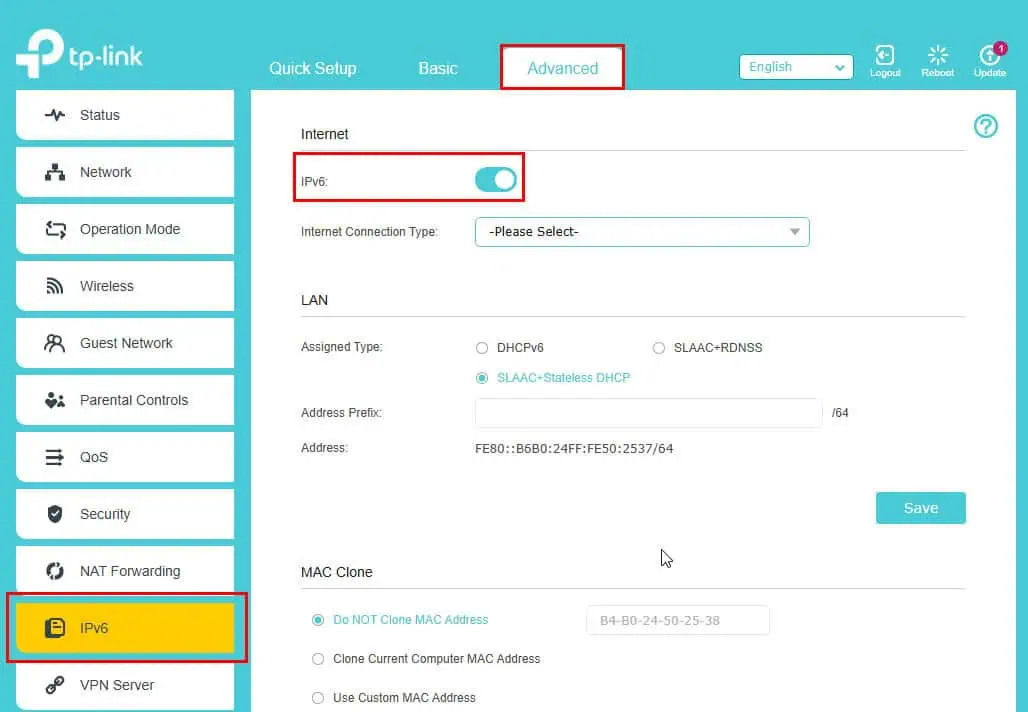
- Log in to the router console by typing 192.168.1.1 in the browser’s address bar.
- Click on the Advanced tab which is often located at the top of the Basic Home screen.
- Then, select the IPv6 menu from the left-side navigation panel.
- Toggle on the IPv6 feature.
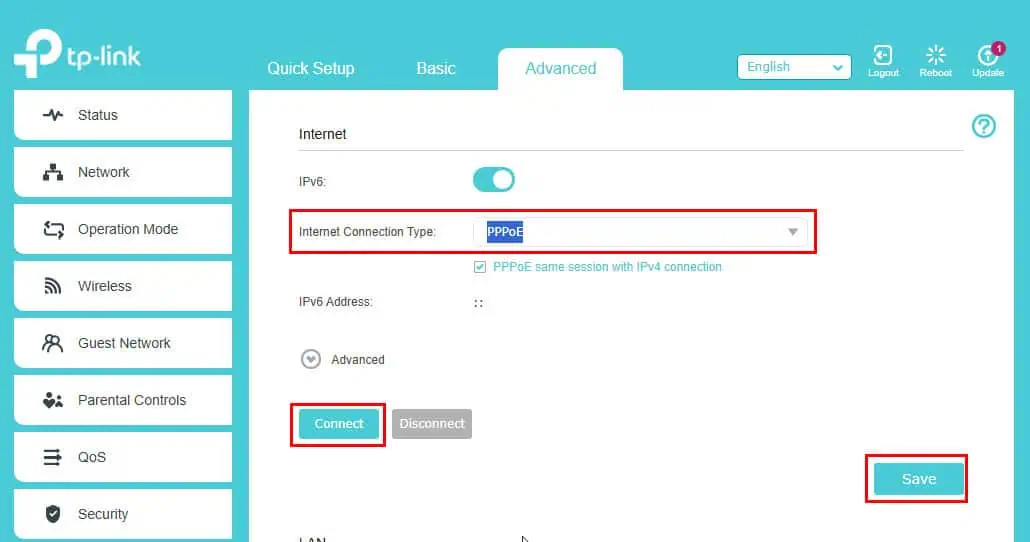
- Click on the Internet Connection Type drop-down menu and select the connection mode for your account, like PPPoE.
- Hit the Connect button and then click Save.
Activate IPv6 in Windows PC
- Launch the Start menu and go to Settings by selecting the gear icon.
- Click on the Network & Internet option and choose Change adapter options below the Status section.
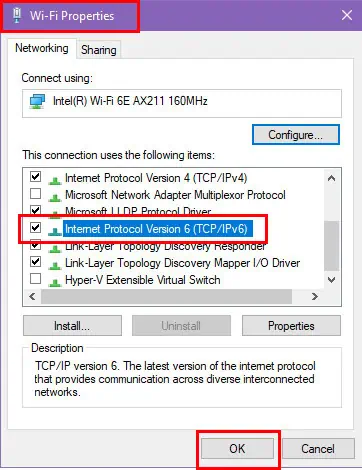
- Right-click on your active network connection, which could be a Wi-Fi or Ethernet line, and pick Properties from the menu.
- Look for Internet Protocol Version 6 (TCP/IPv6) in the list of items.
- If the box next to it isn’t checked, click it to enable IPv6.
- Hit OK to save the changes and close all windows.
Use a Windows Admin Account
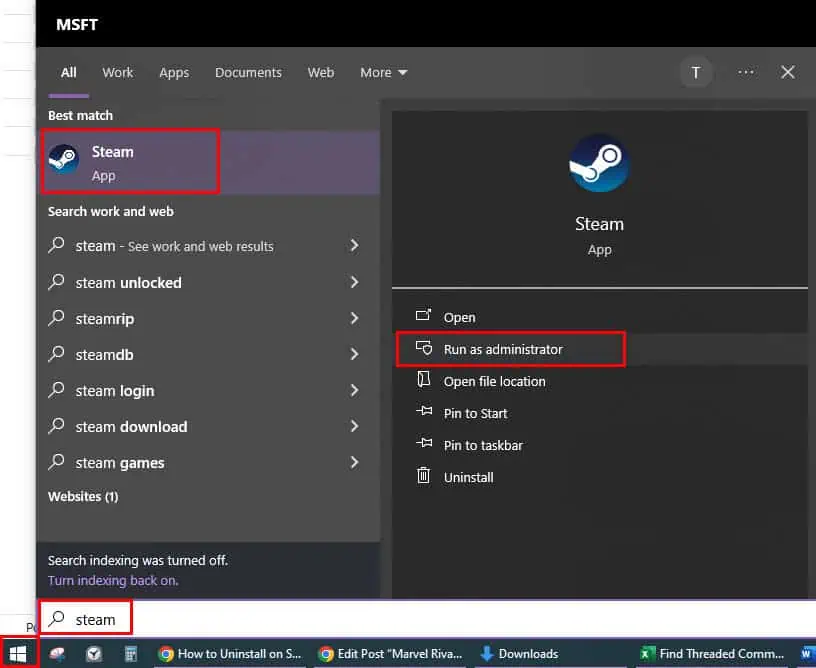
- Click on the Start Menu button and type Steam.
- Select the Run as administrator option on the right side of the Start Menu window.
- Now, go to your Library and find the Marvel Rivals game.
- Right-click the game’s name in the left-hand menu and select Properties.
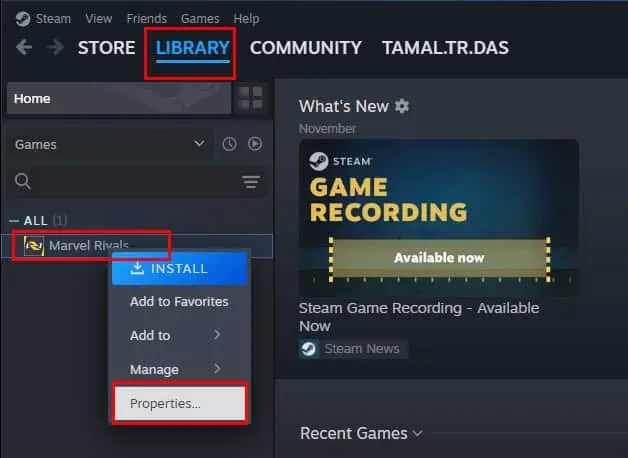
- In the Properties window, click the Installed Files tab (or Local Files if you’re using an earlier version).
- Hit the Browse button to open the game’s installation folder.
- Look for the game’s executable file (it’ll usually have the game’s name and a .exe extension).
- Right-click the .exe file and choose Run as administrator from the context menu.
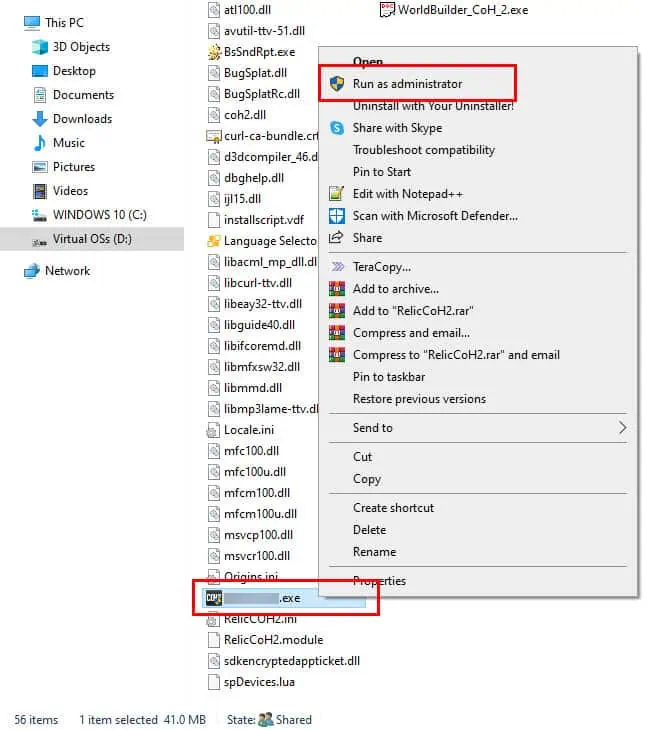
- Check the box for Run this program as an administrator and click OK.
Update the Game App
Update in Steam
- Launch Steam and navigate to the Marvel Rivals game title from the Library tab.
- Right-click on the game in the left-side navigation panel and select Properties.
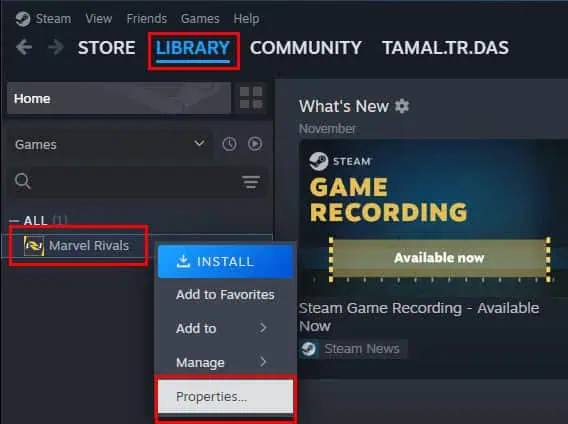
- The Marvel Rivals dialog box will open.
- Click on the Updates menu on the left side.
- Expand the Automatic Updates drop-down menu and select the Always keep this game updated option.
- Also, click on the Background Downloads menu and select the Always allow background downloads option.
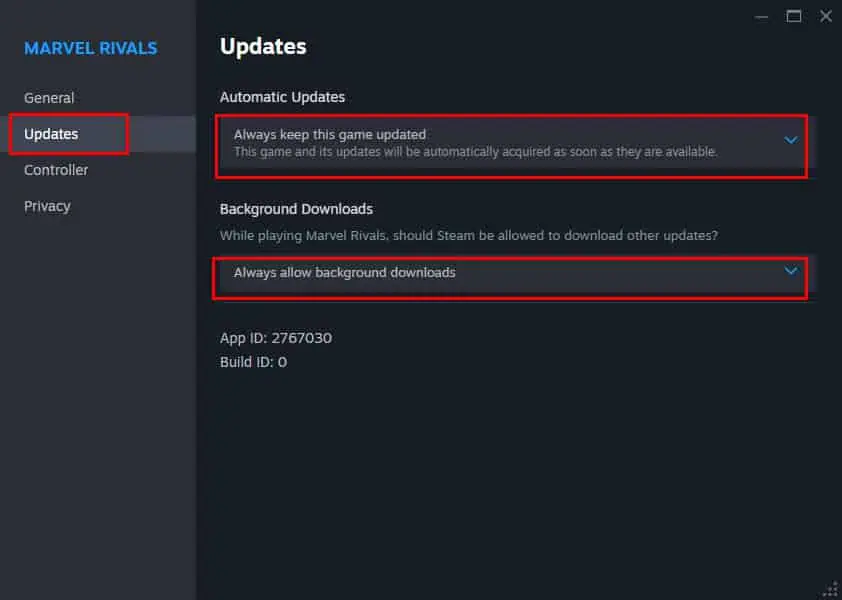
- Close the dialog box.
- Steam should update the game app automatically.
Auto Update in PS5
- Go to Settings from the top-right corner of the home screen (it looks like a gear icon).
- Scroll down and select Saved Data and Game/App Settings.
- Choose Automatic Updates from the list of options.
- Make sure both Auto-Download and Auto-Install in Rest Mode are turned on.
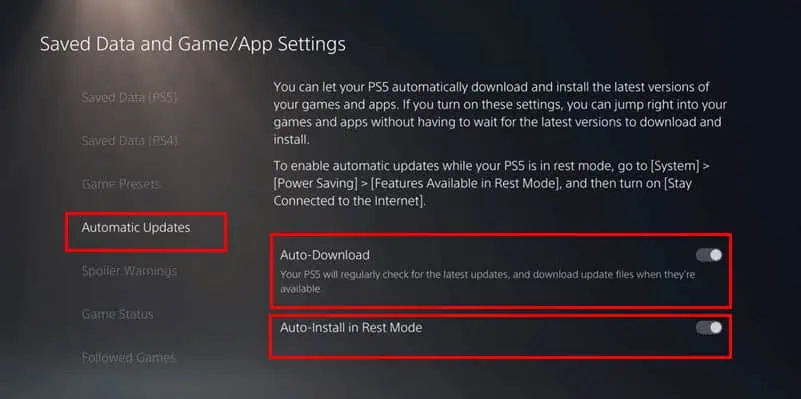
- If you want updates to happen in rest mode, go to Settings, then System, and enable Stay Connected to the Internet under Power Saving > Features Available in Rest Mode.
Auto Update in Xbox
- Power on your Xbox and sign in to your account.
- Press the Xbox button on your controller to open the guide, then go to Profile & system and choose Settings.
- Navigate to System and select Updates.
- Under Games and apps, check the box for Keep my games & apps up to date.
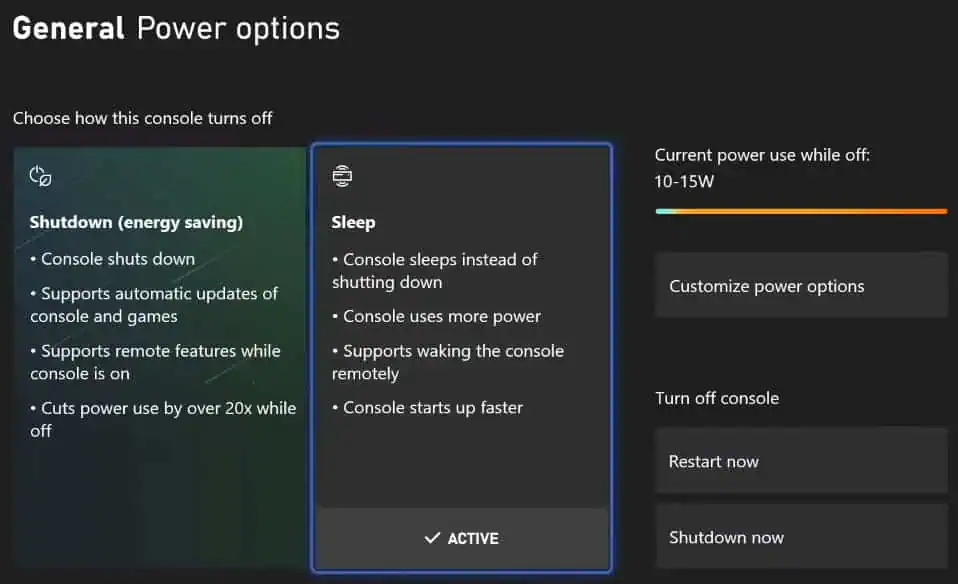
- To allow updates in sleep mode, go back to Settings, go to Power mode & startup, and set the console to Sleep mode.
Verify the Game Files on Steam
- On the Steam app, navigate to your Library and find the Marvel Rivals game app.
- Right-click on the icon and name on the left side panel and choose Properties from the context menu.
- In the Properties window, select the Installed Files tab (or Local Files if it looks different).
- Click the button labeled Verify integrity of game files.
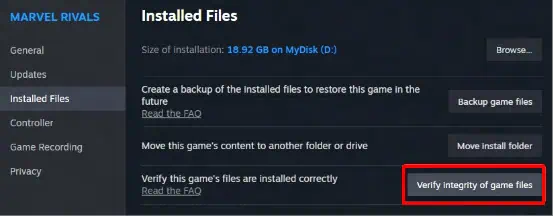
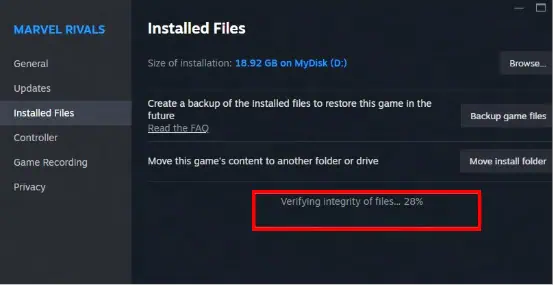
- Steam will check your game files and automatically fix any that are missing or corrupted.
So, now you know how to fix the Marvel Rivals server connection failed error on all supported platforms, like Steam, Windows PC, PS5, and Xbox.
If any of these methods helped, feel free to mention them in the comment box. If you tried a completely different fix and that worked, you can share that too. Moreover, you may face problems with DirectX 12 when launching Marvel Rivals.
Additionally, check these out if the Throne and Liberty gate server is disconnected, Dauntless isn’t launching, and Helldivers 2 is having connection issues.
Read our disclosure page to find out how can you help MSPoweruser sustain the editorial team Read more


User forum
0 messages