How To Take Screenshots on Windows 11 and 10?
As we enter the era of Windows 11, one thing hasn’t changed: screenshot is still an essential feature of any operating system. That said, whether you are still using Windows 10 or currently exploring the phenomenal system of Windows 11, here are the simple ways you can take a screenshot like a boss.
Snipping Tool
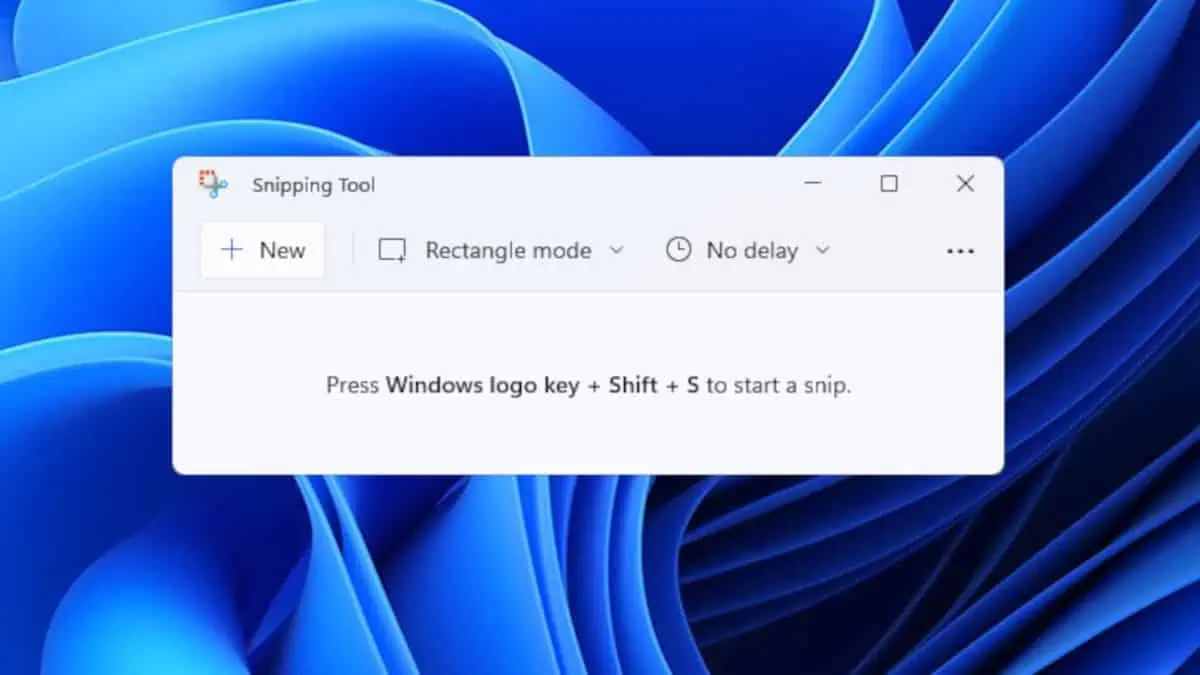
If you can still remember the Snipping Tool in Windows Vista, you are probably one of the loyal users of this tool. It is still available in Windows 10, but users were warned way back in 2018 that the app would be abandoned and replaced by Snip & Sketch. However, Windows did the unexpected. Instead of completely removing the Snipping Tool and replacing it with Snip & Sketch, they gave us Windows 11 with a new and improved Snipping Tool app.
In this new version, the Snipping Tool app is given a new layout and design to complement the new OS and some of the features of the Snip & Sketch. This somehow makes it the hybrid of two screenshot apps.
You can look for the app using the search bar or Start button. For Windows 11 users, using the combination of keys for shortcut (Windows key + Shift + S) will launch the Snipping Tool instead of the Snip & Sketch. Using the Snipping Tool in both versions remains the same: modes, delay options, and more (though the newer version has newer features like Dark Mode).
Snip & Sketch

The Snip & Sketch is accessible in Windows 10, together with the old Snipping Tool. Nonetheless, it sports a more modern design and capabilities, allowing a more convenient way of capturing images on the screen.
There are a variety of ways to summon the app. You search it on your computer system or access it through the Start button or notification panel. Once you have found it, just pin it on the Taskbar for easy access. The fastest way to execute a screen snip, however, is through a combination of keys. To perform the shortcut command for Snip & Sketch, just simultaneously press the Windows key, Shift, and S buttons. You can also set the Print Screen button (PrtSc) as your Snip & Sketch button. Just go to Settings > Ease of Access > Keyboard. Under Print Screen Shortcut, toggle on “Use the PrtScn button to open screen snipping.”
Launching the app by clicking its icon will give you a window to access the settings, screenshot folders, delay options, and more. Directly summoning the app through key shortcuts, on the other hand, will give you the four options for the snip shapes (rectangular, window, freeform, and fullscreen).
The preview of the captured image will also vary depending on how you captured them. If you use the key shortcut, the image will appear as a notification in the lower-right corner of the screen. If you use the other methods mentioned, the screenshot will automatically appear in a window where you can edit it right away.
Print Screen Button (Plus Windows Key or Alt)
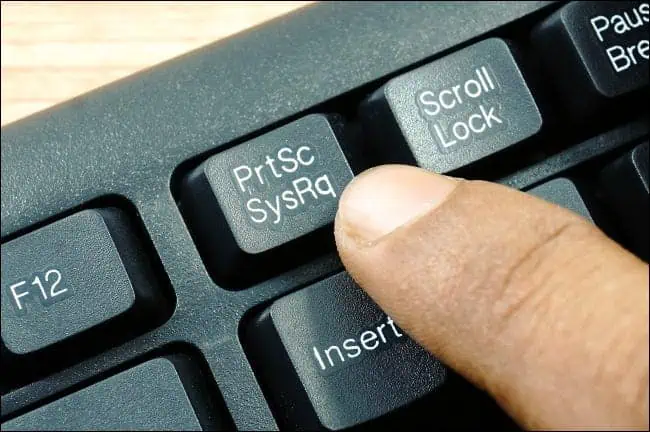
If you just want to screenshot and copy the whole screen of your Windows 10 or 11 computer, you can simply press the Print Screen button. Doing it will automatically copy the image on your clipboard, and you can paste it somewhere.
If you want to copy and save the image, just click the Print Screen button and Windows Key at the same time. When you do it, you’ll notice that the screen will dim for a very short time. This indicates that the action is successful and that the image is saved in the Screenshots folder.
Using the Alt button together with the Print Screen button, on the other hand, will only capture the window currently open and copy it on the clipboard. Unlike the PrtSc + Windows Key or the plain PrtSc button, the image in this snip will not include the Taskbar.
Game Bar
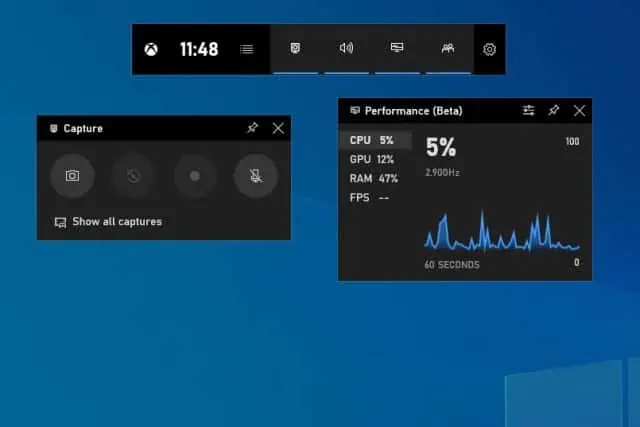
The Game Bar is not just for recording gameplay videos. It can also be used for screenshots. To do it, you can use the keyboard shortcut by pressing on the Windows key + Alt + PrtScn. This will then give you a notification popup saying that the image is saved. To see it, you can click the popup, and it will show you the picture in a Game Bar window, with options for sharing it, opening the file location, deleting it, and more. If you want, you can also set a specific shortcut to launch the Game bar screenshot function. Just head to Settings > Gaming > Game Bar.
Windows Logo + Volume Down
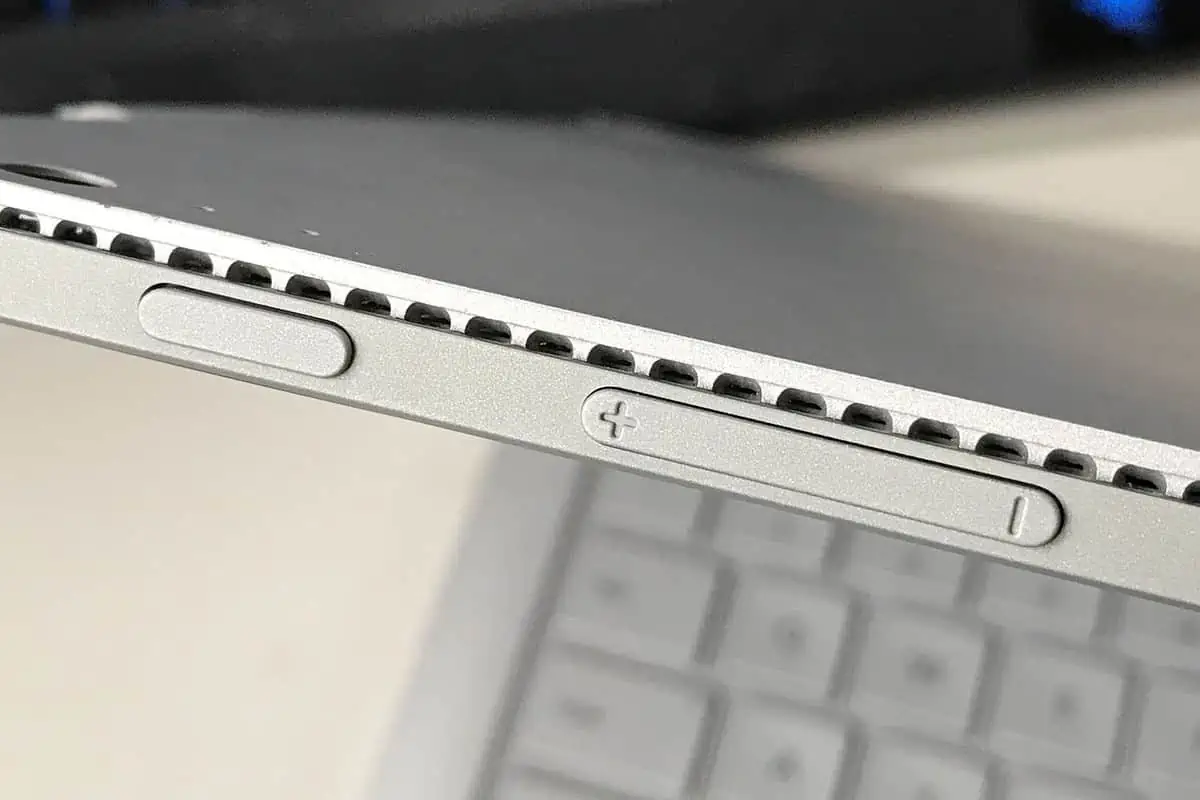
There is another way to do a screenshot for those who are currently using the Microsoft Surface devices. Just press the Windows Logo touch button together with the volume-down button. This will momentarily dim your screen to indicate the success of the command. The pictures will then be saved automatically to the Screenshot folder.
Curious about the other differences between Windows 10 and 11? Click here, and we’ll show you their highlights.
Read our disclosure page to find out how can you help MSPoweruser sustain the editorial team Read more


Improve this guide


User forum
0 messages