How to resolve temporarily blocked IP issue

It is always a headache to realize your IP has been blocked temporarily when visiting particular websites. There are different reasons that cause this issue, which is a good thing as it also means several numbers of solutions to try.
Some explanations causing the problem could be simple, from login issues (logging in too many times) to website terms of service violations. Sometimes, your device might also be the culprit, especially when it experiences malware attacks and an outdated system (you can also try clearing your browser cookies). Nonetheless, having your IP blocked temporarily doesn’t stop there. As such, here are the ways you can do to investigate where the issue originates, which will soon lead you to the right solutions to adopt.
Repeated failed login attempts
Keep in mind that repeated login attempt failures can temporarily ban you from entering a website. The good thing about it is that you can wait for at least 24 hours to regain access to the place. You can visit the site’s terms of use page to check if you have violated anything or did something that caused the issue. However, if you think no information applies to your situation, you can contact the webmaster, who can give you specific details on the problem and remedy to end it. However, note that responses from webmasters from various places vary. In particular, if you are using a bigger website with a huge volume of users, you might not receive answers immediately.
Blacklisted IP address
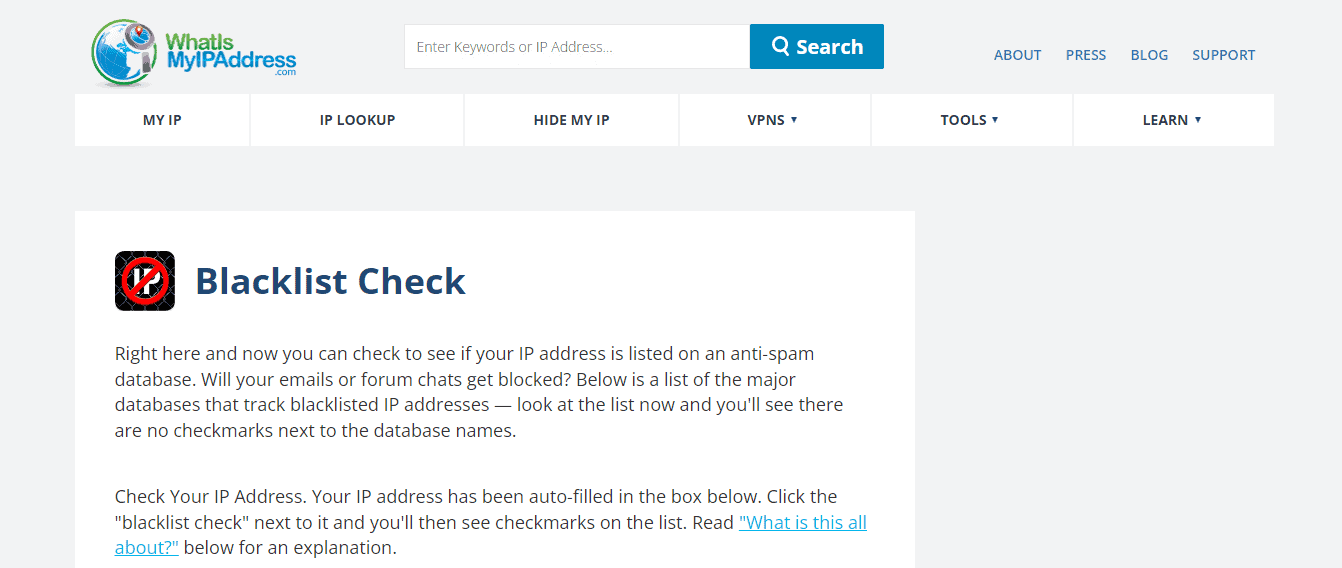
There is a place called WhatIsMyIPAddress where you can check a list of blacklisted IP addresses. Different websites subscribe to this public anti-spam database, which comprises IP addresses from spammers. However, there is a little chance that yours have been added to the blacklist, explaining why you have this problem. When you visit the place, click the ‘Check IP Address’ option, and you’ll see a mark indicating your IP is blocked. If it is, you were likely flagged for some reason, or a user who used to employ that IP address was blacklisted. In such cases, you can contact the website to explain your situation or make an apology if necessary (especially if you admit a specific action caused the ban).
Banning users with the same information
When you commit violations in one of the accounts you use in a particular place, all your other accounts might also be banned, especially if they are using similar details (e.g., email address, password, credit card number, and address). This can be observed in some places like eBay. If you make a new account and use the same details, you’ll likely get banned again. As such, the only solution is to create new accounts and prevent using the same information.
Device issue
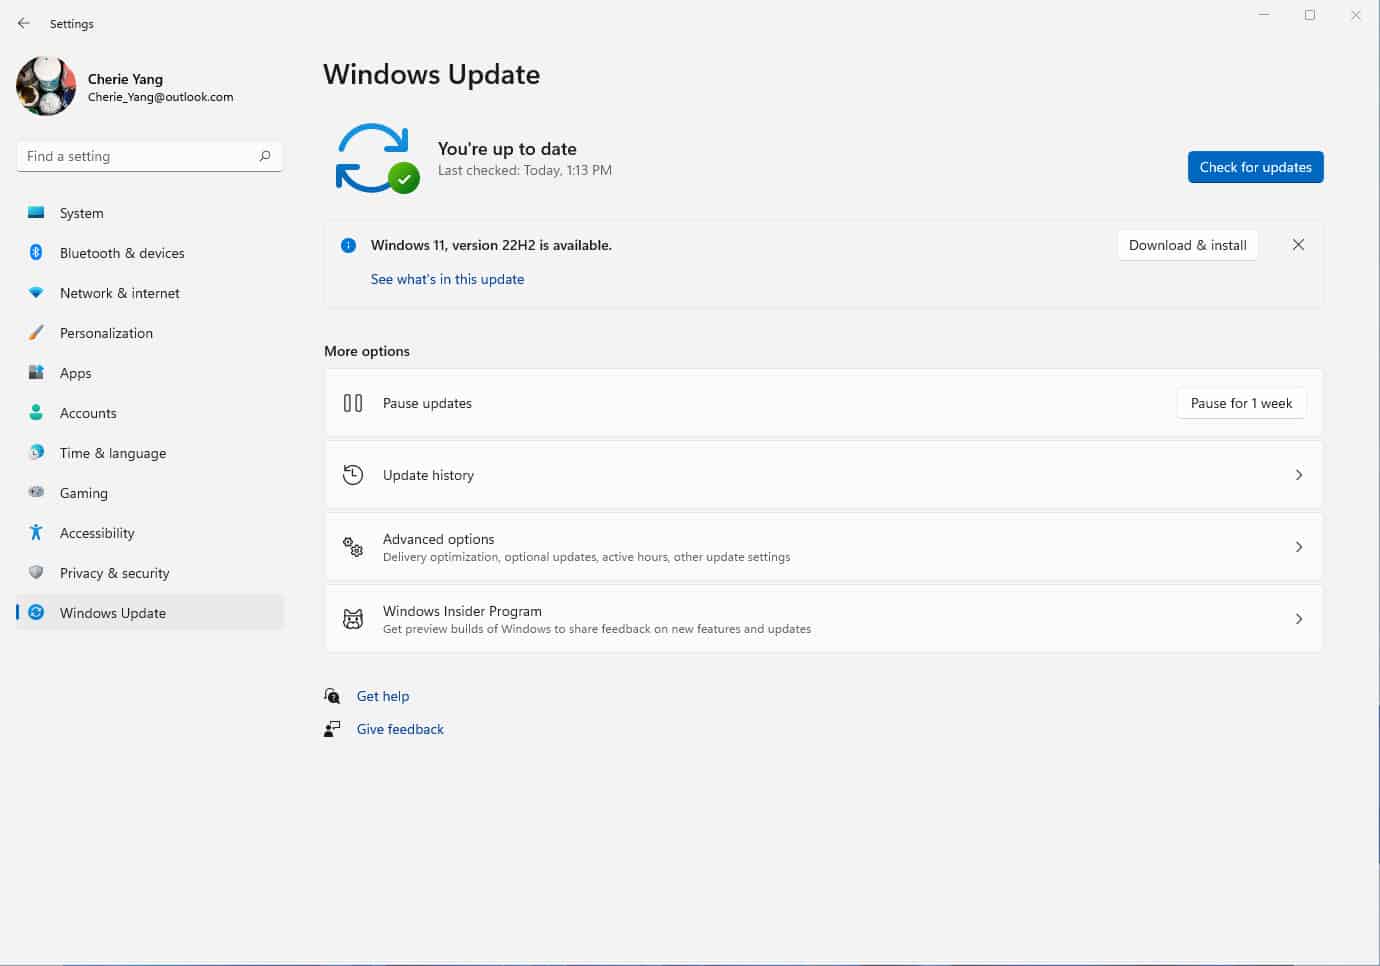
In some cases, your device might be the one causing the issue. For instance, you can first resort to a simple solution of clearing your browser cookie. You might also want to check if your computer system is in its latest possible version. For Windows users, this is crucial as security vulnerabilities can result in different issues, and IP blocking could possibly be one of those. If left unaddressed, this issue can expose you to malware, which can go beyond IP address blocking. To check for the latest updates, go to Start > Settings > Update & Security > Windows Update > Check for updates for Windows 10 users. For Windows 11, go to Start > Settings > Windows Update > Check for updates.
Malware
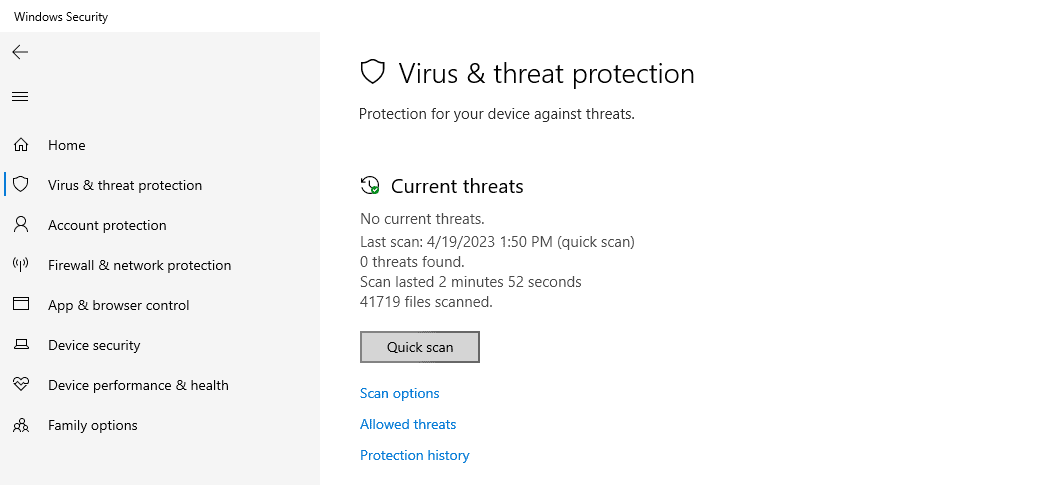
Malware is something not to underestimate. This is why Microsoft always provides frequent updates to patch issues and vulnerabilities that could harm its users. With this, aside from ensuring you have the latest Windows updates, it is suggested to have a reliable antivirus that can always guard your system against possible attacks. If you suspect malware is causing this temporary IP-blocking issue, scan your system and perform the necessary suggestions that would follow. For Windows users, you can use the system’s built-in scan feature. Just open the Windows Security app (you can type it in the Start menu Search bar). Once launched, go to Virus & threat protection, then to Quick Scan.
Problematic IP
There are many reasons and instances where you would want to change your IP address, such as protecting your security and privacy, changing your location to access geographically-locked content and services, troubleshooting issues, and more. In this case, you must do it to resolve a temporary ban. Here are the ways you can change it:
Change the Wi-Fi network or location to change your public IP address. Aside from using a new Wi-Fi connection, you can also try using an LTE phone and its signal (Wi-Fi turned off). This will also give you a different IP address.
Simply reboot your internet modem to refresh all the IP addresses on the network. Make sure to wait for at least three minutes before turning the modem back on.
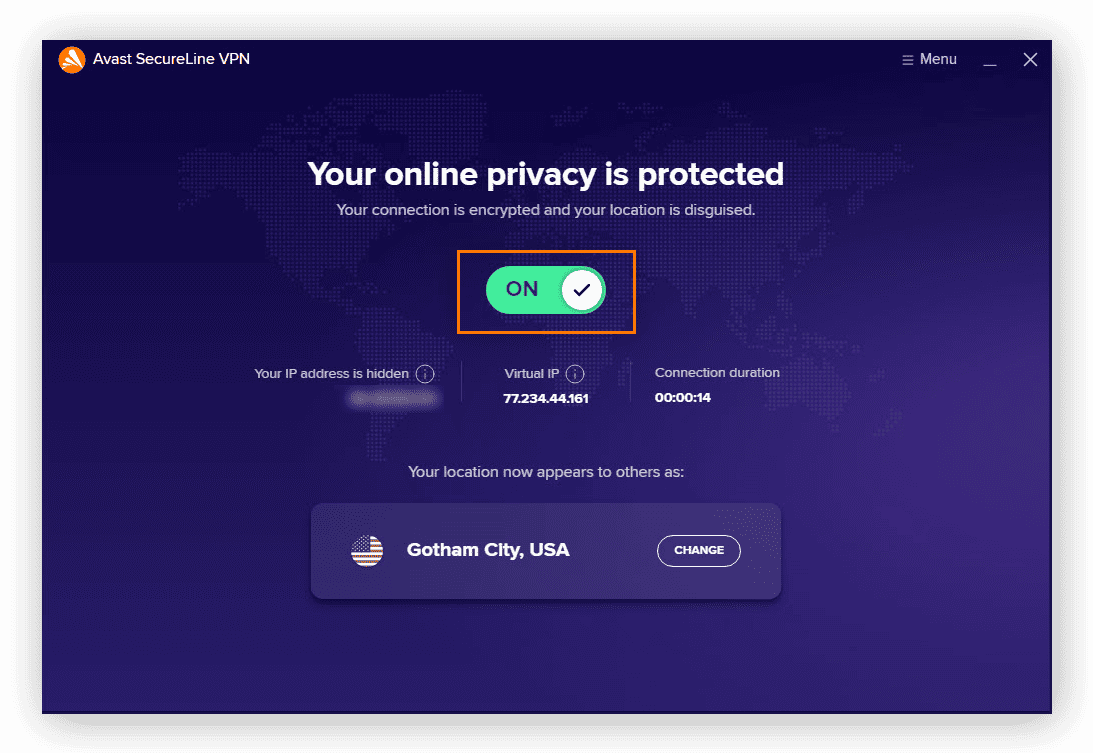
Use a VPN to hide your public IP address. There are different commercial options available out there, but their main defining characteristic is their ability to allow you to connect to a server in a different geographic region with a different IP address. Another option is using a proxy server, which is similar to a VPN. It will give you a fake IP address, albeit it will not encrypt your connection.
Change your IP address manually on your devices. For Windows 11, go to Start > Settings > Network & Internet. Select Ethernet or Wi-Fi, then Manage and Edit (placed after IP assignment). Click Automatic (DHCP) or Manual under Edit network IP settings. Enable IPv4 and provide the IP address settings in the IP address, Subnet mask, and Gateway sections to configure the IP manually. Click Save.
For Windows 10, go to Start > Settings > Network & Internet. Select Properties under local area connection and click the Edit option below the IP assignment. Select Manual, activate IPv4 and enter the IP address you want. Click Save.
If you are using Mac, go to System Preferences and select Network. Choose your network in the left column and click the Advanced button at the bottom. Go to the TCP/ IP tab and select Manually in the dropdown menu for Configure IPv4. Enter the new IP address and click OK to save.
To change the IP on Android devices, go to Settings, then Wi-Fi (the path might vary depending on the phone model and brand). In the network you are using, open the options to modify it. It can be in the form of a gear icon, or you can do it by pressing the network for one to two seconds. Once the modify page is opened, select IP settings and set it to Static. Enter the new IP address and choose Save.
Meanwhile, for iOS users, go to Settings, then to Wi-Fi. Choose your network and select Configure IP under the IPv4 Address section. Select Manual and enter the new IP address.
Read our disclosure page to find out how can you help MSPoweruser sustain the editorial team Read more


Improve this guide

User forum
0 messages