HDMI Port Not Working on Windows 11 - 5 Simple Solutions
3 min. read
Published on
Read our disclosure page to find out how can you help MSPoweruser sustain the editorial team Read more
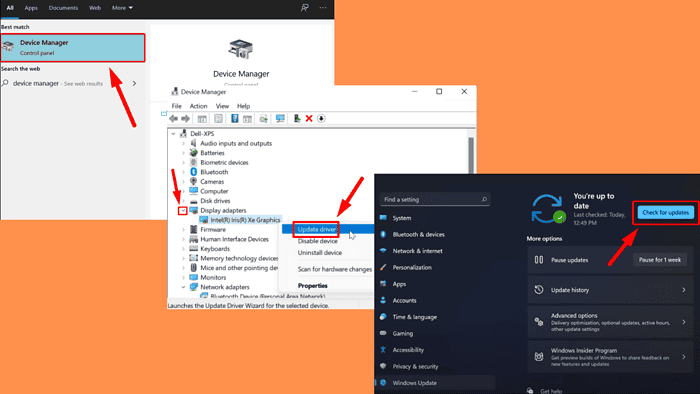
Is your HDMI port not working on Windows 11? I also had the same problem last week and managed to solve it. It can be frustrating, especially if you rely on it every day to connect monitors or TVs.
It’s most commonly caused by faulty cables, outdated drivers, or system settings. However, with the right instructions, you can easily restore your HDMI connection.
But before we begin, try out these quick fixes:
- Check that your cable is plugged in properly.
- Clean the HDMI port.
- Try a different HDMI port or cable.
- Disconnect all peripheral devices (printers, scanners, external hard drives, and USB flash drives).
- Try a different output type.
- Restart your computer.
If these don’t help, let’s move on to more detailed steps.
Enable Display Adapters
If you’ve accidentally disabled the display adapters, the HDMI port may malfunction. To enable them, do this:
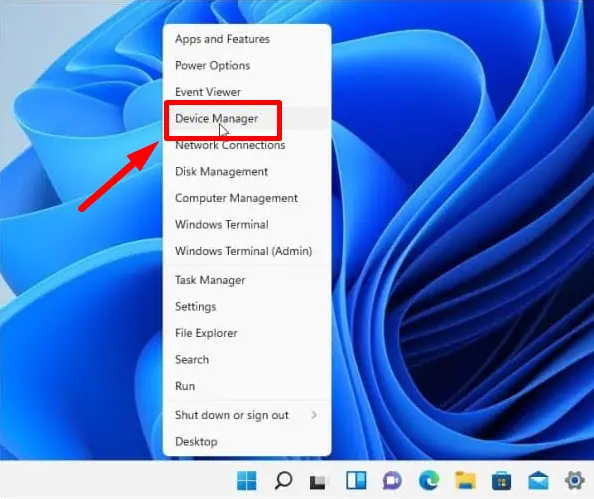
- Right-click on the Start button and select Device Manager from the menu.
- Expand Display adapters, right-click on your adapter, and select Enable device if it’s disabled. Otherwise, disable it and then reanable it.
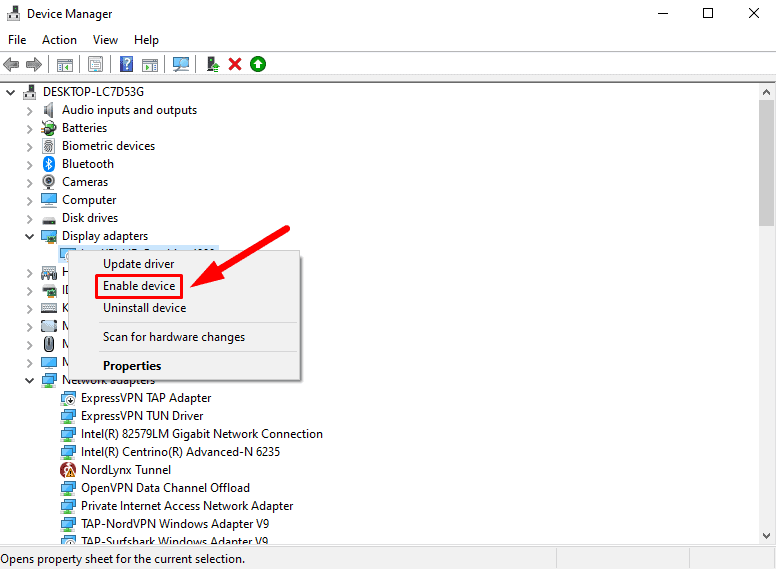
Restart your computer and check if the HDMI port is working.
Update Display Adapters
Driver updates can resolve compatibility issues or bugs that may cause HDMI connection problems. Here are the steps to follow:
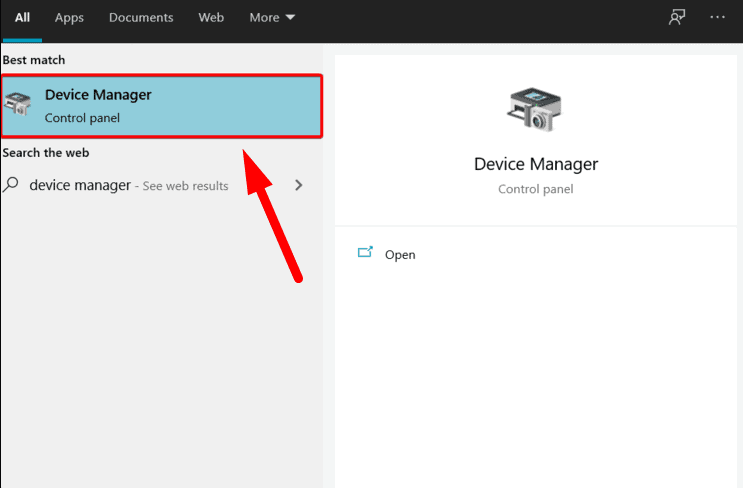
- Press the Windows Icon + S, type Device Manager, and open it.
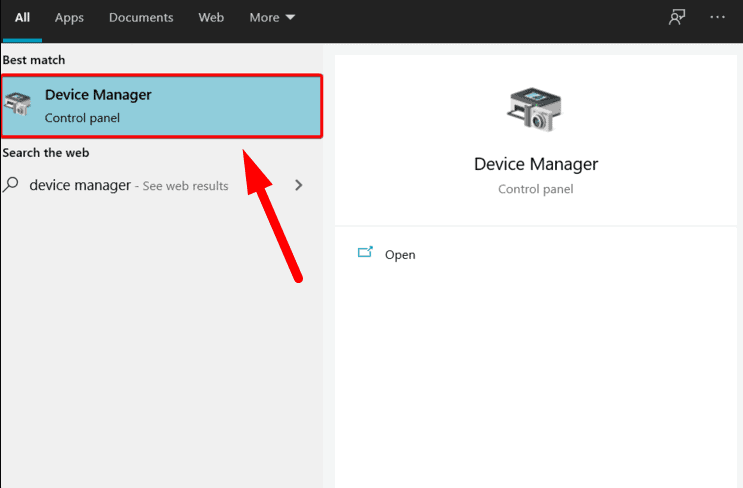
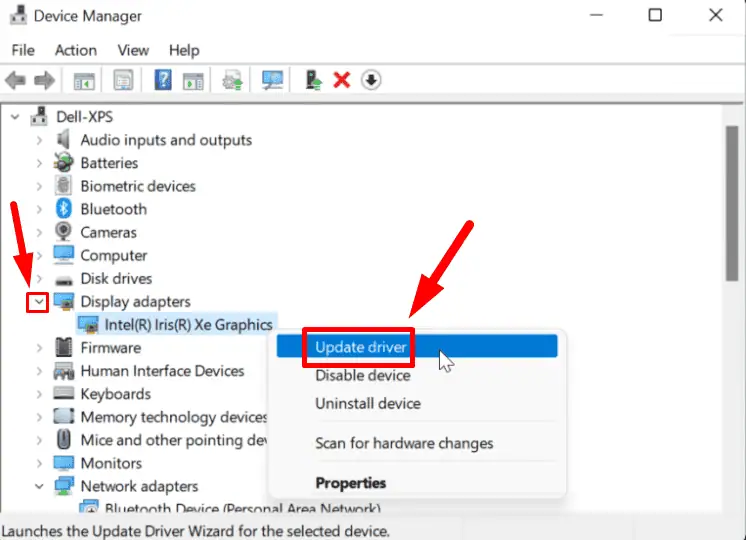
- Expand Display adapters, right-click your graphics card, and choose Update driver.
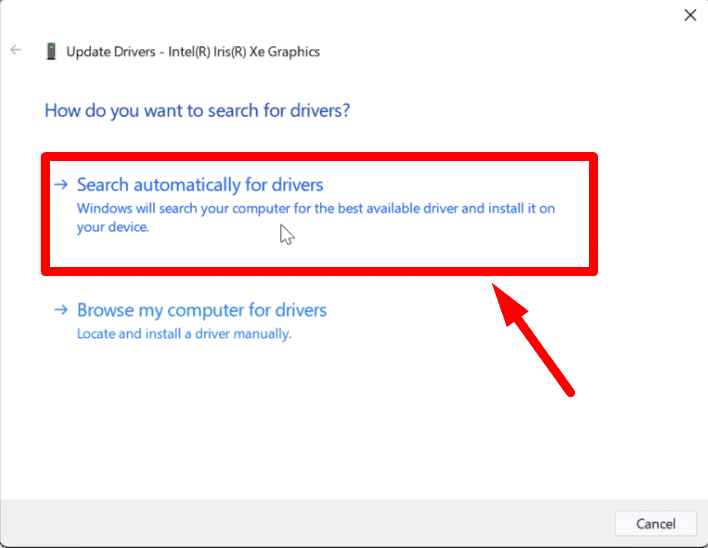
- Select Search automatically for drivers. Follow the on-screen instructions to install the latest one.
Restart your PC to apply the changes, then confirm whether the HDMI ports work.
Alternatively, consider using PC HelpSoft Driver Updater to make this process easier and more reliable. The tool automatically scans your system for outdated drivers and installs the latest versions. You can skip the manual steps.
Uninstall and Reinstall Display Drivers
If updating the drivers doesn’t solve the issue, try uninstalling and reinstalling them to reset any problematic settings. Follow the below steps:
- Press the Windows Icon + S, type Device Manager, and open it.
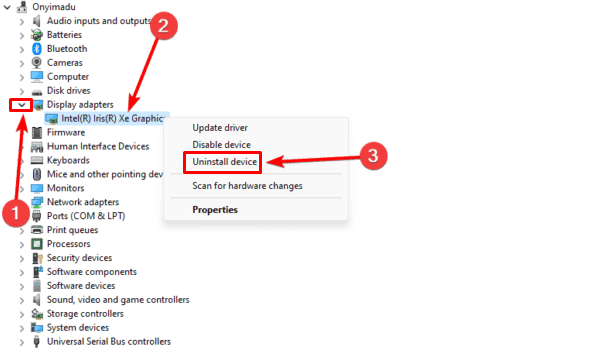
- Expand Display adapters, right-click your graphics card, and select Uninstall device.
- Confirm it by clicking Uninstall.
Restart your computer. Windows will automatically reinstall the display drivers. Check if the HDMI port is functioning correctly.
Update Windows
Outdated OS versions may have bugs that cause display issues. To update your system:
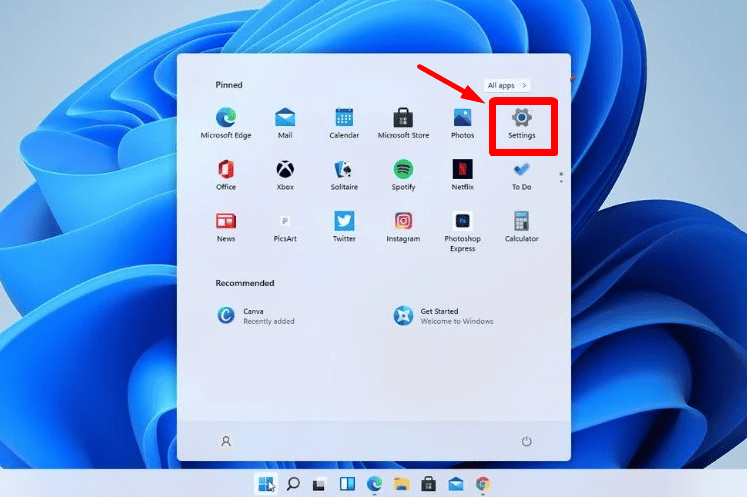
- Click the Start button and tap Settings.
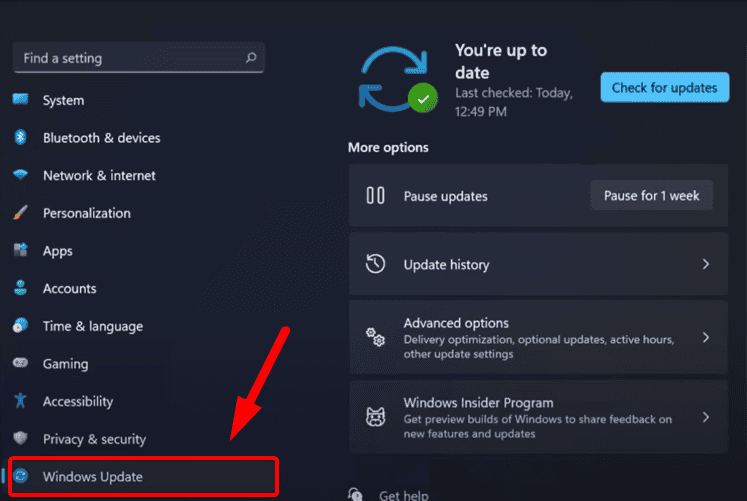
- Tap Windows Update on the bottom left corner of the screen.
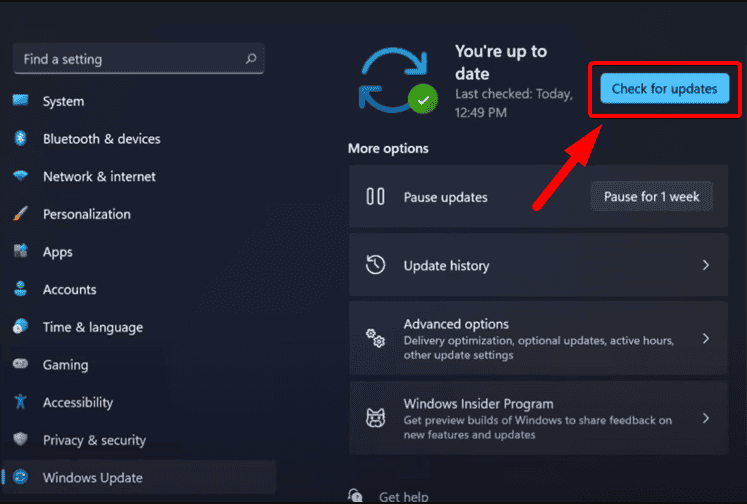
- Click Check for updates. If any are available, download and install them.
Restart your PC to apply the changes.
Hard Reboot
A hard reboot can resolve minor system glitches that may be affecting the HDMI port. This will completely refresh the system’s hardware settings. Here’s how:
- Shut down your PC completely.
- Unplug the power cable from the power source and wait for at least 30 seconds.
- Plug the it back in and start the computer.
- Test if the HDMI connection is now working.
So, now you know what to do when your HDMI port is not working on Windows 11. Follow the above fixes to restore your HDMI connection and get your devices working together smoothly again. Make sure to keep your system updated and check your cables periodically to prevent future problems.
Moreover, you can learn how to fix USB to HDMI adapter issues.





User forum
0 messages