Getting false positives? Here's how to add exemptions to Windows Defender's Scan
Microsoft’s Windows Defender is the best way to protect your PC from nasty bugs and viruses you can pick up on the internet. Sometimes though, it can be a tad too overzealous and pick up a file or file type as dangerous, calling it to your attention even though you know for a fact it’s perfectly harmless. You can check Windows Defender by adding said file to a list of exclusions. That way, Defender can scan for things that are actually dangerous, and you don’t end up ignoring it.
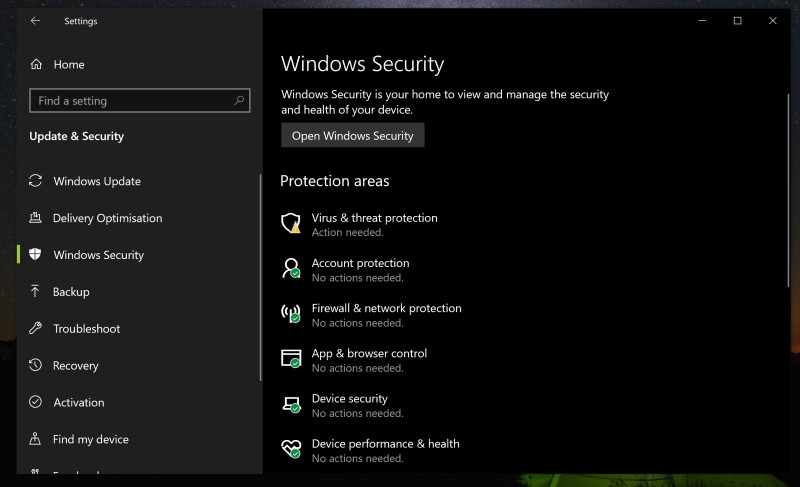
Here’s how to exclude files from Windows Defender’s virus scan
- Open the Windows Security app in the Start Menu
- Go to Virus and Threat Protection
- Under Virus and Treat Protection, click on Manage Settings
- Scroll to Exclusions, click on “Add or remove exclusions. You’ll be able to add a file, file type, folder and process to your exclusion lists. For instance, if Windows Defender’s virus scan gets triggered by — let’s say–APK files, you can click on file type enter the extension and save yourself a bit of heartache.
Readers help support MSpoweruser. We may get a commission if you buy through our links.

Read our disclosure page to find out how can you help MSPoweruser sustain the editorial team Read more


Improve this guide


User forum
0 messages