Driver Signature Enforcement Windows 11: How To Disable It
Want to know how to disable driver signature enforcement on Windows 11? This security feature only allows digitally signed drivers to be installed on your PC.
However, keep in mind that unsigned drivers can be outdated and not work correctly with your computer, or worse, contain malicious code. I’ll show you how to install unsigned drivers on Windows 11, but you should do so cautiously and at your own risk.
How To Disable Driver Signature Enforcement on Windows 11?
1. Use Local Group Policy Editor
Keep in mind that the Local Group Policy Editor tool isn’t available in Windows 11 Home Edition. Therefore, if you have this edition, you must use a different version or move on to the next solution.
1. Press the Windows + R keys simultaneously on the keyboard to open the Run dialog box.
2. Type “gpedit.msc” to open Local Policy Editor.

3. Navigate to the User Configuration > Administrative Templates > System > Driver Installation.
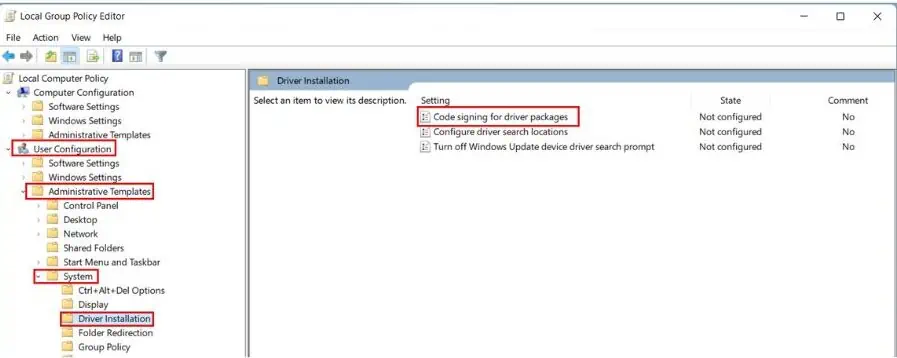
4. Right-click on the Code Signing for Driver Packages and choose Edit.
5. In the Code Signing for Driver Packages window, select Enabled. For the option “When Windows detects an unsigned driver, “click the drop-down and select Ignore or Warn.
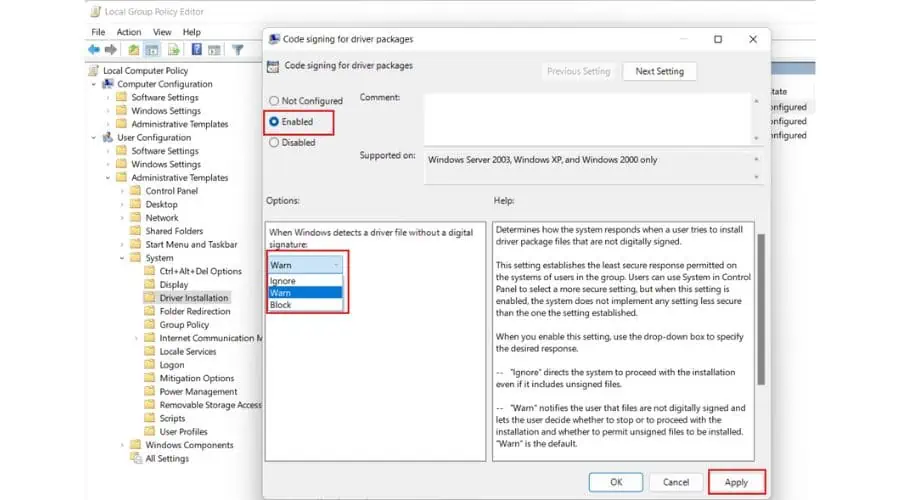
6. Click Apply and OK and reboot your PC.
You can now install unsigned drivers. Repeat the steps to enable driver signature enforcement again and select Block from the drop-down.
2. Use Startup Settings
The advanced startup settings in Windows 11 allow you to make changes that aren’t possible when logged in to the PC.
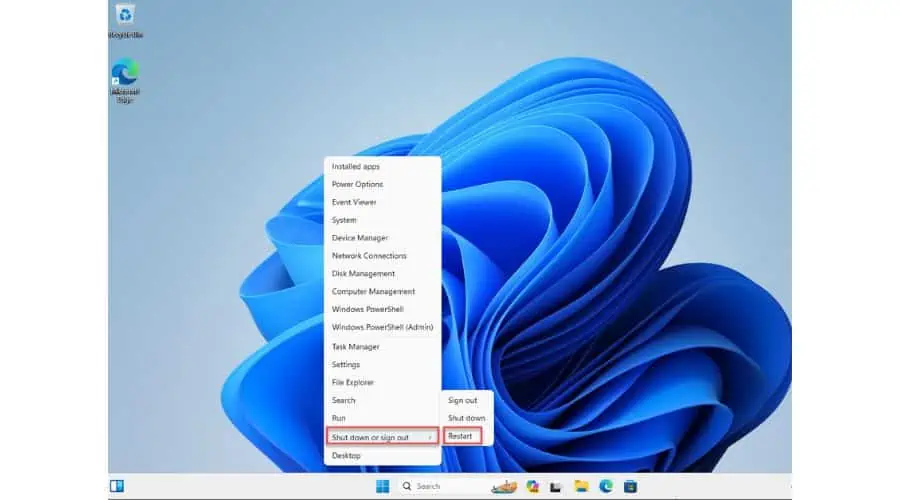
1. To enter the recovery mode in Windows 11, right-click the Windows Start icon and select Restart while holding down the Shift key on the keyboard.
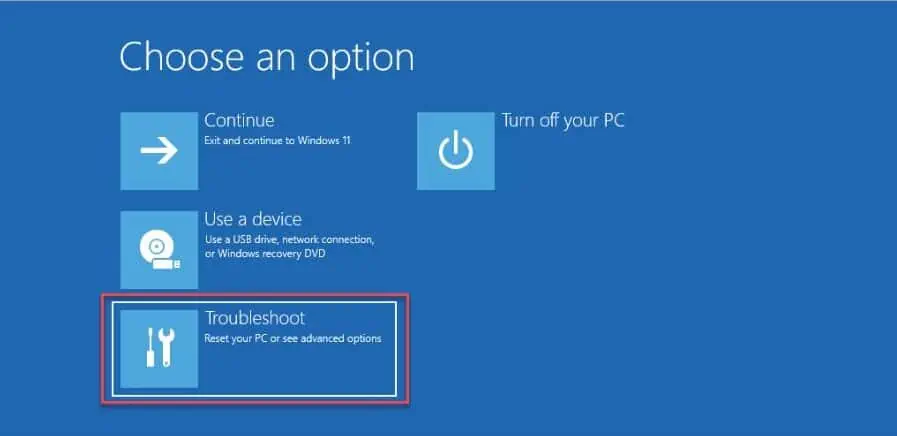
2. When the Windows 11 recovery mode screen appears, select Troubleshoot.
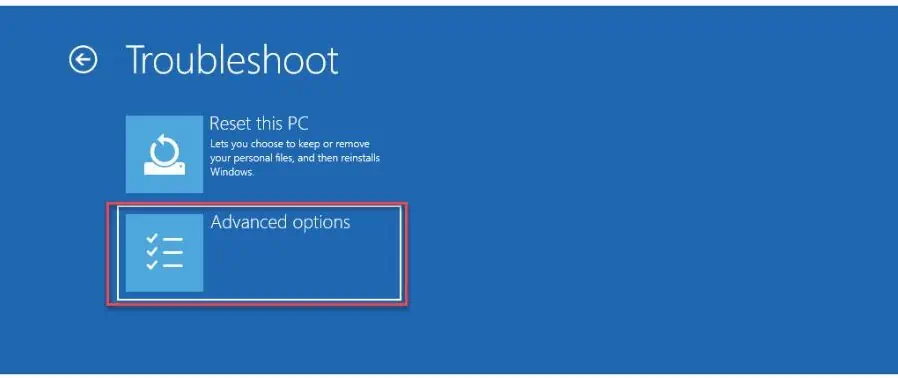
3. Choose the Advanced Options from the Troubleshooting list.
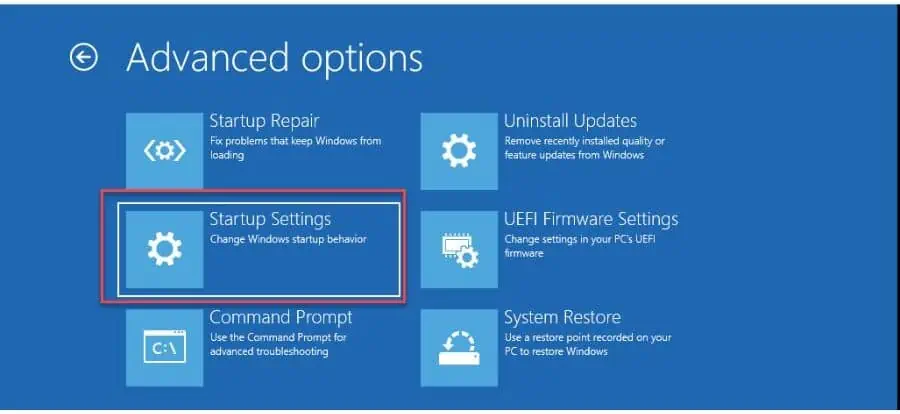
4. Go to Startup Settings.
5. If you want to disable driver signature enforcement in the startup settings, you must restart your PC. Click on the Restart button to do so.
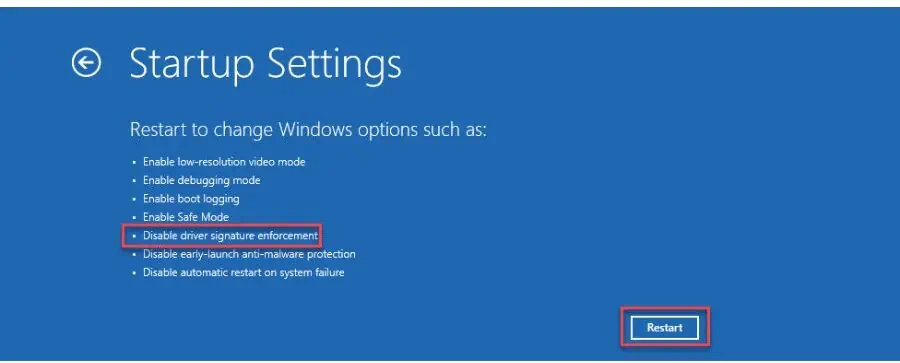
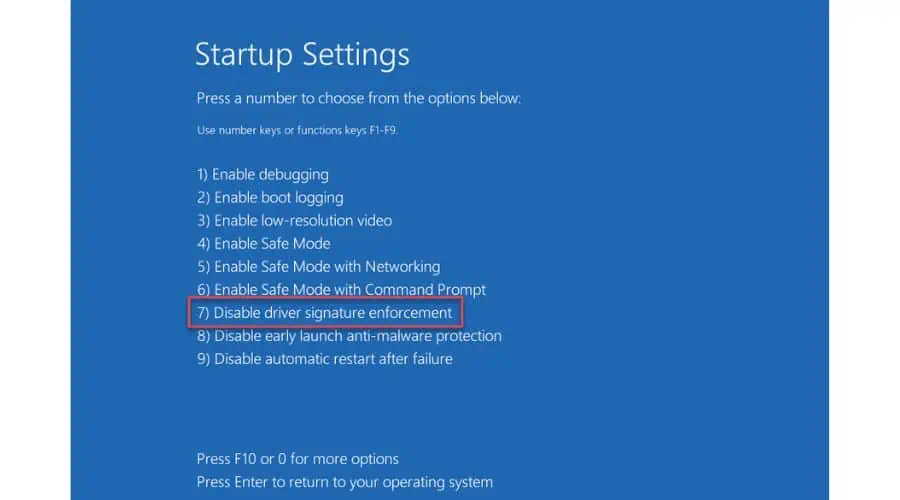
6. Press 7 on the Startup Settings page to disable driver signature enforcement.
3. Use Command Prompt
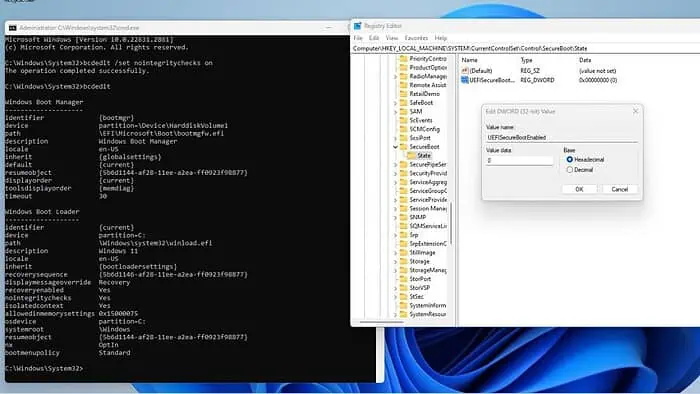
This method will work only if Secure Boot is disabled. Let me show you how to disable Secure Boot first:
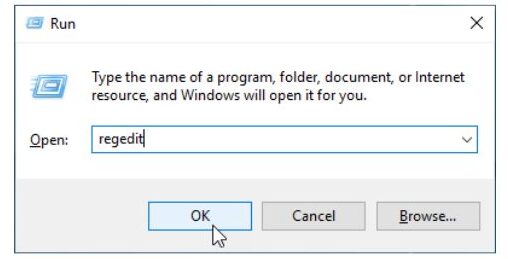
1. Press the Windows + R keys to show the Run dialog box.
2. Type “regedit” to open Windows Registry Editor.
3. Navigate to: “Computer\HKEY_LOCAL_MACHINE\SYSTEM\CurrentControlSet\Control\SecureBoot\State“
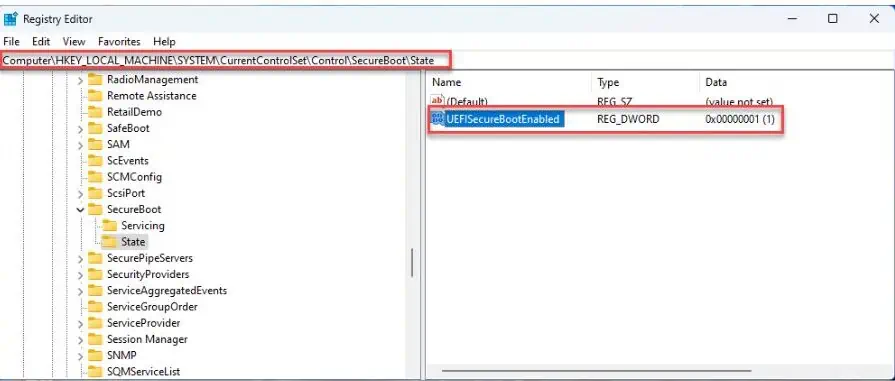
4. On the left pane, double-click DWORD UEFISecureBootEnabled.
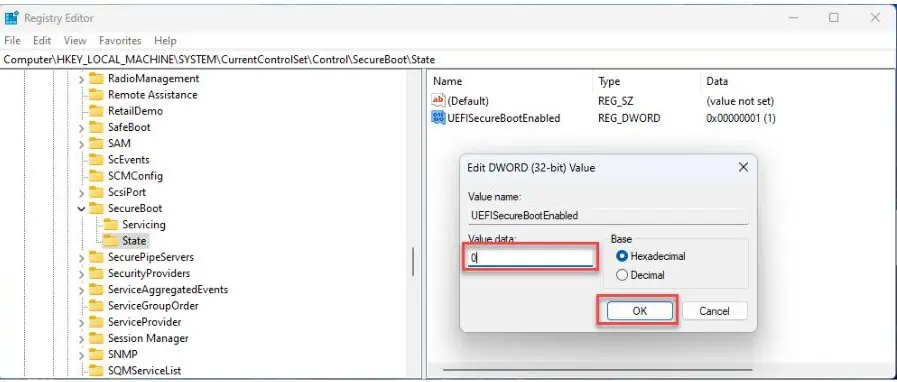
5. If the DWORD value is 1, change it to 0 and click OK.
6. Close Registry Editor and reboot your PC to confirm changes.
7. Upon restarting, open the Run dialog box again.
8. Type “cmd” and press Ctrl+Shift+Enter keys to open Command Prompt as administrator.
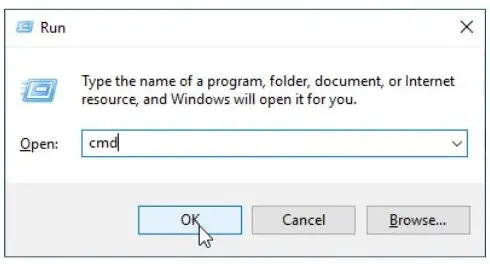
9. Type “bcdedit /set nointegritychecks on” command and press Enter.

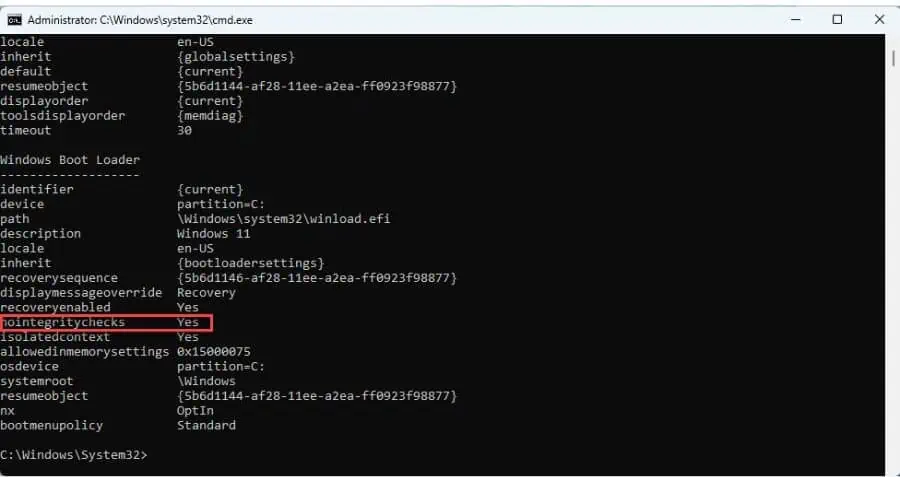
10. To check if the command worked, type “bcedit” and look if the “nointegritychecks” value is set to Yes.
You may also be interested in:
- Manually Install Drivers Windows 11: 2 Best Methods
- 7 Best Driver Updater Software for Windows 10 & 11
I hope my guide will help you disable driver signature enforcement in Windows 11. You can use multiple methods to completely turn it off via the Local Group Policy, Command Prompt, and Advanced Boot Options.
However, it’s essential to understand that unsigned drivers can potentially be unstable or even malicious drivers that could harm your computer.
Read our disclosure page to find out how can you help MSPoweruser sustain the editorial team Read more


User forum
0 messages