How to Fix DLL Files Missing on Windows 11: Tested Methods
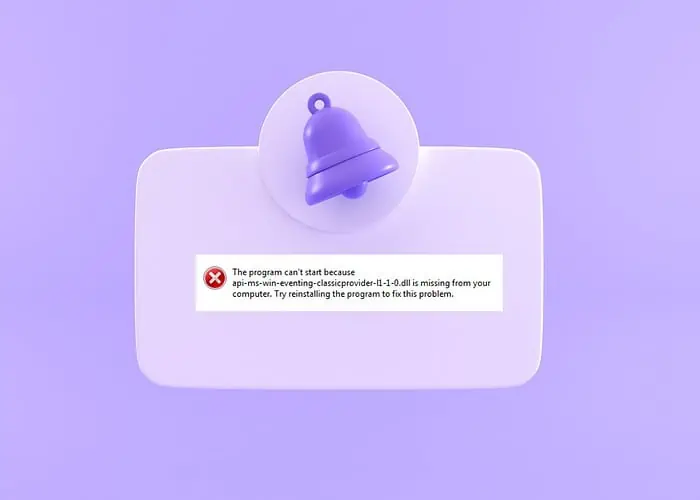
If you’re getting errors about DLL files missing on Windows 11, I’ll walk you through the best fixes that worked for me.
Dynamic Link Libraries (DLLs) are an important part of the Windows operating system. They allow multiple programs to share features, so when they go missing it can cause chaos for your PC.
Table of contents
Luckily, the issue is easy to fix:
1. Check Windows Update Status
Sometimes Windows updates can cause system file corruption. This is especially true if the update fails or is interrupted. Therefore, you should check the status of your last Windows update and resume or retry the process to ensure it completes properly.
1. Click the Windows Start button, followed by the Settings gear icon.
2. In the Settings window, select Windows Update from the menu.
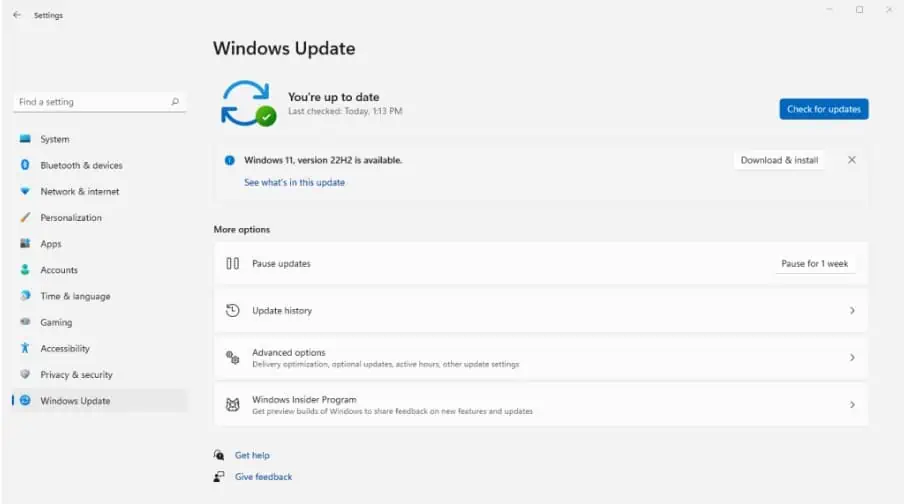
3. Once you are in the Windows Update section, you’ll see your current update status.
4. Resume the last update or click Check for Updates to install the latest one.
5. Wait for the process to fully complete. This may restart your computer to finish the process. This may restore any missing DLLs.
2. Reinstall the program
The error message that accompanies missing DLLs often suggests a problem with the program you’re currently running. This is because some DLLs come bundled with the software itself.
1. Go to Settings and click Apps in the menu.
2. Under Apps & features, you’ll see a list of all installed programs.
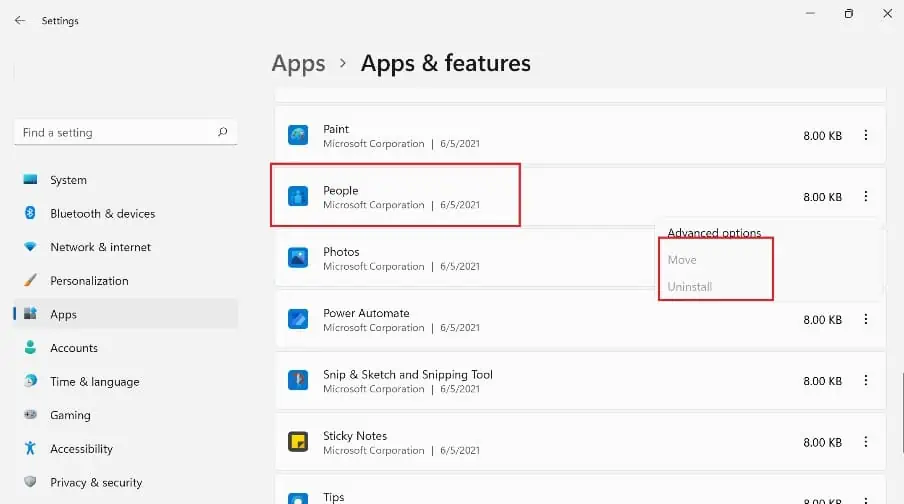
3. Locate the program in question, click the three dots, and select Uninstall.
4. Find the latest version of the program and reinstall it.
5. Alternatively, go to the installation folder. If it has an uninstaller executable, double-click to begin the uninstallation progress.
3. Run the System File Checker
Windows has a built-in repair utility called the System File Checker (SFC). It scans the system for missing or corrupted files and aims to repair and replace them. Here’s how to use it:
1. Use the start menu search bar and type CMD.
2. The Command Prompt will show in the results. Click the Run as administrator option.
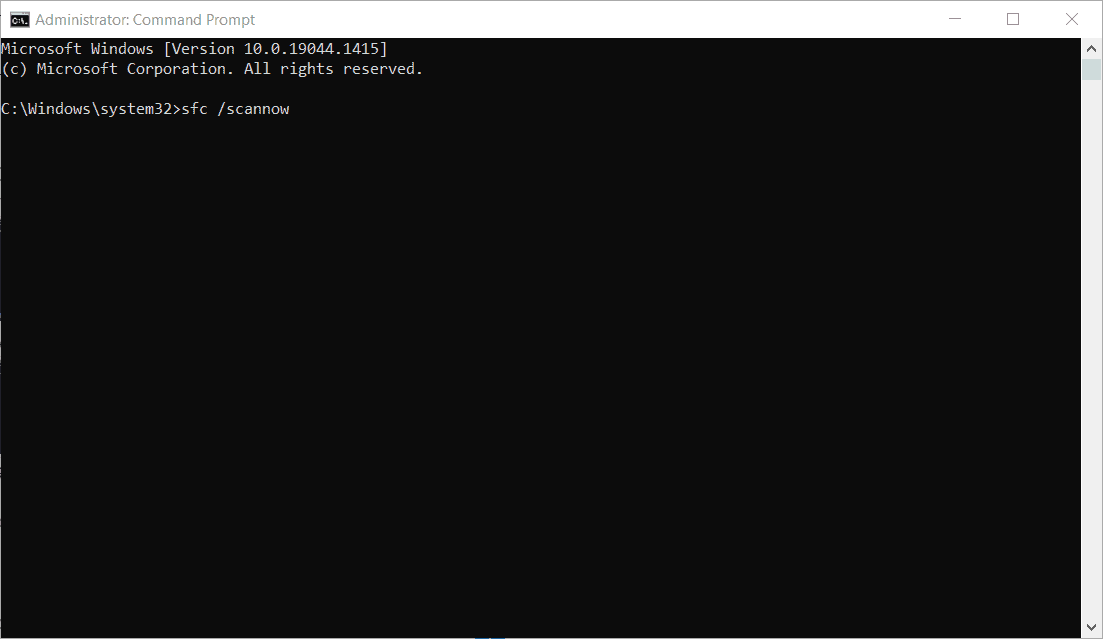
3. Within the Command Prompt, type sfc /scannow and press the Enter key.
4. The SFC tool will scan your system files for corruption and attempt to repair any issues.
5. Look for the message: Windows Resource Protection found corrupt files and successfully repaired them.
4. Use a Restore Point
It’s often difficult to pinpoint the exact cause of a missing DLL file. But if you have a good idea of when the error started happening, loading a restore point can revert your system back to its working state.
Note that this may also revert settings, programs, and drivers that may have recently changed.
1. Use the start menu search bar and type System Restore.
2. Click the top result, and in the new window, click the Next button. You will eventually come to a list of available restore points.
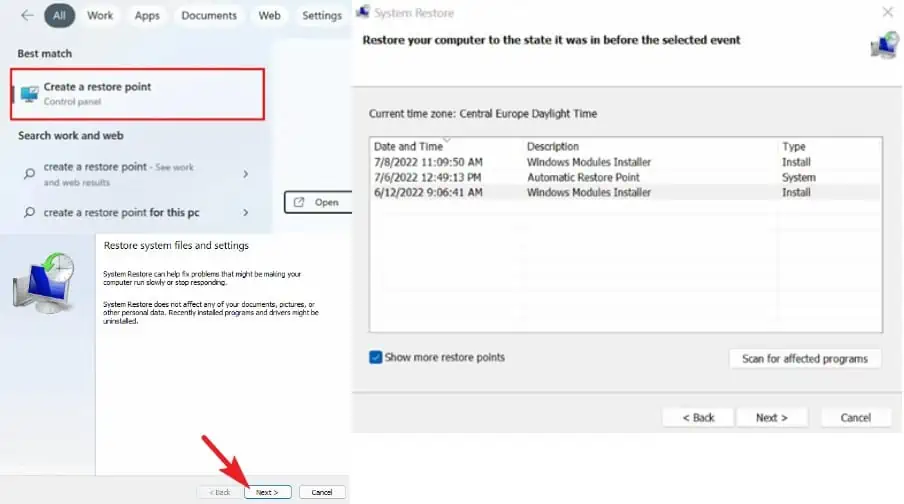
3. Locate a restore point that is dated before the missing DLL error.
4. Click on Scan for affected programs to see a list of programs and drivers that might be affected by the restoration process. If you’re satisfied with your choice, click Next.
5. Your computer will restart and begin restoring your system to the selected point.
5. Use a DLL Fixer
While you can always locate a missing DLL file online yourself, this can be risky because the site might not be legitimate and it’s difficult to know where to place the file and register it with Windows.
The best option is to use a DLL fixer that can find and replace the file automatically.
For this, a Windows repair tool called Fortect gave me the best results.
1. Download and install Fortect on your PC.
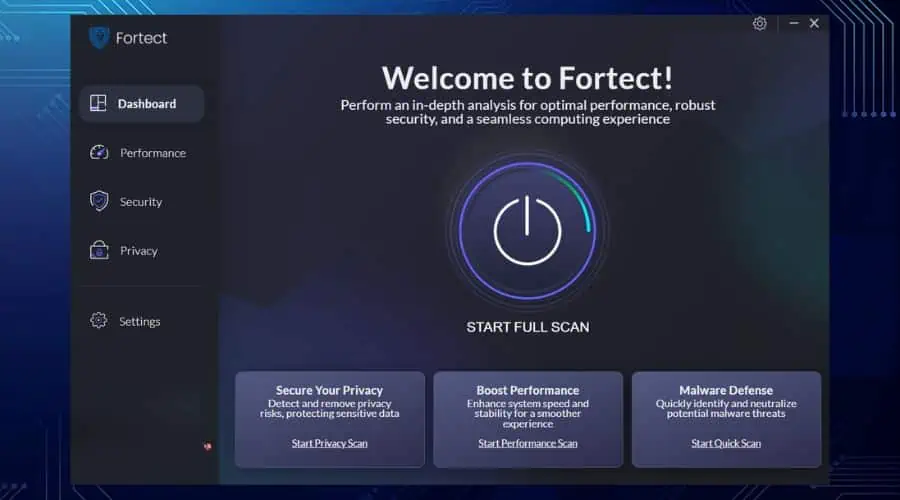
2. Launch the software and click the Start Full Scan button.
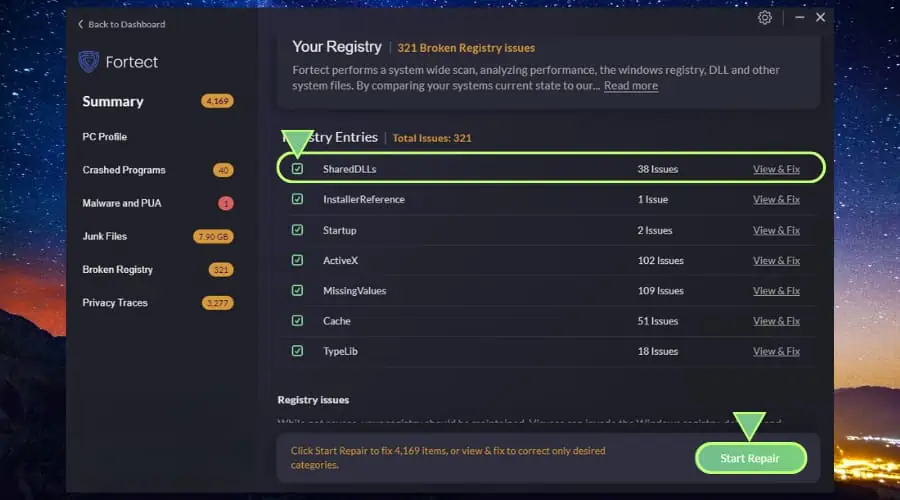
3. After a few minutes, Fortect will display different categories of results to fix. You can click Start Repair to fix all known problems or click through the Broken Registry section to find specific DLL errors.
During the repair process, Fortect pulls fresh system files from its database, automatically fixing corruption and missing files.
Missing DLL files on Windows can be frustrating when it renders programs unusable. However, by following my tips above, it doesn’t take long to replace and repair them.
It’s always a good idea to scan for malware after fixing DLL errors, in case viruses and other threats are infecting DLL files.
Read our disclosure page to find out how can you help MSPoweruser sustain the editorial team Read more


Improve this guide

User forum
0 messages