How to Convert OST to PST: A Comprehensive Guide
Email communication is essential in today’s digital world, both in personal and business contexts. One of the most popular email programs, Microsoft Outlook, uses the OST (Offline Storage Table) file type to store and synchronize mailbox data remotely.
For various reasons, such as switching email clients or retrieving data from a broken OST file, you might need to convert OST to PST (Personal Storage Table) format.
In this article, we’ll show you how to convert OST to PST and talk about the tools and methods you may use to do so quickly. So let’s get started and learn about the various ways to convert OST to PST.
1. Use Stellar Converter for OST
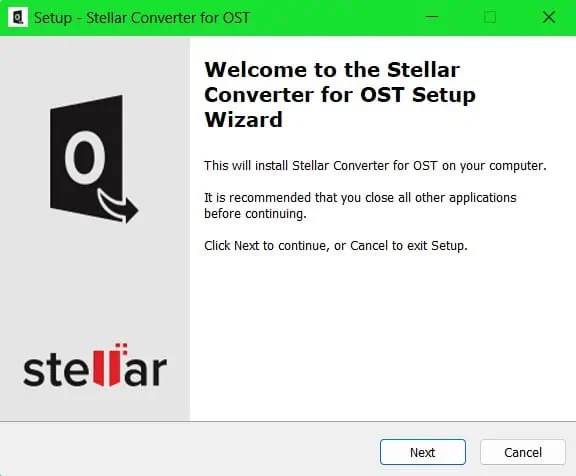
- Download the Stellar Converter for OST.
- Run the installer by double-clicking it, and follow the instructions to complete it.
- Click the SelectOutlook Data File button, then click Browse and navigate to the respective file.
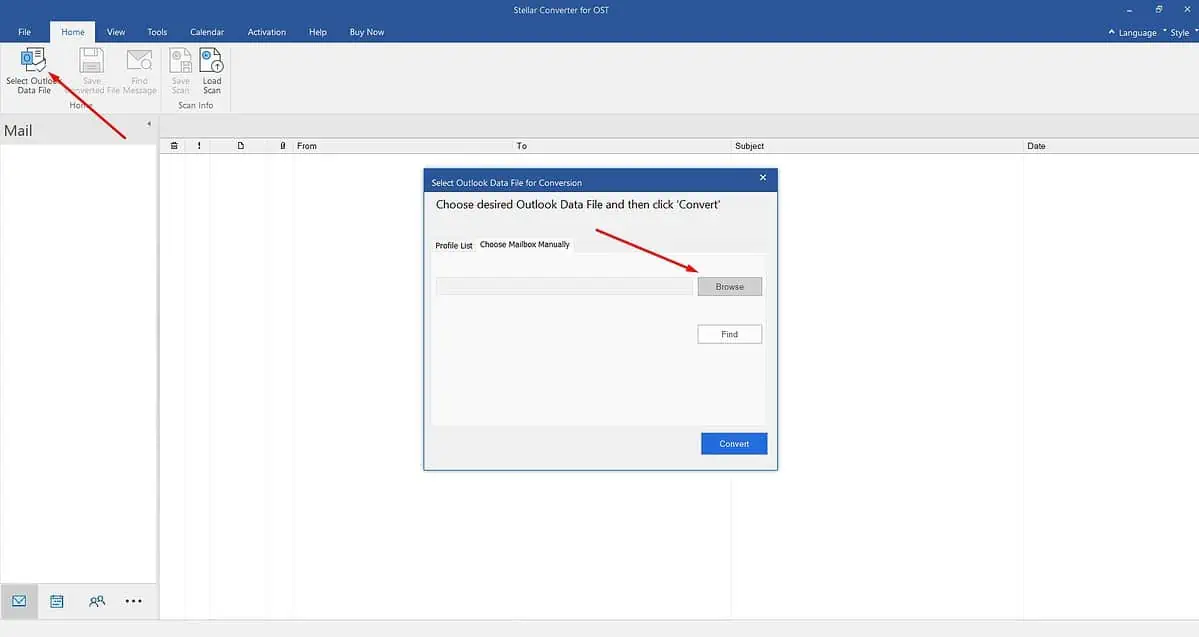
- Click Convert and your file be transformed in minutes.
2. Convert OST to PST using Microsoft Outlook
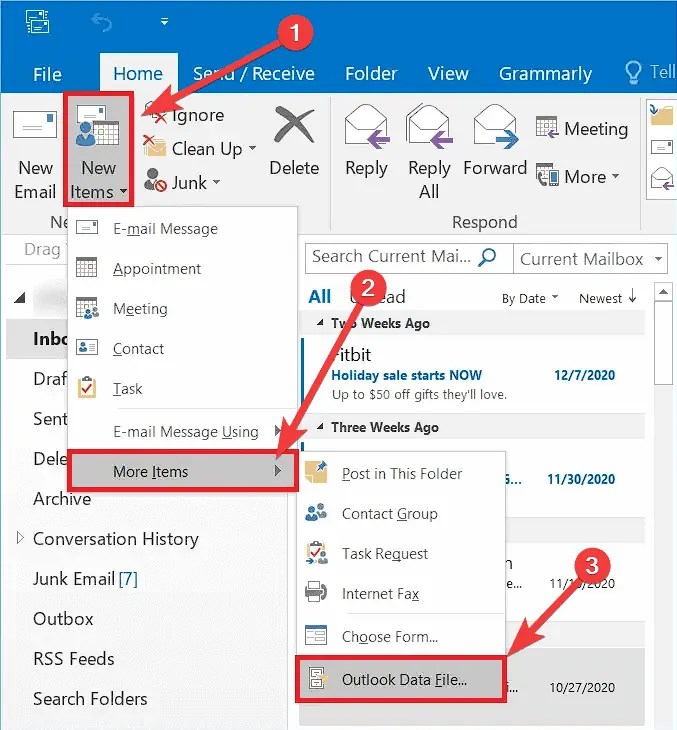
- Open Microsoft Outlook and create a new PST file (or use an existing one).
- Import the OST file into Outlook by following the import wizard.
- Once the import is completed, you will have a PST file containing all the information from the OST file.
Note: This method also helps to convert OST to PST with Outlook 2016, 2019, 2013 & 2019.
3. Online OST to PST conversion
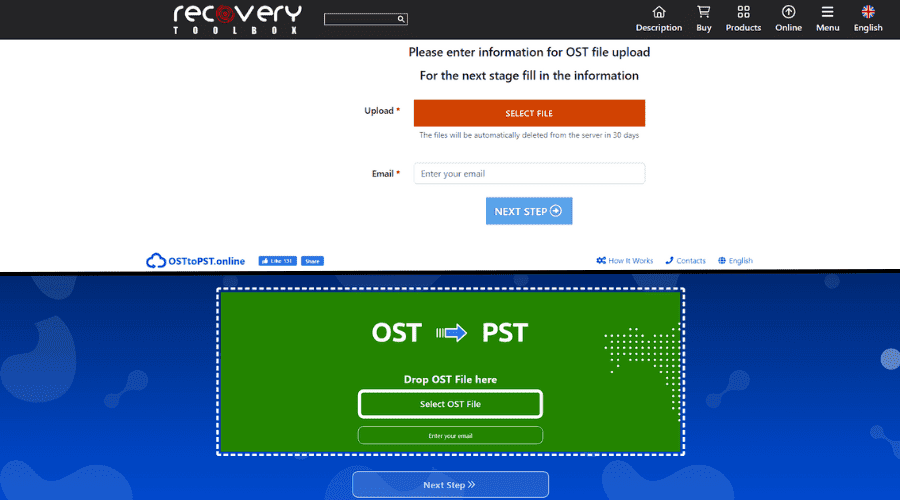
Several online businesses offer OST to PST conversion if you’d prefer a web-based alternative. You can convert OST to PST for free with some of these tools.
To guarantee the confidentiality and protection of your data, it is crucial to use a reliable and secure provider when converting OST to PST online.
Here are some trustworthy examples:
- Recovery Toolbox – Easy-to-use site with good results
- OST to PST Online – Straightforward and fast file conversion
If these tools do not satisfy your file conversion needs, check out the following method.
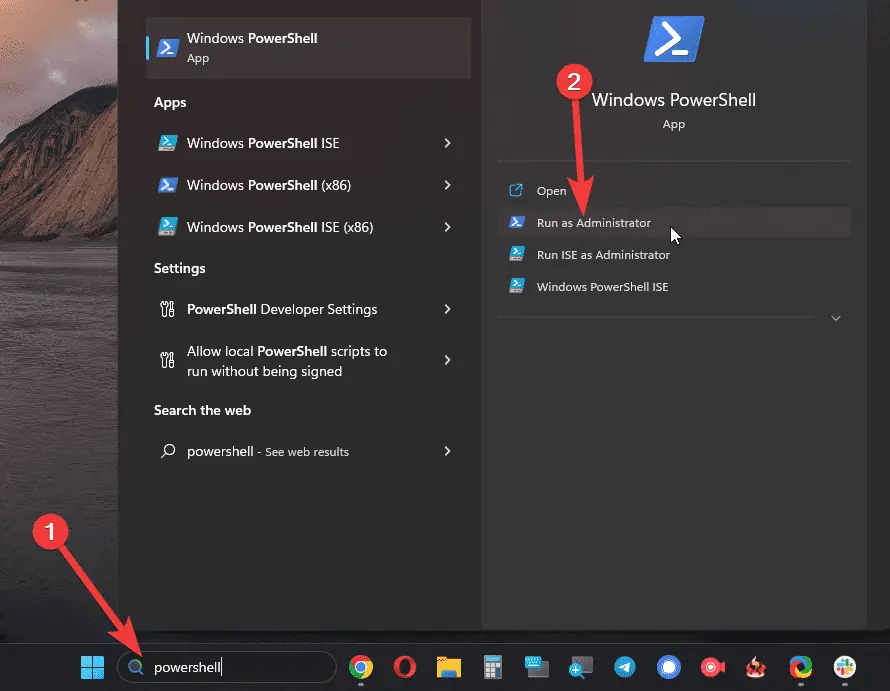
4. Use PowerShell
If you want to convert OST to PST without using Outlook, try this method.
- Click the Start menu, search for PowerShell, and click the Run as administrator option.
- As PowerShell usually restricts running scripts, run the following command to change the policy:
Set-ExecutionPolicy -ExecutionPolicy Unrestricted
When prompted to confirm, enter Y and press Enter. - Use the cd command to navigate to the location of your OST file. For example, if your file is on the desktop, run the following command:
cd C:UsersYourUsernameDesktop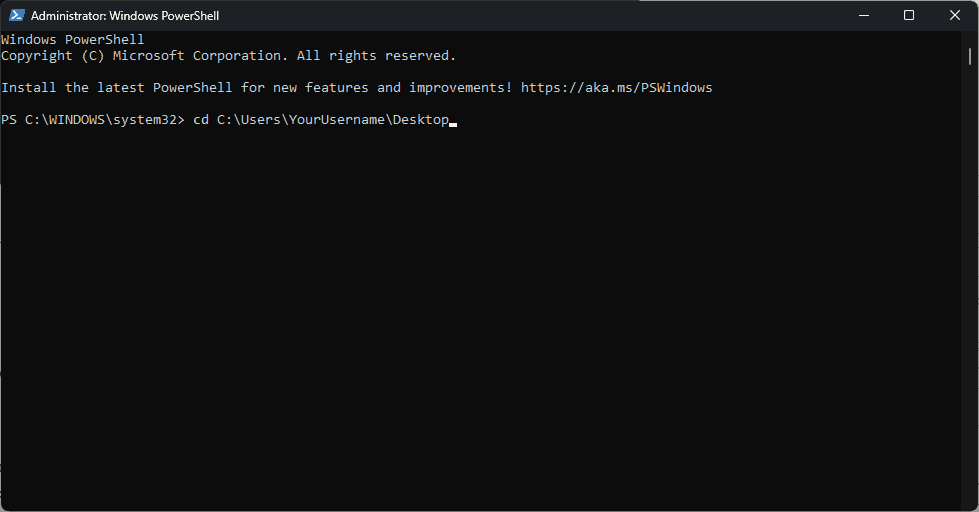 Replace YourUsername with your actual username.
 - Run the following command inside PowerShell to initiate the OST to PST conversion process:
New-Object -ComObject Outlook.Application | %{$_.Session.AddStoreFromFile("Path oYourOSTFile.ost")$_.Session.GetDefaultFolder(6).Items |Select-Object -Property Subject, ReceivedTime, SenderEmailAddress |Export-Csv -Path "Path oSaveYourPSTFile.csv" -NoTypeInformation}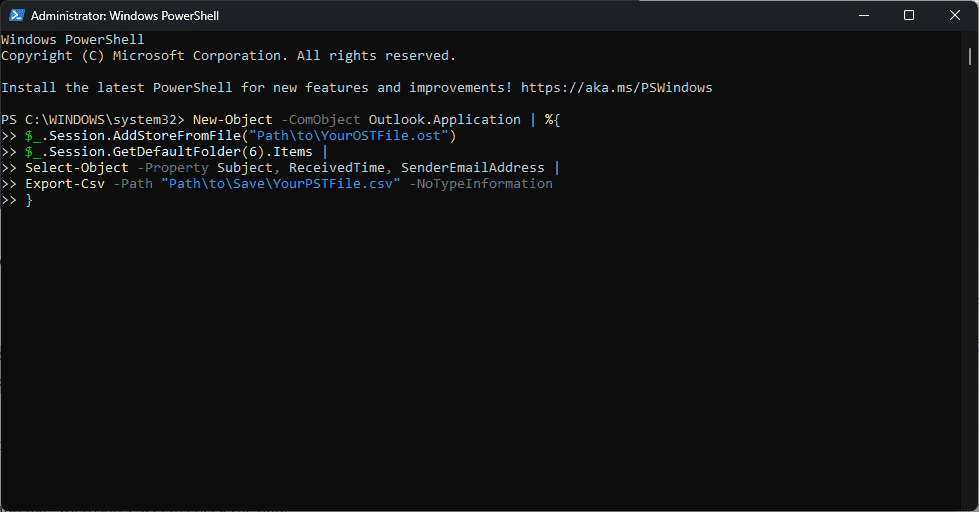
Replace Path oYourOSTFile.ost with the file path of your OST file and the Path oSaveYourPSTFile.csv with the location of where you want the file to be saved. - Wait for the process to complete, as the duration might vary due to file size.
- Navigate to the location of your PST file, and open it using a spreadsheet app like Microsoft Excel to check the data.
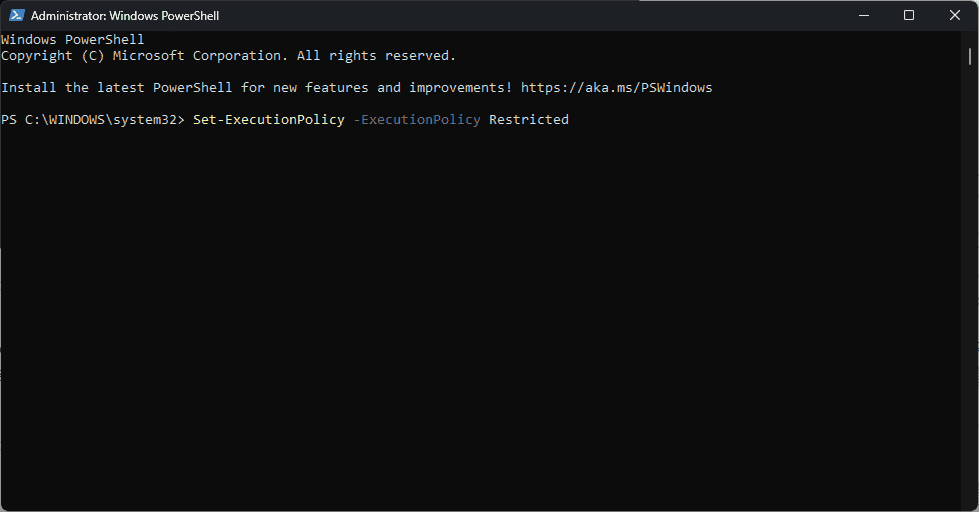
- Restore the changes made to the execution policy by running the following command inside PowerShell:
Set-ExecutionPolicy -ExecutionPolicy Restricted
The selected mailbox item properties, such as subject, received time, and sender email address, should be included in the converted PST file (CSV file).
5. Convert OST to PST file for Office 365
5.1. Remove any file encryption
- Open Microsoft Outlook on the PC that has the OST file stored.
- Ensure that you’re connected to your Office 365 account and that the syncing process is active.
- If your OST file has encryption, remove it by clicking the File tab > Options > Trust Center, then select Trust Center Settings. Under the Email Security section, uncheck the Encrypt contents and attachments for outgoing messages option.

- Exit Microsoft Outlook and make sure it is not running in the background.
5.2. Modify Mail settings in Control Panel
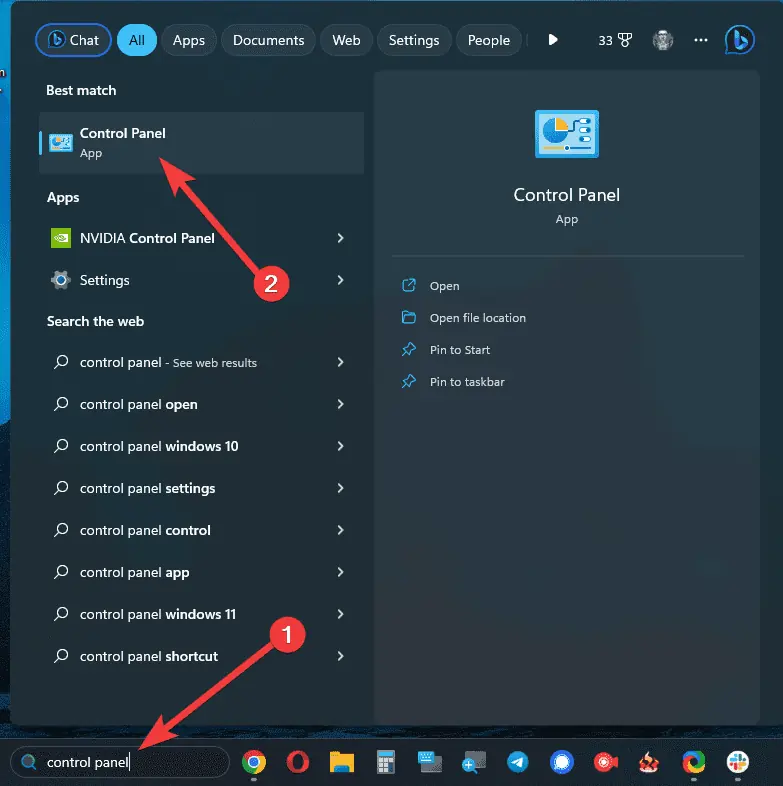
- Search for Control Panel, and open it.
- Navigate to Mail or Mail (32-bit), depending on your system.
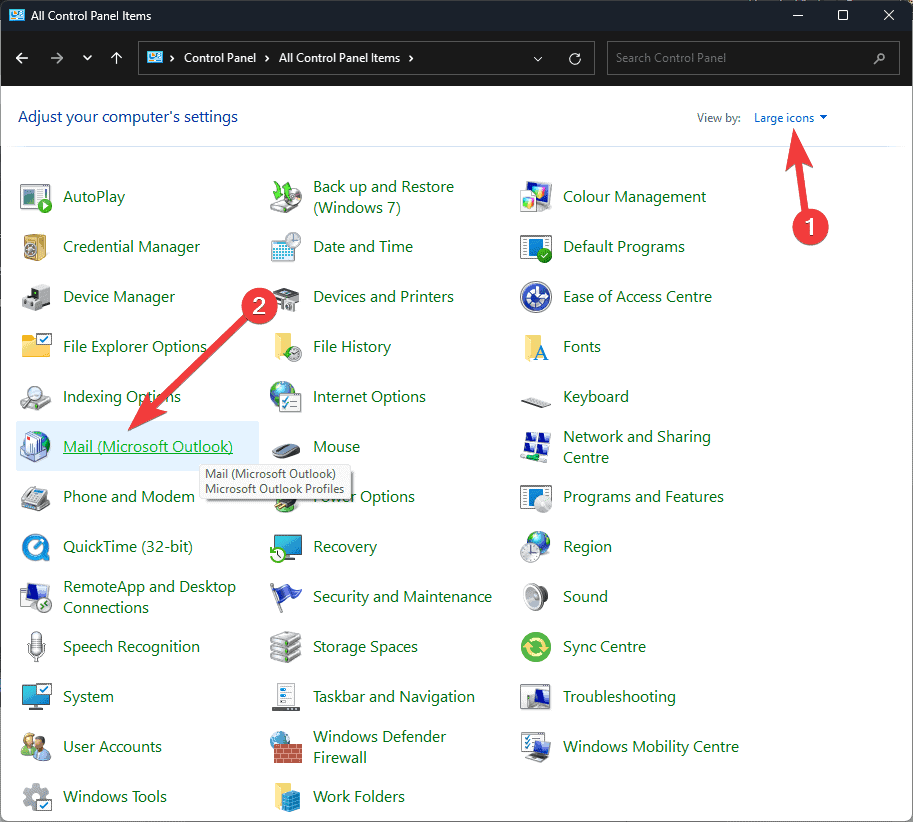
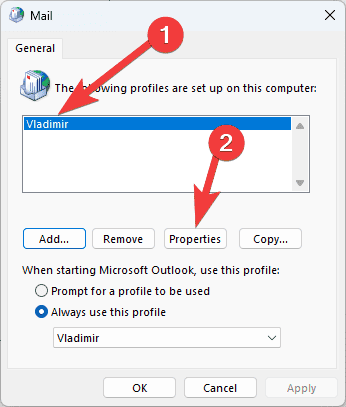
- Inside the Mail Setup window, click Show Profiles.
- Select the current Outlook profile and click the Properties button.
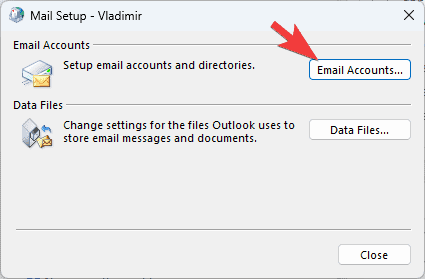
- Click the Email Accounts button inside the Mail Setup – Outlook dialog box.
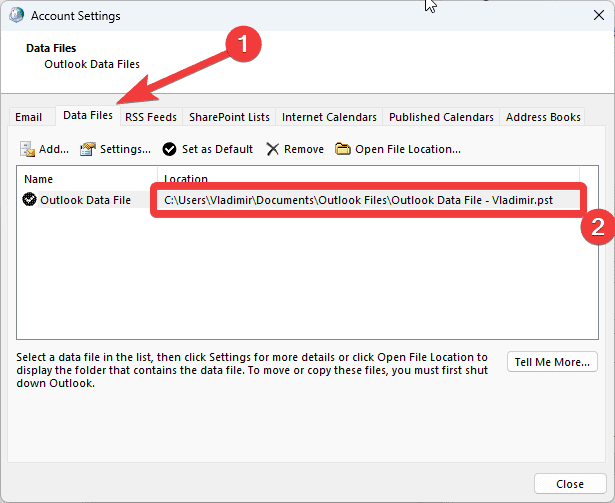
- Choose the Data Files tab, and note down the OST file location in the File column.
- Close all open dialog boxes.
5.3. Transform the OST file to PST
- Open File Explorer or Windows Explorer on your PC.
- Paste the path of the OST file you noted down earlier inside the address bar in the File Explorer.
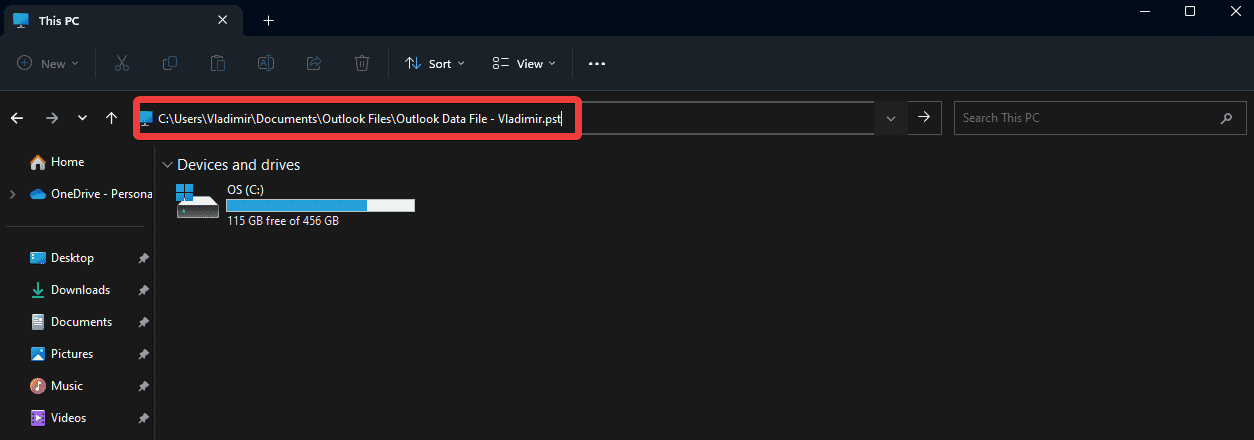
- Find the OST file and rename it, changing the file extension from .ost to .pst.
For example, if the file name is Outlook.ost, rename it to Outlook.pst. - Press Enter to save the new file name.
- Relaunch Microsoft Outlook.
- Click File > Open and Export, and choose the Open Outlook Data file option.
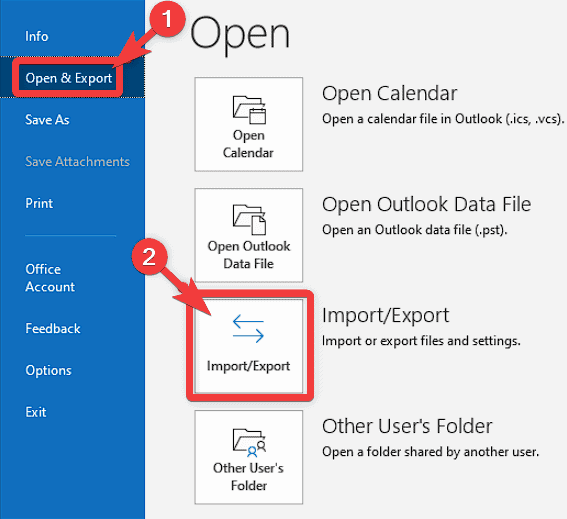
- Navigate to the location of the newly-renamed PST file, and click OK to open the file in Outlook.
Benefits of converting OST to PST
- Flexibility – You can manage your emails and other data with greater freedom by converting your OST file to a PST format that allows access to your mailbox data from various email applications or platforms.
- Data recovery – If your OST file becomes corrupt, you can restore your important data and ensure it is accessible by converting it to a PST file.
- Backup and archiving – Your mailbox data may be reliably protected against data loss by creating backups or archives using OST to PST conversion.
Accessing and effectively managing your mailbox data is possible by converting OST to PST. Various techniques and tools are available to make the conversion more accessible, whether switching to a different email client, restoring data from a broken OST file, or creating backups.
To ensure a seamless transition from OST to PST, pick the approach that best meets your needs.
Read our disclosure page to find out how can you help MSPoweruser sustain the editorial team Read more


Improve this guide


User forum
4 messages