Cloudflare's 1.1.1.1 privacy-focussed DNS service is no joke - Here's how to set it up

Global network service provider Cloudflare has announced a new privacy-focused DNS service to take on Google’s 8.8.8.8 alternate DNS provider.
Cloudflare’s main claim to fame is their focus on privacy – they promise to never write your DNS request to disk and not to keep logs for more than 24 hours.
They also support DNS over HTTPS (and DNS-over-TLS), which means even your ISP will not know which domain name you are requesting.
Cloudflare’s other advantage is speed, with responses on the order of 14 ms for sites outside their network, and even faster for the large segment of the web on their service.
The service is completely free, and Cloudflare promises to never use the data for marketing and other uses. To guarantee this they are having KPMG, the well-respected auditing firm, audit their code and practices annually and publish a public report confirming they are doing what they said they would.
The service is live now – to enable it for your public ISP on Windows 10, follow the following instructions:
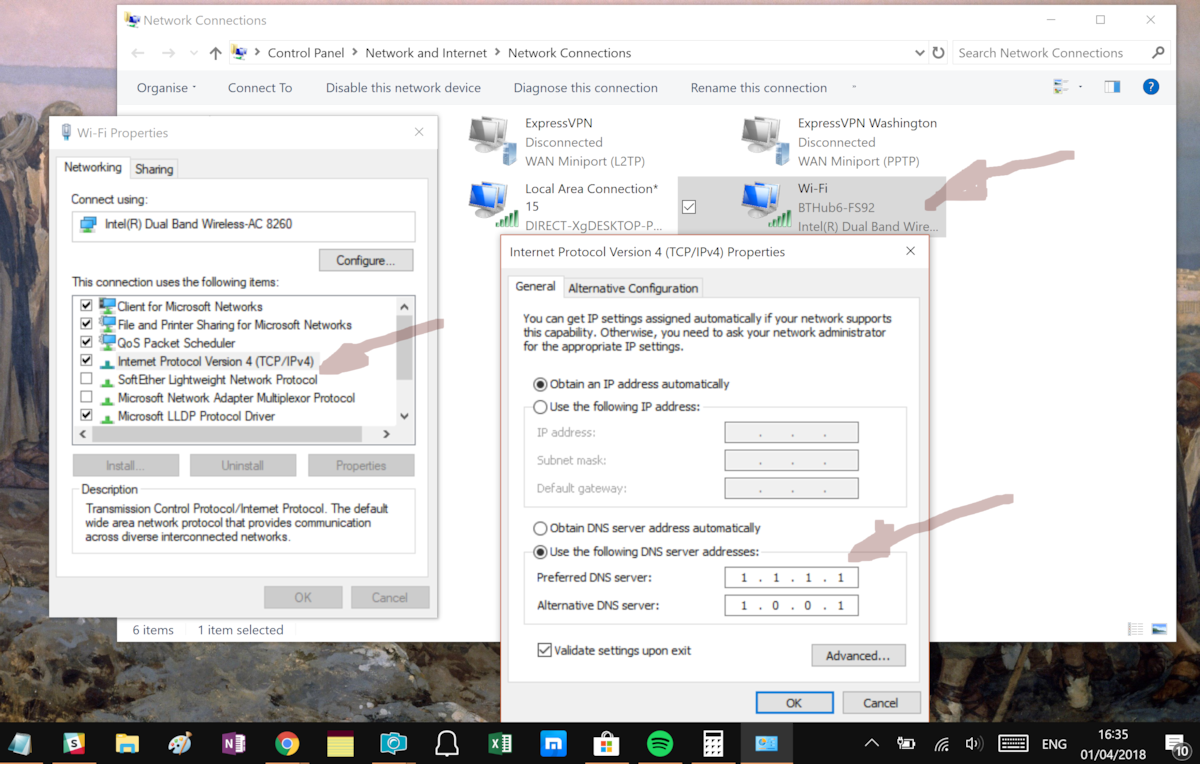
Setup on PC
Setting up 1.1.1.1 takes two minutes and requires no technical skill or special software.
- Click on the Start menu, then click on Control Panel.
- Click on Network and Internet.
- Click on Change Adapter Settings.
- Right click on the Wi-Fi network you are connected to, then click Properties.
- Select Internet Protocol Version 4 (or Version 6 if desired).
- Click Properties.
- Write down any existing DNS server entries for future reference.
- Click Use The Following DNS Server Addresses.
- Replace those addresses with the 1.1.1.1 DNS addresses:
- For IPv4: 1.1.1.1 and 1.0.0.1
- For IPv6: 2606:4700:4700::1111 and 2606:4700:4700::1001
- Click OK, then Close.
- Restart your browser.
- You’re all set! Your device now has faster, more private DNS servers
Read more at Cloudflare here.
Read our disclosure page to find out how can you help MSPoweruser sustain the editorial team Read more


Improve this guide

User forum
0 messages