6 Ways to Change Username in Windows 10
Change your username in Windows 10 with ease! This article will help you through the procedure, whether you wish to customize your user account or have to change it for security concerns.
This article will give you step-by-step instructions on how to modify your Windows 10 username using various tools, such as the Command Prompt and the Local Account settings.
1. Use the Local Account settings
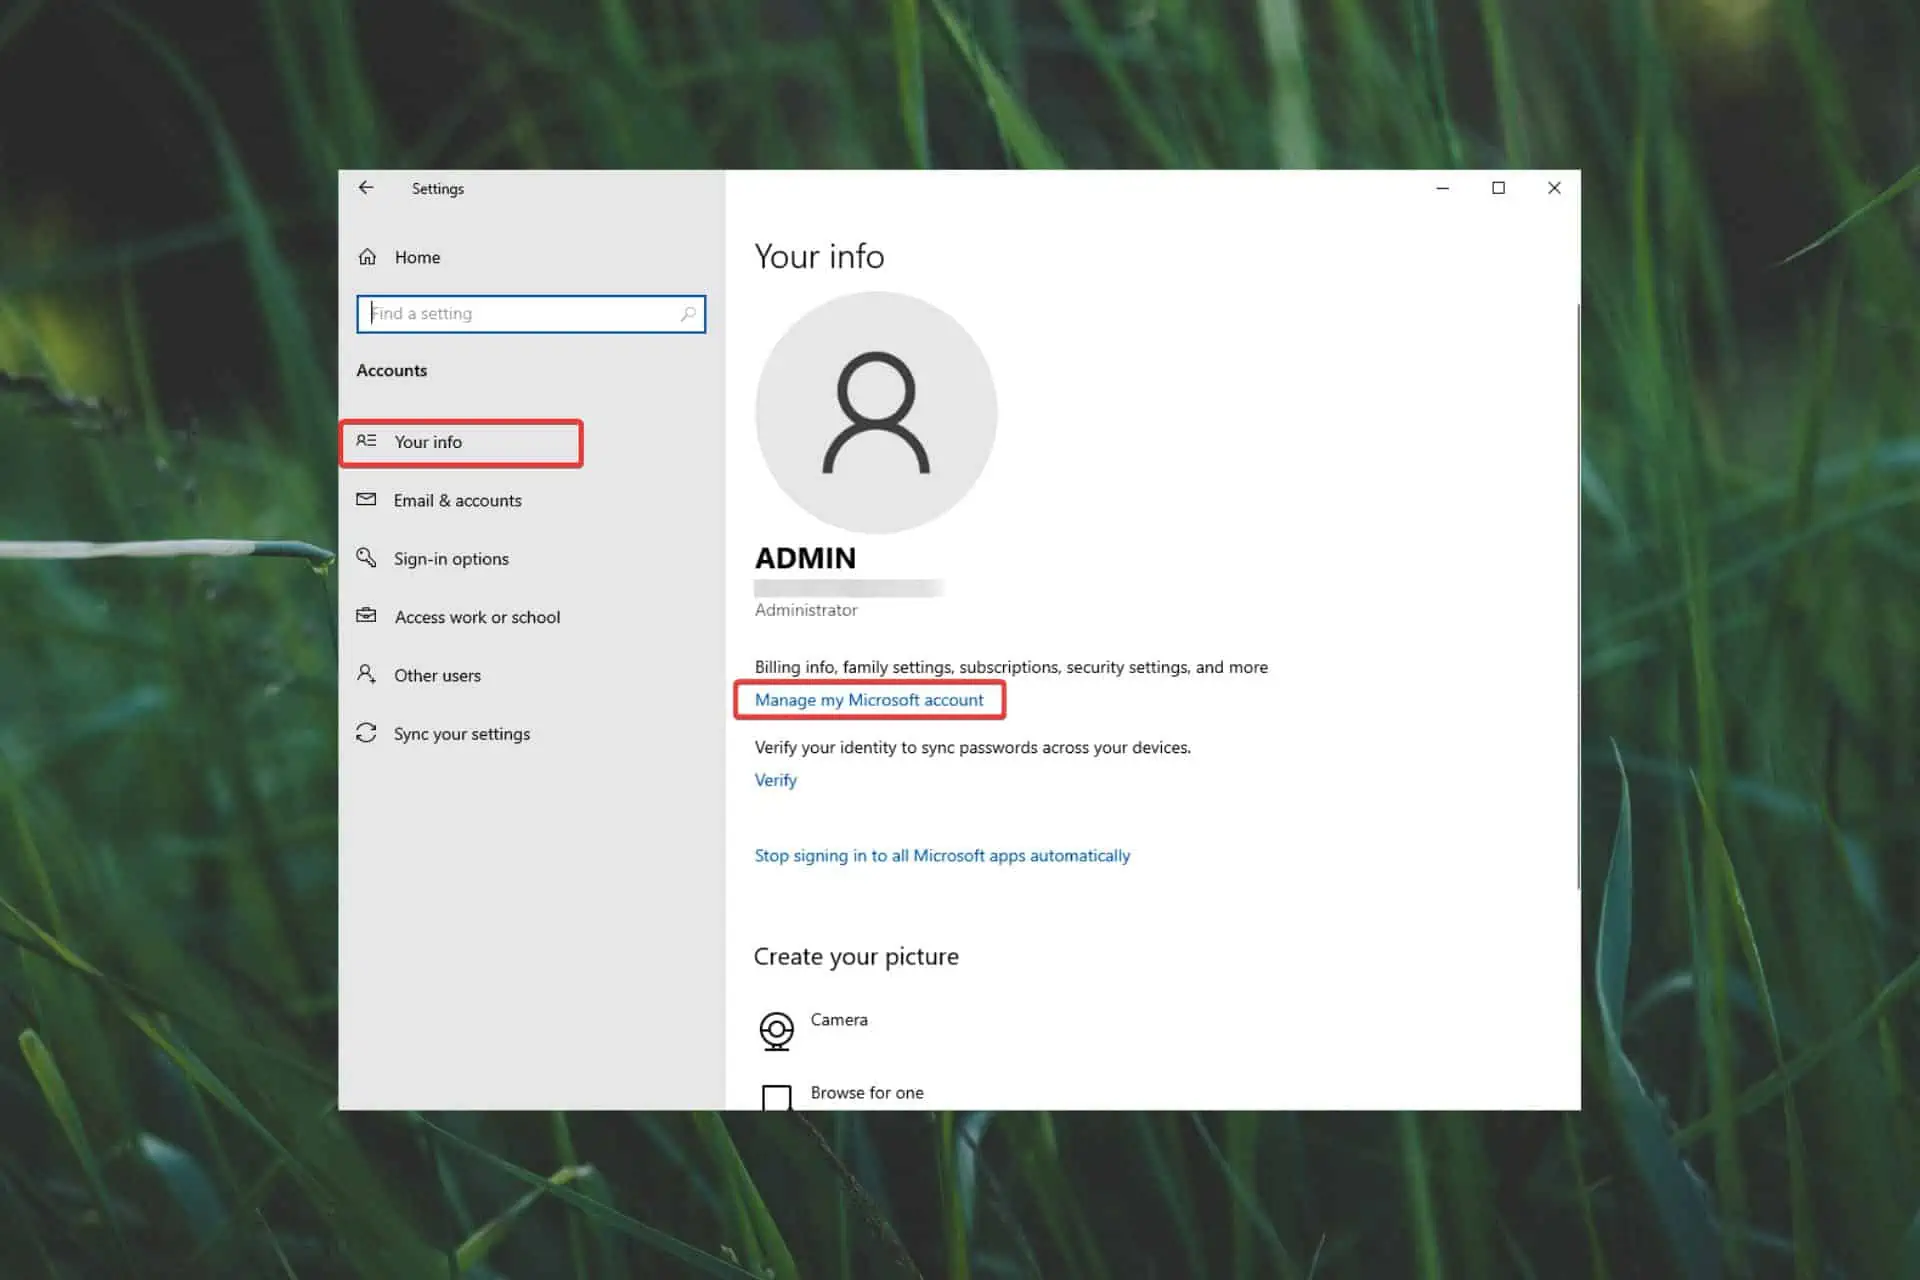
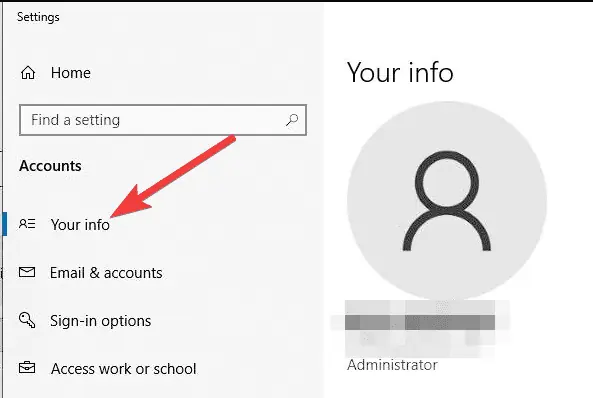
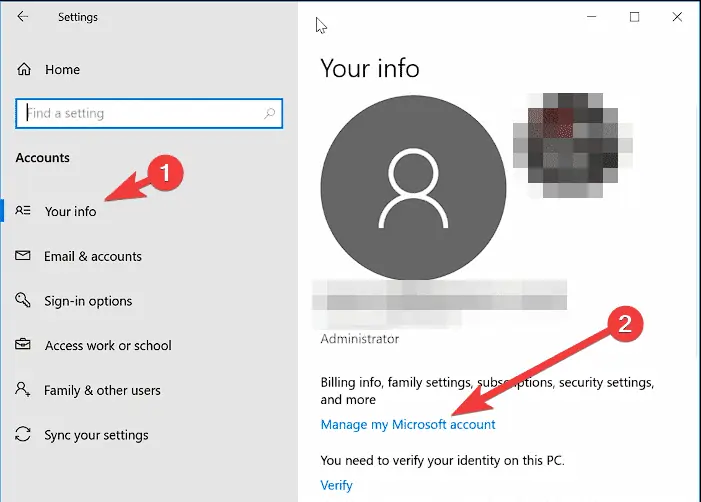
- Press the Win + I keys to open the Settings app.
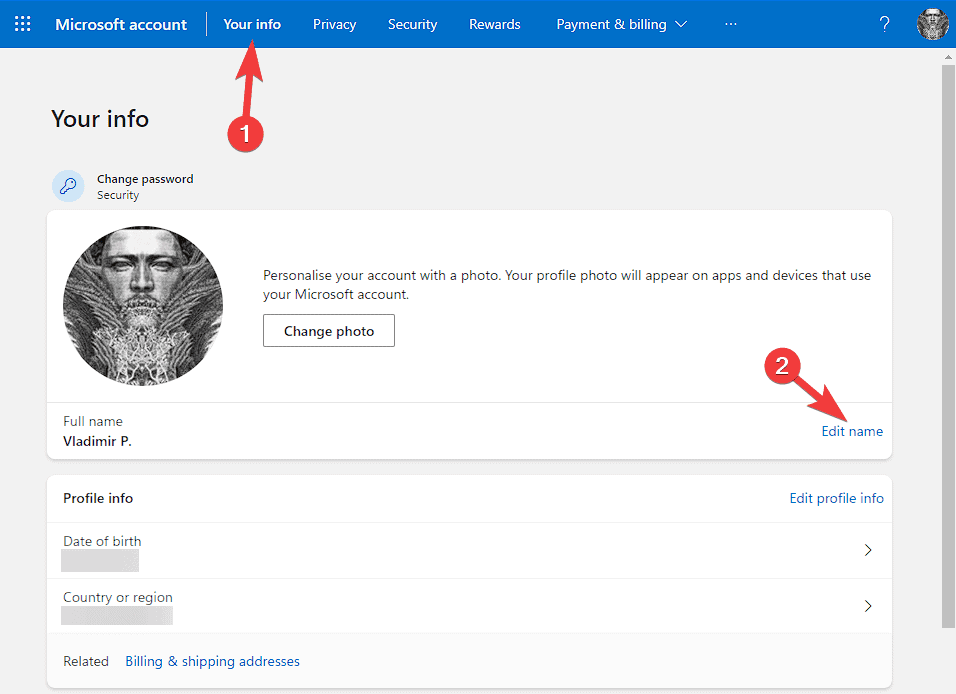
- Click Your Info from the left sidebar.
- Choose Manage My Microsoft Account.
- Sign in to the Microsoft page that opens with your existing credentials.
- Click Your Info on the Microsoft account page, and choose Edit Name.
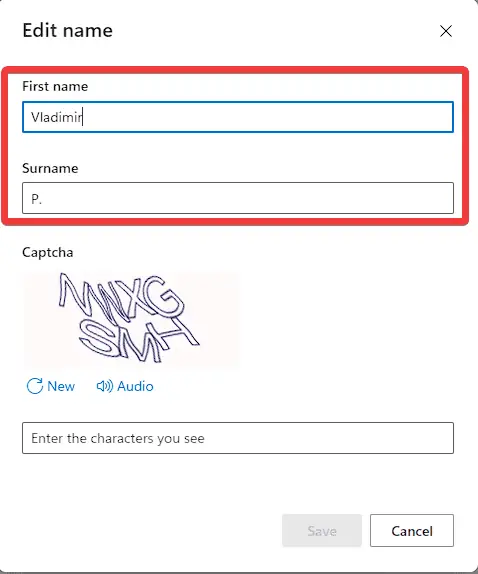
- Enter your new username in the First name field, and add a Surname if you want.
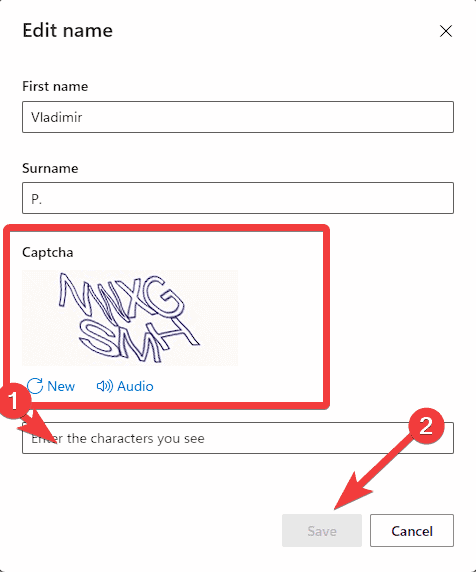
- Write the Captcha code, and click Save to apply the changes.
- Sign out of your Windows 10 account and sign back in to see the updated username.
2. Create a new Local User Account
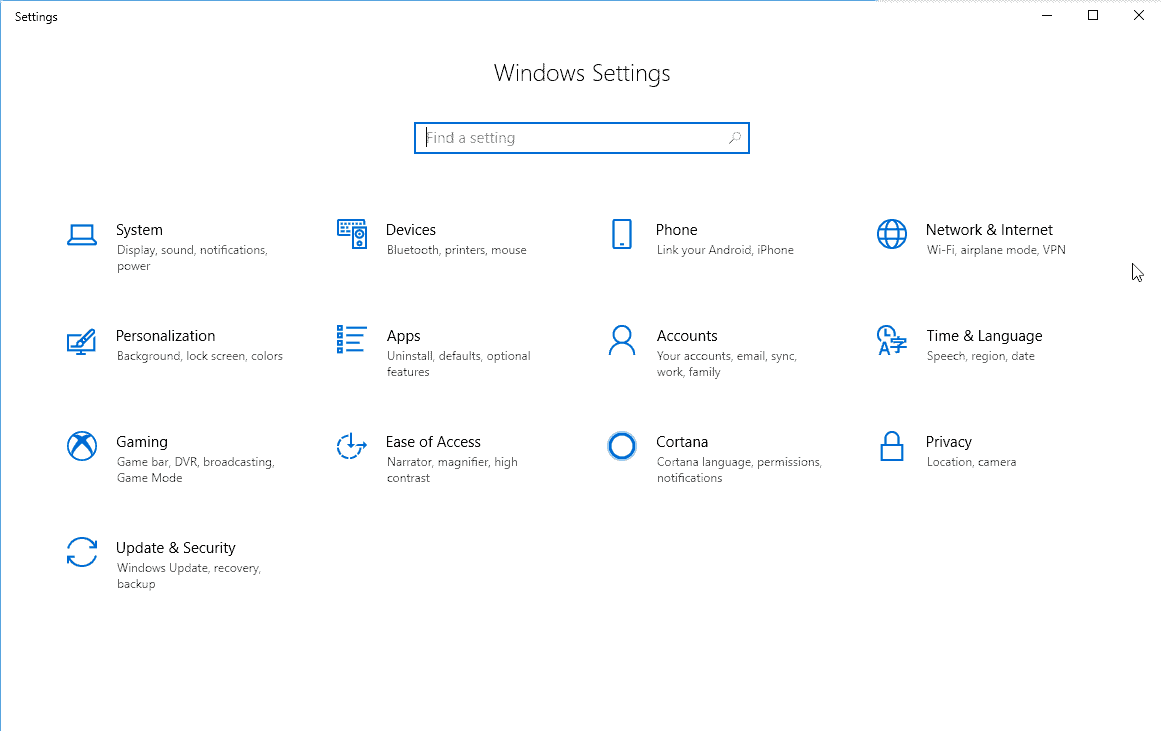
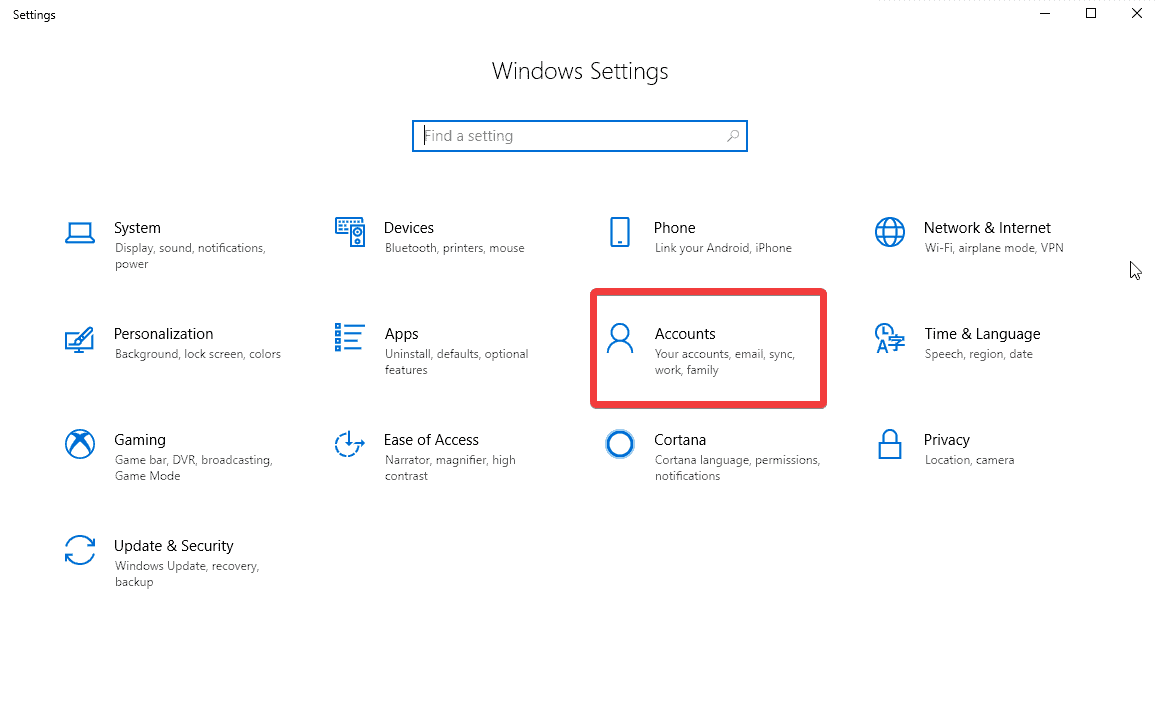
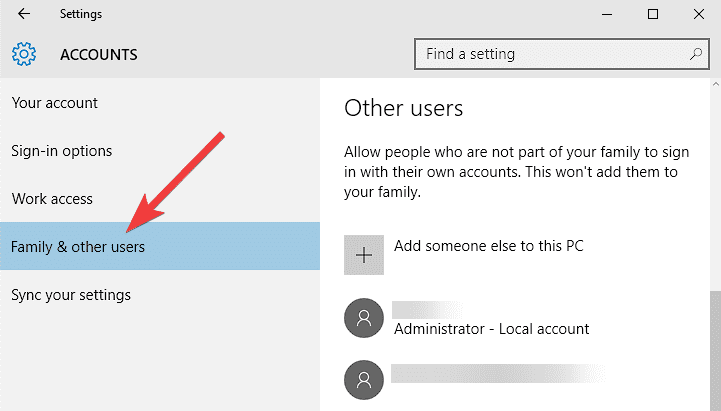
- Press Win + I to open Settings, and click on Accounts.
- Choose Family & Other users from the left sidebar.
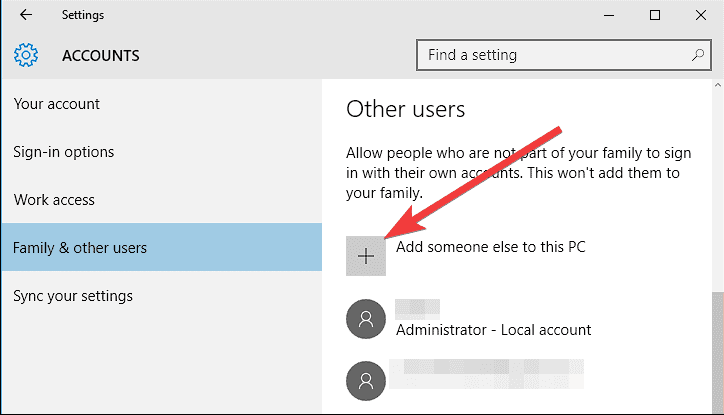
- Click on Add someone else to this PC.
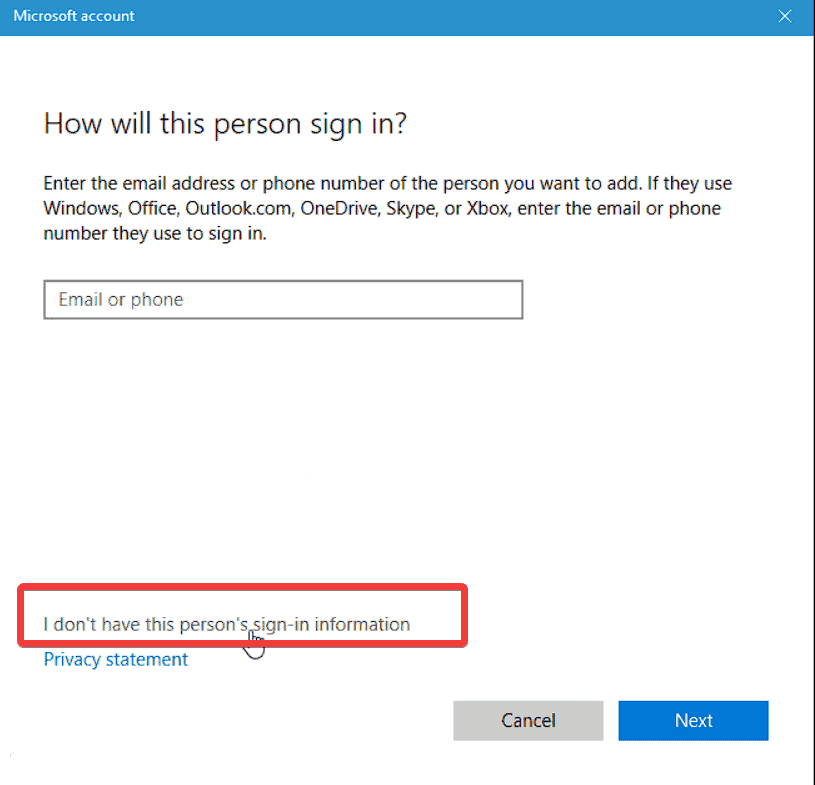
- Choose the I don’t have this person’s sign-in information option.
- Select Add a user without a Microsoft account.
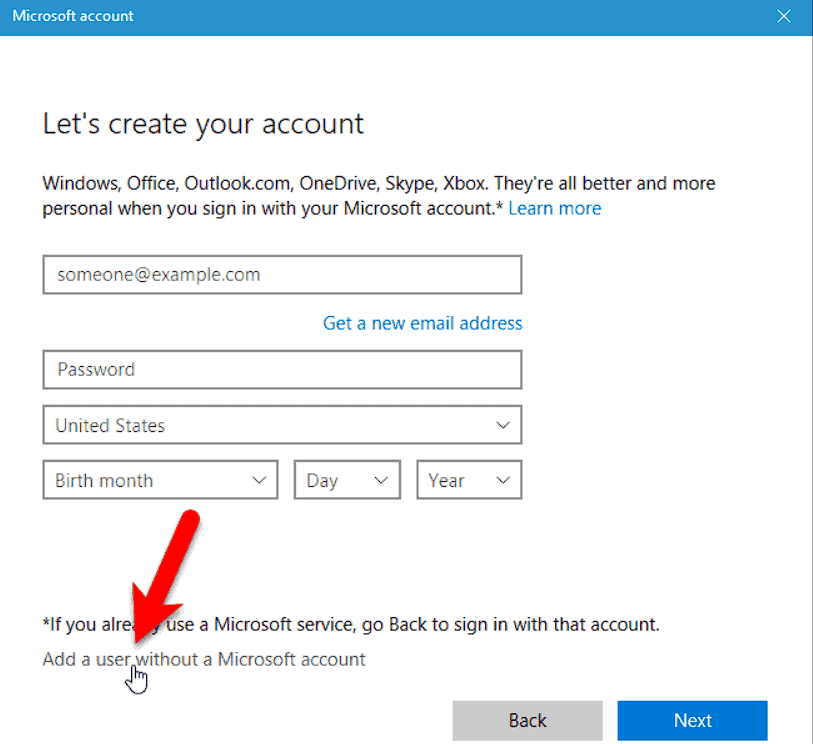
- Write the new username and password for the local account, and click Next.
- Follow the on-screen instructions to finish the setup and sign out of the current account to log in to the new one.
3. Use the Control Panel
- Press Win + X and select Control Panel.
- Set the View by option to Large icons or Small icons.
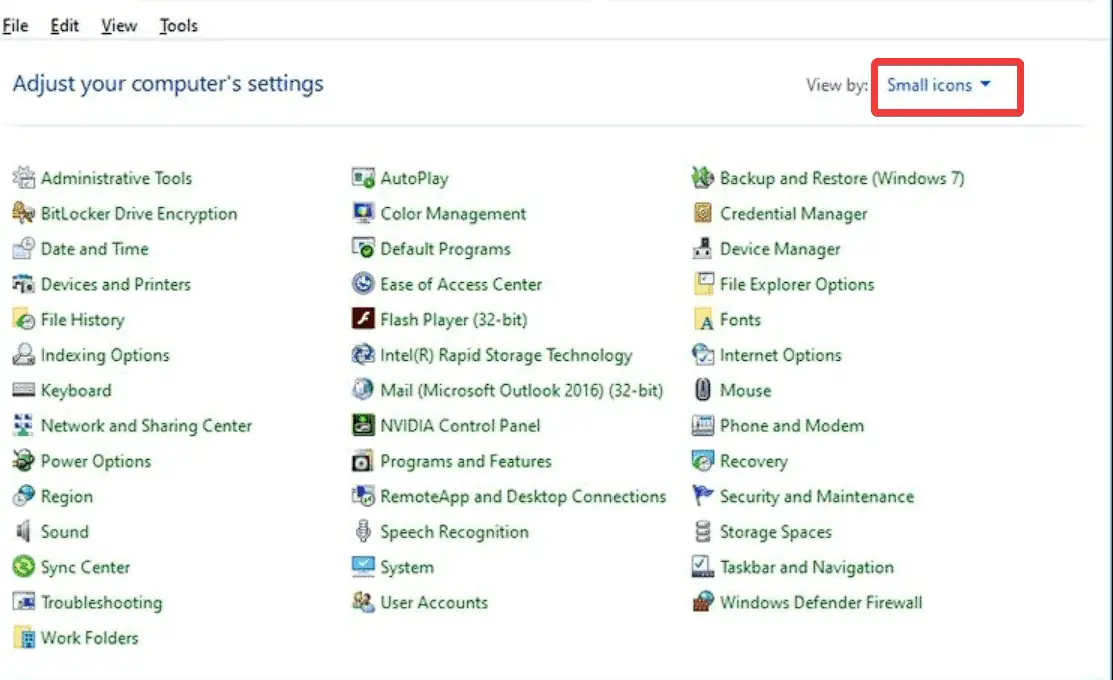
- Click on User Accounts, and select Change your account name.
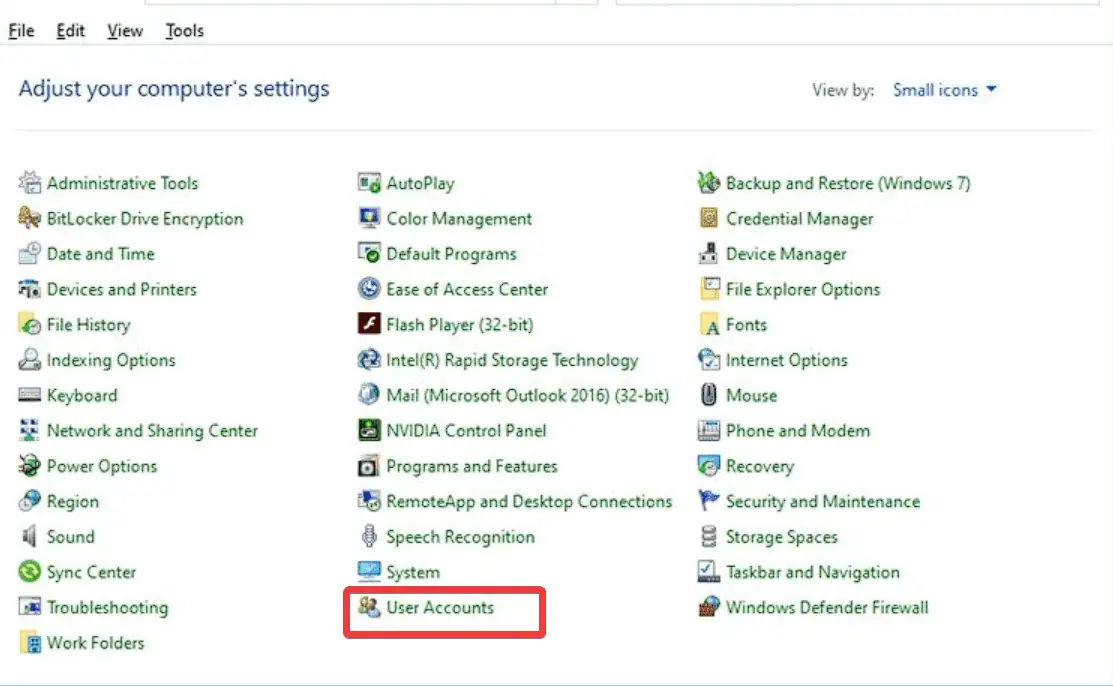
- Enter the new username, and click Change Name to apply.
- Sign out and log into the new Windows 10 account for the changes to take effect.
4. Rename the Users folder
- Create a system restore point before attempting this method to ensure you can revert any necessary changes.
- Press the Win + E keys, and navigate to the following path:
C:Users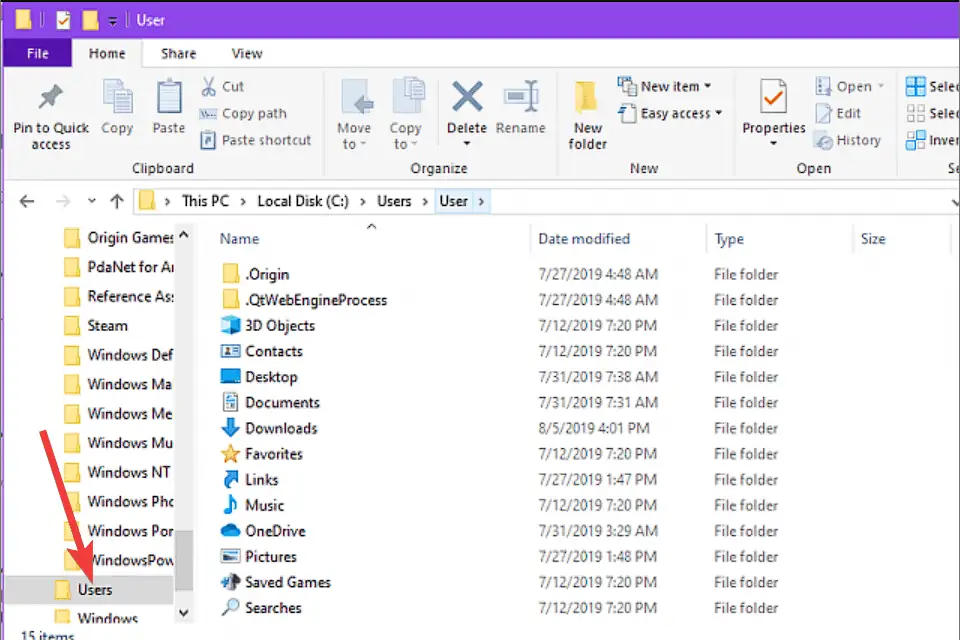
- Find your user folder that matches your current username.
- Right-click the folder and select Rename.
- Enter your new username and press Enter.
- A prompt asking for administrator permission will appear; click Continue.
- To view the changed username, sign out of your Windows 10 account and back in.
5. Use Command Prompt
- Press the Win + X keys on your keyboard and choose Command Prompt (Admin).
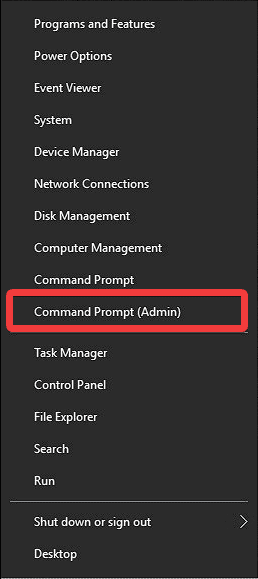
- Type the following command and press Enter:
netplwiz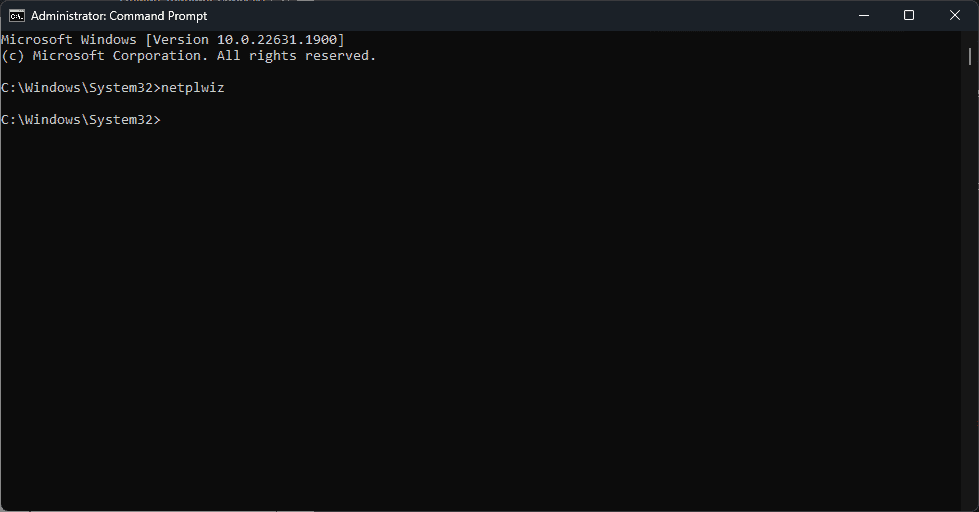
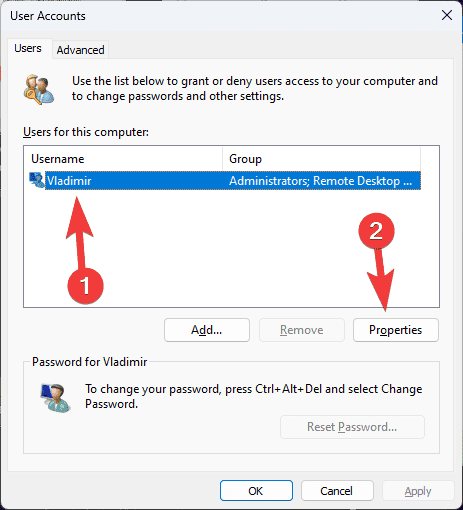
- Click on the current username, and select Properties.
- Navigate to the General tab.
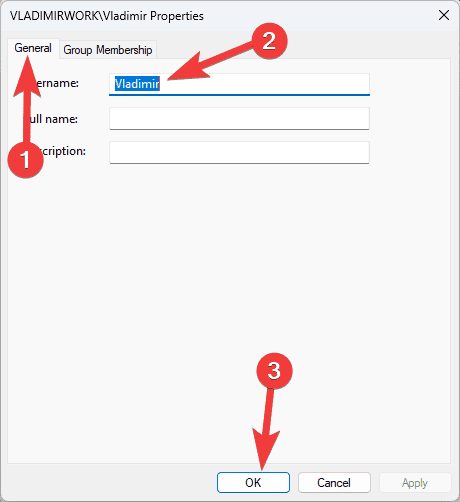
- Under the User Name section, enter your new username, and click OK to save the changes.
- Save any ongoing work, and click OK inside the prompt asking you to restart your PC for the changes to take effect.

6. Create a new User Account and transfer files
You can make a new user account and move everything to it if you wish to change your username while keeping all your files and preferences:
- Follow the information from method #2 presented above to create a new local user account with the username you want.
- Sign into the new account, and press the Win + I keys to open Settings.
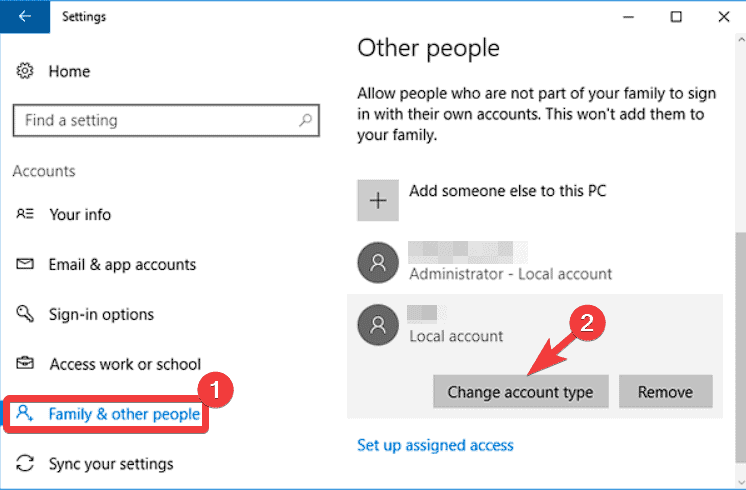
- Click on Accounts, and choose Family & other users.
- Select your old username, found under the Other Users section.
- Click on the Change account type option, and select Administrator.
- Sign out of the new account and sign back into the old one.
- Open File Explorer and navigate to the following path (where OldUsername will show your previous username):
C:UsersOldUsername - Copy all the files and folders you want to transfer.
- Navigate to the following path (where NewUsername is the newly-created account’s name):
C:UsersNewUsername - Paste all the copied files and folders into the new account’s folder.
Note: Before deleting the previous user account, remember to check the transferred files to ensure everything is in place.
How to change a username in Windows 10 without a Microsoft account?
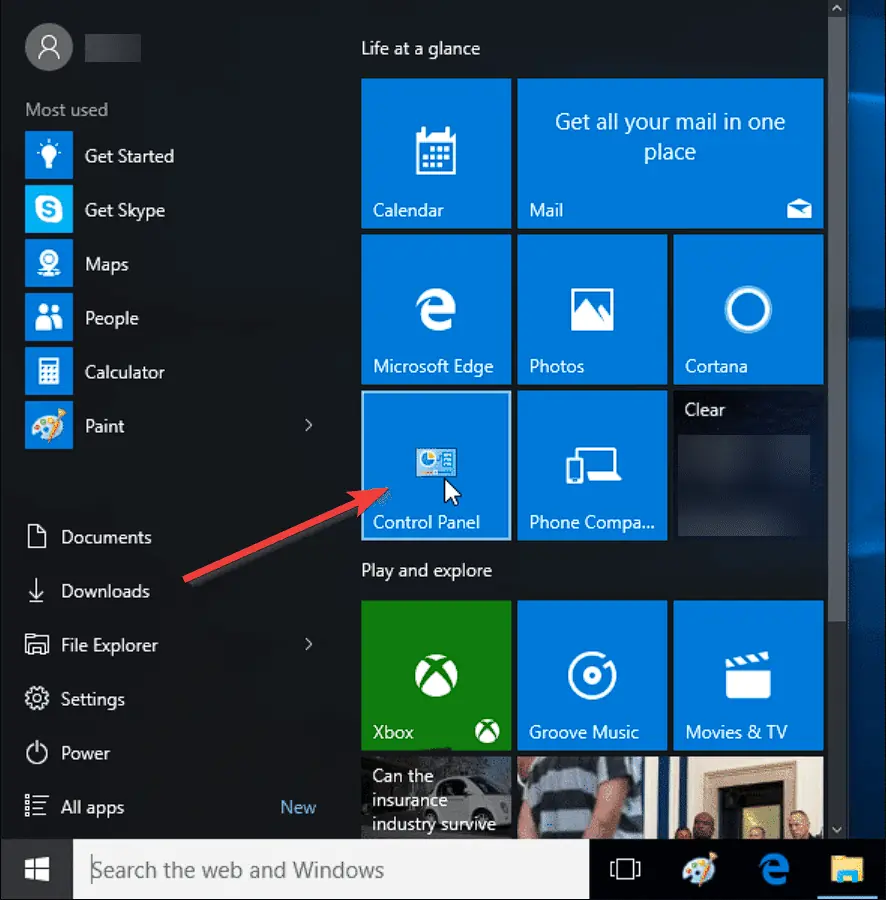
- Click the Start button and search for Control Panel, then open it.
- Find and open the User Accounts option.

- Click the User Accounts link again.
- User Accounts will open a new window, displaying relevant information and settings.
- Click on the Change your account name option.
- Write your new username inside the text box that appears.
- Click on the OK button to save the changes.
In Windows 10, changing your username is a quick and easy process that can be done through the Command Prompt or local account settings.
You can quickly adjust your user account for security purposes or to fit your tastes by carefully following the step-by-step directions in this article.
To see the changes take effect, don’t forget to save your work and restart your computer.
Read our disclosure page to find out how can you help MSPoweruser sustain the editorial team Read more


Improve this guide


User forum
0 messages