[FIX] Can’t Import Photos From iPhone to Windows [7 Methods]
Can’t import photos from iPhone to Windows?
As an iPhone user, you might feel self-sufficient. But for full-screen viewing, editing, and other tasks, it’s essential to import photos to your PC. Read on to find out why this problem happens and how to resolve it in 7 simple steps.
Why You Can’t Import Photos From iPhone to Windows
In my experience, the most common causes behind this issue are:
- Using outdated versions of iTunes or iCloud
- Having a faulty or loose USB cable
- Connectivity issues
- Absence of necessary drivers on Windows
- Incorrectly configured AutoPlay settings
- iPhone photos being stored in iCloud instead of the device
- File system incompatibility
- Interference of third-party software or anti-virus applications
- Not responding to the prompt during the connection.
How To Import Photos From iPhone to Windows – Fixes
1. Use File Explorer
The easiest way to import iPhone photos into a Windows 10/11 computer is to use the file explorer. This is not a wireless method. You’ll need a compatible and fully functional USB cable to establish a connection between these two devices.
- Connect your iPhone to a Windows PC using an appropriate USB cable.
- You’ll see a prompt on your iPhone: Allow this device to access photos and videos.
- Tap on Allow and your iPhone will be connected to the Windows computer.
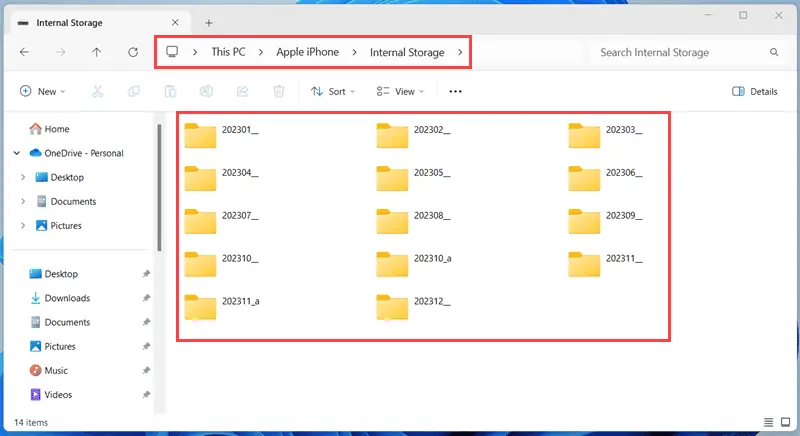
- Go to your computer and double-click on This PC. All the drives including the iPhone’s drive will be visible as a list.
- Double-click on the drive named iPhone.
- Double-click on the Internal Storage option.
- Next, there will be a list of folders named by the year and month of the photos taken.
- Click on the folder you want and access photos taken in that month.
- Select the pics you want to import and right-click to choose Copy icon.
- Navigate to the preferred folder on Windows and click on the Paste icon to import iPhone photos there.
2. Use the Windows Photos App
Windows 10 and 11 computers come with a Photos app that allows you to import photos from your iPhone securely. Here’s how:
- Connect your iPhone to Windows using a USB cable.
- Tap on Allow when prompted on the iPhone screen.
- On Windows, type Photos in the search field.
- Click on the best match from the results to open the Photos app.
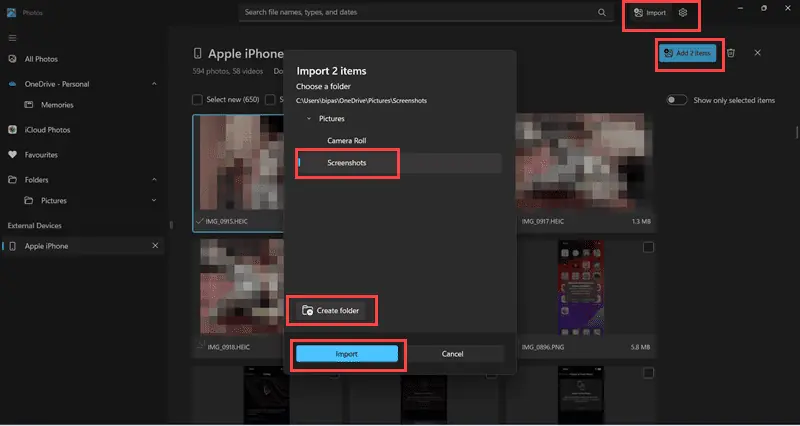
- On the app interface, click on the Import button from the top beside the search field.
- From the list of connected devices, click on the name of your iPhone.
- Select the photos you want to import.
- Click on Add X item(s), where X signifies the number of photos you’ve selected.
- You need to select a folder under the Pictures folder on your computer.
- You may also create a new folder there clicking on the Create folder button.
- Click on the Import button.
3. Use iCloud
iCloud app is another reliable method to import iPhone photos to a Windows computer.
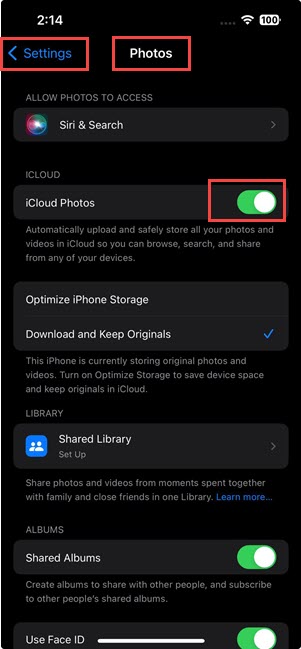
- Navigate to the Settings section on your phone.
- Select Photos to open the picture-related settings of iCloud.
- Make sure the slider button for iCloud photos is enabled. It means all images are saved in iCloud.
- On your Windows computer, open a web browser to visit iCloud.
- Log in using your Apple ID and password. If you have two-factor authentication enabled, a code will appear on the iPhone screen.
- Tap on Allow on your iPhone and enter the passcode into the Windows computer.
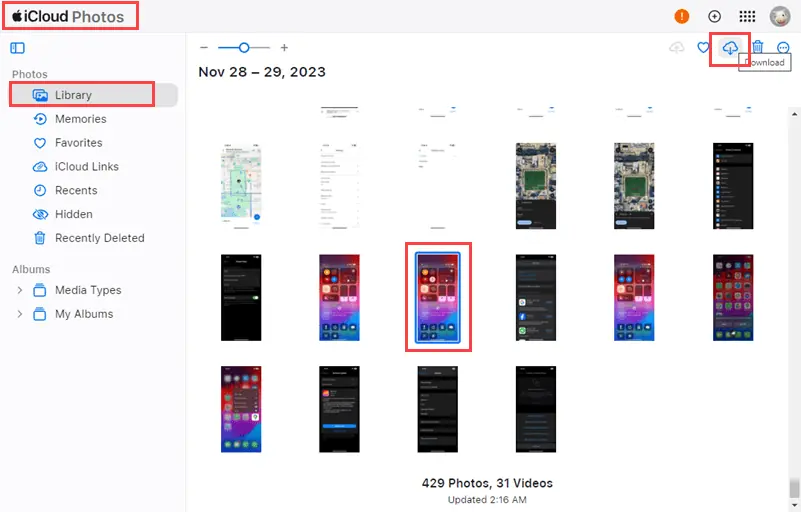
- Now, select Photos from the iCloud interface.
- Select the photos you want to import and click on the Download icon from the top panel menu.
4. Use a Cloud-Based File Storage App
Cloud-based storage apps like Google Drive can also import iPhone pictures to Windows.
- Open Google Drive, Dropbox, Box, or a similar app on your iPhone.
- Create a new folder and add a name to it.
- Upload your preferred photos from your iPhone into that folder.
- Now, go to your Windows computer and access that application.
- Select the folder where you have uploaded iPhone photos and download it to your Windows PC.
5. Use a Messaging App
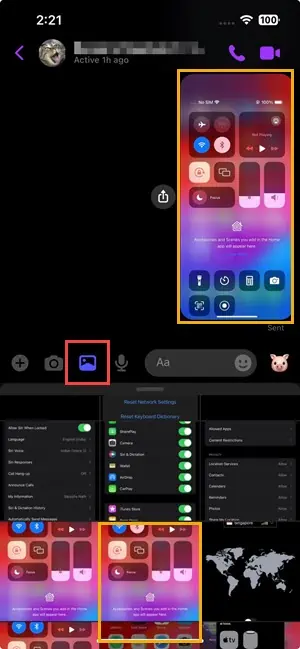
Messaging apps like Facebook Messenger or WhatsApp could be a convenient alternative. While using this approach, make sure to send your images to a trustworthy person or yourself.
- Open Facebook Messenger or WhatsApp on your iPhone.
- Select all the photos you want to import to Windows.
- Send them all to a reliable person or yourself.
- After sending them, open the same app on a Windows computer.
- Download the pictures to your Windows computer. If possible, create a separate folder and move the photos there for quick usage.
6. Use PC HelpSoft Driver Updater
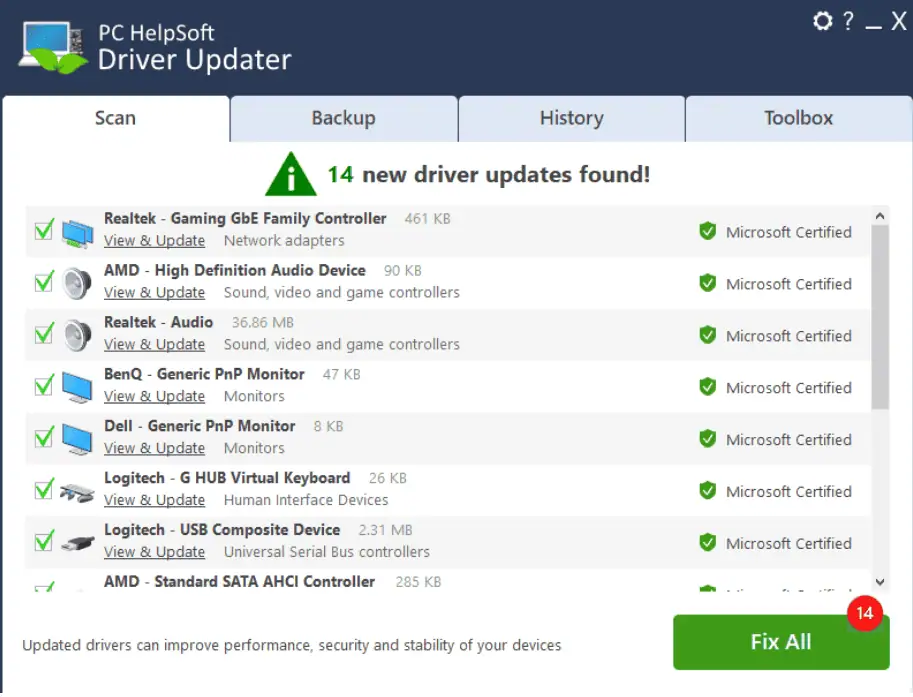
Sometimes, you might be unable to import photos via USB. In such cases, outdated drivers may be responsible. To fix any driver-related problem, you can rely on PC HelpSoft Driver Updater.
This software takes only one click to update all your drivers. This is how you can use it:
- Download and install PC HelpSoft Driver Updater on your Windows PC.
- The software will scan your computer and locate the outdated drivers. It will also generate a report.
- Select the driver you want to update. You may also select all the outdated drivers.
- The software will automatically update the drivers and your problem will be fixed.
7. Use Feem v4 to Share Files Offline
If you’re looking for efficient software for offline photo transfer, you can go for Feem.
- Install Feem on your iPhone and Windows computer.
- Open the app on your iPhone.
- It’ll show the nearby devices. Select your Windows PC.
- Connect the two devices using a password.
- Select your preferred photos from the iPhone and use Feem to send them.
- Accept the photos on your Windows PC.
If you can’t import photos from iPhone to Windows, you should try these approaches to fix the problem. In case the issue is caused by outdated Windows drivers, use PC HelpSoft Driver Updater to resolve it in no time.
Related readings:
Which of these approaches worked for you? Tell me in the comment section.
Read our disclosure page to find out how can you help MSPoweruser sustain the editorial team Read more





User forum
0 messages