Canon Printer Not Connecting to Wi-Fi: 10 Easy Solutions
Is your Canon printer not connecting to Wi-Fi anymore? Read on to find some easy yet proven solutions to this problem.
A printer needs to be connected to a computer to follow the print commands. Usually, the connection is established via Wi-Fi. So, if the printer isn’t connected to your network, printing won’t be possible.
Now, let’s see how to fix this problem!
Canon Printer Not Connecting to Wi-Fi – Fixes
When you can’t print anything using your printer because it’s not connected to your Wi-Fi, you should try the following approaches.
Solution 01: Check if Your Canon Printer Has Wi-Fi
For this to work, your printer has to have Wi-Fi capability. When you come across this problem, confirm if your Canon printer comes with Wi-Fi technology or not.
You can find this information from the following sources:
- Printer user manual
- The control panel of the printer
- Canon customer support
- Official website of Canon
- Canon Print app.
Solution 02: Check if the Canon Printer Is Connected to the Right Network
If you’re trying to connect your printer to a random network to which you don’t have access, it’ll surely fail. So, you must make sure that your printer is connected to your Wi-Fi network.
For that, check the SSID. That’s the name of the Wi-Fi network your printer is connected to.
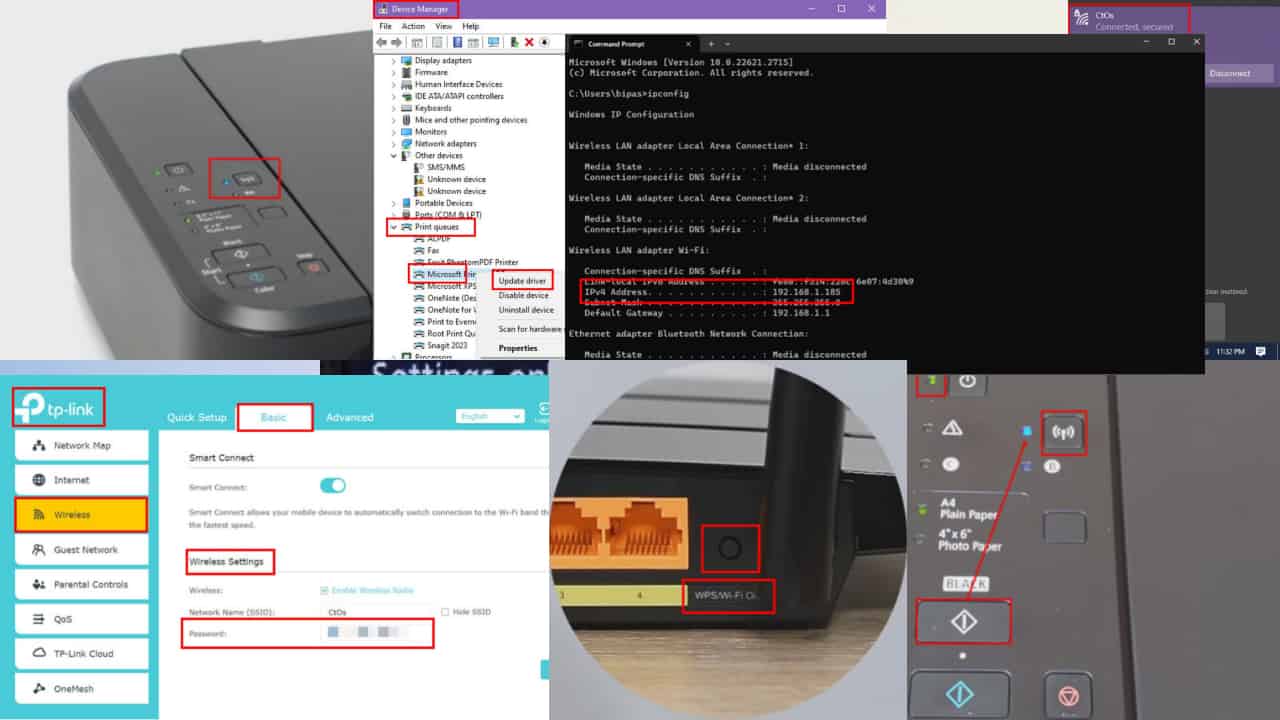
- Click on the Wi-Fi or Internet access icon on the System tray on your Windows PC.
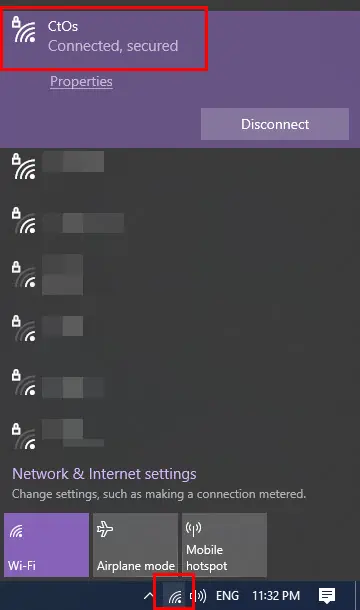
- Note down the name of the Wi-Fi network to which your PC is connected.
- On the printer, connect to the same one.
Solution 03: Enter the Correct Wi-Fi Password
To connect your Canon printer to the Wi-Fi, you must enter the correct password.
Here’s how:
- Access the router web portal by entering its IP address, like 192.168.1.1.
- Enter your user ID and password for the router web portal.
- On the left side navigation panel, you should see many router options.
- Find the option that says Wireless and click on it.
- Click on the Basic tab on the right side menu of the Wireless menu. On some routers, you may not see the Basic tab.
- Under Wireless Settings, you should see the SSID and Password.

- Note down the password and enter it when connecting your Canon printer to the same Wi-Fi SSID.
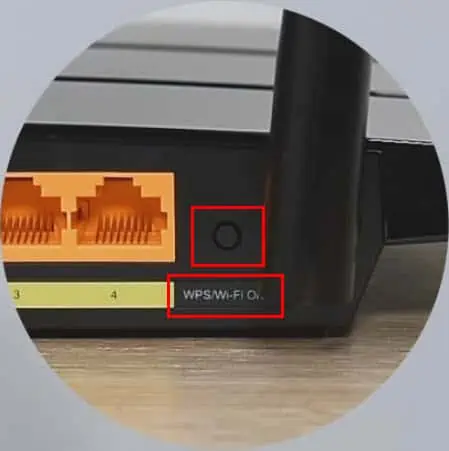
Solution 04: Use the WPS Button
Alternatively, you can establish a connection between the Wi-Fi and the printer using WPS.
WPS means Wi-Fi Protected Setup and your router should have a specific button for that. This technology lets you connect devices to your network without any need to enter a password.
This is how you’ll be able to connect these two devices:
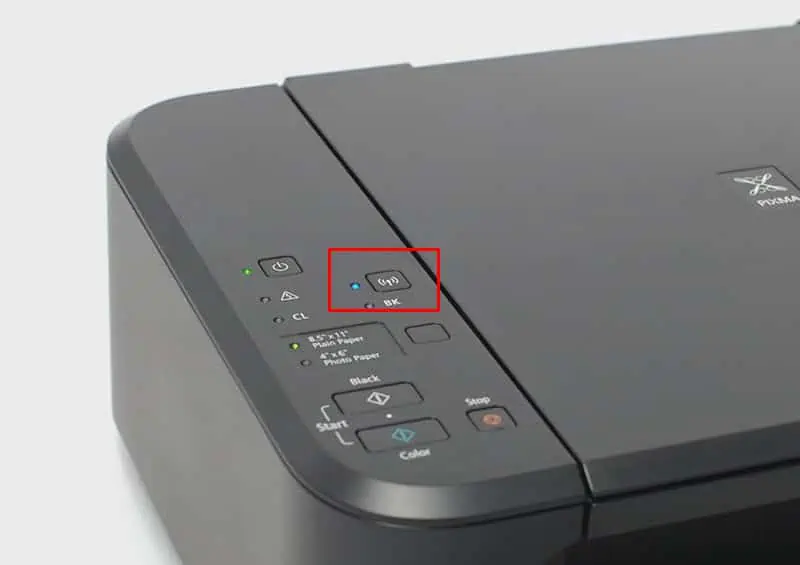
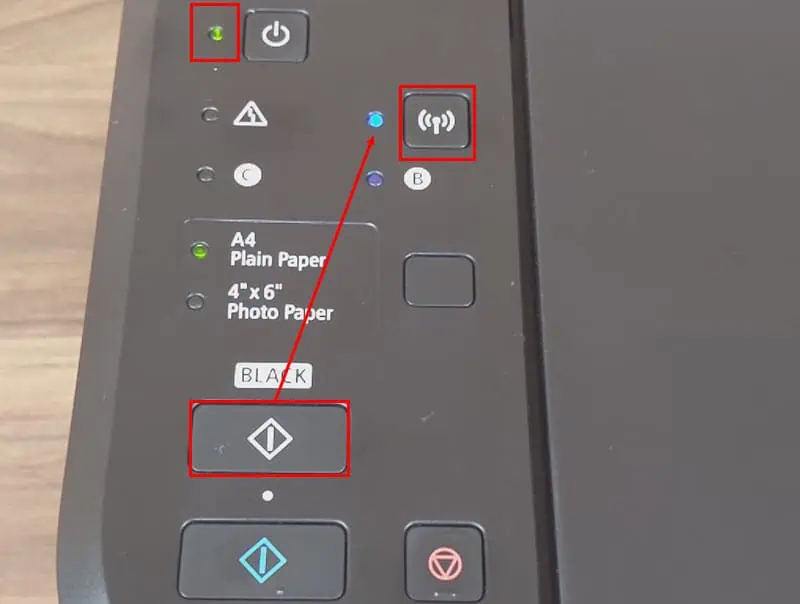
- Press and hold the Wi-Fi button until the Power light starts flashing.
- Press the Black copy button and press the Wi-Fi button.
- Now, the Wi-Fi light will also start to flash.
- Locate the WPS button in your router and press it for a few seconds before releasing it.
- The flashing of Power and Wi-Fi lights on your printer will continue until the connection is established.
- When the flashing stops and the lights are on normally, it means the printer is connected.
Solution 05: Restart Your Printer and Wi-Fi
If your printer is not responding yet, you can try restarting both these devices. To restart a printer, follow these steps:
- Press the power button to turn off the printer.
- Wait a few seconds.
- Press the power button again to turn it on.
To restart your router, simply switch off the power connector’s switch to which the router adapter is connected. After 10 seconds, switch on the power adapter again. Wait for the router to stabilize and light up the data transfer LED.
Solution 06: Check Wireless Signal Strength
Is your printer located far away from the router? In that case, chances are that it’s unable to establish a stable connection due to the weak signal.
You can check the Wi-Fi signal strength with the following steps:
- Go to the Settings menu of your printer.
- Navigate to the Network or Wireless section to find Wi-Fi settings.
- Check the signal strength indicator to find out if it shows white waves or just a grey Wi-Fi icon.
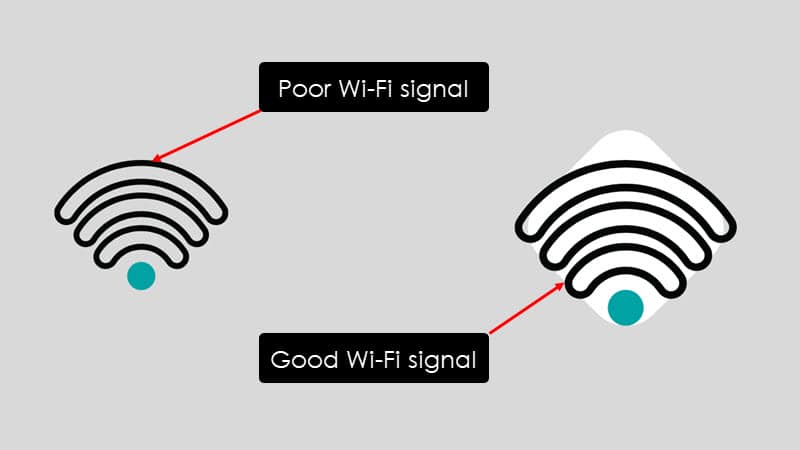
- If it’s grey, it means the signal strength is poor.
- You need to bring the Canon printer closer to the router.
Solution 07: Configure IP Address Properly
IP address configuration plays a great role in establishing a stable Wi-Fi connection.
- Type cmd in the search field and click on Command Prompt to open it.
- Type ipconfig and hit Enter.
- There, you’ll see the IP address of your own computer.
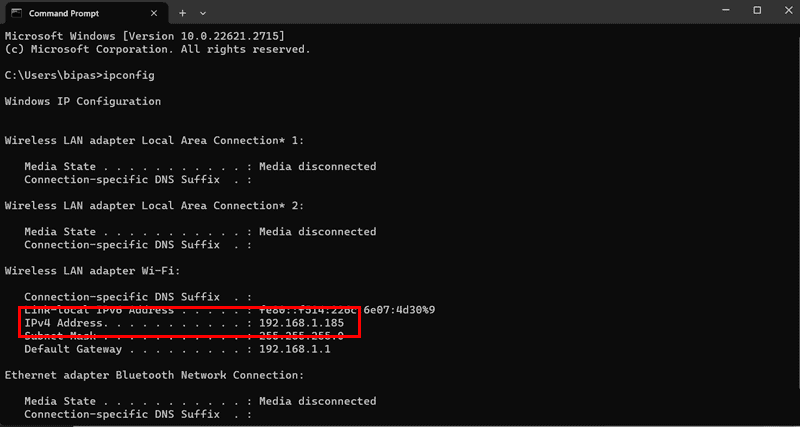
- Now, you need to choose an IP address that’s close, but not exactly the same.
- For example, your IP address is 192.168.1.185. You can choose 192.168.1.186 and enter that in your printer. You can enter between 1 to 256 in the 4th place of the IP address.
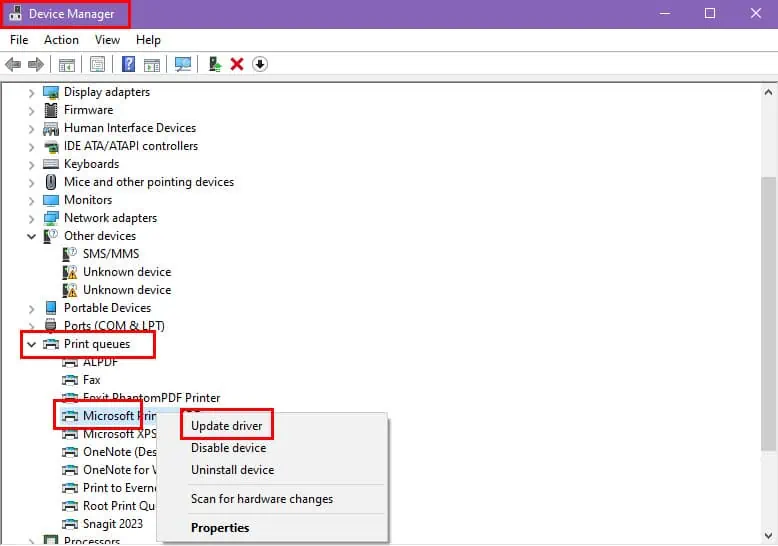
Solution 08: Update Printer Drivers
If your Canon printer driver is outdated, you may experience connection issues. To resolve this, you must update your printer driver using these steps:
- Type device manager in the search field of the taskbar.
- Click the best match to navigate to that section.
- Double-click on Print queues to open the list of printers.
- In the case of an outdated Canon driver, you’ll see a yellow question mark beside the printer name.
- Right-click on that and select the Update Driver option.
- Select Search automatically for drivers.
- The computer shall locate the driver and display it if the printer is supported by Windows.
- Select it and the driver will get updated automatically.
Solution 09: Reset Network Settings
Another effective method to fix connection issues is to reset the network settings on your printer.
You should follow the model-specific instructions that come with the manual to reset it. However, if you’ve got a Canon printer with an LED display, follow these steps:
- Use the Left and Right navigation keys on the OK button to go to Setup on the LED screen.
- Press OK to enter the Setup menu.
- Use the Right navigation key to go to Device settings and press OK.
- On the Device settings screen, scroll down to the bottom to find the Reset setting.
- Press OK.
- Now, go to the Reset all option and press OK.
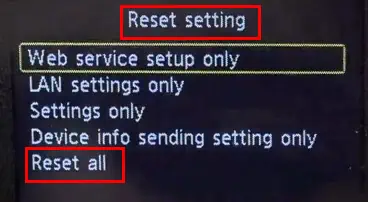
- On the Reset all warning message, select Yes and press OK.
Now, you can set up a fresh connection with your Wi-Fi router and the printer shouldn’t have any issue connecting.
Further readings:
- Printer Keeps Going Offline on Windows 10 & 11 [Fix]
- Canon PIXMA MG2522 Driver – How to Download and Install Properly
Solution 10: Contact Canon Customer Support
If you have tried all the above solutions but are still having trouble connecting, you don’t have any other choice but to contact Canon’s customer care team. They should be able to assist you if there’s a hardware-related issue.
So, now you know how to fix your Canon printer not connecting to Wi-Fi. Just implement the methods one after another and the issue will be resolved in no time.
Do you have any questions regarding this printer connection issue or having trouble performing any methods? Write them down in the comment section so that I can get back to you.
Read our disclosure page to find out how can you help MSPoweruser sustain the editorial team Read more


Improve this guide


User forum
0 messages