4 Ways to Archive Emails in Outlook
Archiving is essential because, over time, your inbox may get congested with a pile of old emails, making it challenging to find the messages you need. This may also take a toll on your device, slowing it down considerably.
It is possible to perform this process manually or automatically in Outlook, and this guide will give you the exact steps you need to follow in order to archive emails in Outlook.
1. Manually archive emails in Outlook 365
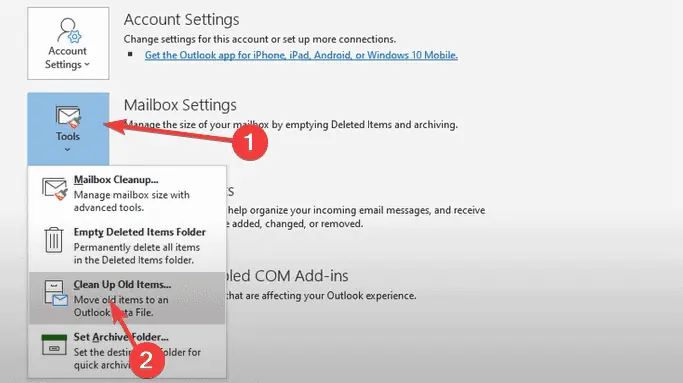
- Click on File.

- Expand Tools and select Clean up old items.
- Select Archive this folder and all subfolders, pick the folder you need to archive, under the Archive items older than, select a date, and click the OK button.
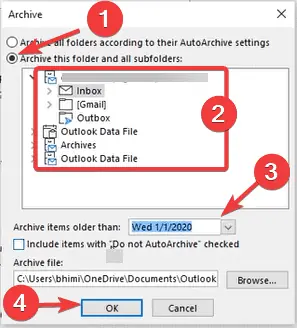
- Outlook will archive the selected emails in this folder and within the date range in a .PST file.
2. Auto-archive emails in Outlook
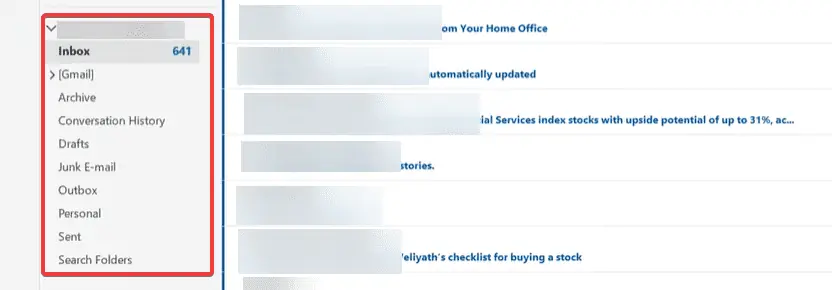
- Select the folder you want to archive on the left pane of the Outlook interface.
- Click on the File tab.
- On the left pane, click on Options.
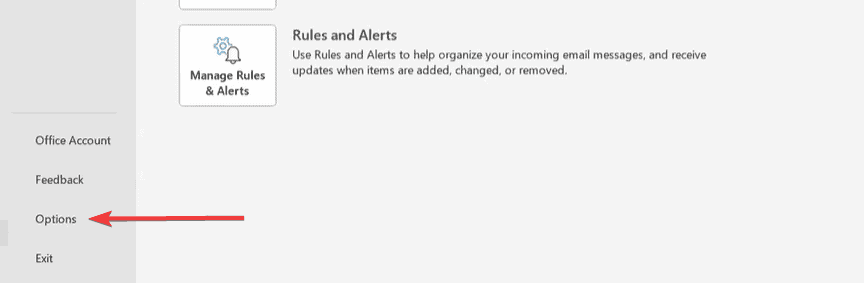
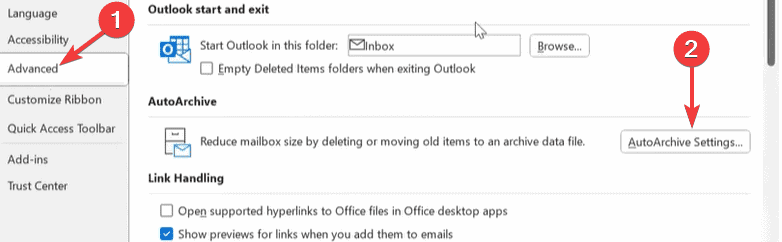
- Select the Advanced tab, then click the AutoArchive Settings button on the right.
- Tick the Run AutoArchive every option, input your preferred number of days, and click the OK button at the bottom. All your emails will be archived in the selected folder according to your settings.
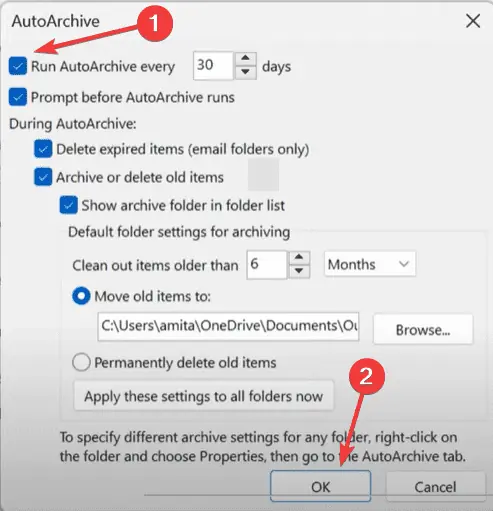
- Optionally, before clicking the OK button, you may edit other settings like Prompt before AutoArchive runs, Delete expired items (email folder only), Archive or delete old items, Show archive folder in folder list, etc. Simply try what suits you.
3. Auto-archive additional folders in Outlook
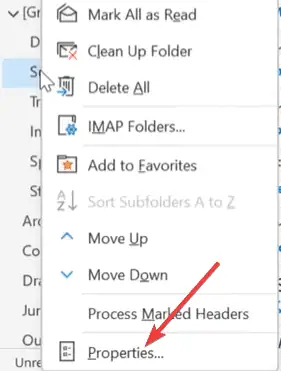
- Right-click on the folder you need to auto-archive and click on Properties.
- Select the AutoArchive tab and click Archive items in this folder using the default settings, then click Apply and OK.
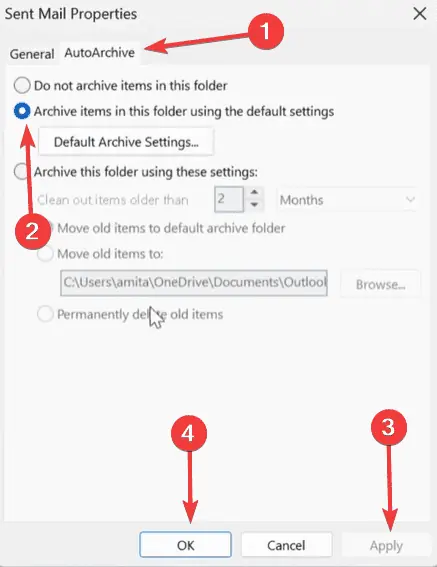
- Optionally, you may click the Default Archive Settings button, then change some settings before clicking Apply and OK.
The above auto-archiving process will only work if you have initially turned on auto-archiving for one of your email folders.
4. Archive Outlook emails using the Online Archive feature
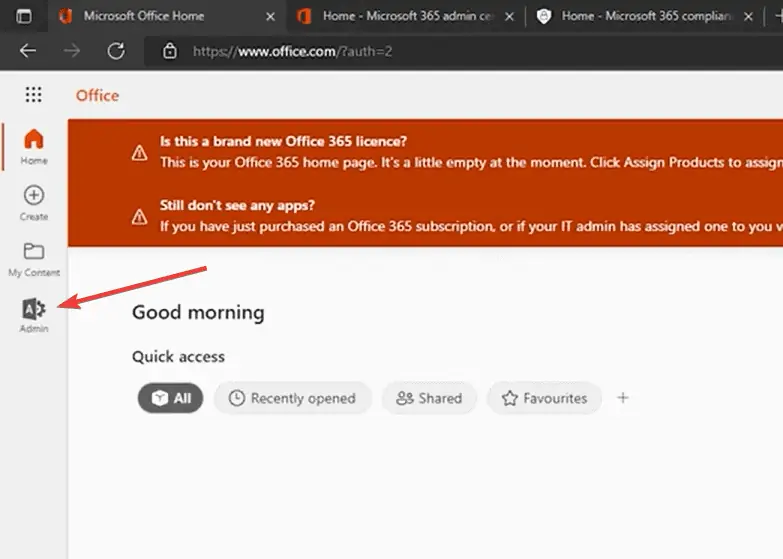
- Log into the Microsoft 365 web portal and click on the Admin icon.
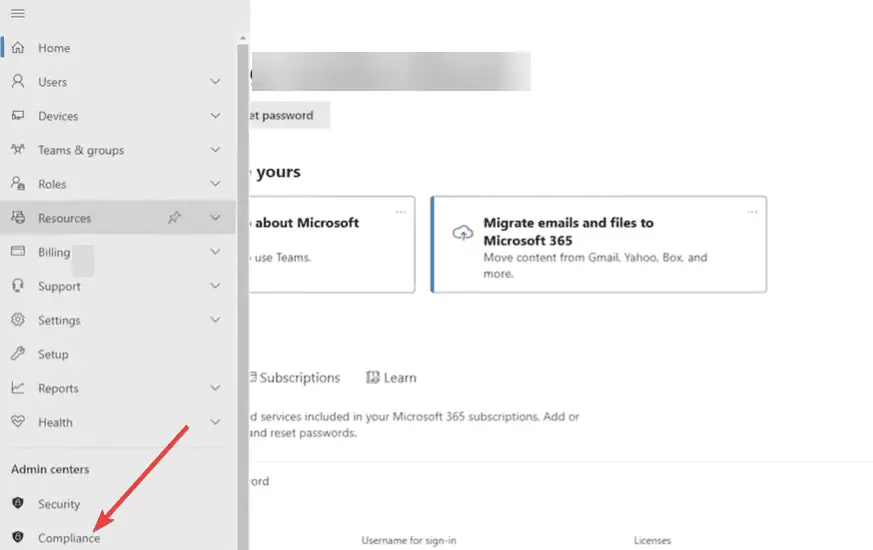
- Click the menu (3 horizontal lines) on the top left, and select Compliance.
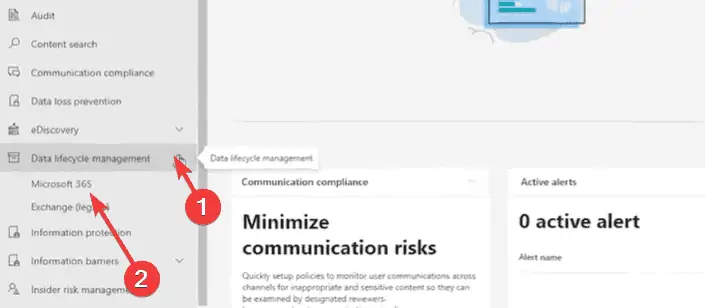
- Expand the Data lifestyle management option on the left pane and select Microsoft 365.
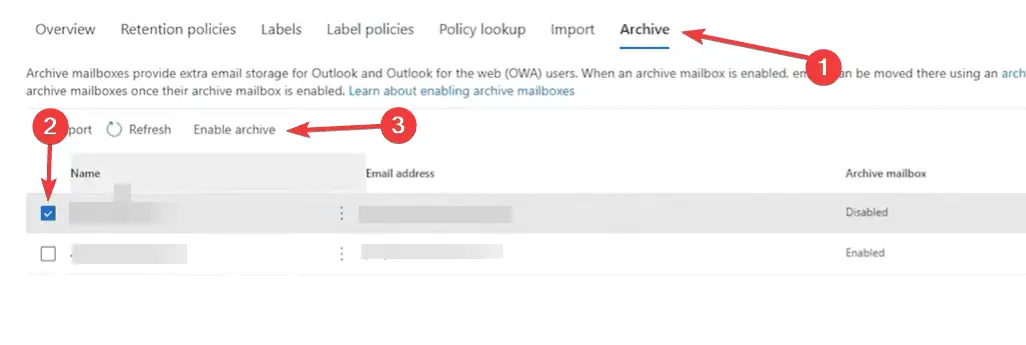
- Click Archive, select the email you need to enable it for, and click Enable archive.
- Relaunch Outlook, and the archive function should be working. Remember that this solution only works if you use Microsoft 365 and you have access to the Admin panel.
If you have read this far, you should know all the possible solutions to archive emails in Outlook. Most of the solutions discussed are very easy to implement. You may also consider manually deleting individual emails, but this solution will not be practical if you have many emails to delete.
If you have other solutions, our readers will love to hear from you. So please leave your remarks in the comment section below.
Read our disclosure page to find out how can you help MSPoweruser sustain the editorial team Read more


Improve this guide

User forum
0 messages