A Driver Cannot Load On This Device [Fixed]
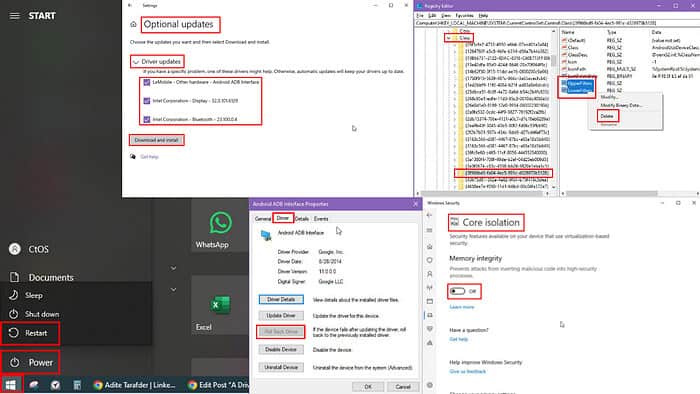
If you’re seeing the “A driver cannot load on this device” error on your Windows PC, you’re not alone. It can prevent your PC from functioning properly, leading to frustrating delays and disruptions.
Many users face challenges when drivers fail to load, especially after updates or system changes. Keep reading to discover effective solutions and get your device back on track.
1. Quick Fixes
Before moving on with more technical solutions, try these simple steps first:
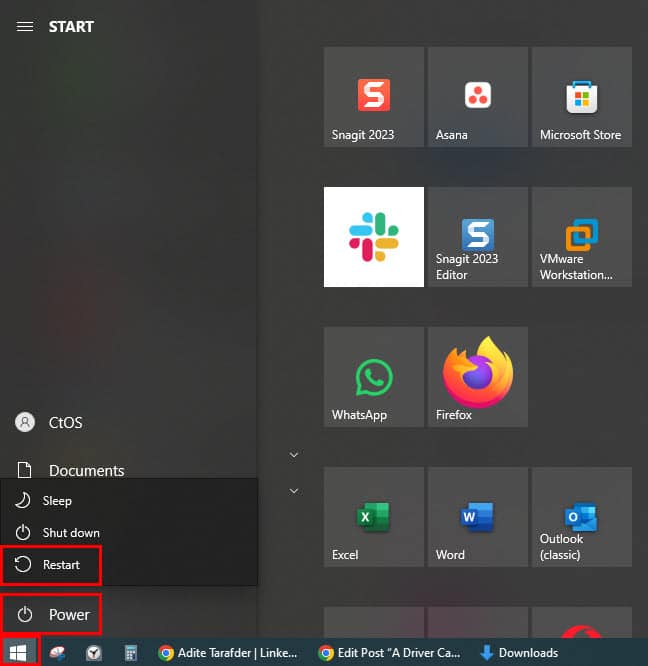
- Restart your PC from the Start Menu > Power button > Restart button.
- Try disconnecting and reconnecting the hardware that the driver controls. Often drivers can’t load just because the Windows OS can’t communicate with poorly seated hardware.
- Is the hardware you’re using a plug-and-play device? Instead of using the front USB connectors, use one on the back of the PC, preferably the blue one that offers USB 3.0 capabilities.
- If your Windows PC is based on an ASRock motherboard, the AsrDrv.SYS file of the ASRock Utility often causes this driver-loading issue. Uninstall the ASRock Utility from your PC and check if it works. If it does, install the latest version from the official ASRock Utilities Update portal.
2. Install Optional Windows Updates for Drivers
- Click on the Start button in the bottom left of the PC screen.
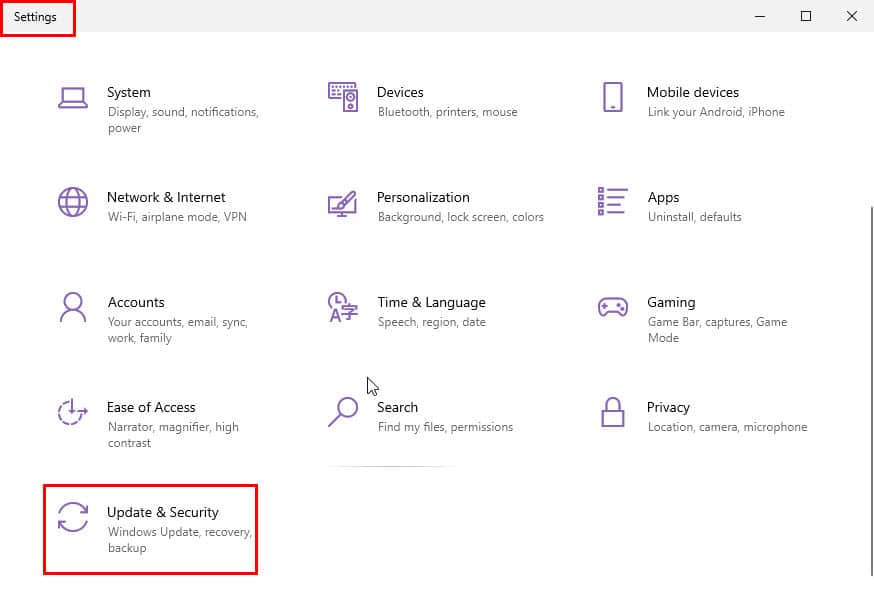
- Select Settings (the gear icon) from the list of options.
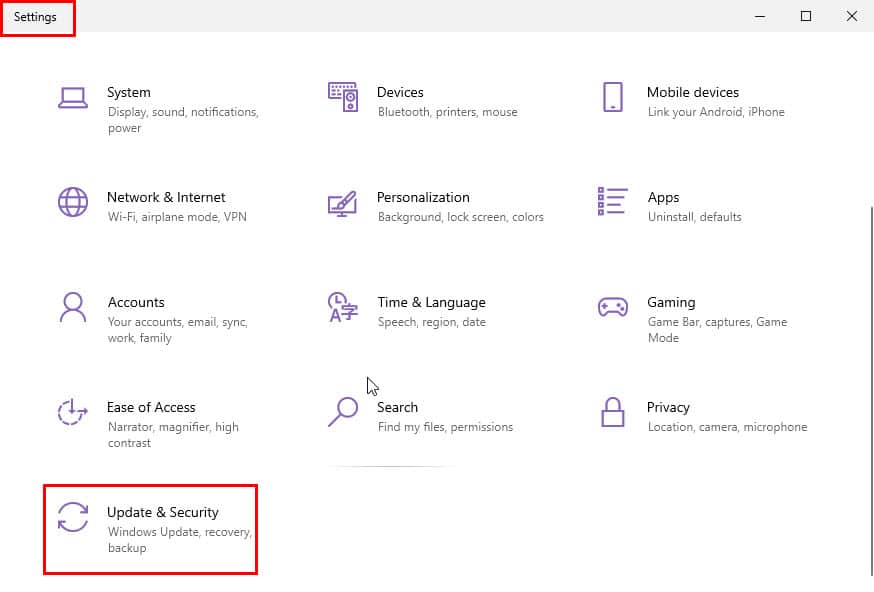
- Click on Update & Security.
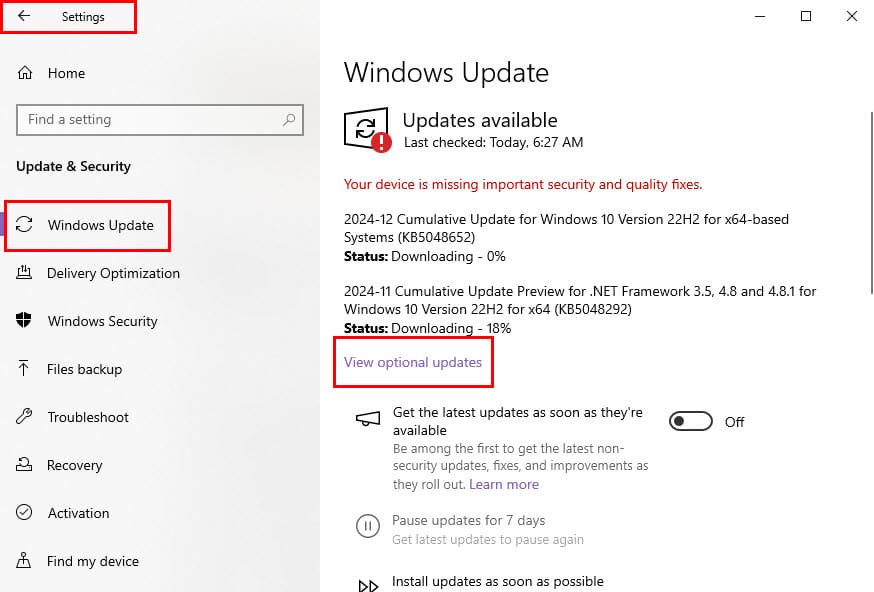
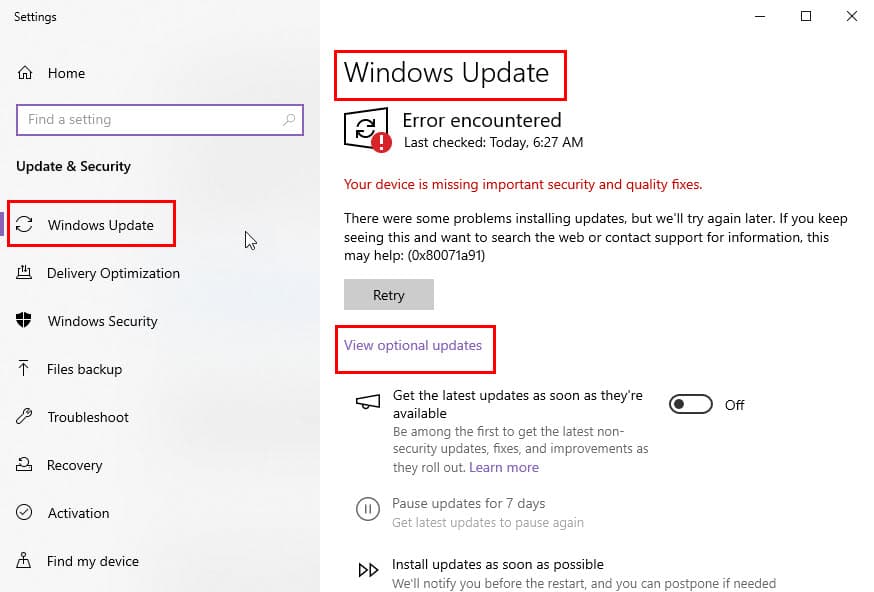
- From the left-hand menu, choose Windows Update.
- Click on the Check for updates button.
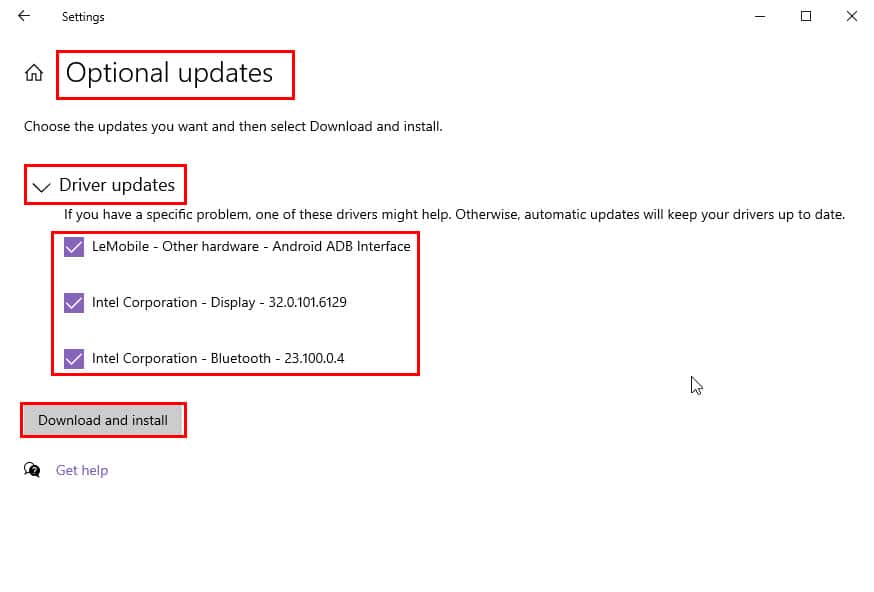
- After the search completes, look for a link that says View optional updates. Click on that hyperlink.
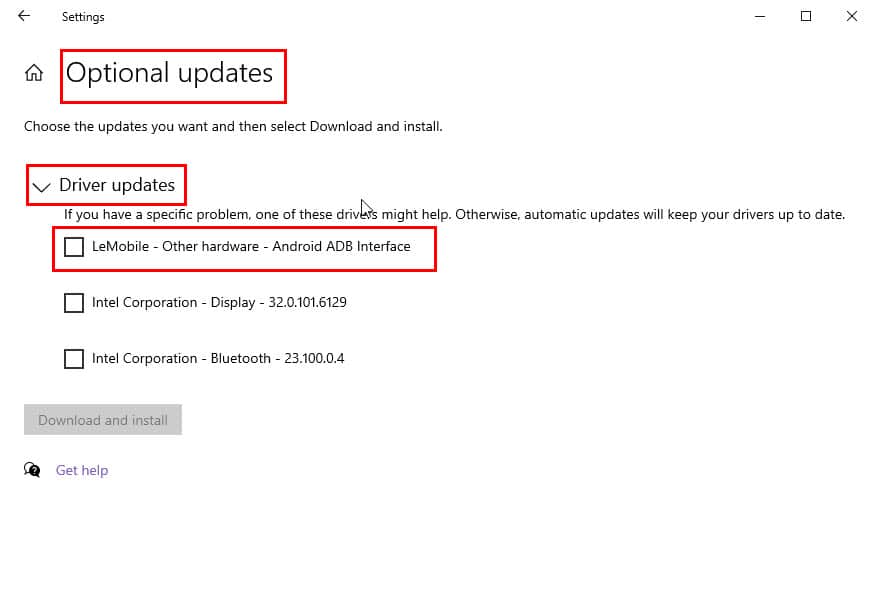
- In the Optional updates dialog box, expand the Driver updates section.
- Browse the list and check the box next to each driver you want to install.
- Click the Download and install button at the bottom of the screen.
- After the installation is over, reboot your PC to apply the changes.
3. Toggle Off the Windows Memory Integrity Setting
- Hit the Start button at the bottom left corner of the screen.
- Choose the Settings or the gear icon from the Start Menu.
- In the Settings window, click on Update & Security.
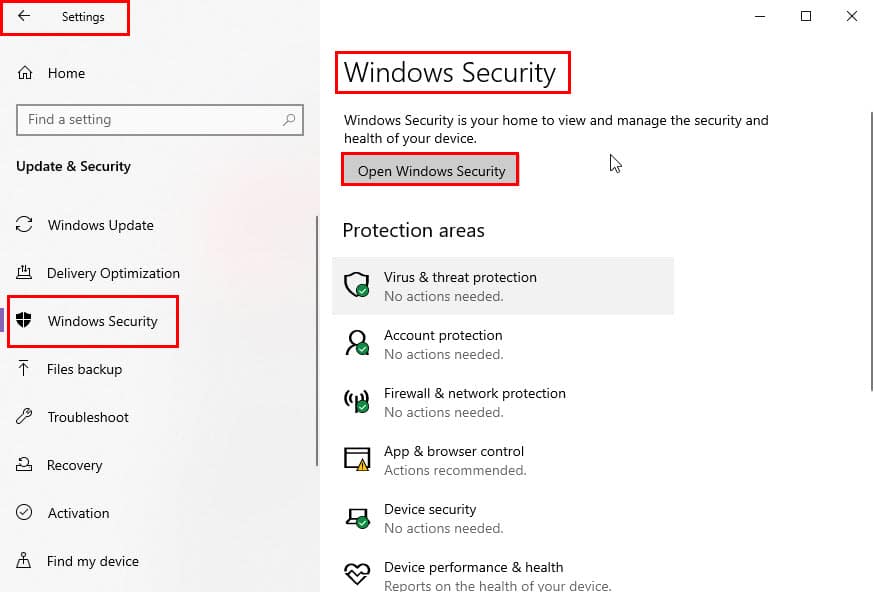
- When on Update & Security, from the left-hand menu, choose Windows Security.
- Click the Open Windows Security button at the top of the screen.
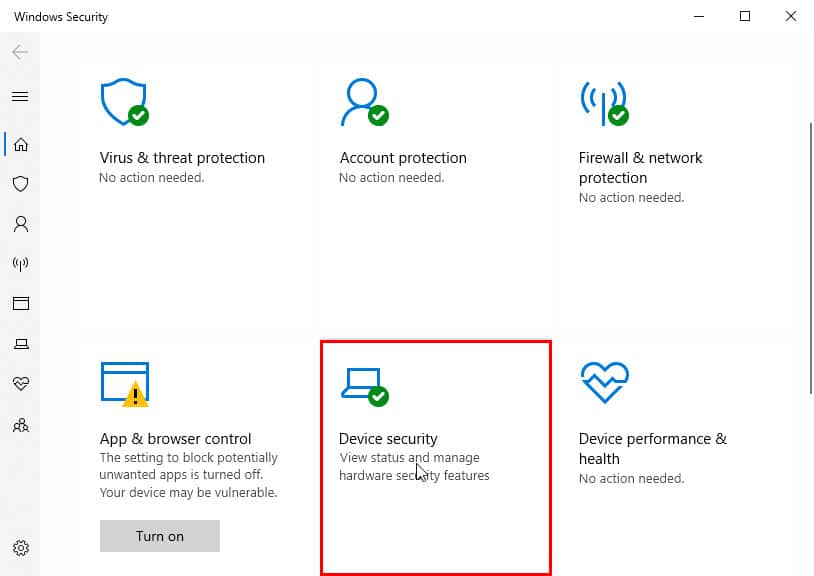
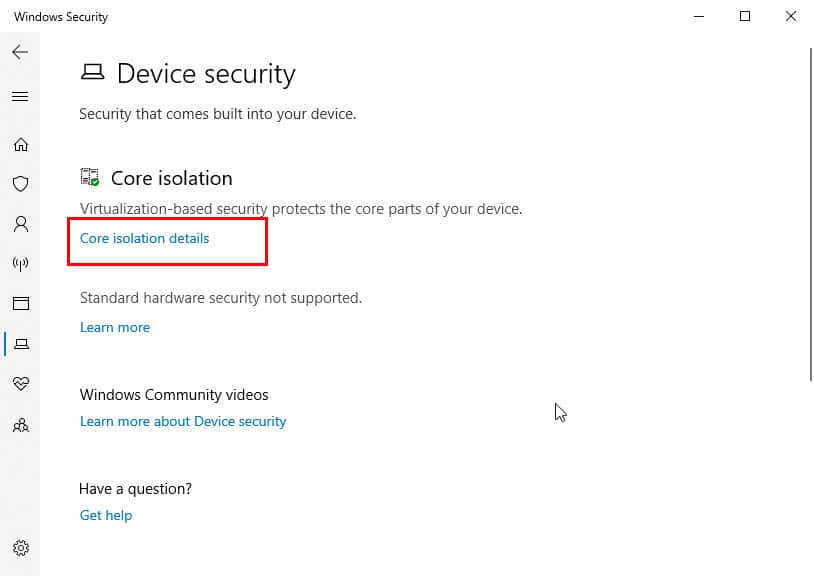
- In the Security at a glance window, select Device security.
- Under the Core isolation section, click on Core isolation details.
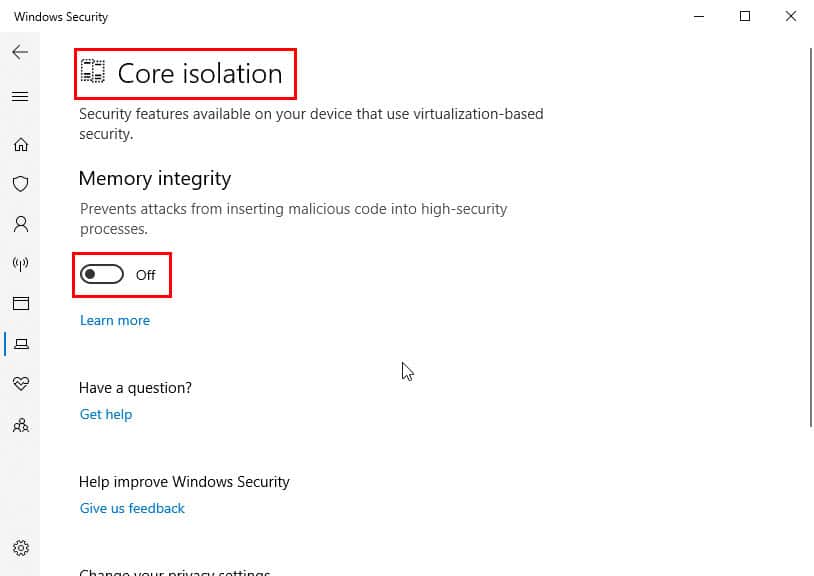
- Locate the Memory integrity toggle switch and click it to turn it off.
- If prompted, confirm the action by clicking Yes or entering your administrator password.
- Restart your computer to apply the changes.
4. Roll Back Recently Installed Windows Updates
- Press the Windows + I keys together to open the Settings app.
- Select the Update & Security option.
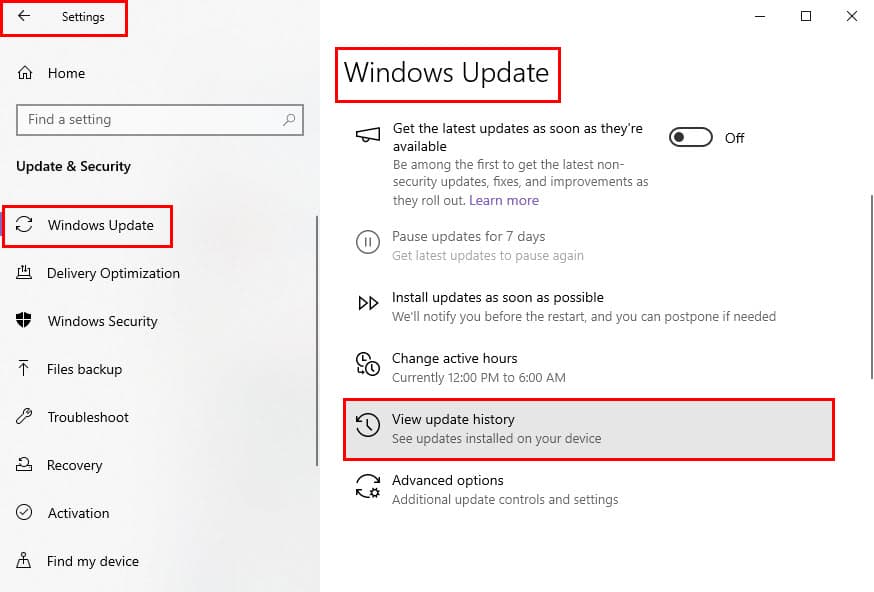
- From the left-hand menu, click on Windows Update.
- Click on View update history to see the list of installed updates.
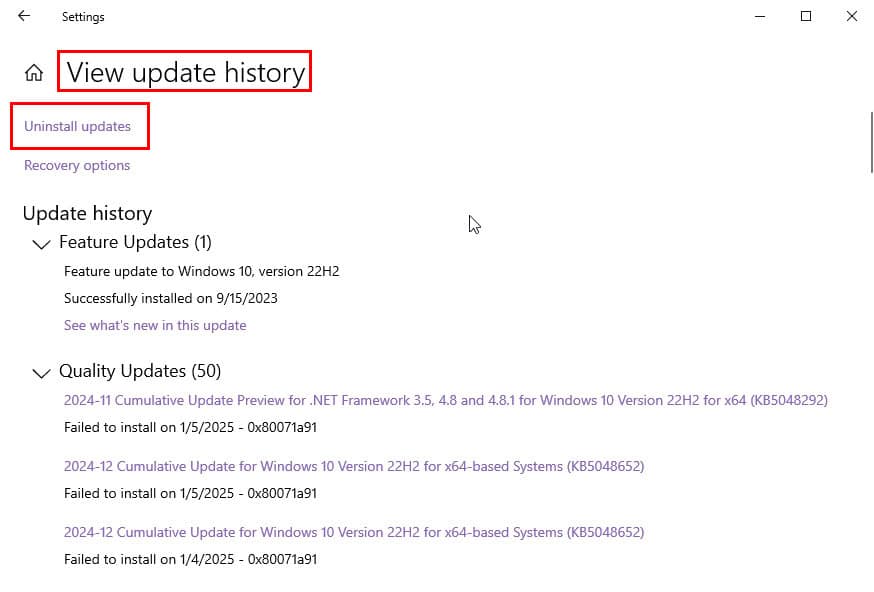
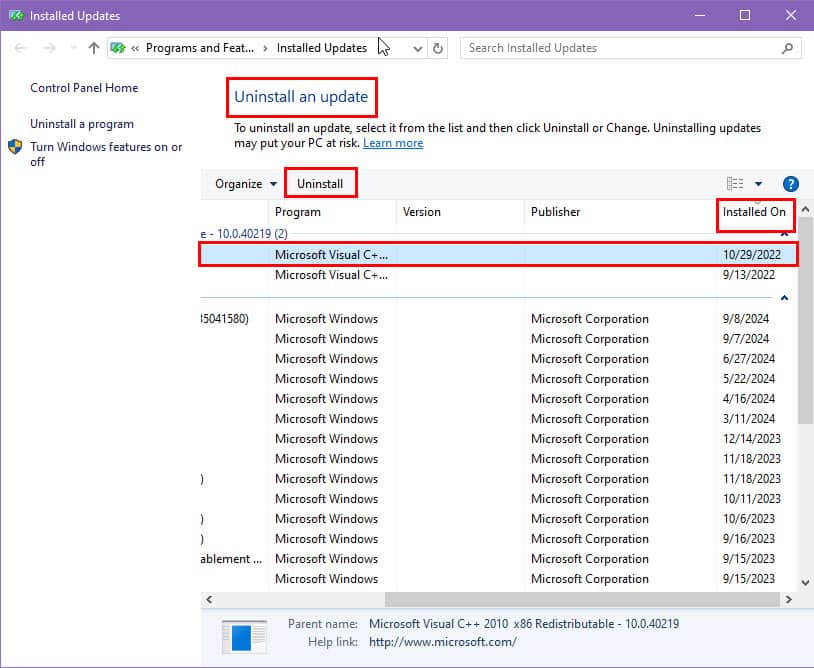
- Click on Uninstall updates at the top of the screen.
- A new window will open showing the list of installed updates.
- Find the most recent one by looking at the Installed On column.
- Click once on the update you want to remove to highlight it.
- Again, click the Uninstall button at the top of the list.
- Confirm the uninstallation by clicking Yes when prompted.
- Wait for it to uninstall.
- Reboot your PC if prompted to complete the process.
5. Tweak the Windows Registry
Locating the Class GUID for the Problematic Driver
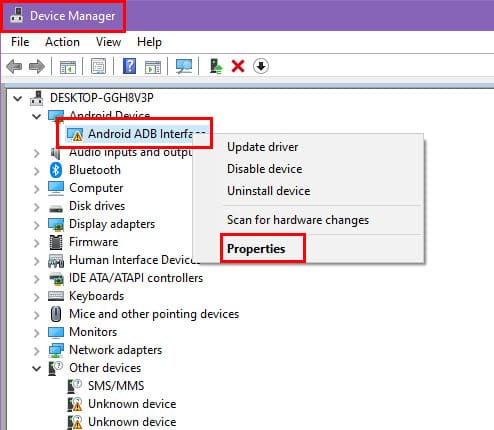
- Right-click on the Start Menu button and select Device Manager from the Power User context menu.
- Locate the device for which the driver is unable to load.
- Select it, right-click, and choose Properties from the context menu.
- The Device Properties dialog box will open.
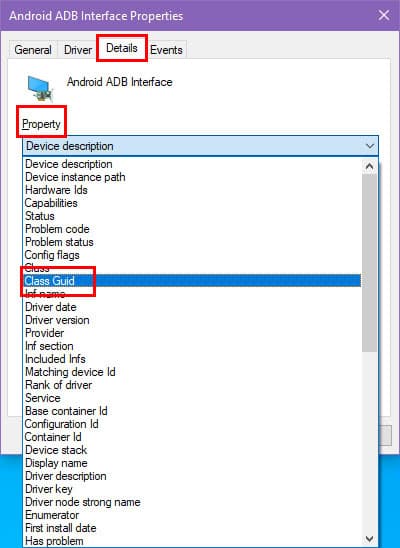
- Navigate to the Details tab and click on the Property drop-down menu.
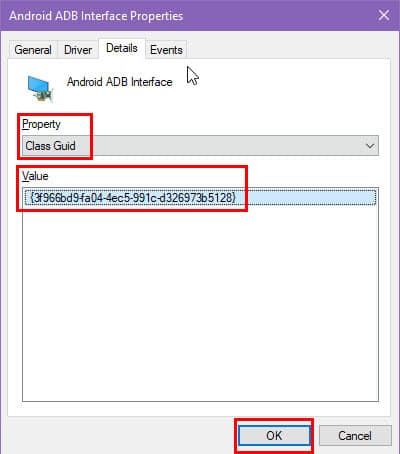
- Select the Class GUID from the Property list.
- You should now see the Class GUID Value in the box below Class GUID.
- Keep this dialog box open.
Delete UperFilters and LowerFilters Registry Values
- Press the Windows + R to bring up the Run dialog box.
- Type regedit in the Run command box and hit Enter.
- The Registry Editor dialog box will open.
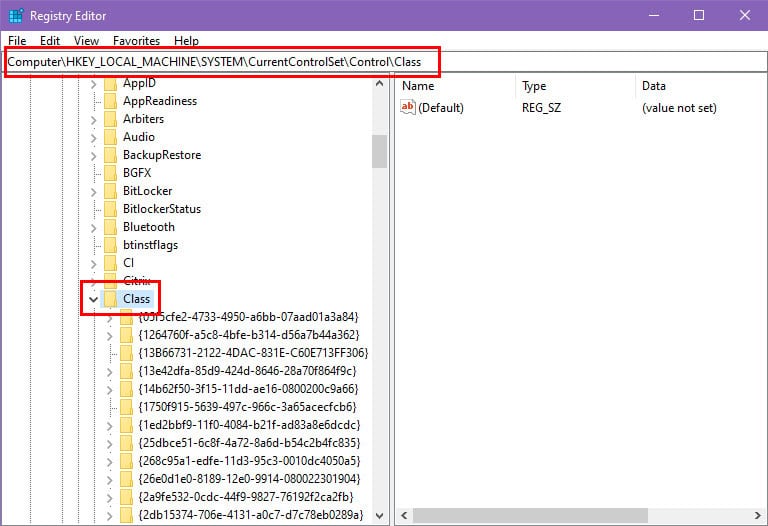
- Enter the following Windows Registry address in the address bar at the top.
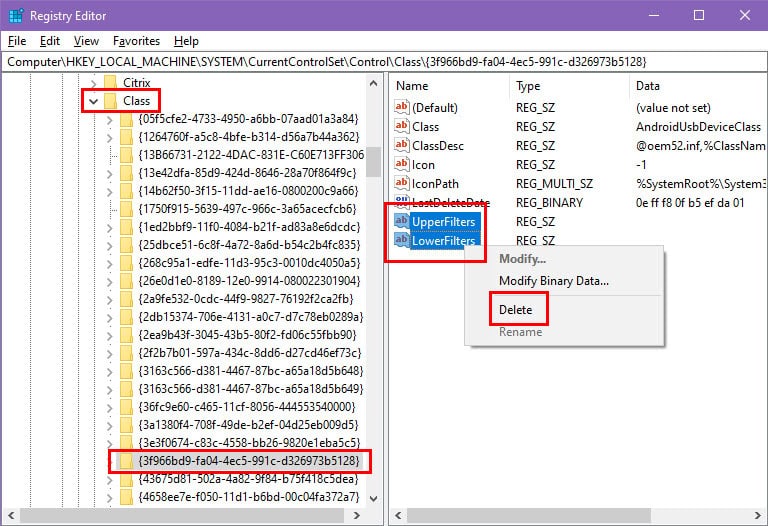
HKEY_LOCAL_MACHINESYSTEMCurrentControlSetControlClass - Hit Enter to quickly redirect to the Class Registry Key.
- Now, check the Class GUID Value in the previously opened driver dialog box and find it in the Class Registry Key directory.
- Select the Windows Registry entry to reveal the UpperFilters and LowerFilters String Values on the right side.
- After selecting these two String Values, right-click, and choose Delete from the context menu.
- Reboot the PC.
6. Uninstall and Reinstall the Problematic Driver
- Bring up the Device Manager tool by right-clicking on the Start Menu button and choosing Device Manager.
- Click on the device for which Windows can’t load the driver.
- Right-click and choose Properties from the context menu.
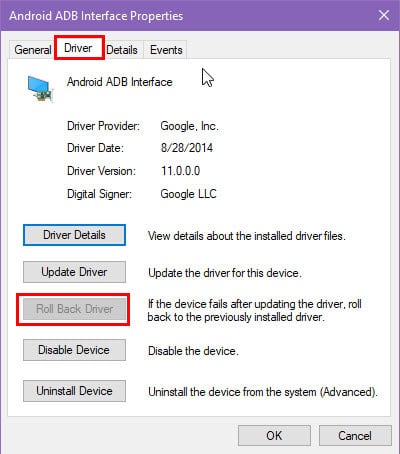
- You’ll see a new dialog box named Device Properties.
- Now, navigate to the Driver tab.
- Click on the Roll Back Driver button.
- Accept the changes you’re about to make in the confirmation dialog box.
- Restart the PC.
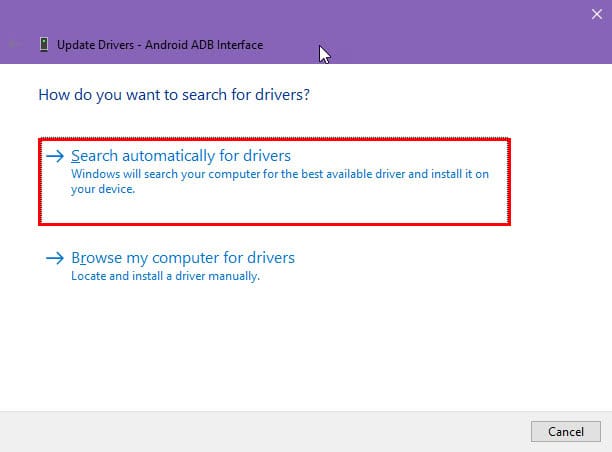
- Again navigate to the problematic device, select that, right-click, and click on the Update driver option.
- Select Search automatically for drivers in the new dialog box.
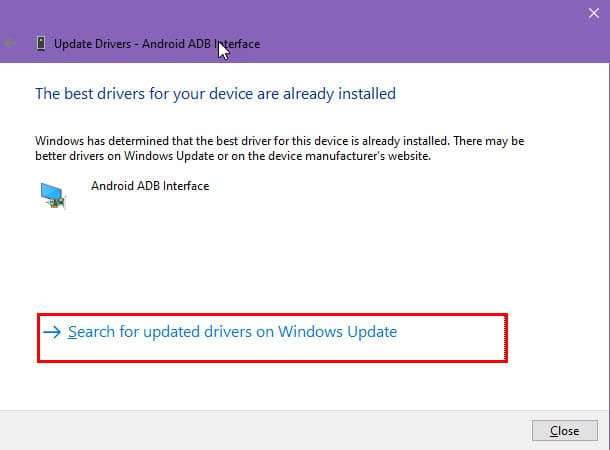
- Now click on the Search for updated drivers on Windows Update button.
- The Windows Update dialog box will open automatically.
- Click on the View optional updates link.
- Extend the Driver updates tree.
- If you find any relevant driver in the list that opens, checkmark them.
- Click on the Download and Install button.
- Reboot the PC when the driver installation is over.
If you’d like to get help from a specialized tool to automate the process, try the PC HelpSoft Driver Updater.
7. Restore Using the System Restore App
- Click on the Start button at the bottom left of your screen.
- Type Create a restore point in the search bar and click on the matching result.
- In the System Properties window that opens, click the System Restore button.
- Click Next to continue.
- Select a restore point from the list that shows the most recent system changes.
- Click Next.
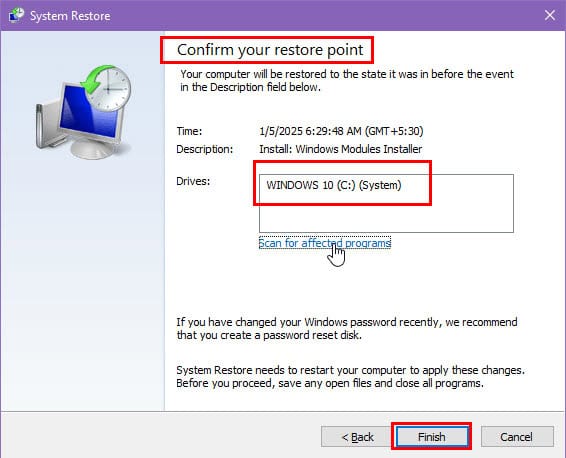
- Review the details on the confirmation screen and click Finish to begin the restoration process.
- Wait while Windows restores your system to the selected point. Your computer will restart automatically.
- After the restart, a message will confirm that System Restore completed successfully.
So, now you know the tried and tested solutions to fix the “A driver cannot load on this device” error on a Windows PC. You can try these fixes on Windows 7, 8, 10, and 11.
Also, learn how to resolve a driver power state failure on Windows 11 and DRIVER_CORRUPTED_MMPOOL.
Read our disclosure page to find out how can you help MSPoweruser sustain the editorial team Read more





User forum
0 messages