WiFi Adapter Not Working on Windows 11? Here's How To Fix It
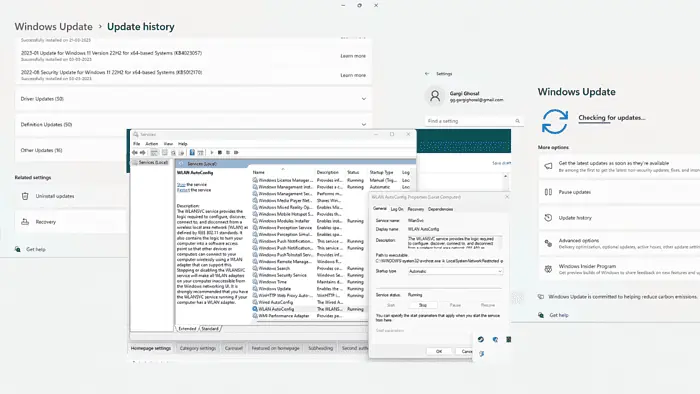
Is your WiFi adapter not working on Windows 11? It can be frustrating when your WiFi decides to give up on you in the middle of a busy workday or an upcoming game session. There are numerous software and hardware issues that might be behind it.
Luckily, I’ve plenty of experience dealing with such problems. This guide covers each step in detail, so read on!
Fix WiFi Adapter Not Working on Windows 11
I’ll start with the easiest solutions and move on to more complicated ones. Let’s dive in!
1. Preliminary Checks
Before trying any advanced fixes, try these quick ones that usually solve the problem:
- Reset the WiFi adapter – Go to Settings > Network & Internet > Change adapter options. Click Disable. After 60 seconds, select Enable. Reconnect to your network and enter the password again.
- Install pending Windows updates – Go to Settings > Windows Updates > Check for updates > Download and install all. Restart your system to apply them.
2. Try a Network Reset From Your PC
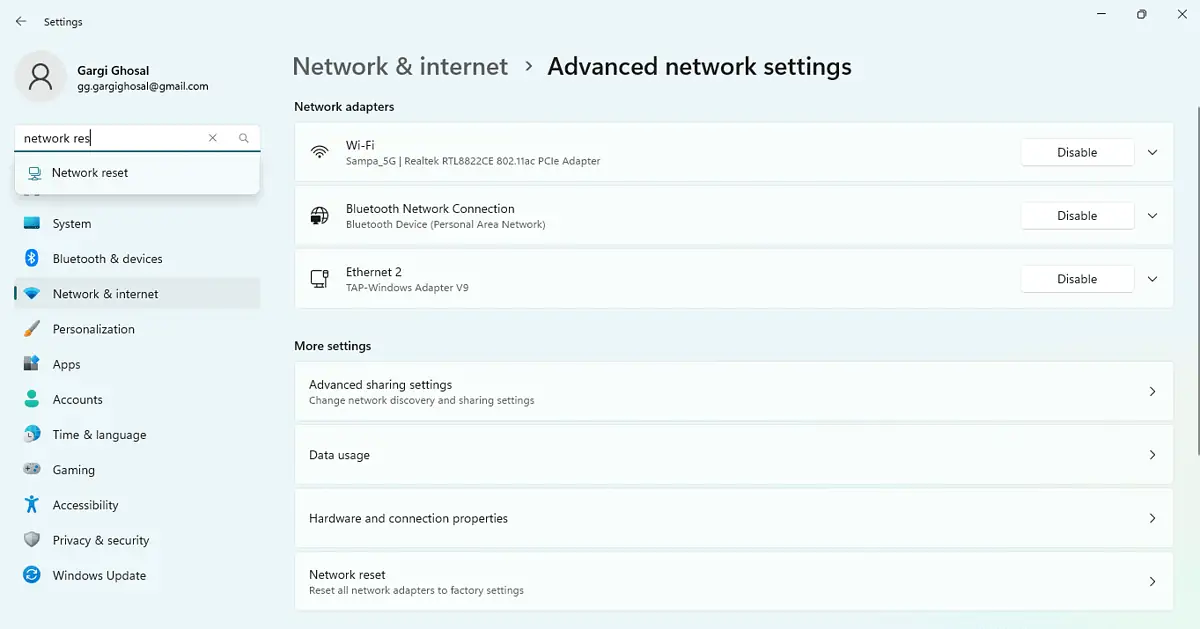
Close running applications, and try the steps below to reset your PC’s network settings:
- Go to Settings > Advanced Network Settings.
- Scroll down to Network Reset or search for it in the search bar.
- Click on Reset now to remove all installed network adapters, including WiFi adapters.
- You might be prompted to click Yes or Confirm > Finish.
This will first remove and then install your WiFi adapter. However, you might need to reinstall additional network software like VPNs, or virtual switches. Additionally, if your laptop WiFi’s not working, you might try updating your drivers or enabling SSID broadcast and other fixes.
3. Run the Internet Troubleshooter
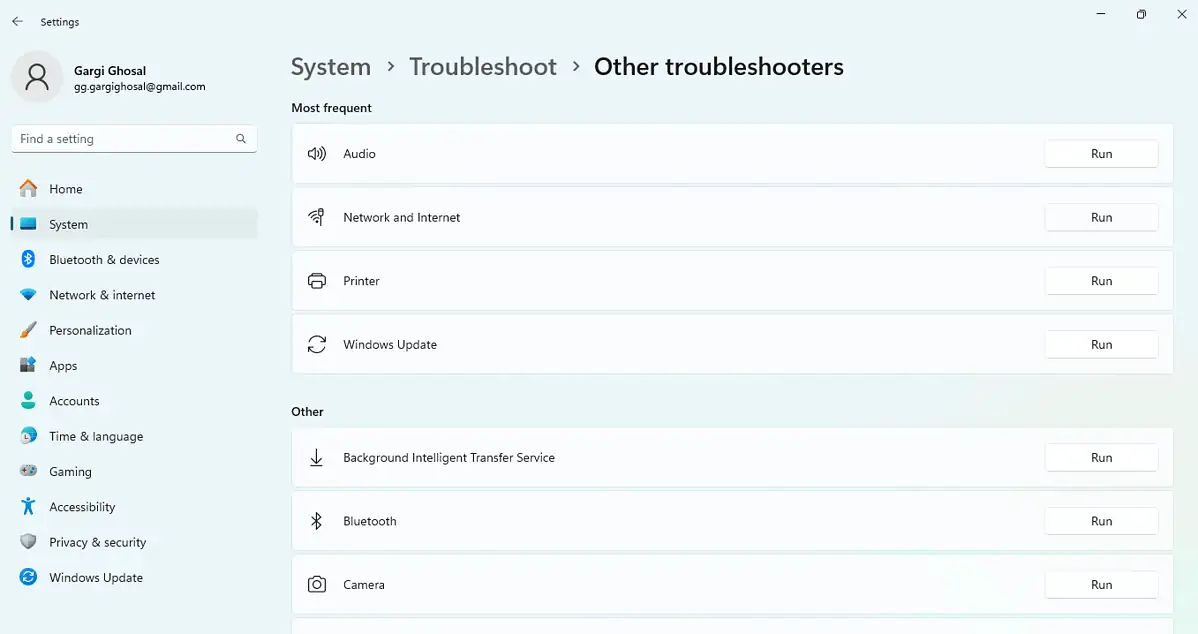
Your Windows 11 PC has a built-in network troubleshooter that can help fix this issue. Follow these simple steps:
- Go to Settings > System > Troubleshoot.
- Scroll down to Other Troubleshooters and click on Network and Internet.
- Click on Run to diagnose the issue, and you can also explore recommended fixes.
A few of the recommended fixes might include restarting the adapter, restarting your PC, and more. You can also explore additional help from the Microsoft site, but it can be time-consuming.
4. Update or Reinstall Drivers

Outdated or corrupted drivers can be behind the ‘WiFi adapter not working on Windows 11’ issue:
- Go to Settings and search for Device Manager.
- Another window will open, scroll down to Network Adapters.
- Right-click on your WiFi adapter and click on Update if it’s outdated.
You can also disable it and re-enable it from here. Or, choose to uninstall it altogether. As for reinstalling, it’ll happen automatically once you select Scan for hardware changes.
Besides this, you also have the option to use a handy driver updater to update your drivers automatically. This kind of tool will scan your PC for outdated drivers and find the latest driver versions within seconds.
Get PC HelpSoft Driver Updater
5. Uninstall Windows Updates
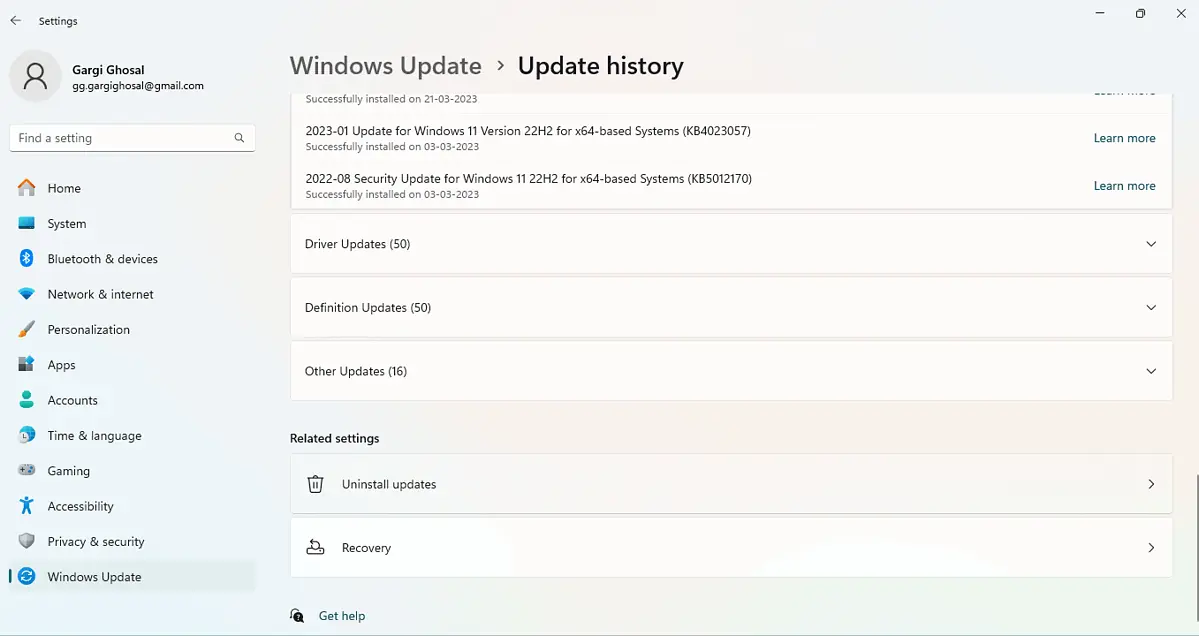
If the problem appeared right after installing new updates, I recommend that you uninstall them:
- Press the Windows key and go to Settings > Windows update.
- Scroll down to Update history and Uninstall updates.
- Next, you’ll be redirected to a page with the recent updates.
- Select your target, click on Uninstall, and confirm Yes.
6. Restart WLAN AutoConfig Service
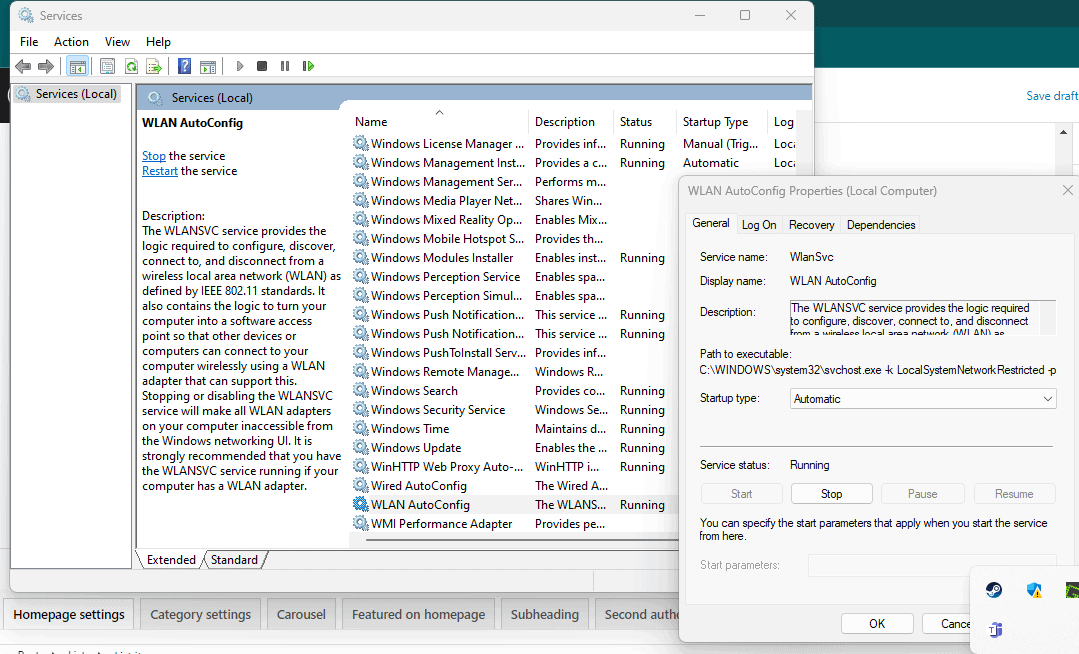
Once enabled, WLAN AutoConfig will configure the necessary settings for the WiFi adapter. Here’s how to restart or re-enable it:
- Press the Windows key + R on your keyboard.
- Type services.msc in the box and click on OK to open the Services panel.
- Scroll down to find WLAN AutoConfig and double-click to open its Properties.
- Click on startup type and choose: Automatic and click on OK.
You can also try pausing the service and resuming it, or clicking on Start if it’s stopped or disabled for some reason.
7. Enable the Networking Icon
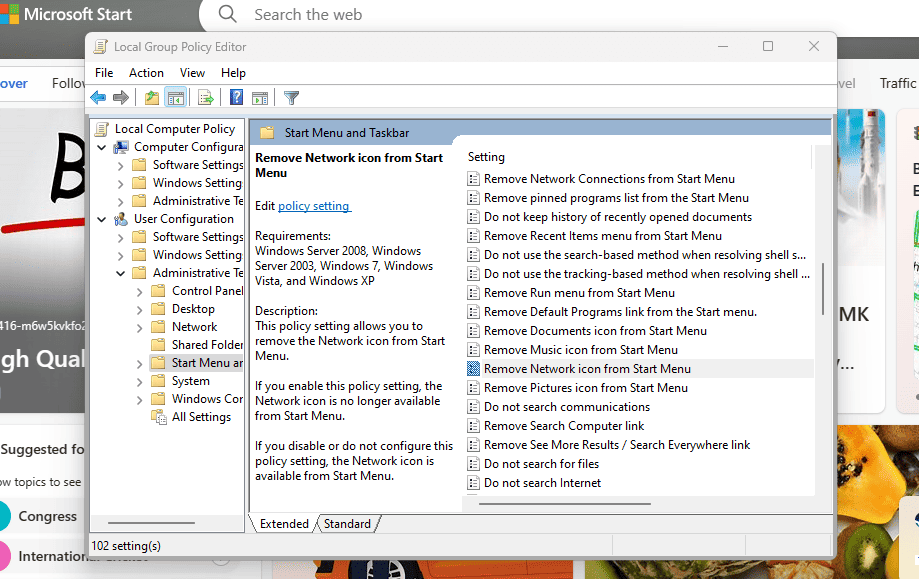
If your WiFi is still not working, it might be time to check Group Policy Settings and if your networking icon is disabled from there. Follow the steps:
- Launch the run command by pressing the Windows key + R on your Windows 11 PC.
- Type gpedit.msc and click on OK to launch.
- Click on User Configuration in the left panel, click and expand Administrative Templates.
- Next, select Start Menu and Taskbar and scroll down to Remove network icon from Start Menu.
- Select Disable > OK > Apply to confirm the new settings.
If you’re unable to find Group Policy Settings when you type gpedit.msc, go to Command Prompt. Right-click and run it as an Administrator. Next, run these prompts separately:
FOR %F IN ("%SystemRoot%servicingPackagesMicrosoft-Windows-GroupPolicy-ClientTools-Package~*.mum") DO (DISM /Online /NoRestart /Add-Package:"%F")

FOR %F IN ("%SystemRoot%servicingPackagesMicrosoft-Windows-GroupPolicy-ClientExtensions-Package~*.mum") DO (DISM /Online /NoRestart /Add-Package:"%F")
8. Flush Your DNS Cache

If you’ve tried everything and your WiFi is still not working, your DNS or Domain Name System might be the culprit. However, you can clear DNS caches and request a new IP address to resolve this:
- Search for CMD or Command Prompt and run it as administrator.
- Input the following five commands separately, and press Enter after each:
netsh winsock reset
netsh int ip reset
ipconfig /release
ipconfig /renew
ipconfig /flushdns
Once done, reconnect your PC and see if it’s working now.
If you’ve tried everything, it might be a hardware issue worth checking into. If your Wi-Fi’s not working on your phone but everywhere else, you might want to try disabling airplane mode, resetting the network settings, and similar other fixes. Moreover, if you keep experiencing issues with your WiFi adapter or access point, we can help out.
So, now you know what to do if your WiFi adapter is not working on Windows 11. In my experience, it’s usually due to pending software updates or DNS cache problems. Let me know which one helped solve your issue in the comments!
Read our disclosure page to find out how can you help MSPoweruser sustain the editorial team Read more


User forum
0 messages