NVIDIA Control Panel Only Shows 3D Settings: 4 Easy Fixes
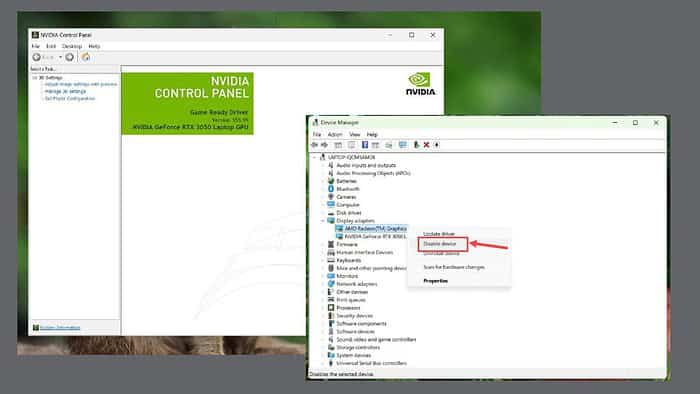
Recently, I noticed that my NVIDIA control panel only shows 3D settings and omits all other configuration options. The problem indicates that the system isn’t recognizing the NVIDIA drivers correctly and is prioritizing the integrated graphics card.
I thought it was a minor glitch that I could fix with a simple restart, but no such luck. So, after researching on the internet and forums like Reddit, I found various working solutions.
Let’s check them out!
1. Enable the Option To Use Both GPUs From BIOS/UEFI
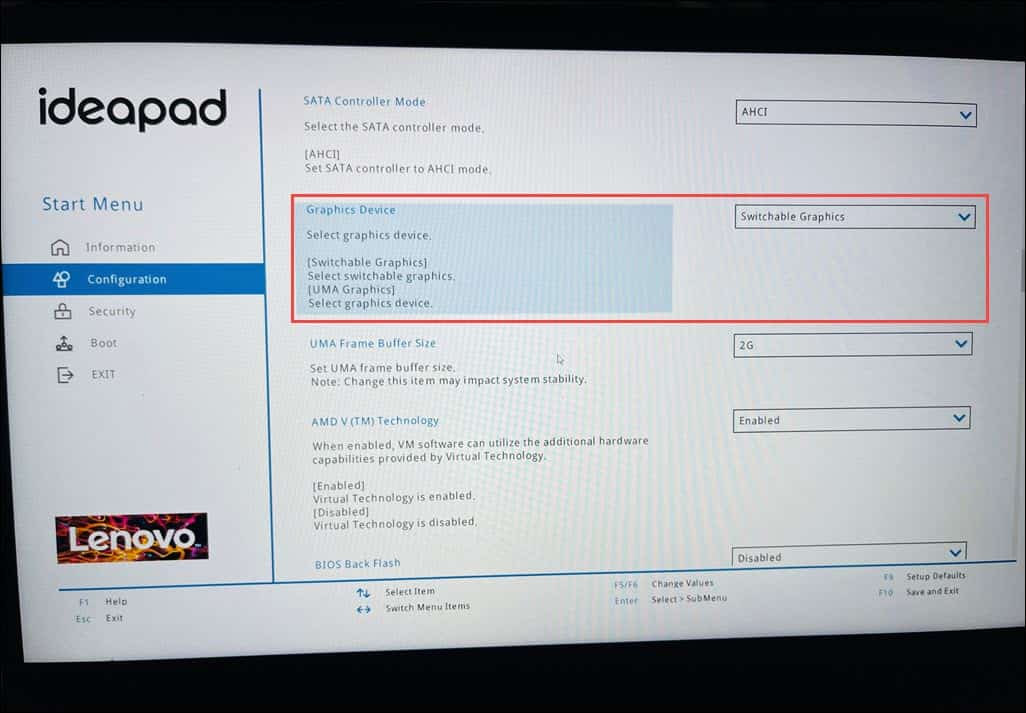
On my Lenovo gaming laptop, the integrated GPU was prioritized, making the NVIDIA GPU useless, and that’s why I could only see the 3D settings. Check if the same is happening on your device by following these steps:
- Restart your device and repeatedly press F2 to enter the BIOS or UEFI settings. In my case, it’s UEFI; look for similar steps if your system has BIOS.
- Switch to the Configuration section on the left, and then look for the Graphics Device section on the right.
- Expand the drop-down menu and select Switchable Graphics.
- Finally, press F10 to save and exit the UEFI settings.
2. Disable Integrated Graphic Card
You can disable your integrated GPU from the Device Manager to force Windows to use an NVIDIA graphics card.
Here’s how to do that:
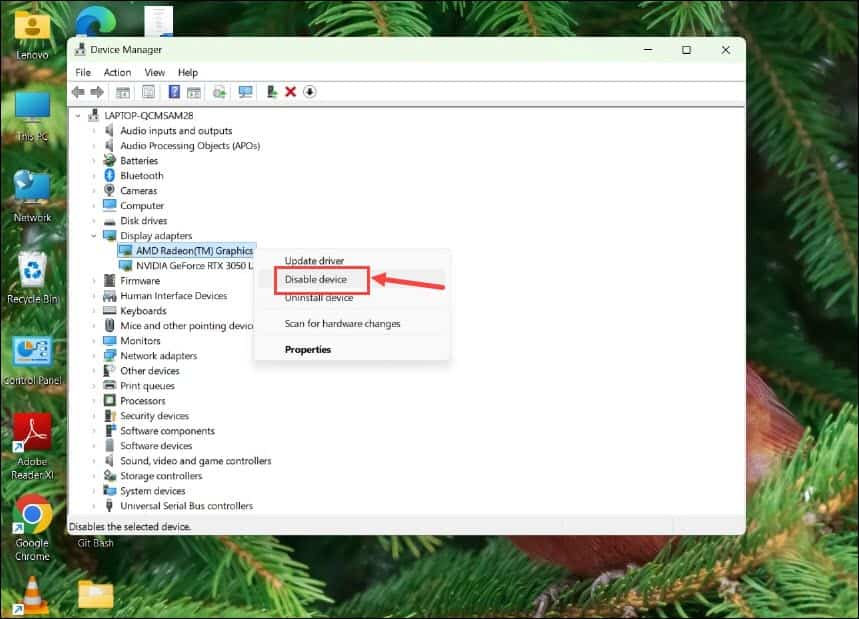
- Press Windows + X on your keyboard and select Device Manager from the list.
- Expand the Display Adapters section, right-click on your integrated card, and select Disable.
- Restart your system once and check if the NVIDIA control panel is displaying other settings now.
3. Update NVIDIA Graphic Card Driver
An outdated NVIDIA driver can also prevent the control panel from showing all the settings. To fix this, you should update it to the latest version. The best way to do that is to use the NVIDIA GeForce Experience app:
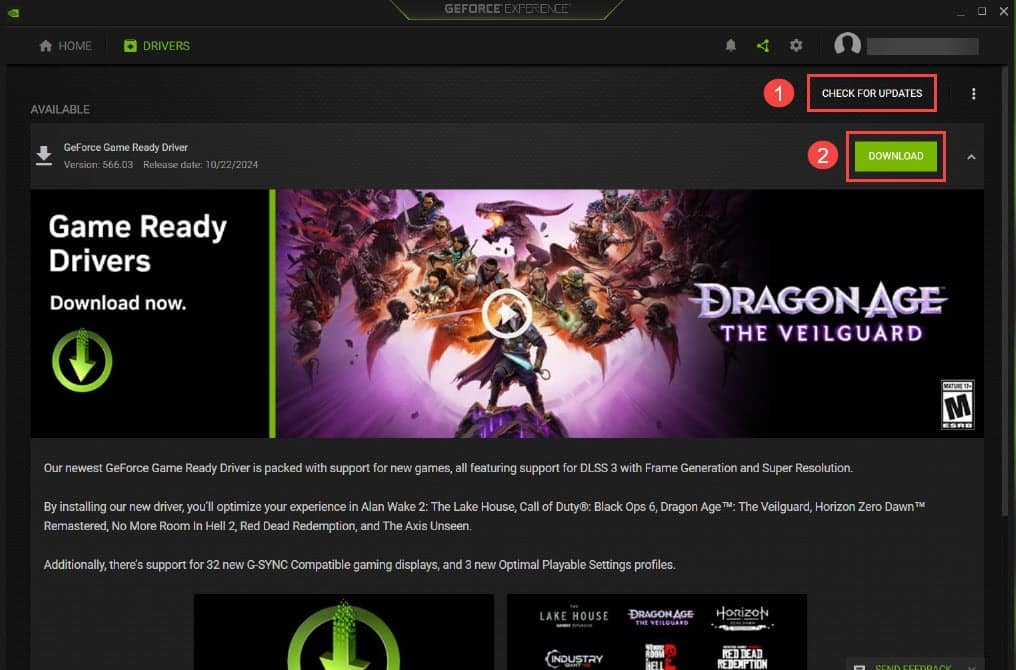
- Launch the NVIDIA GeForce Experience app on your system. If you can’t find it, download it from the official website.
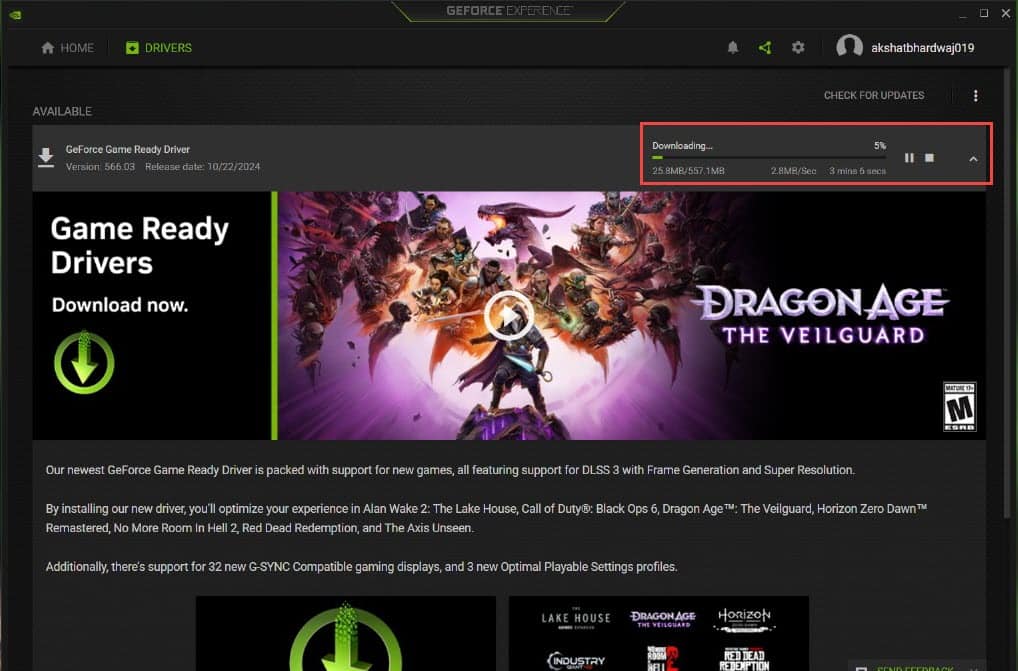
- Switch to the Drivers section and click the Check for Updates button.
- Next, click the Download button.
- It may take some time, depending on your internet speed.
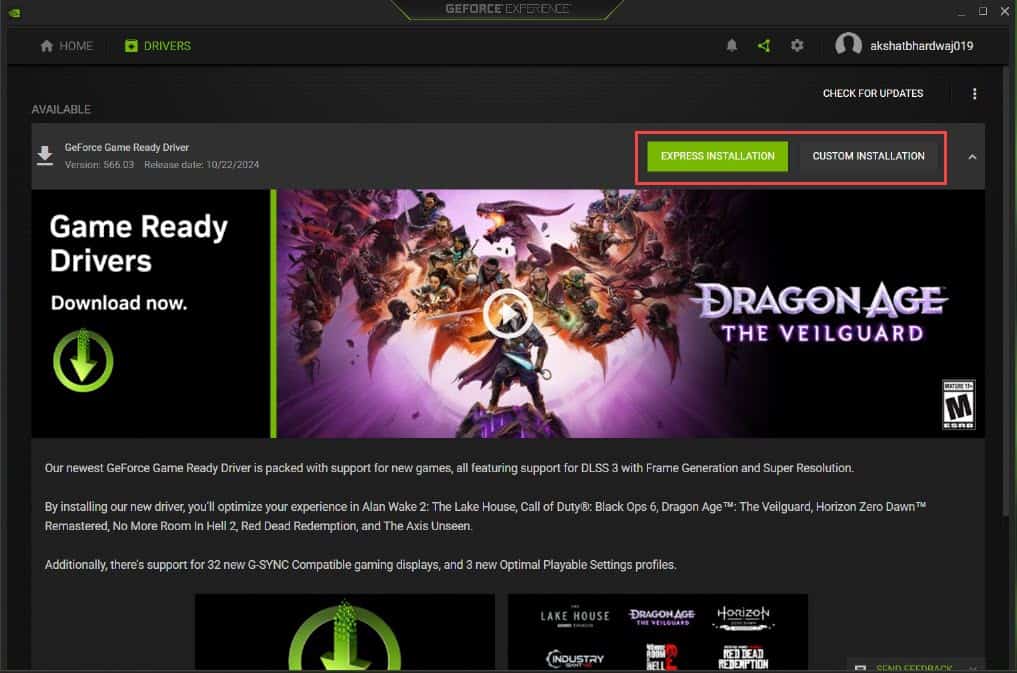
- Next, choose Express Installation or Custom Installation.
- After the driver is installed, restart your device and check if the problem persists.
If you don’t use this app and find manually searching for drivers tedious, you can use a dedicated tool. A popular one is PC HelpSoft Driver Updater. It comes with extensive features that give you total control over all your driver needs.
4. Restart NVIDIA Process
Sometimes, simply restarting the NVIDIA processes can fix temporary issues like this. Here’s how to do that:
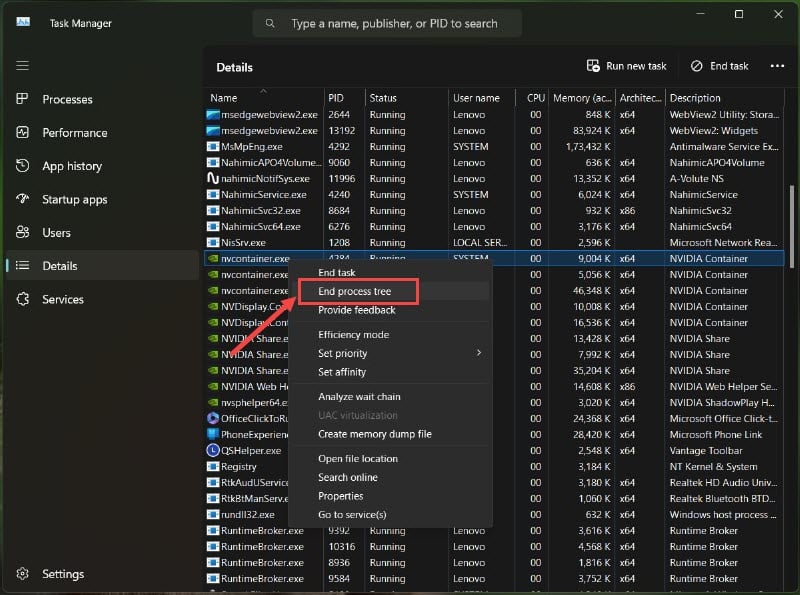
- Right-click on the taskbar and select Task Manager from the menu.
- Switch to the Details tab on the left and look for NVIDIA processes. Right-click on each of them and select End Process Tree.
- Restart your computer and launch NVIDIA control panel to check if its settings are available now.
So, now you know what to do when the NVIDIA control panel only shows 3D settings. This issue can be frustrating, as it limits your control over your powerful GPU. If you don’t know the exact cause, systematically trying every listed solution will solve the problem. However, if nothing else works, you can restore the system to a previous point or reset your PC.
Read our disclosure page to find out how can you help MSPoweruser sustain the editorial team Read more


User forum
0 messages