How to test and select the best DNS for your PC
![]() 3 min. read
3 min. read
![]() Updated on
Updated on
Share this article

Improve this guide
Read our disclosure page to find out how can you help MSPoweruser sustain the editorial team Read more


Recently we reported that Cloudflare has released a new DNS that promises better speeds than other available DNS providers. The release of Cloudflare’s DNS was to take on Google’s 8.8.8.8 alternate DNS but it doesn’t answer one question: Which DNS provider is the best for you?
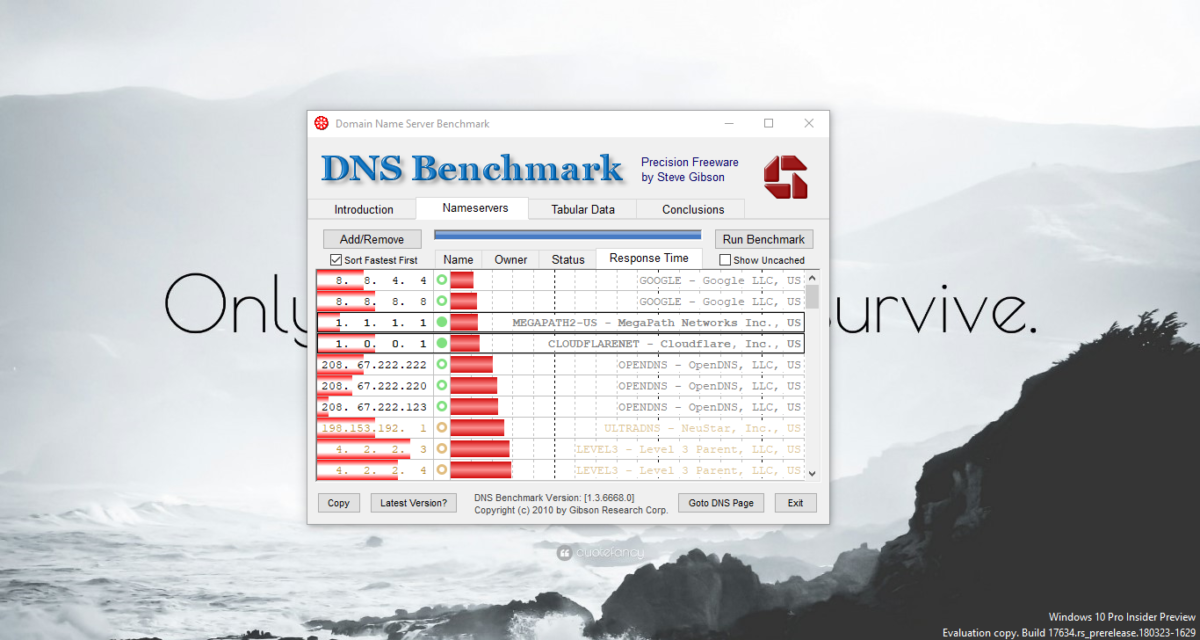
This question might not be as simple to answer as you thought since the performance of DNS depends on various factors like geographical location, ISP, etc. So to solve this, you can use a third party utility that will run a DNS checkup for you and give you the best DNS according to the performance. For our test, we chose GRC’s DNS Benchmark which is available for Windows. The software is not directly available on Mac OS X or Linux but it is compatible with Wine. The software is available for free on GRC’s website and you don’t need to install it to use.
How to measure DNS performance:
- Once downloaded, open the DNS Benchmark.
- Click the “Nameservers” tab to select the main benchmark display and data pages.
- Click the “Run Benchmark” button.
- Click and read the “Conclusions” tab after the benchmark completes.
Once the Benchmarking is done, go to Nameservers>Response Time and check Sort Fastest First. You can now see the fastest DNS available for you.
How to change DNS provider:
- Click on the Start menu, then click on Control Panel.
- Click on Network and Internet.
- Click on Network and Sharing Settings.
- Click on Change Adapter Settings.
- Right click on the Wi-Fi network you are connected to, then click Properties.
- Select Internet Protocol Version 4 (or Version 6 whichever you’re using).
- Click Properties.
- Write down any existing DNS server entries for future reference.
- Click Use The Following DNS Server Addresses.
- Replace those addresses with the DNS addresses of the provider. For example, we got Google as the fastest so we will use 8.8.8.8 as the DNS address. (Do note that the DNS address given in the software is for IPv4 and not IPv6. If you’re using IPv6 then search online for that provider’s IPv6 address.)
- Click OK, then Close.
- Restart your browser.
Update: Once you have found the DNS provider for your location, you can use DNS Jumper to set it as your default DNS and skip steps listed above. DNS Jumper is a free software that lets you work with the DNS easily. (Thanks to Lolloso for the tip.)
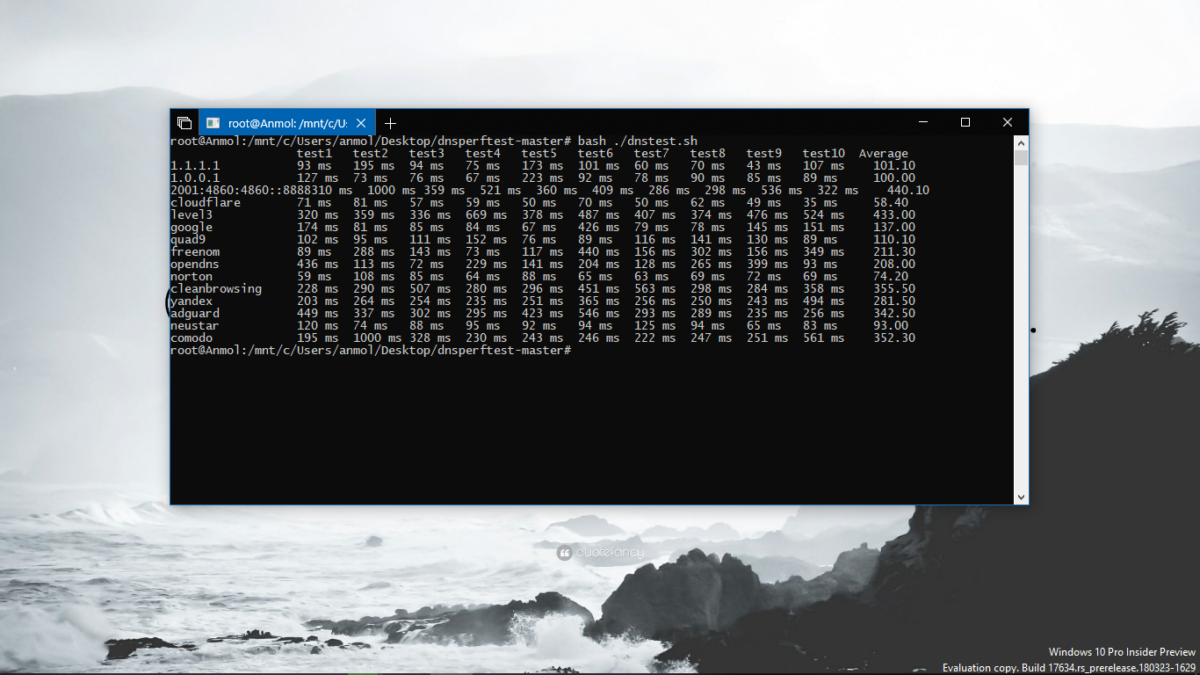
If you’re someone who’s interested in the exact numbers and advanced details, then you can download a project available on GitHub that lets you monitor and measure the latency of different DNS Providers. However, you will require Windows Subsystem for Linux to run it.
We hope this guide helped you set the fastest DNS provider for your PC. You can head down to the comments section and let us know your thoughts and suggestions.