How To Permanently Delete Files On Windows 11: A Comprehensive Guide
By the end of this guide, you’ll have a solid understanding of how to permanently delete files on Windows 11, giving you peace of mind and control over your data.
If you document your cleanup policies or reports, you can present them more clearly by setting 1-inch margins in Google Docs for a consistent layout.
Table of contents
How Do I Permanently Delete Files in Windows 11?
Using the Recycle Bin
The Recycle Bin is the first line of defense when deleting files, but it doesn’t permanently remove them. If you want to record or demonstrate the steps you take while managing deleted items, you can capture your screen by following this guide on how to snip in Windows 11.
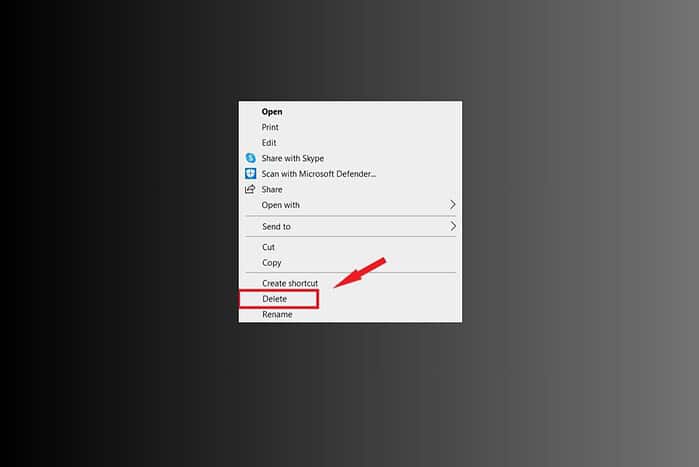
- Locate the file or folder you want to delete.
- Right-click on the file or folder.
- Select the “Delete” option. This sends the file to the Recycle Bin.
- Right-click the Recycle Bin icon on your desktop.
- Select “Empty Recycle Bin”.
- Confirm the deletion by clicking “Yes”.
Secure Empty Recycle Bin
Windows doesn’t offer secure erase natively. Instead, you can use third party tools like BleachBit.
- Download and install BleachBit.
- Launch the application.
- Select
shred filesoption. - Click
deleteto start deleting the files securely.
Using Shift + Delete
Bypassing the Recycle Bin is a quick way to delete files directly.
- Select the file or folder you wish to delete.
- Press and hold the “Shift” key.
- Press the “Delete” key.
- Confirm the deletion by clicking “Yes” on the prompt.
Using Command Prompt (CMD)
The Command Prompt offers a more technical approach to permanent deletion.
- Open the Command Prompt as an administrator. Search for “cmd,” right-click, and select “Run as administrator.”
- Type the command
cipher /w:C:(replaceC:with the drive letter where the files were located). - Press “Enter.” This command overwrites the free space on the drive, making it harder to recover deleted files.
Using File Shredder Software
Dedicated file shredder software provides the most secure method for permanent deletion.
- Download and install a reputable file shredder software like Eraser or CCleaner.
- Open the software.
- Select the files or folders you want to shred.
- Choose a shredding method (e.g., Gutmann, DoD 5220.22-M). Higher passes offer greater security.
- Start the shredding process.
Overwriting Free Space
This method involves filling the free space on your drive with random data, making it difficult to recover previously deleted files.
- Use a tool like CCleaner or Disk Wipe to wipe the free space on your drive.
- Select the drive you want to wipe.
- Choose the number of overwrite passes.
- Start the wiping process.
Physically Destroying the Storage Device
For ultimate security, physically destroying the storage device is the most foolproof method. When you retire mobile devices alongside PCs, you should also power them down properly; if you need a refresher, you can follow this step-by-step guide on turning off an iPhone 11 before disposal.
- Remove the hard drive or SSD from your computer.
- Use a hammer, drill, or specialized degaussing tool to physically damage the drive.
- Dispose of the damaged drive responsibly.
Tips for Secure File Deletion
- Always empty the Recycle Bin after deleting files.
- Use file shredder software for sensitive data.
- Regularly overwrite free space on your drives.
- Consider encrypting your entire drive for added security.
- Be cautious when selling or donating old computers; always wipe the drives first.
- If you fax or share documents that originally contained sensitive files, create a clear and professional cover sheet by following this guide on using a fax cover sheet Word template.
Comparing Deletion Methods
| Method | Security Level | Ease of Use | Speed |
|---|---|---|---|
| Recycle Bin | Low | High | Fast |
| Shift + Delete | Low | High | Fast |
| Command Prompt (cipher) | Medium | Medium | Slow |
| File Shredder Software | High | Medium | Very Slow |
| Overwriting Free Space | High | Medium | Very Slow |
| Physical Destruction | Very High | Low | Instant |
Ensuring Data Erasure
Deleting files permanently on Windows 11 requires a multifaceted approach. While simple methods like emptying the Recycle Bin or using Shift + Delete are quick, they don’t guarantee complete data erasure. For truly sensitive information, employing file shredder software or physically destroying the storage device provides the highest level of security. Understanding these different methods allows you to choose the right approach based on your specific needs and the sensitivity of the data you’re handling. If you also manage privacy on social platforms, you can periodically review what images remain online by following this guide on how to find photos on Facebook.
FAQ
How do I know if my files are permanently deleted?
Using file shredder software with multiple passes or physically destroying the drive are the most reliable methods.
Can deleted files be recovered?
Yes, if the files are not overwritten or securely shredded, they can potentially be recovered using data recovery software.
Is it safe to sell my old computer without wiping the hard drive?
No, it’s highly recommended to wipe the hard drive completely before selling or donating your computer to protect your personal information.
What is the best file shredder software for Windows 11?
Eraser and CCleaner are popular and reputable file shredder software options for Windows 11.
Does formatting a drive permanently delete files?
Formatting a drive alone doesn’t guarantee permanent deletion. It’s best to use secure wiping methods or file shredder software after formatting.
Read our disclosure page to find out how can you help MSPoweruser sustain the editorial team Read more
Improve this guide


User forum
0 messages