How to Edit Background Graphics in PowerPoint (2025 Guide)
You can edit background graphics in PowerPoint via Slide Master view or the Design ? Format Background pane. This tutorial covers Windows, Mac, Web (Microsoft 365), troubleshooting tips like using the Selection Pane, keyboard shortcuts, accessibility, template consistency, and more.
Edit Background Graphics in PowerPoint
Table of Contents
- Edit Background via Slide Master (Windows, Mac, Web)
- Use Format Background (Design tab)
- Add, Change, Hide or Remove Graphics
- Troubleshooting Locked Graphics
- Applying Backgrounds to Slides or Entire Deck
- Accessibility & Branding Guidelines
- FAQ
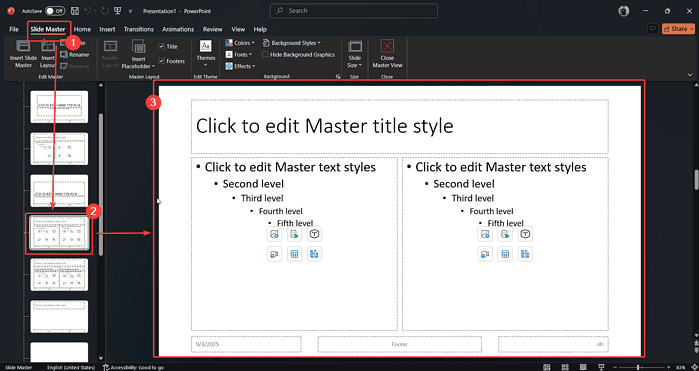
1. Edit Background via Slide Master View
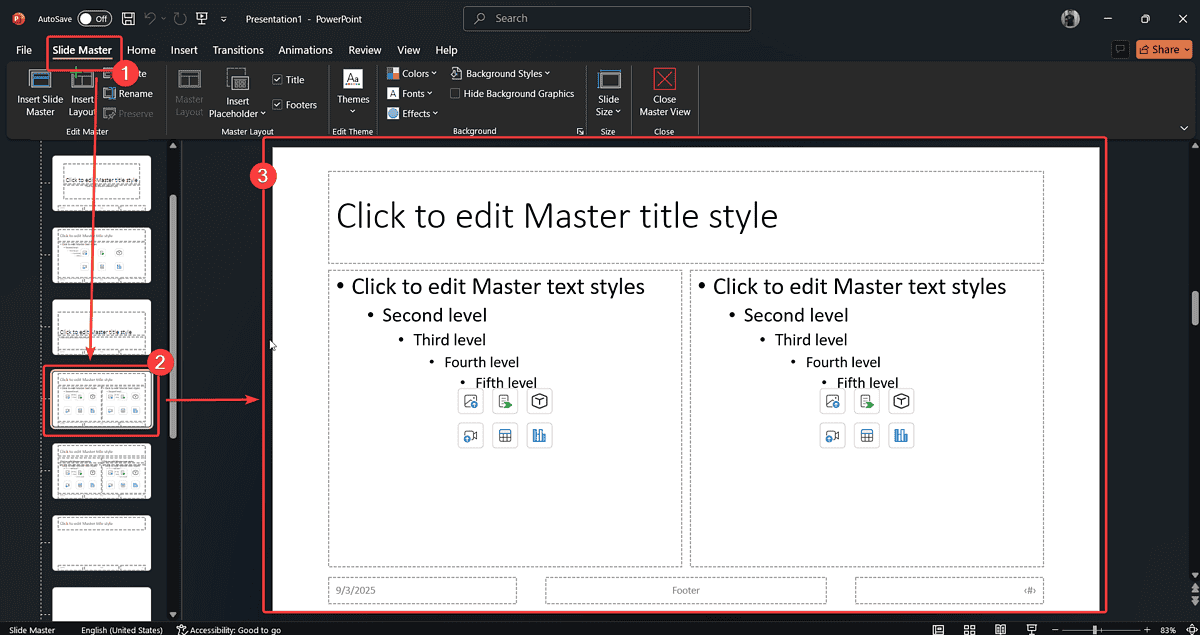
Editing background graphics is most powerful in Slide Master view:
- Go to View > Slide Master. This opens the master and all layout slides.
- Select the top master slide or a specific layout.
- You can select, move, resize, delete, or change the graphics.
- Use Send to Back to ensure text and content layers sit above background.
Version notes:
- Windows / PowerPoint 365/2024/2021/2019: Full Slide Master features.
- Mac users: Same path applies via View ribbon.
- PowerPoint for Web: Limited Slide Master support—use Design ? Format Background for basic options.
2. Use Format Background from the Design Tab
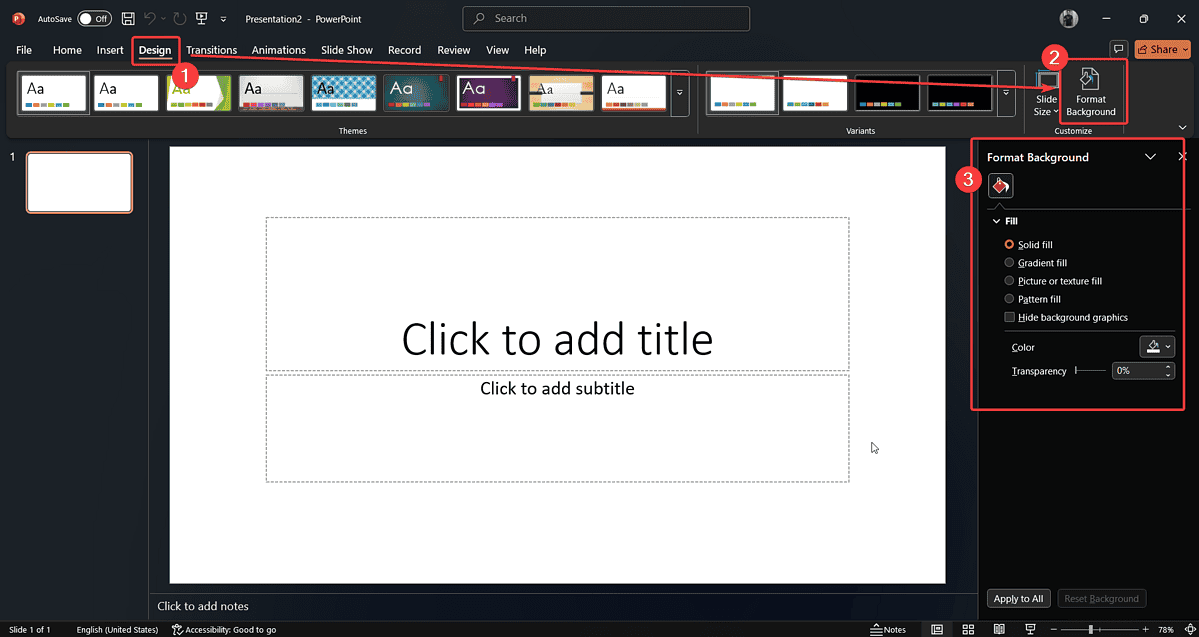
This method is accessible and user-friendly for slide-by-slide edits:
- Go to Design > Format Background.
- Choose Solid fill, Gradient fill, Pattern fill, or Picture/Texture fill.
- Select color, adjust transparency, or insert images from file, stock library, or online sources.
- Note: Some options such as gradient or transparency are unavailable in the Web version.
3. Add, Change, Hide or Remove Graphics
Add or Change Graphics
- In Slide Master: right-click a graphic, select Change Picture, or insert a new image or icon from the Insert tab.
Hide Background Graphics
- Tick Hide background graphics in the Format Background panel. This makes template art invisible.
Remove Graphics
- In Slide Master view, delete the graphic or use the Hide option. Close master view to apply changes.
4. Troubleshooting Locked Graphics
If background graphics can’t be selected in normal or master view:
- Use the Selection Pane: Go to Home ? Arrange ? Selection Pane.
- Locate the graphic, click the unlock icon, then edit it.
- Sometimes the graphic is locked or set as a theme element—slide-level editing or unlocking may be needed.
If changes don’t apply, check if you’re editing a child layout rather than the top master slide.
5. Applying Background to One Slide or All Slides

- To apply changes on one slide: make edits in Format Background and don’t click Apply to All.
- To apply on all slides: use Apply to All, or make edits in master slide view.
- For bulk edits across multiple layouts: select multiple layout masters (hold Shift) before applying edits.
6. Accessibility & Branding Tips
- Hiding overly busy background graphics improves readability for users with dyslexia or visual impairments.
- Use accessible contrast ratios and avoid background clutter behind text.
- For branding consistency, insert logos in the Slide Master center or footer, and keep graphics slightly transparent.
- Use keyboard shortcuts: Slide Master = Alt + W, M (Windows), then navigation keys to select master.
7. Frequently Asked Questions
Q: How do I hide background graphics in PowerPoint master?
A: In Slide Master view, tick Hide background graphics in the sidebar. To remove completely, delete the graphic on the master slide.
Q: Can I edit background on one slide?
A: Yes—use Design ? Format Background for individual slides, without “Apply to All.”
Q: How to unlock background graphic?
A: Open Slide Master or Selection Pane, locate the object, and click the unlock/hide toggle before editing.
Q: What’s best for uniform branding?
A: Add your logo or repeated visuals to the topmost master slide. Use transparency to keep it subtle.
Read our disclosure page to find out how can you help MSPoweruser sustain the editorial team Read more
Improve this guide


User forum
0 messages