How To Create Websites With AI Using Solo by Mozilla Easily
No coding experience needed.
Key notes
- Mozilla has just launched a platform where you can create websites with AI.
- It’s called Solo, and you don’t need any coding experience to try it.
- Here’s how you can take this feature out for a spin, free of charge.
Mozilla, the non-profit that brought you the popular browser Firefox, has just launched a platform where you can create websites with AI. It’s called Solo, and you don’t need any coding experience to try it.
A lot of hosting services now have their AI-centered tools, but Solo by Mozilla is something else. It’s very well suited for businesses, a builder where you can design websites (mostly) using word prompts.
“Whether launching a chess coaching or pet walking business, Solo helps the solopreneur generate their business website and provide them the basic tools to grow their business,” the non-profit’s spokesperson says in the official announcement.
Interested enough? In this article, we’re walking you through how to create websites with AI using Solo by Mozilla. Here’s how.
How to create websites with AI using Solo by Mozilla.
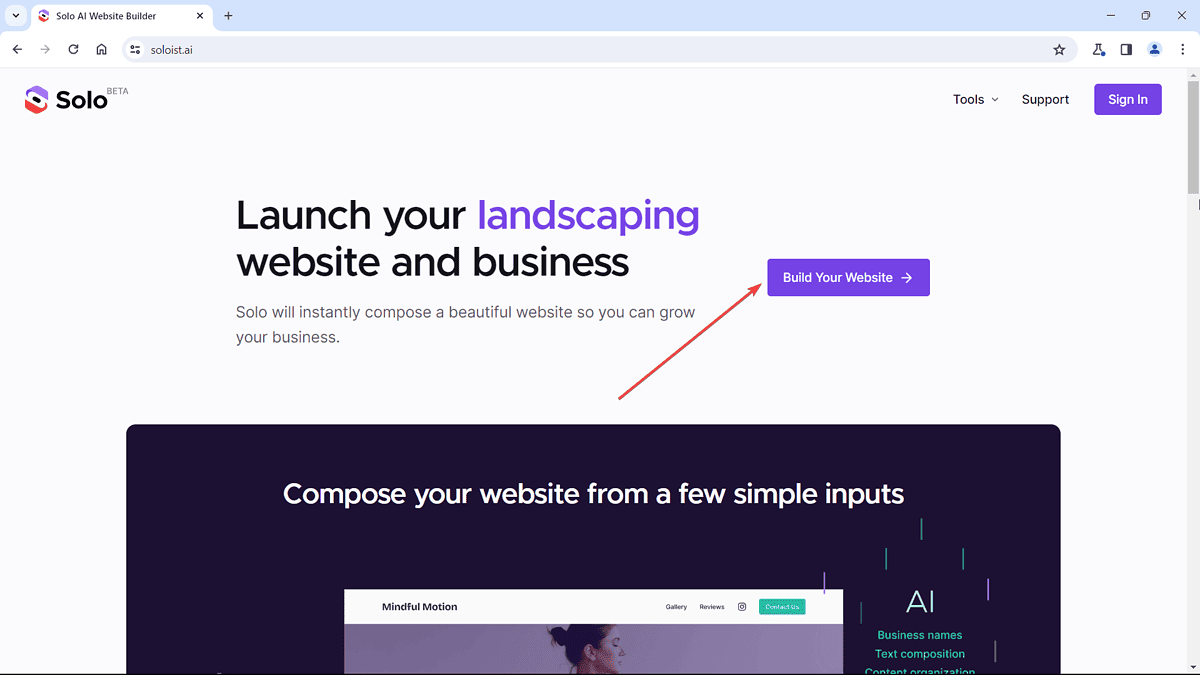
1. Open Solo by Mozilla’s website. Then, click Build your website.
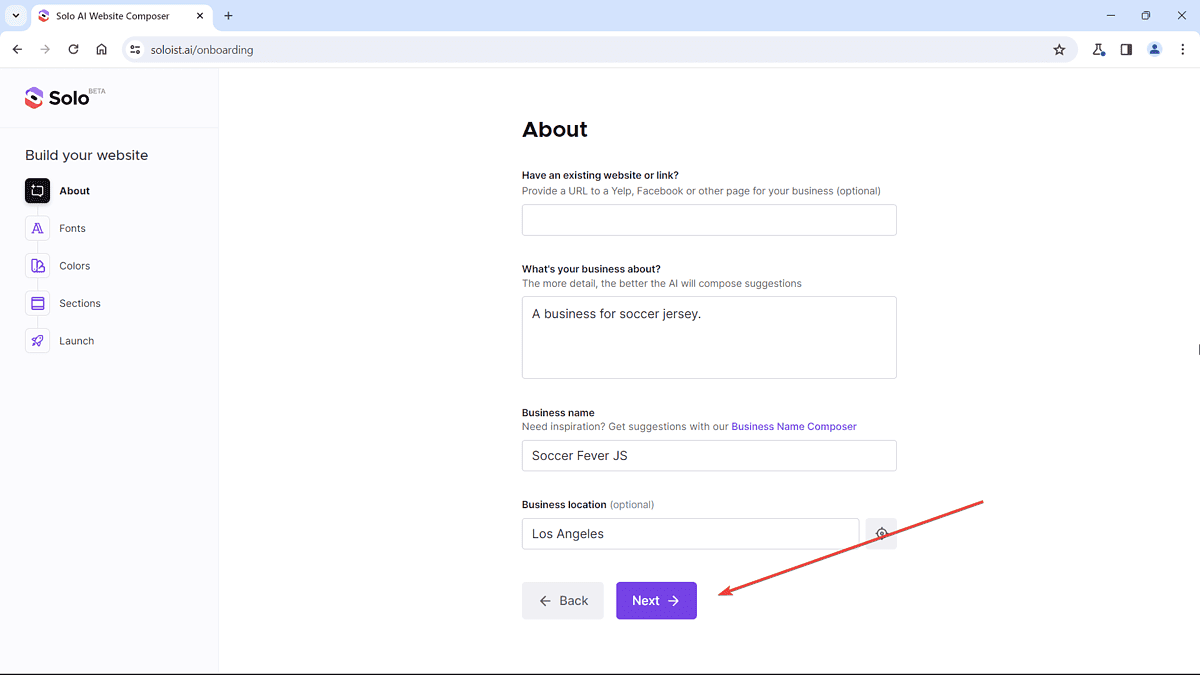
2. Fill in the blanks. What’s the name of your business? Do you have previous links to it? Where is it located? We’re giving you an example here. Then, click Next.
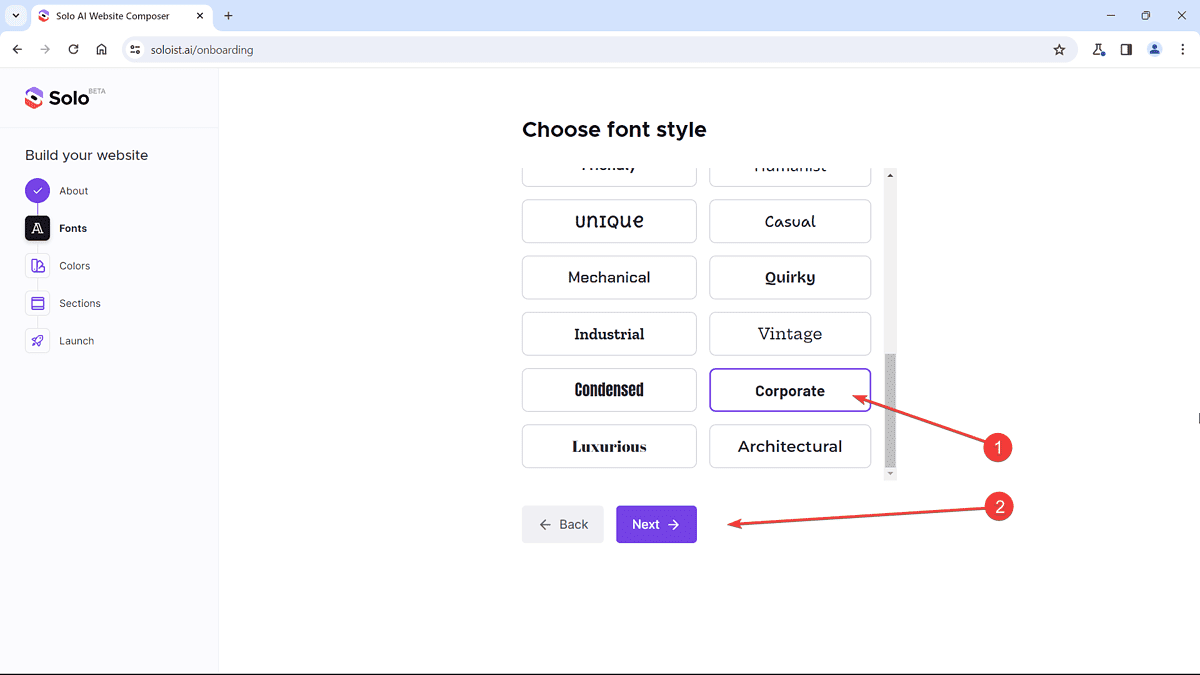
3. Select the font & color palettes that fit the aesthetic of your business. Click Next.
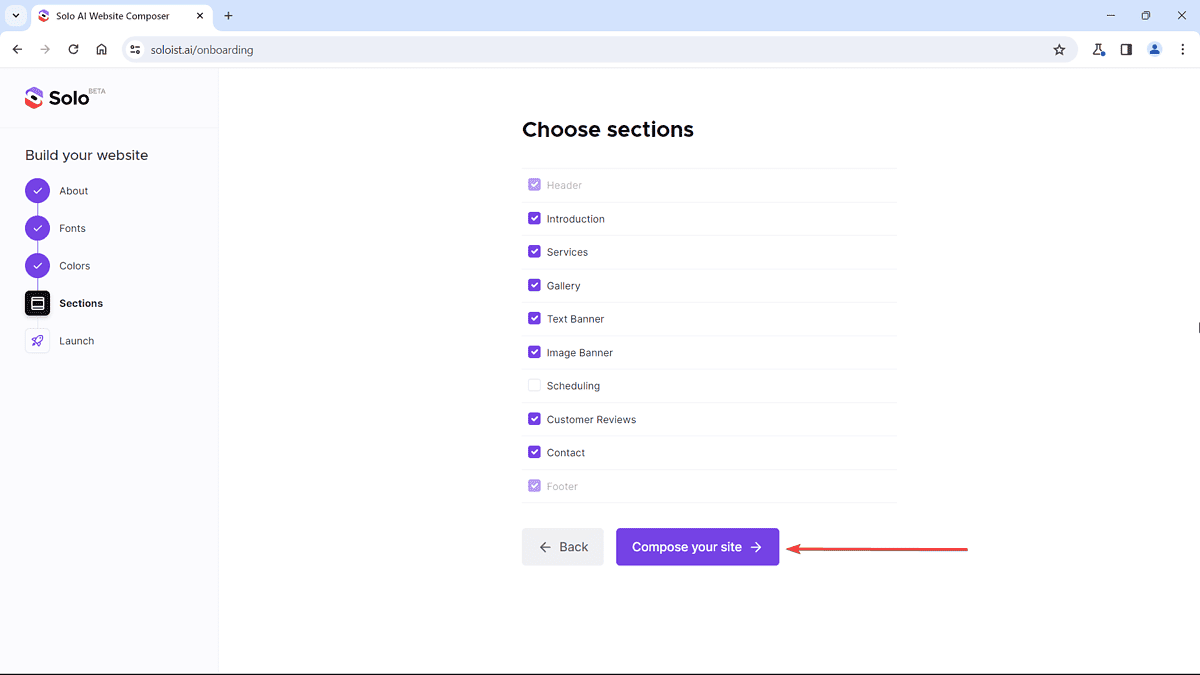
4. Choose sections of a website that you’ll need. For a business that sells items, for example, we’d recommend having everything ticked but Scheduling. It’s up to you, though. Once it’s done, click Compose your site.
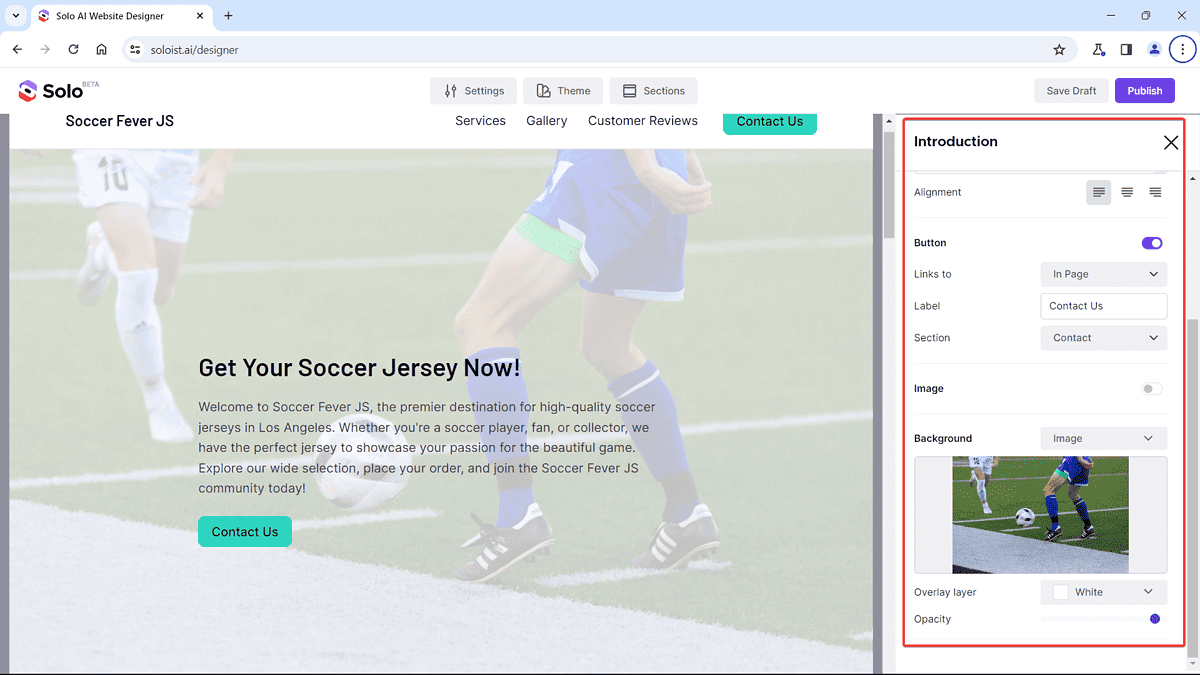
5. Your website is done, and you can scroll through it to manually edit whichever section you want to edit. In this case, we have sections like Gallery, Our Services, Reviews, Contact Us, etc. You can edit the welcoming message, background image, and everything.
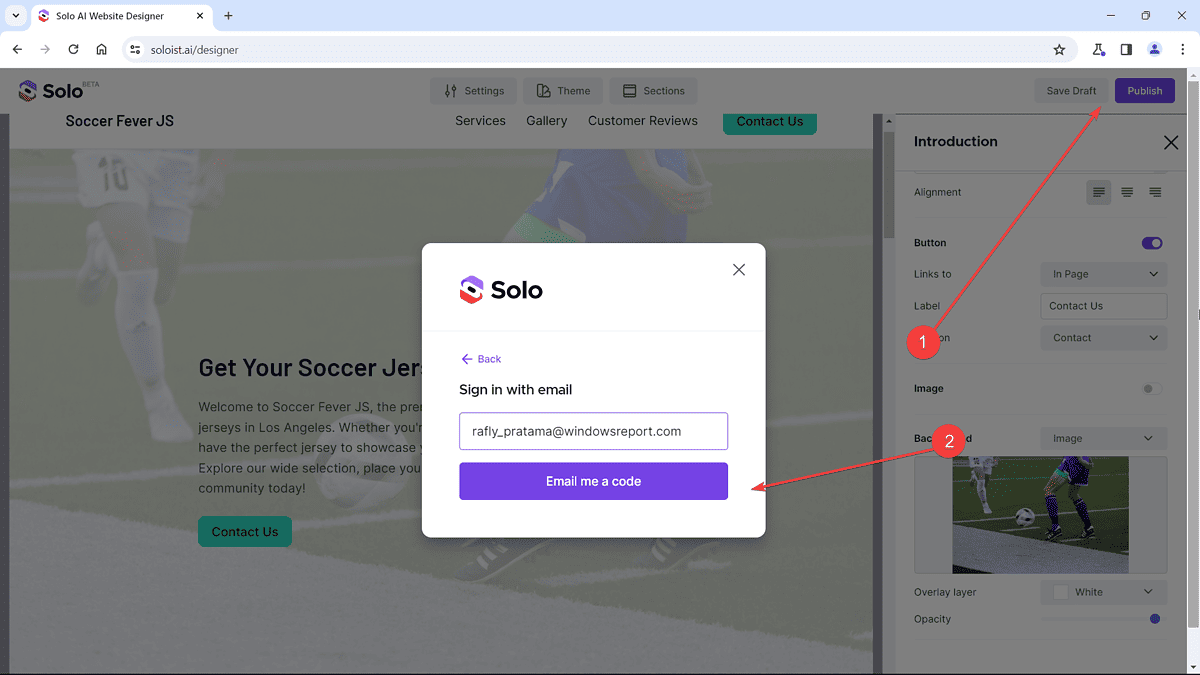
6. Once you’re happy with the website, click Publish. It will take you to a login page to Solo. Fill in your email and click Email me a code.
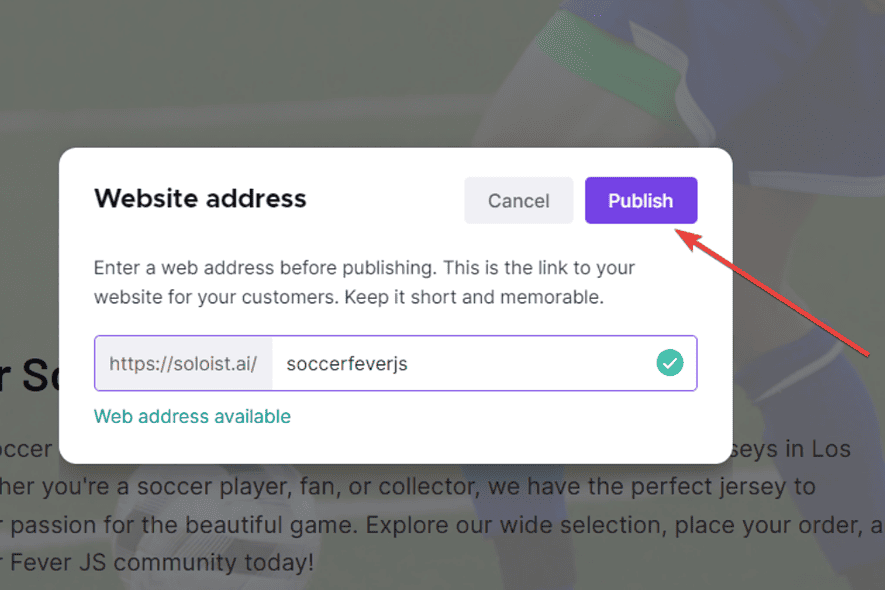
7. Open your email to get the OTP code, then once the login is done, fill in the website address that you want to use.
Keep in mind that this is a free service so it will always start with “https://soloist.ai/,” and if you want to get domains like .com or .net, you’d need to pay a little extra & move your website to a paid hosting service.
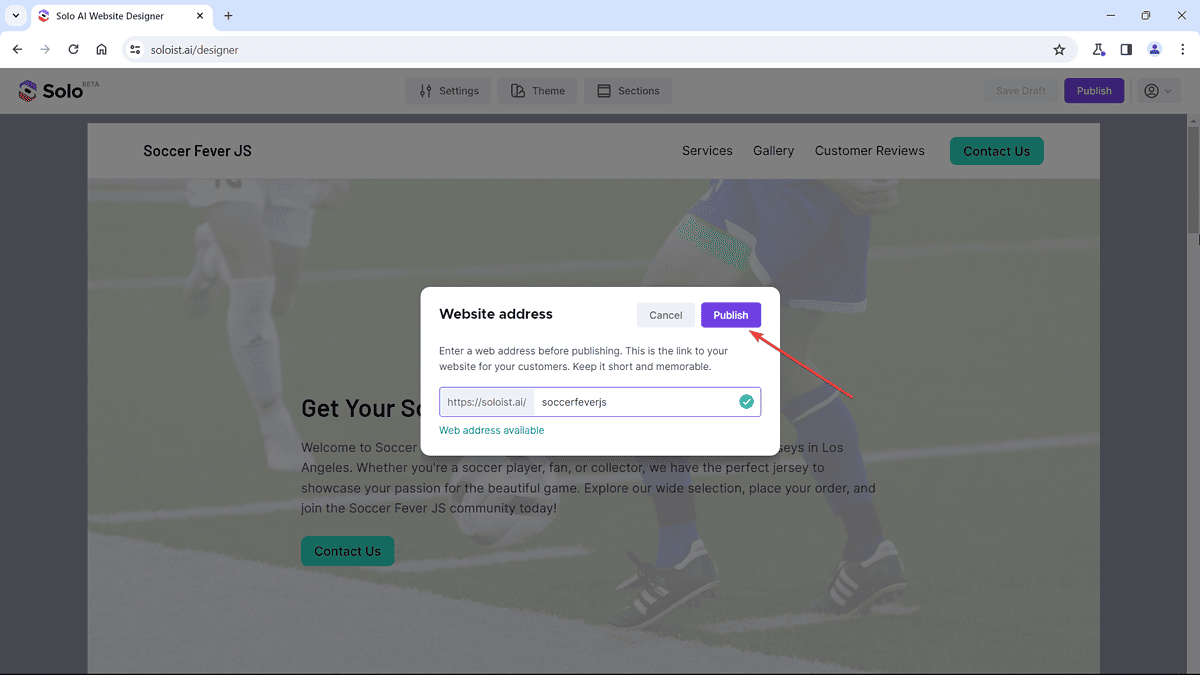
8. Click Publish, and it’s done!
Read our disclosure page to find out how can you help MSPoweruser sustain the editorial team Read more


Improve this guide

User forum
2 messages