Different ways to share Outlook calendars
Most professionals and organizations are using Outlook to communicate with relevant individuals in their businesses. More importantly, this Microsoft’s personal information manager software system allows you to inform others about your sched, thanks to its calendar features and tools. With this, you can easily give an idea to your colleagues when to contact you. Even more, you can share other details and files of your calendar. You can simply do that in a few simple steps. There are ways to do it since Outlook is accessible via web or a desktop app. You can also choose to publish it to allow anyone to view your calendar or subscribe to it.
Share Calendar via Desktop App
- Launch the Outlook app on your computer.
- The app has different views. From Mail, go to the Calendar view by clicking the icon at the bottom left of the screen.
- From the Home tab of Calendar, choose the “Share Calendar” command. When you click it, the “Calendar” option under your Outlook email address will appear. Click it to specifically choose the calendar you want to share.
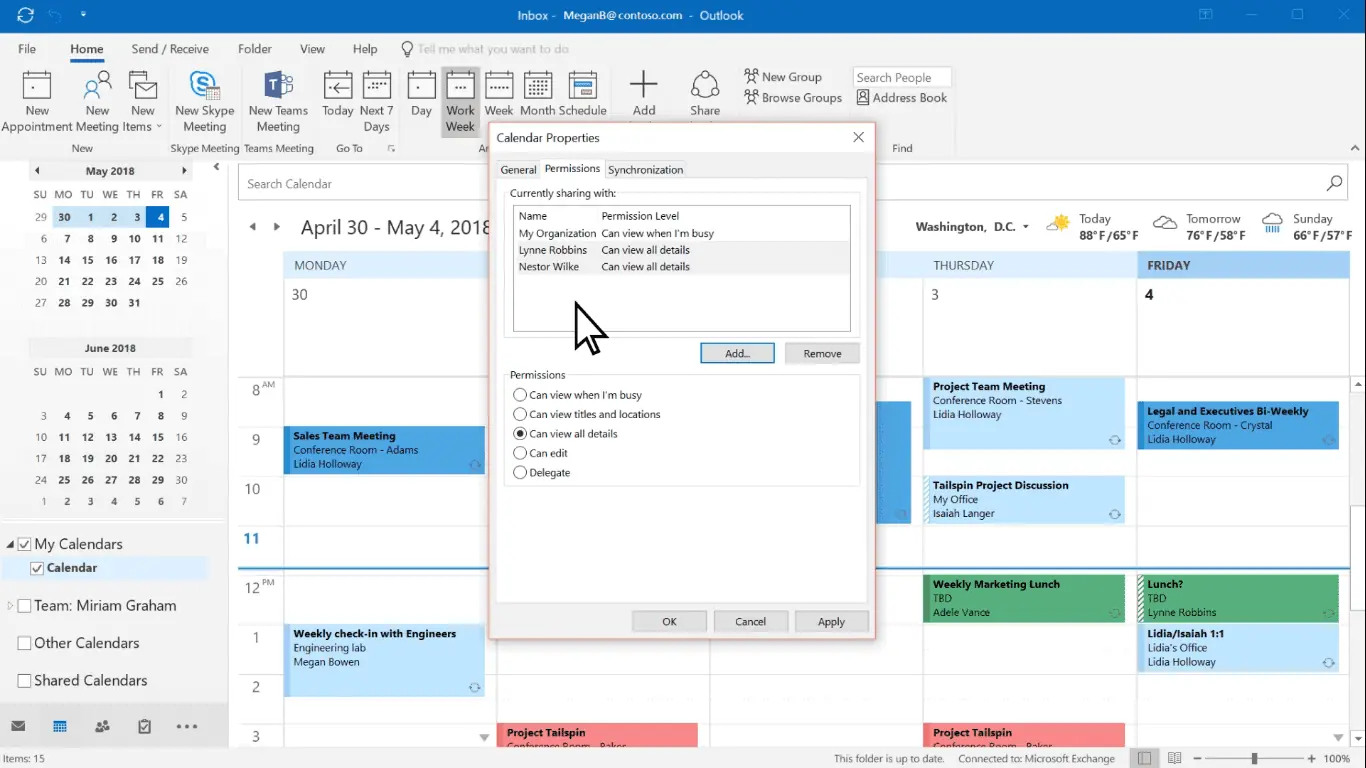
- A Calendar Properties dialog box will appear and open in the Permissions section. Here, you need to add the users you only want to access the calendar you want to share. To do so, click “Add….”
- In the “Add Users” dialog box that will open, you’ll see your contact list. You can choose from them one by one or search for a specific one. When you want to add any contact, just click “Add.” Select Ok when you’re done.
- You’ll be back in the Calendar Properties dialog box with the users you added. Now, you can assign permissions to them one by one. Just click email one after another and select the access you want to grant (can view when I’m busy, can view titles and locations, can view all details, can edit, delegate). Click the Apply button, then Ok to save everything.
- An email will be sent to the users you added, and they can accept or reject the invite. They can then view it by going to the Calendar view of their Outlook and scrolling down to the left bar navigation. Click “Shared Calendar” and choose the calendar sched you sent. They can choose to view it separately from their own calendars or have it on Overlay Mode to compare and see if there are conflicts in the schedules.
Note: Sharing your calendar in an email through the “Email Calendar” command is no longer available with Outlook for Microsoft 365. The feature used to allow users to email a static copy of a calendar for a specific date range, wherein updates and changes wouldn’t be seen by the receiver.
Share Calendar via Web
- Launch Outlook via the web. The layout of the web and desktop Outlook apps are a bit different, but they are both intuitive. Go to the Calendar view by clicking the Calendar icon placed under mail on the left navigation.
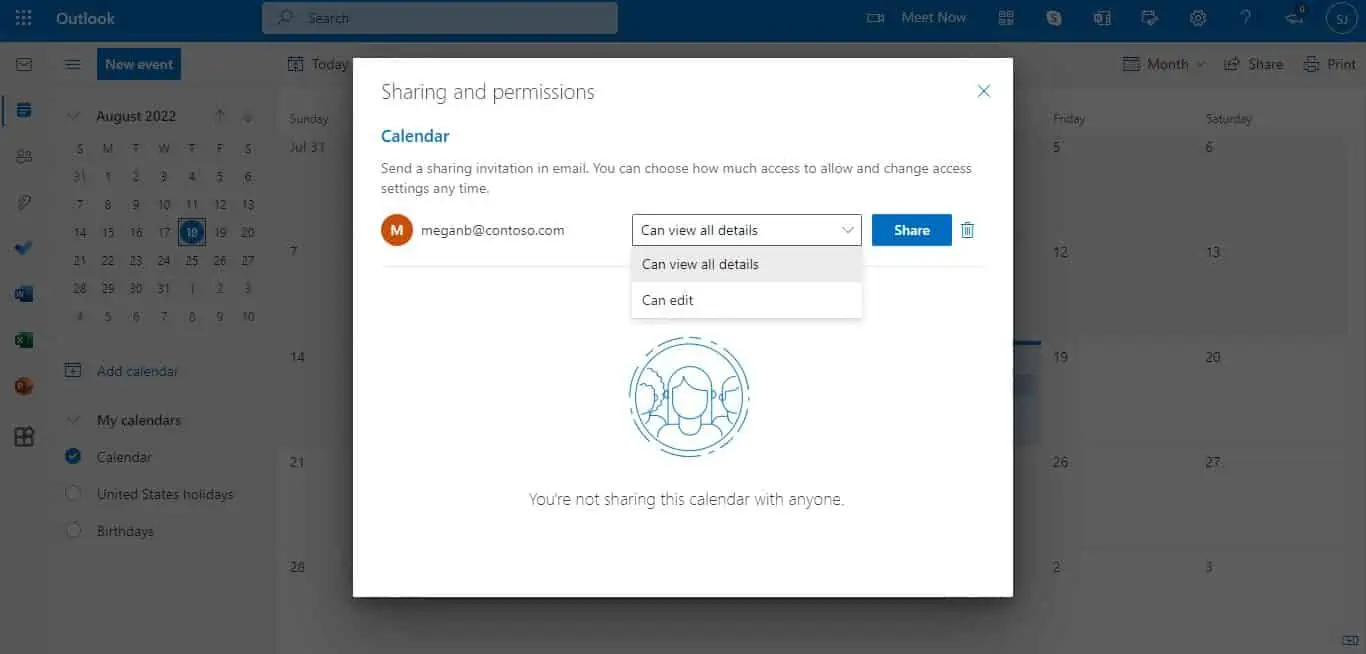
- Click the “Share” button at the top right part of the screen. It will open a window called “Sharing and Permissions,” where you can add users. There’s also another way to launch that window. If you have a specific calendar to share (under My Calendars on the left interface), you can simply right-click it or select the three-button icon that will appear when you hover, and the Sharing and Permissions will open.
- In the Sharing and Permissions window, you can search the email address of the people you want to share your calendar with. There will be suggestions when you type. You can just select them.
- Upon selecting a user, you’ll be asked for the type of permission you want to give. Click the drop-down menu beside the user and choose the access they can have (can view all my details or can edit). Unlike in the desktop app, you have to assign permission to the user right away after selecting them in order to search for another one. Selecting the Share button will instantly send an invite, so make sure of the access you want to give.
- Repeatedly search users and assign permissions until you’re done.
- An invite will directly be sent to the user, and they accept or reject it. You can change the permissions anytime you want or stop sharing by going to the Sharing and Permissions once again and looking for a specific user.
Publish Calendar on web
- Launch Outlook on the web and go to the Calendar view.
- Click the gear icon at the top left part of the screen to open Settings. Scroll down and click “View all Outlook settings.”
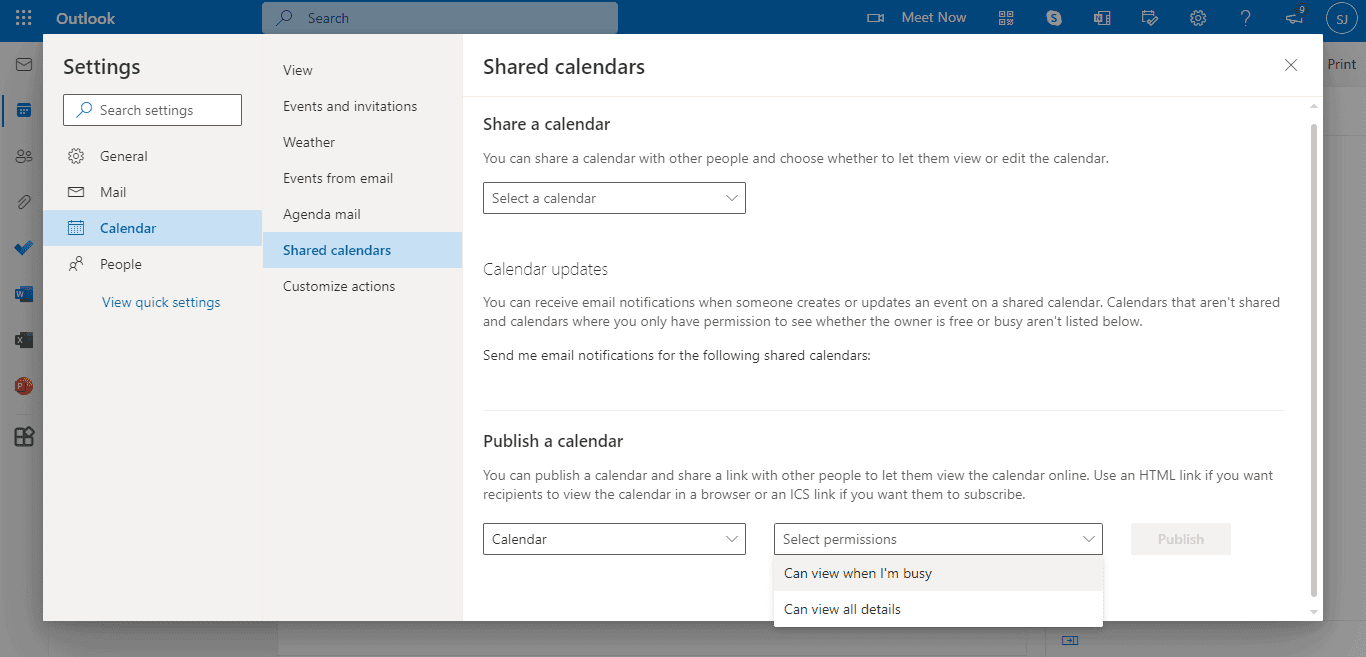
- When the Settings window appears, go to the Calendar section, then click Share Calendars.
- Under “Publish a Calendar,” there are drop-down menus you can use to choose the calendar you want to publish and the permissions (can view when I’m busy and can view all details). Click Publish button once you’ve set up everything. Note: Choosing an HTML link means the recipients can copy and paste the URL into a browser. This will let them view the calendar in a new browser window. Meanwhile, an ICS link will allow them to download the ICS file and import it into Outlook and even use it to subscribe to your calendar through Outlook. Also, both HTML and ICS links won’t allow editing of your calendar.
- If you need to unpublish the calendar, just follow the same steps, except you’ll now click “Unpublish.”
Share Outlook Calendar events to your contacts via mobile app
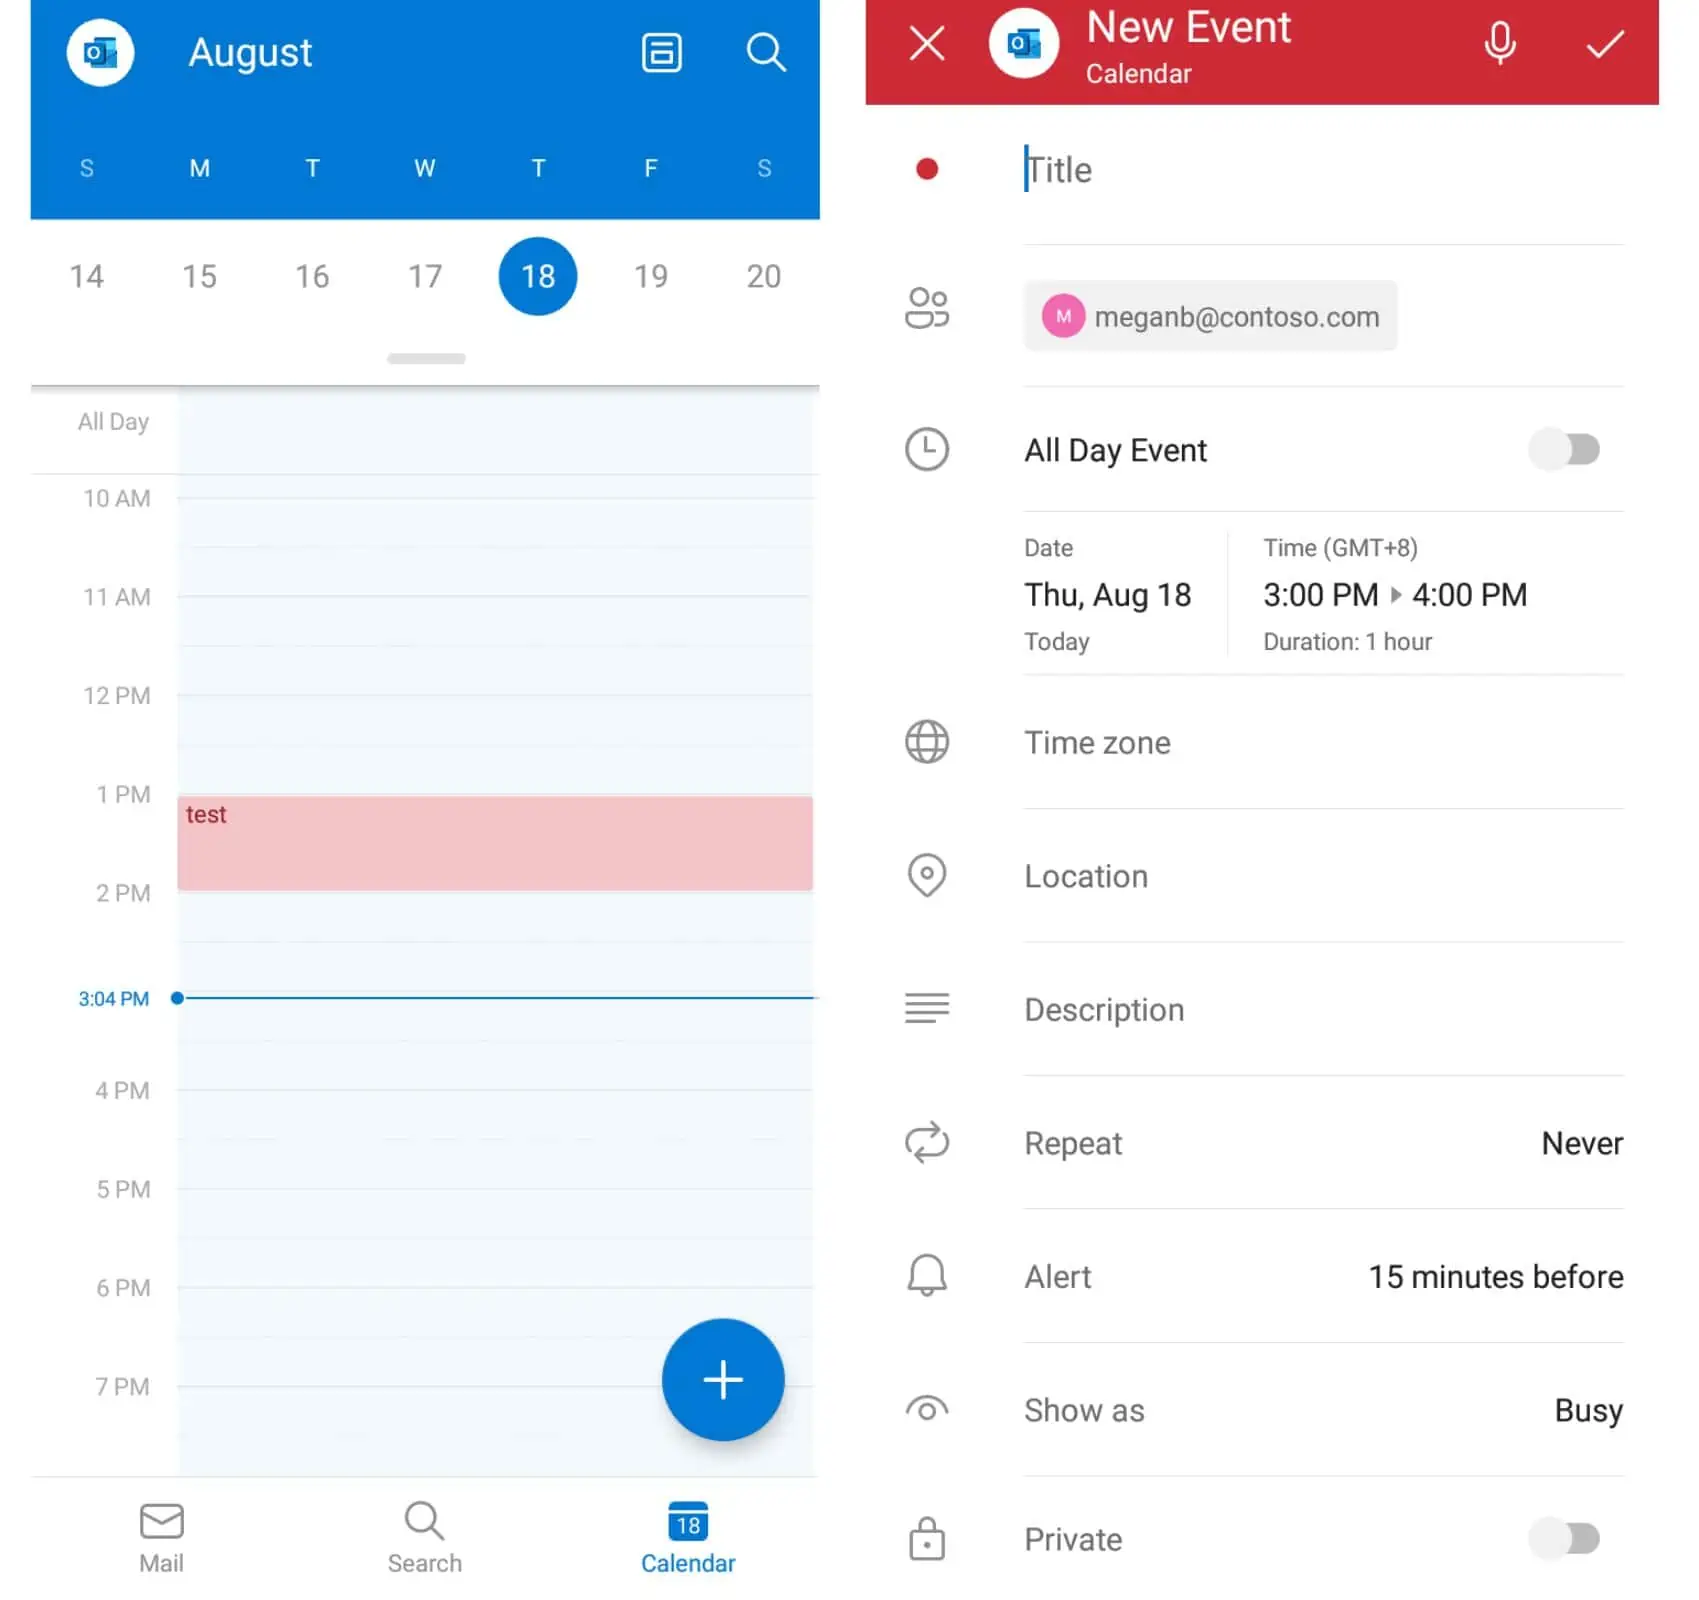
- You can’t share your calendar via Outlook mobile app, but you can invite contacts as attendees to an event. Just launch the app and go to the Calendar view by tapping the third icon at the bottom of the app’s screen.
- Tap the plus icon. It will let you create an event.
- Fill in the necessary sections of the invitation, such as the title, location, description, and more. Under the title, type the email addresses of the people you want to invite.
- Click the check mark at the top right corner of the screen to save the invitation and send the invites to your selected participants.
Read our disclosure page to find out how can you help MSPoweruser sustain the editorial team Read more


Improve this guide


User forum
0 messages