DHCP Not Enabled for Wi-Fi Windows - 8 Definite Solutions
![]() 3 min. read
3 min. read
![]() Published on
Published on
Share this article

Improve this guide
Read our disclosure page to find out how can you help MSPoweruser sustain the editorial team Read more
The “DHCP not enabled for Wi-Fi” Windows error prevents you from using the internet. The Dynamic Host Configuration Protocol (DHCP) is responsible for distributing IPs to systems. If this is disabled, then you won’t be able to use the internet since the IP addresses won’t be assigned.
To fix this problem, please read through this article.
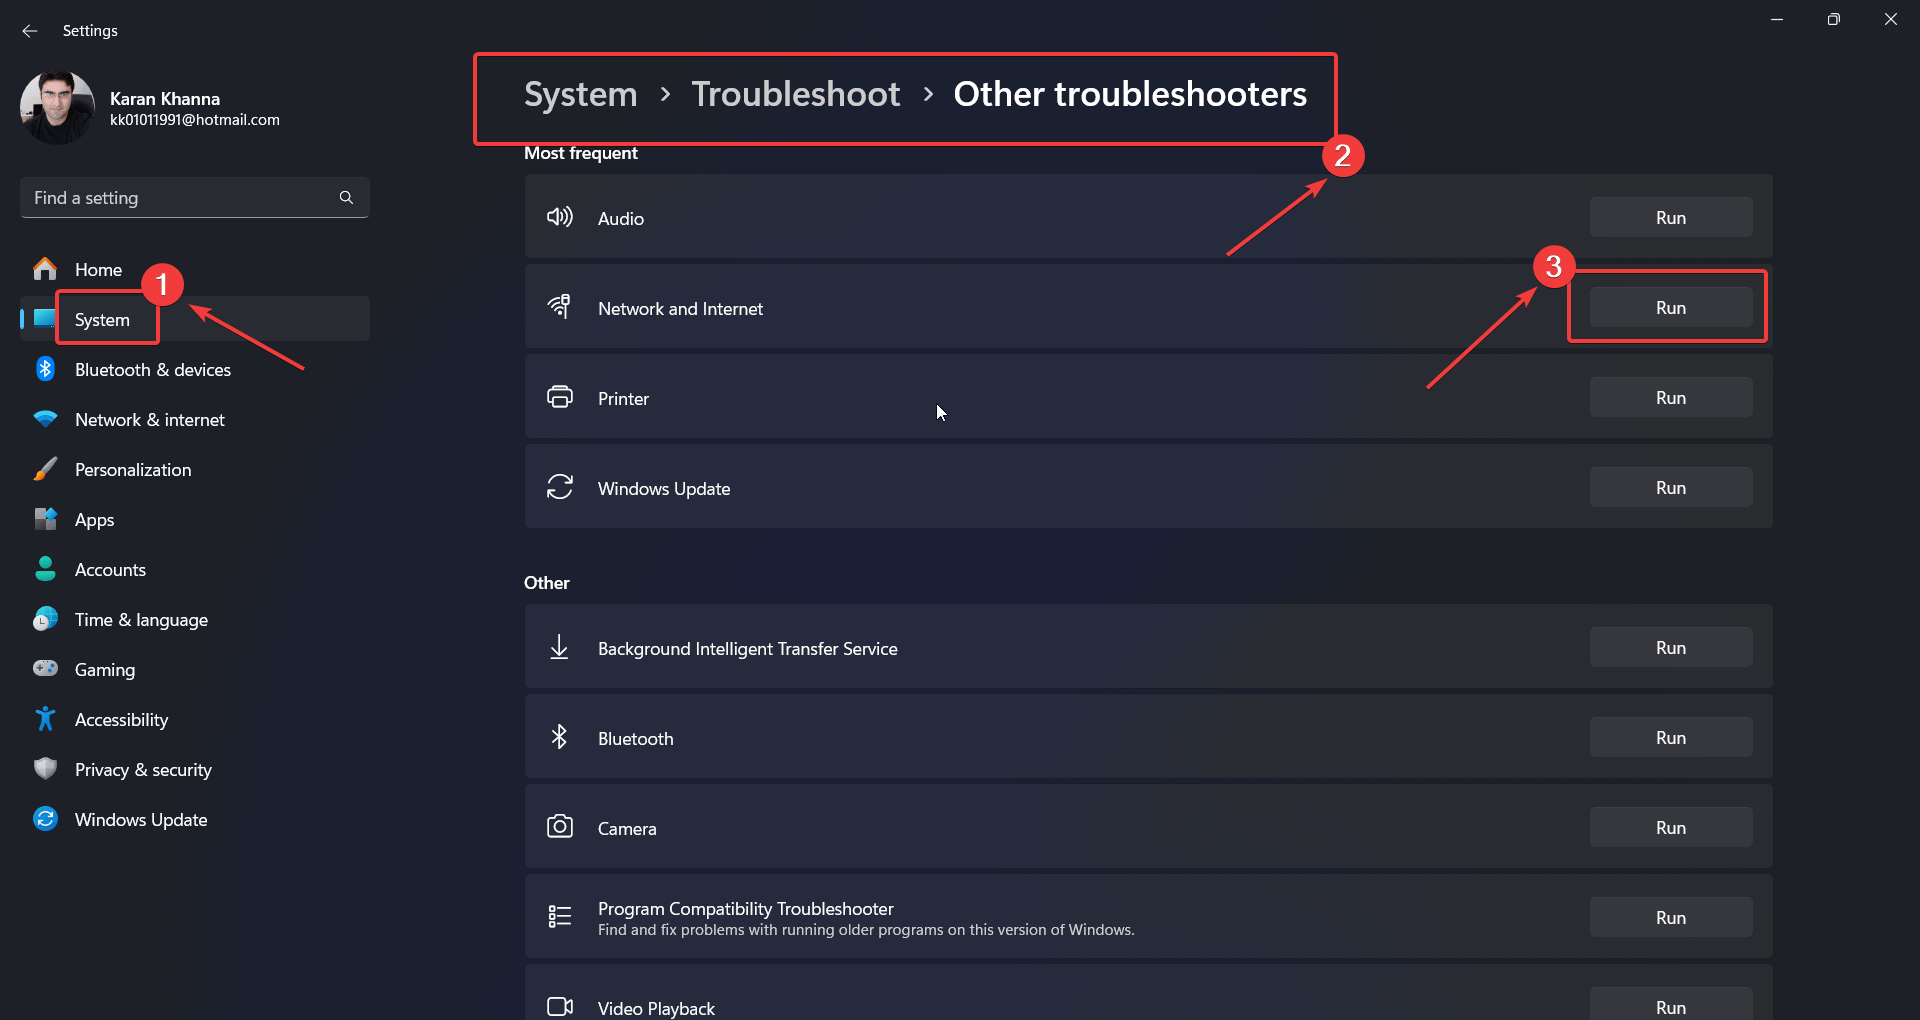
Solution 1: Run the Network Adapter Troubleshooter
- Right-click on the Start button and select Settings from the menu.

- Go to System >> Troubleshoot >> Other troubleshooters.
- Click on Run corresponding to the Network Adapter troubleshooter.
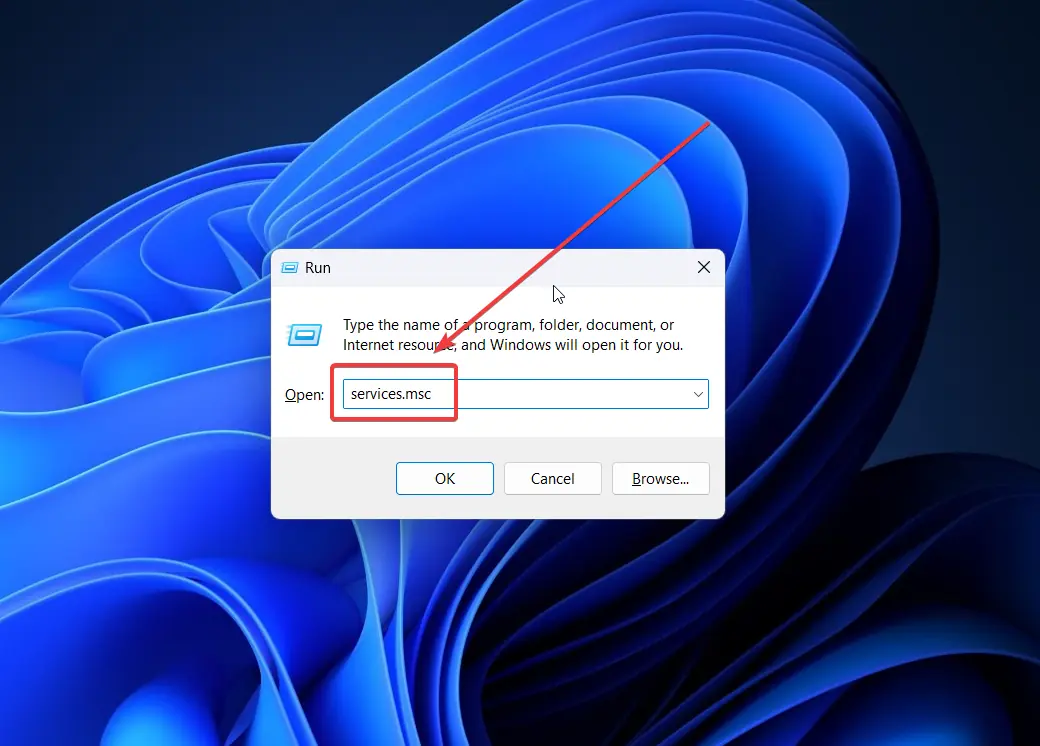
Solution 2: Start the DHCP Client Service
- Press Windows + R to open the Run window.
- Type the following command and hit Enter to open the Service Manager window: services.msc
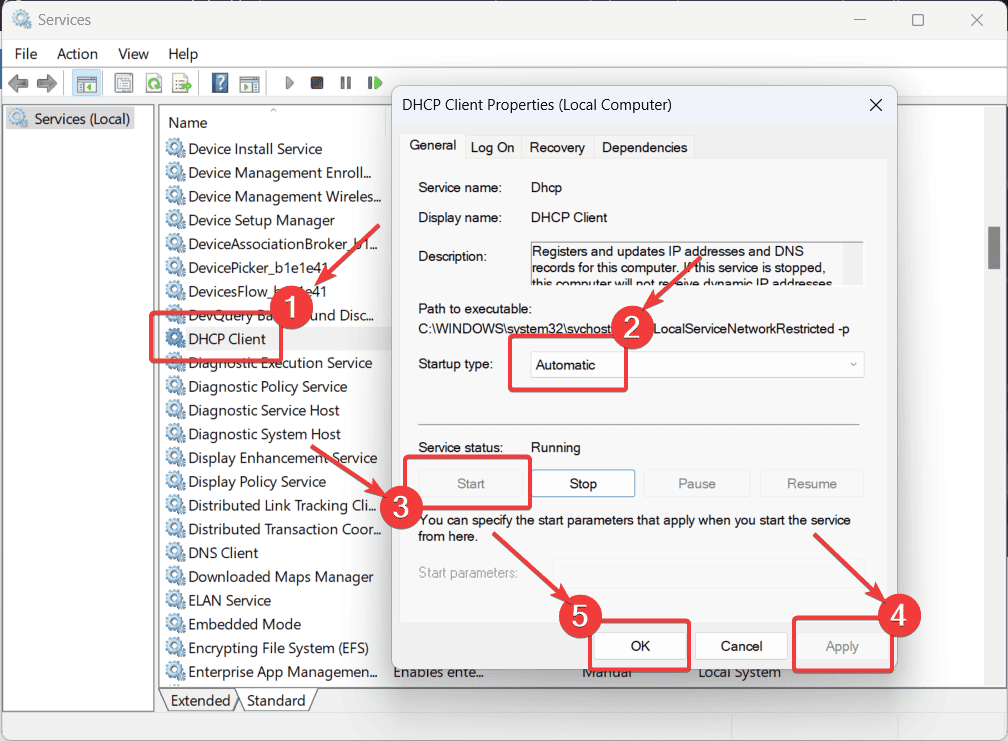
- Scroll down to the DHCP Client service.
- Double-click the DHCP Client service to open its properties.
- Change Startup Type to Automatic.
- If the service is stopped, click on Start.
- Click on Apply and then on OK.
Solution 3: Update Network Driver
If the Network Adapter driver is obsolete, you may encounter the issue.
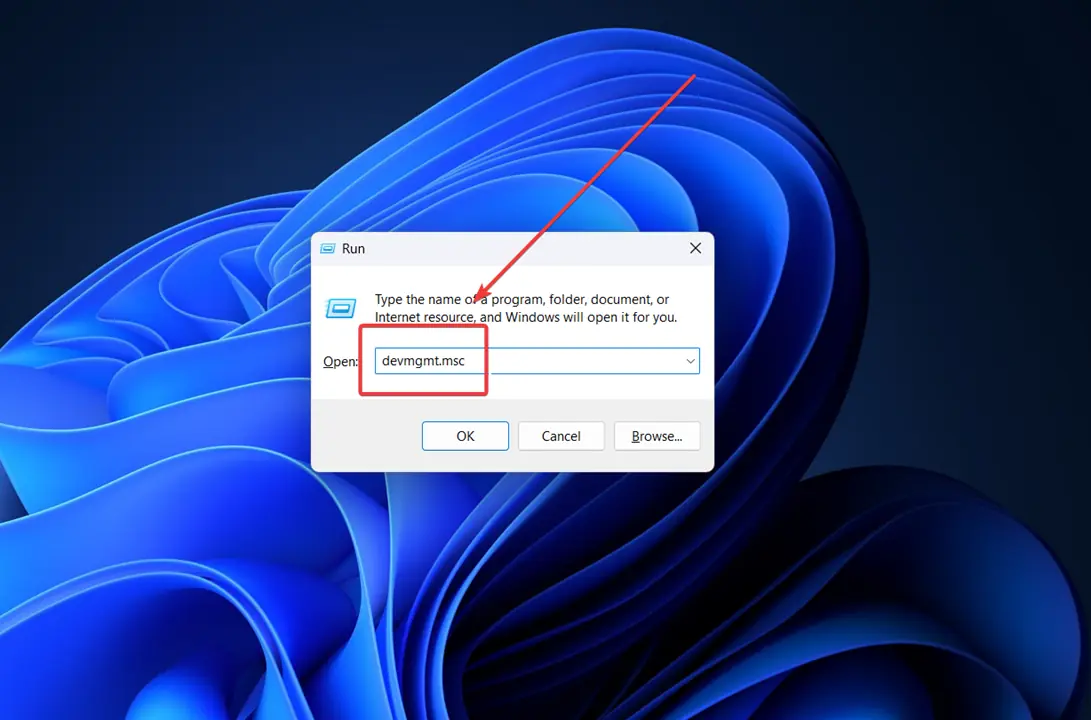
- Press Windows + R to open the Run window.
- Type the following command and hit Enter to open the Device Manager window: devmgmt.msc
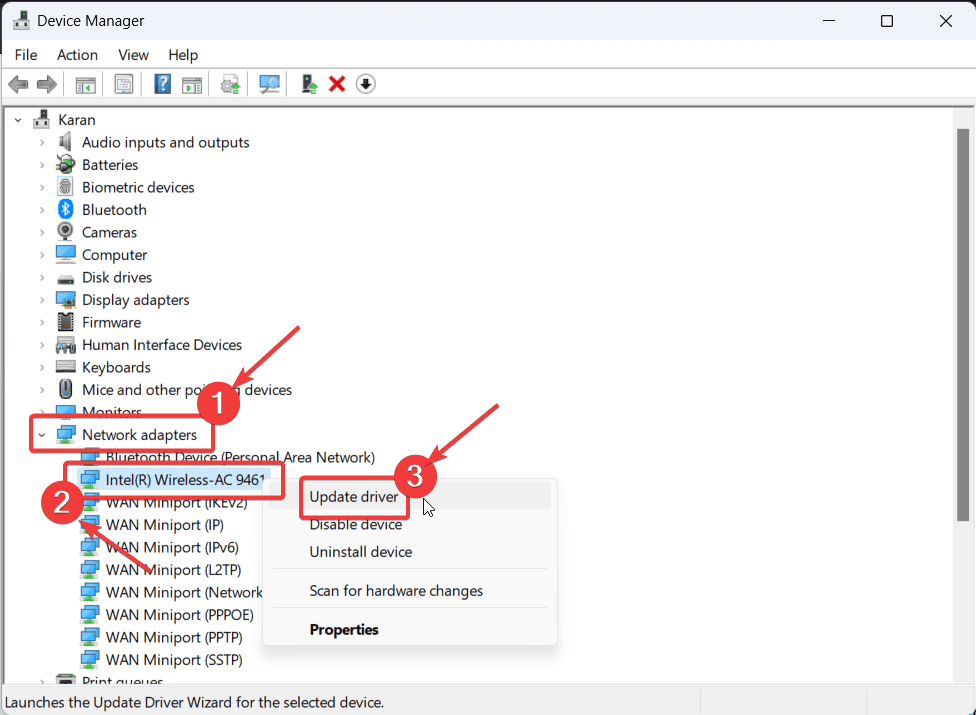
- Expand the list for Network Adapter drivers.
- Right-click on the Intel Wireless AC driver and select Update driver.
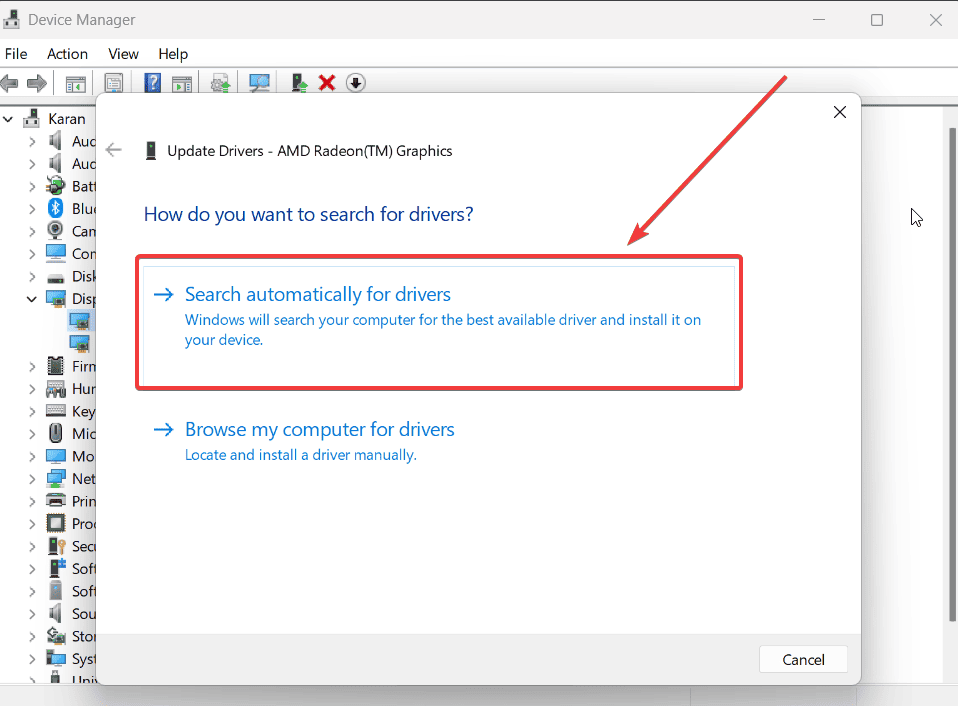
- Click on Search automatically for drivers.
Solution 4: Change Network Adapter Settings
Inconsistent Network Adapter settings may cause the issue.
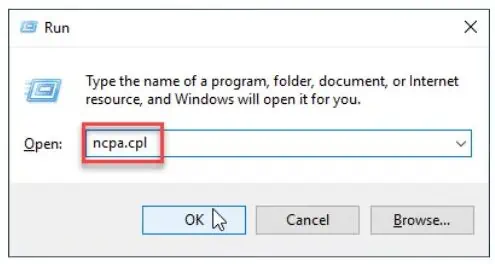
- Press Windows + R to open the Run window.
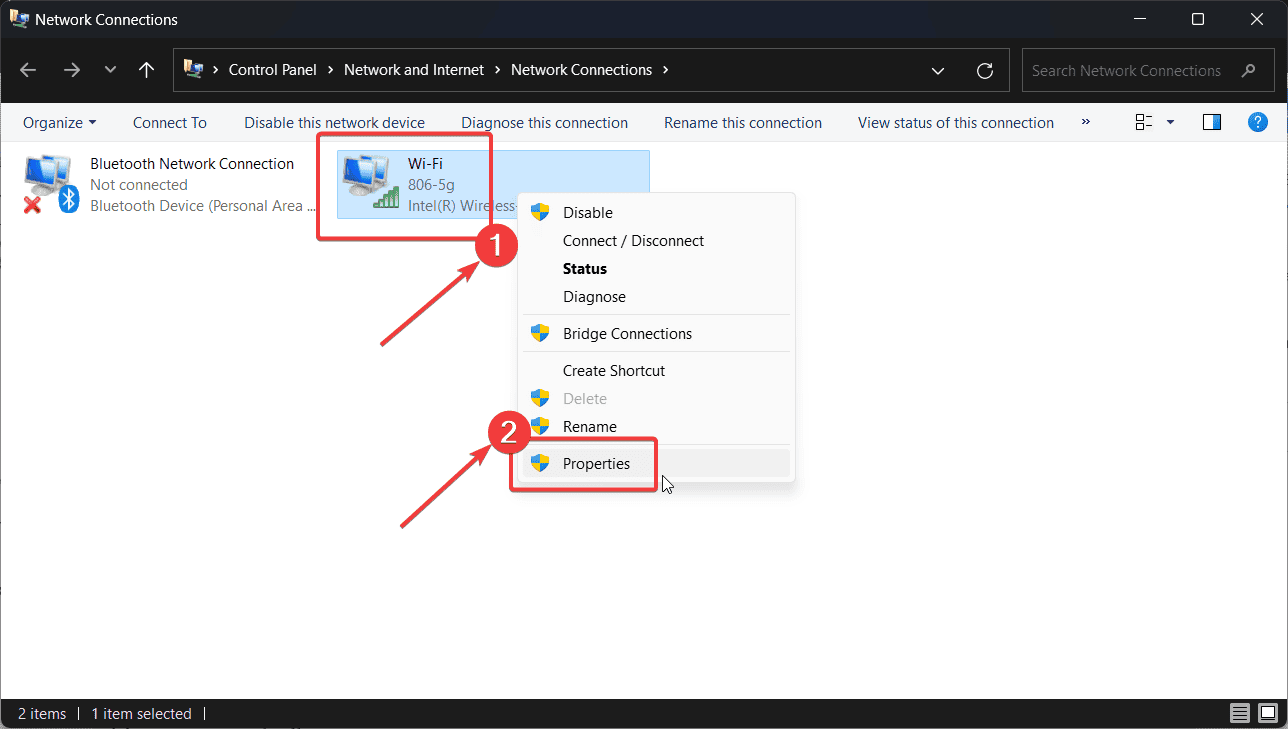
- Type the following command and hit Enter to open the Network Connections window: ncpa.cpl
- Right-click on Wi-Fi and select Properties.
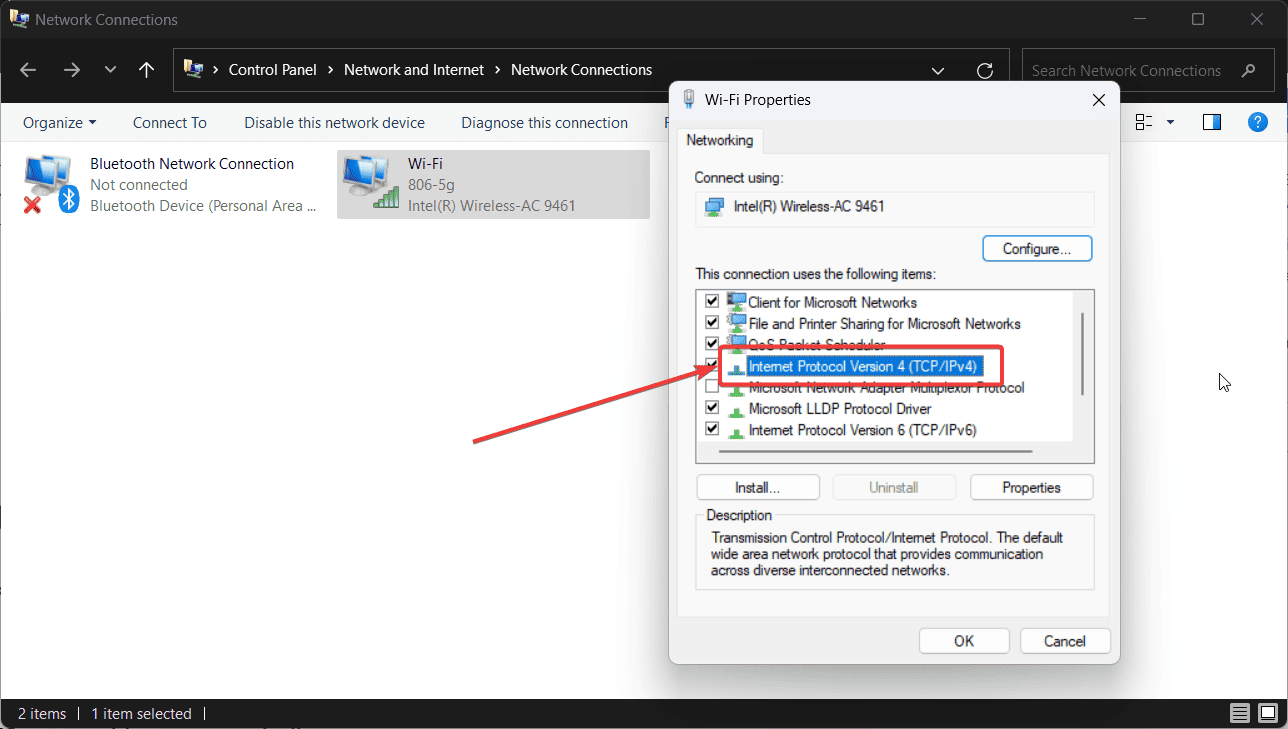
- Double-click on Internet Protocol Version 4 to open its properties.
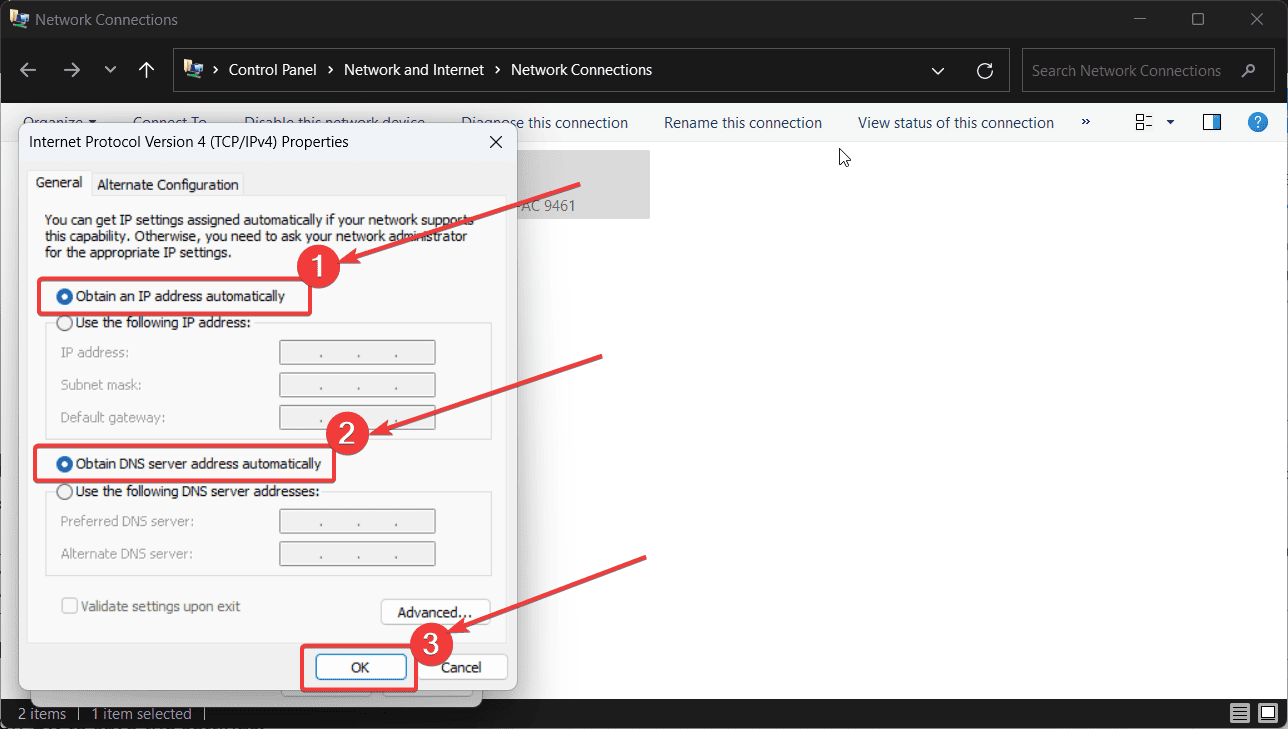
- Check the radio buttons at the following 2 values and then click OK:
Obtain an IP address automatically
Obtain DNS server address automatically
Solution 5: Disable Proxy Networks
- Right-click on the Start button and select Settings from the menu.
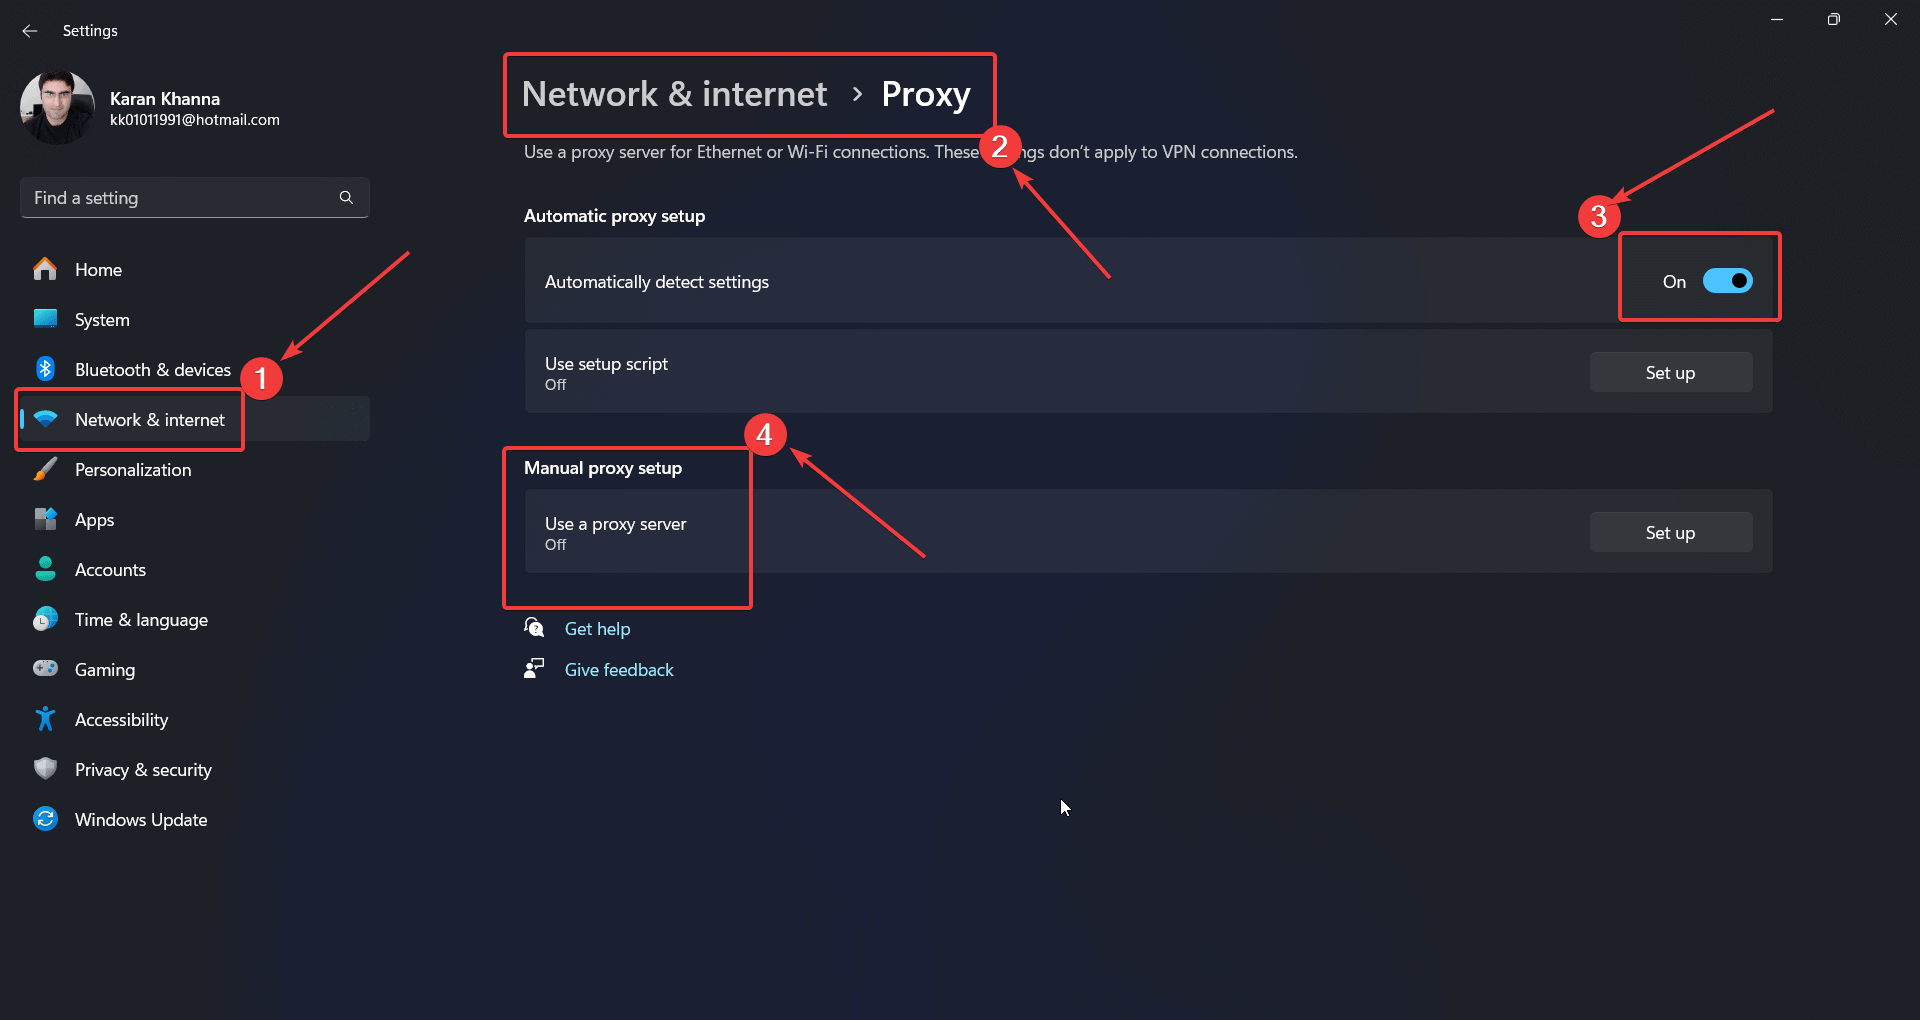
- Go to Network & Internet >> Proxy.
- Turn the switch ON for Automatically detect settings.
- Turn the switch OFF for any manual proxy.
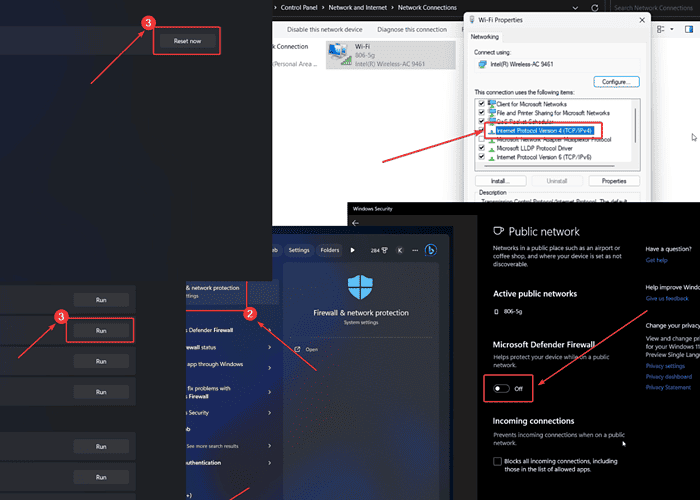
Solution 6: Disable Windows Firewall
An overprotective Firewall may also cause this issue.
- Search for Firewall in the Windows Search bar.
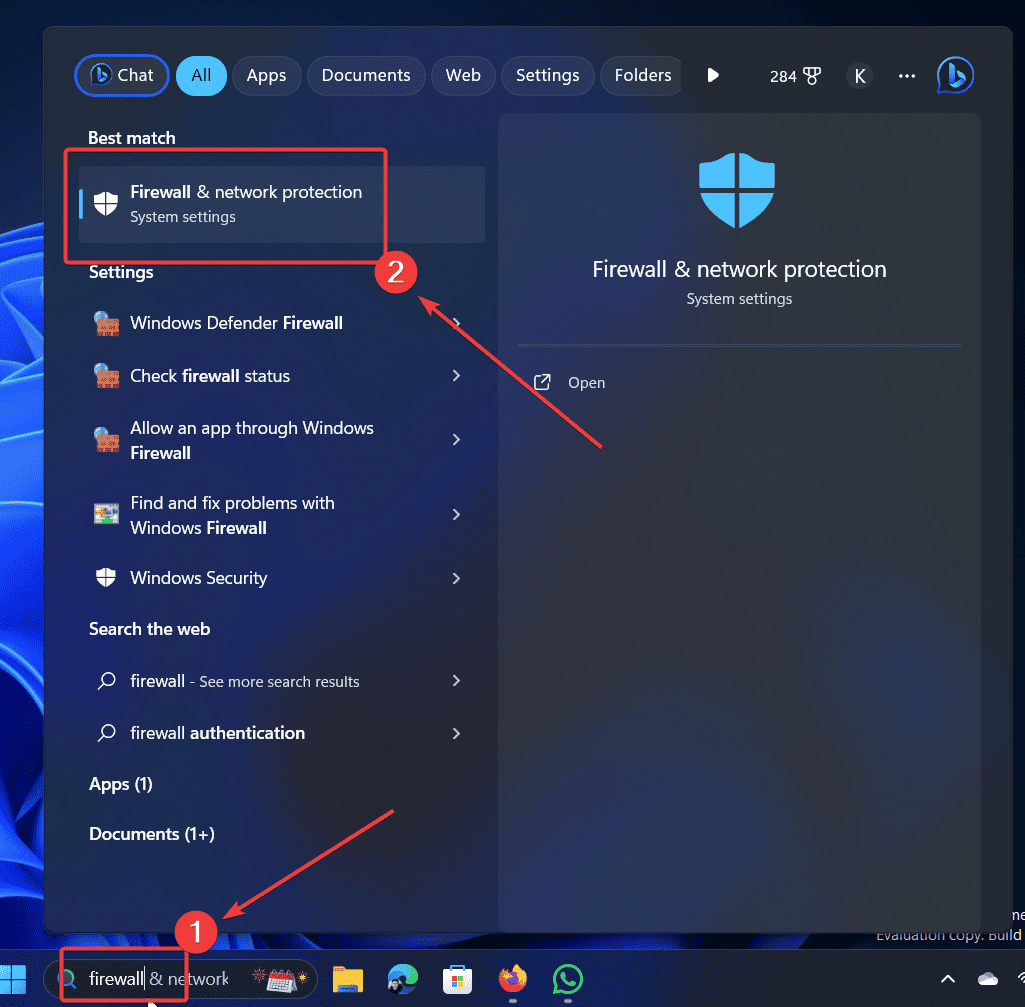
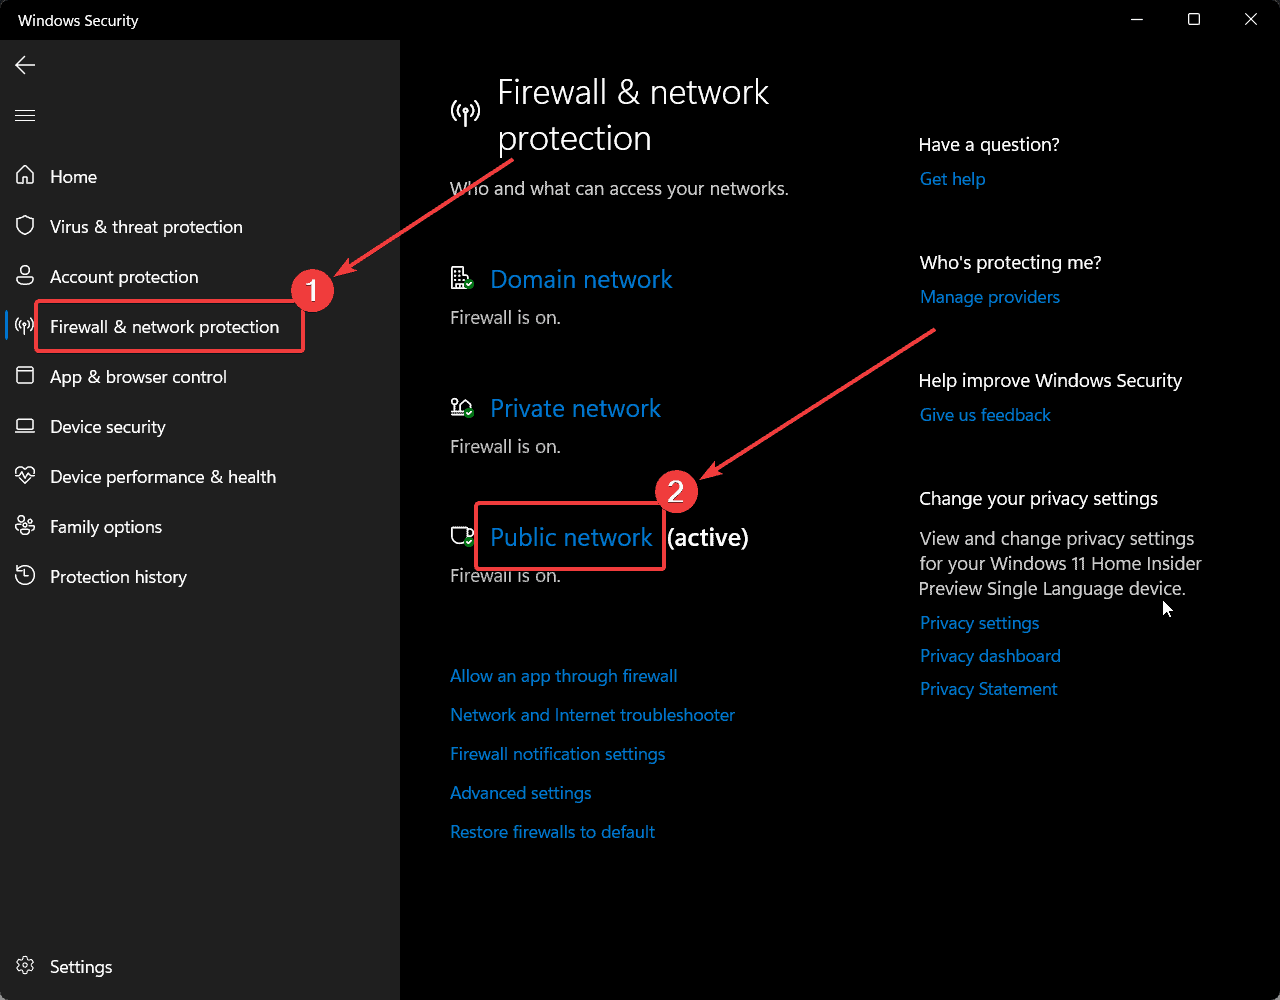
- Open Firewall & network protection.
- Click on Public network.
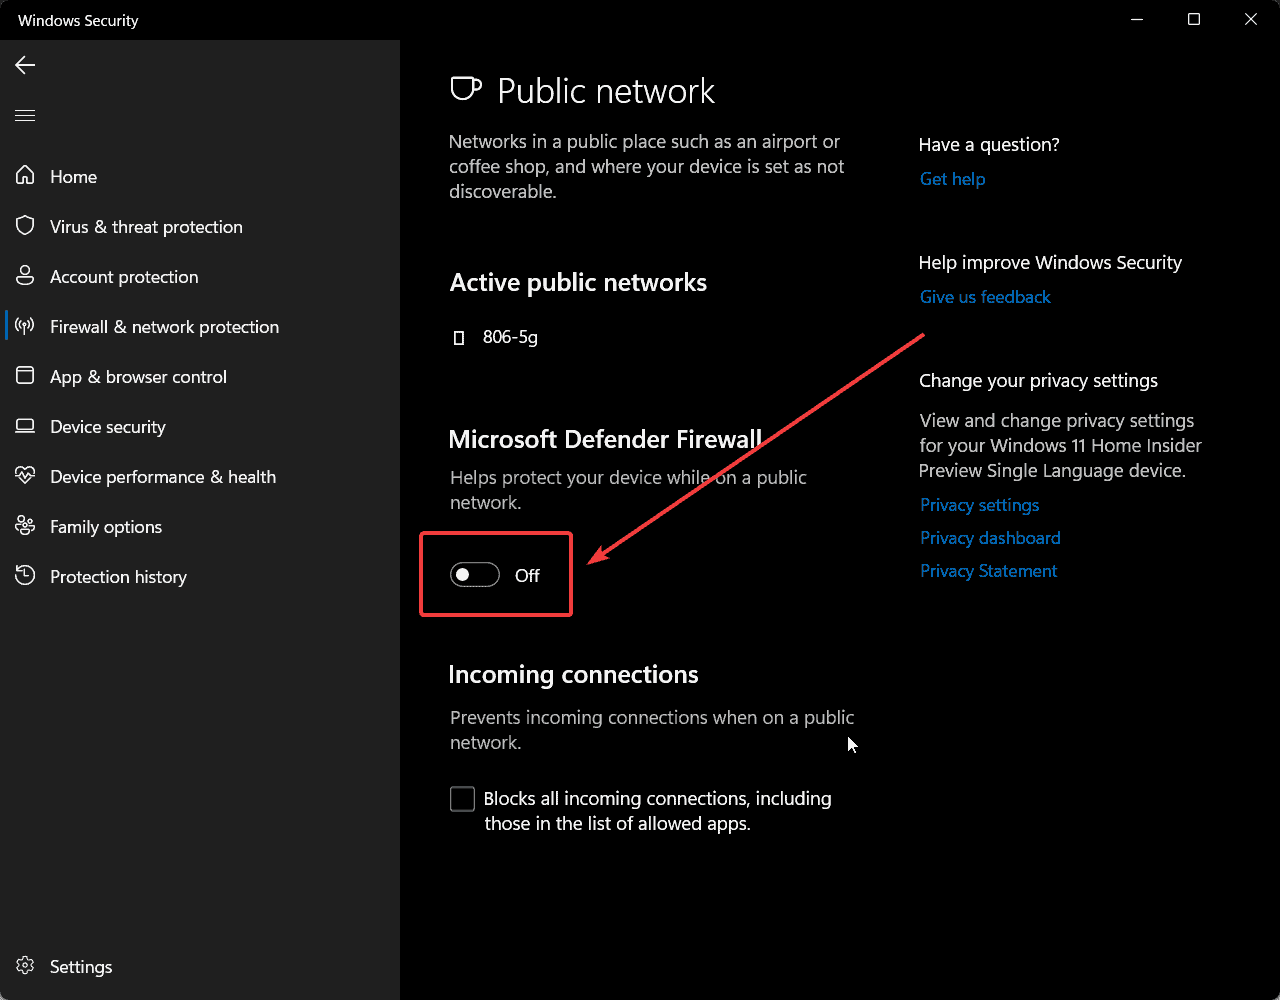
- Turn the switch OFF for Microsoft Defender Firewall.
Solution 7: Reset Network Settings
If you don’t know which exact setting is problematic, consider resetting Network settings.
- Right-click on the Start button and select Settings from the menu.
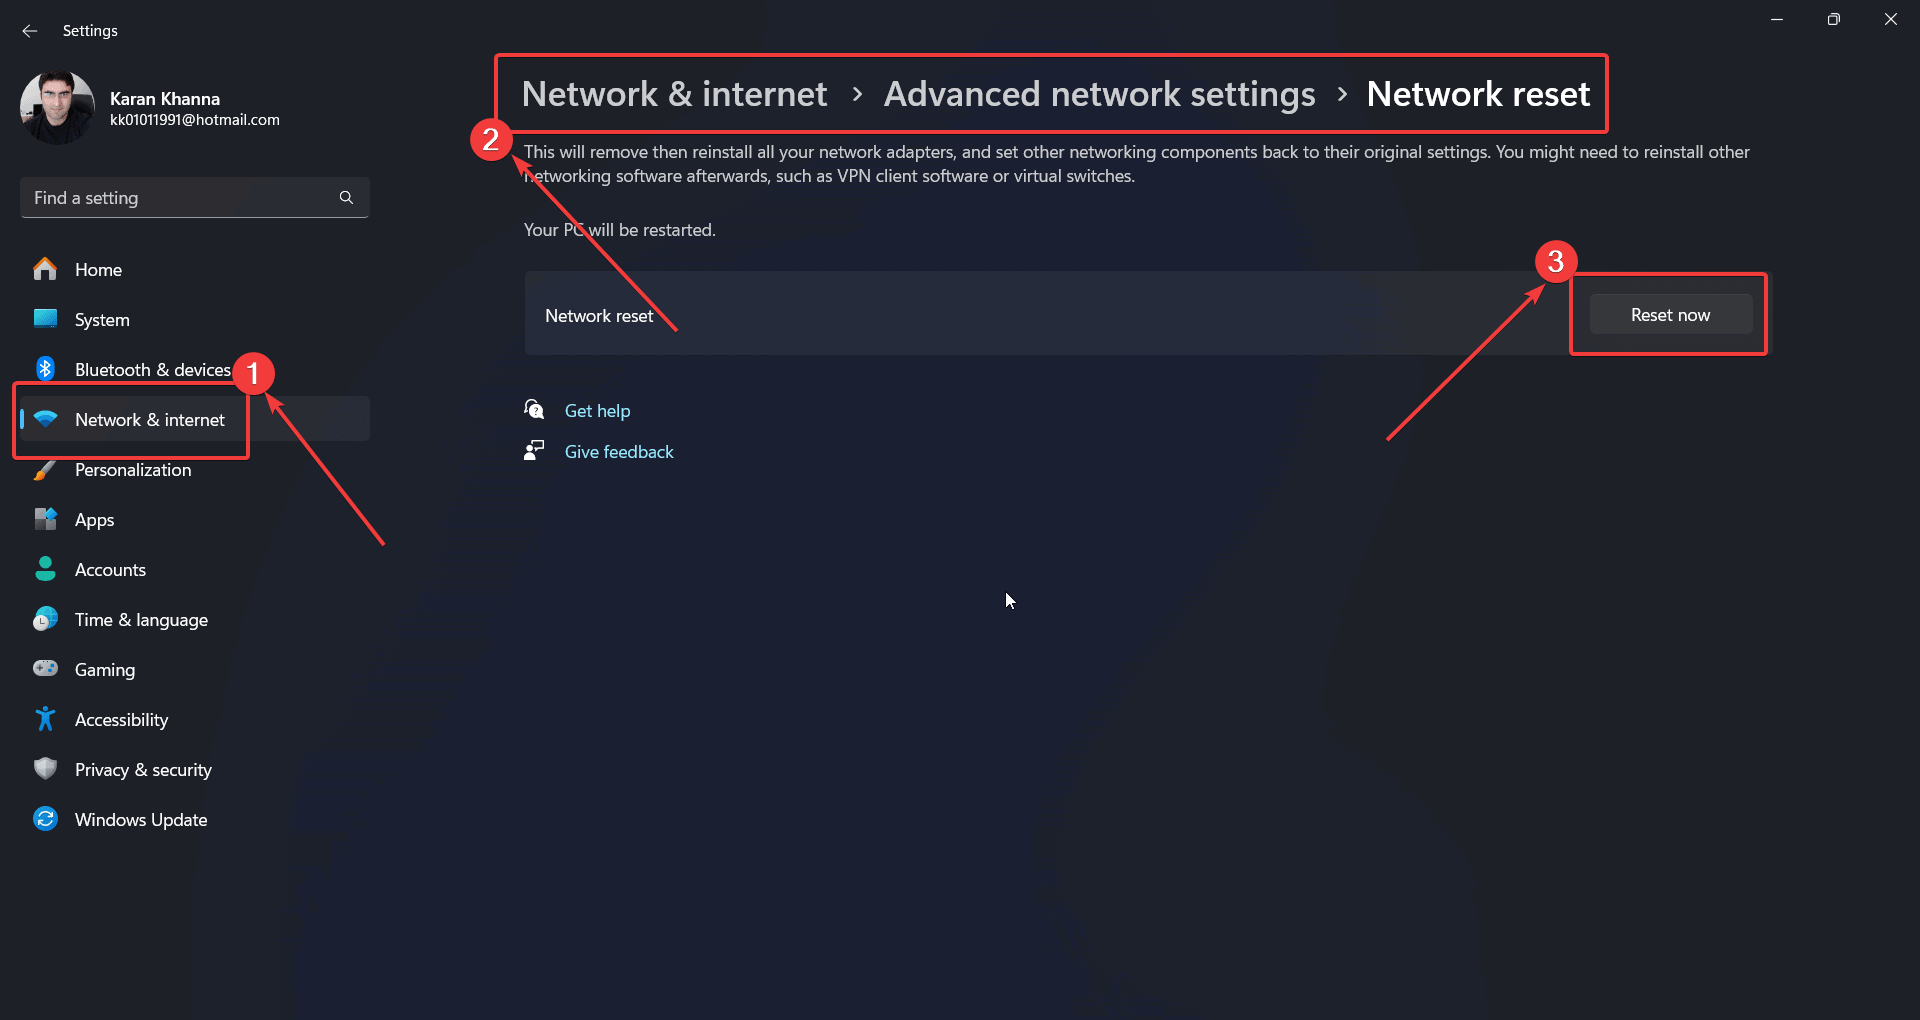
- Go to Network & Internet >> Advanced network settings >> Network reset.
- Click on Reset now.
- Select Yes.
Solution 8: Command Prompt Fix
You can also reset the IP address, flush the DNS, and reset Winsock via Command Prompt.
- Search for Command Prompt in the Windows Search bar.
- Click on Run as administrator in the right pane to open the Command Prompt window.
- Copy-paste the following commands and hit Enter to execute them:
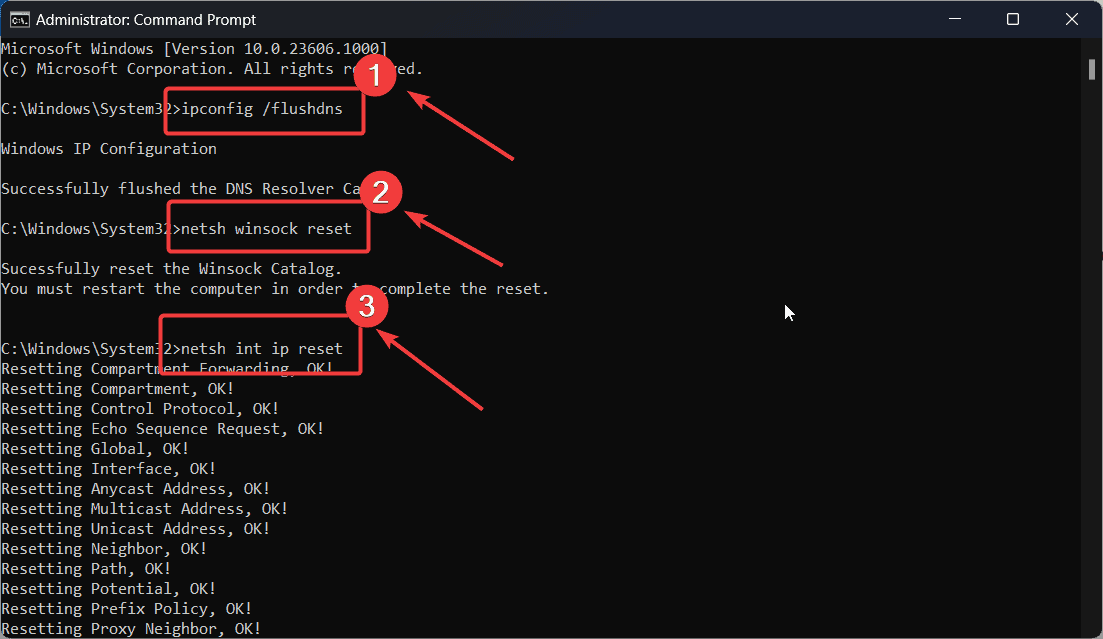
ipconfig /flushdns
nbtstat –r
netsh int ip reset
netsh int ip renew
netsh winsock reset
Reboot your system for the changes to take effect.
You may also be interested in:
The “DHCP not enabled for Wi-Fi” Windows error can be very troublesome for internet users. Usually, running the Network Adapter Troubleshooter and re-enabling the DHCP should fix the problem. If this guide was helpful, please let me know in the comment section below.


User forum
0 messages