How to Change Outlook Data File Location?
Want to change Outlook data file location?
If you want to do any of the following, this post is for you:
- You want to create an Outlook backup file.
- You want to move the Outlook file to another file location.
- Are unable to use conventional methods to transfer your PST or OST file to a new location.
- You are unable to change the location of your OST file.
If you’ve found yourself in any of the above-mentioned positions, read on.
Why can’t I change the location of my OST file?
The nature of an OST file does not allow its location to be changed. If you do so (especially with the newer Outlook version), it will disable the browse option on the Data File Settings page.
There are a few available options that will allow you to do so:
- Convert your OST file to a PST file.
- Move your OST file using the Registry Editor on Windows. (explained below).
- Move your OST file using the Symlink on Windows.
Where is My PST File Located?
Usually, Outlook saves all its PST files in a default save location. However, the PST file may be stored in another location if moved or imported by a user. There are two ways to find the location of your Outlook data file, and you can use the methods below to do so.
1. Locate PST file using default Save location
As mentioned earlier, Outlook has a default storage location where it stores and updates all the OST and PST files.
If you have created your Outlook profile using the same system, there is a good chance that you will find your file here. You can refer to the paths given below to locate your PST Outlook data file:
C:\Users\UserName\AppData\Local\Microsoft\Outlook
2. Locate PST file using Outlook
If you were unable to find your file using the default save location, then you can use the Outlook Import/export option.
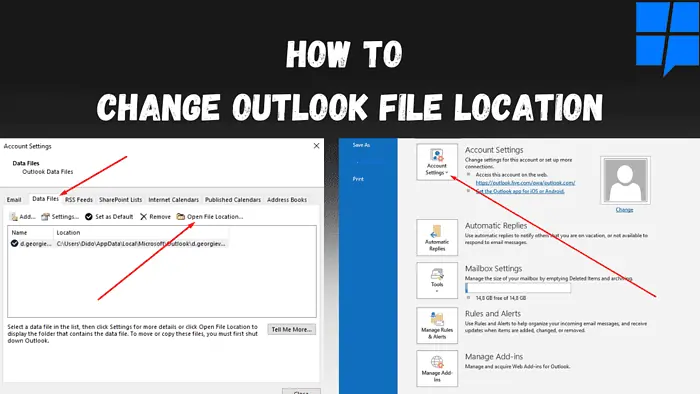
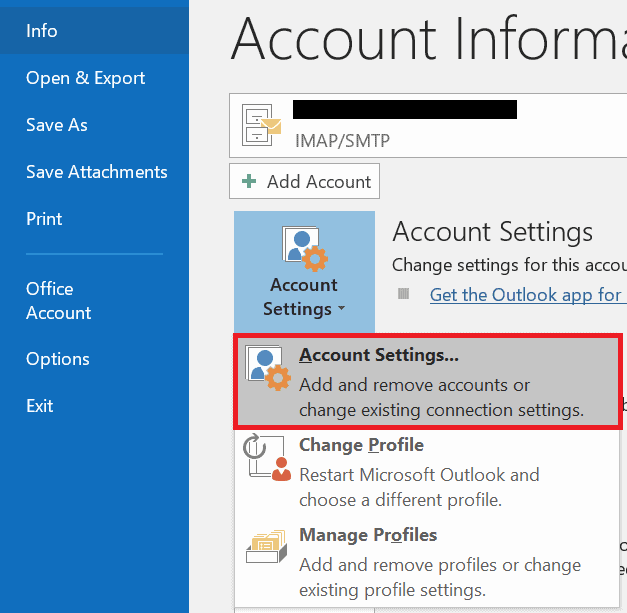
- Open Outlook and click on File to open the file menu.
- In the Info Section, you will notice the Account Settings option.
- Click on Account Settings and select Account Settings in the drop-down options.
- An Account Settings Window will open. Click on Data Files.
- All the PST and OST data files synced with Outlook will be displayed. Select the Outlook data file that you would like to move and click on Open File Location.
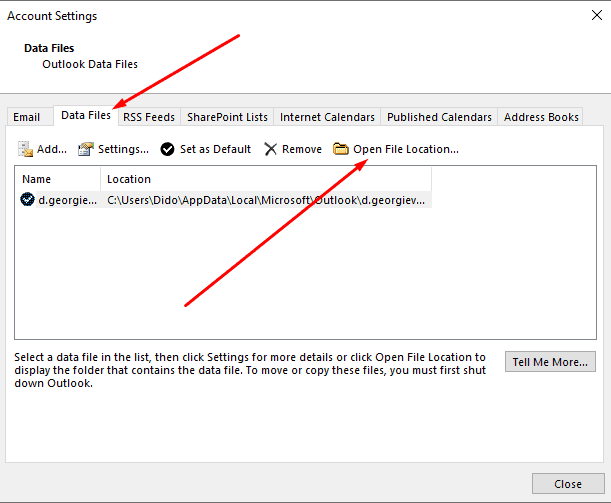
- The respective file location Window will open up, giving you access to your OST or PST files.
How to change Outlook Data File Location
1. Manually Change Outlook data file location using Outlook Accounts Settings
You can easily change the Outlook data file location with the help of Outlook. The straightforward method is easy to use. However, this method may not work if you have an OST file. You can instead use the remaining three methods.
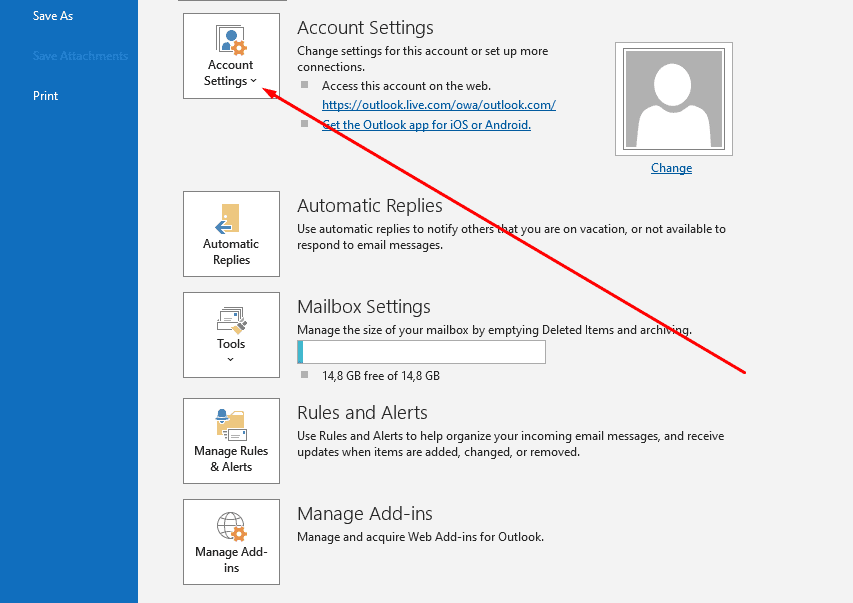
- Open Outlook, click on File, and access the file menu.
- In the Info Tab, Locate the Account Settings option.
- Click on Account Settings and select Account Settings.
- After the Account Settings Window opens. Click on Data Files.
- All the PST and OST data files synced with Outlook will be displayed. Select the Outlook data file that you would like to move and click on Open File Location…

- The respective file location Window will open up, giving you access to your OST or PST files.
- You can now move the file, create a copy of your Outlook data file to store as a backup, or transfer it to another PC.
2. Change Outlook data file location using .symlink
If you want to transfer an OST file or the first two methods fail, you can always use .symlink to change the file location.
Symlinks are files that redirect the system to another file or folder address and act as shortcuts. You can create one by using the steps below-
Note: If you are unfamiliar with .symlink to computers, I suggest you take someone’s assistance or move on to the method below.
- Use Outlook Account Settings to locate the default PST file save location, copy the path address from the File Explorer address bar, and close the Outlook application.
- Move the PST file to the new folder path where you want to relocate the PST file.
- Use the Windows+R shortcut to open Run Command. Type in “cmd” and click on OK to Open Command Prompt.
- Then execute the following command in the command prompt-
mklink "C:\Users\username\Documents\Outlook Files\Outlookfile.pst" "D:New PST location\Outlookfile.pst"
- When you look at the original location, you should see a .symlink file with the same name.
- You can now use Outlook as before with the new PST file location.
3. Change Outlook data file location using Registry Editor
The Registry Editor is a graphic tool that allows users with admin privileges to edit the Windows registry database. By doing so, you can change the location of your OST or PST file.
- Use the Windows + R shortcut to open Run Command, type regedit, and click OK.
- Navigate to the following registry key: HKEY_CURRENT_USER\Software\Microsoft\Office\16.0\Outlook
- Then right-click on Outlook, choose New, and select Expandable String Value.
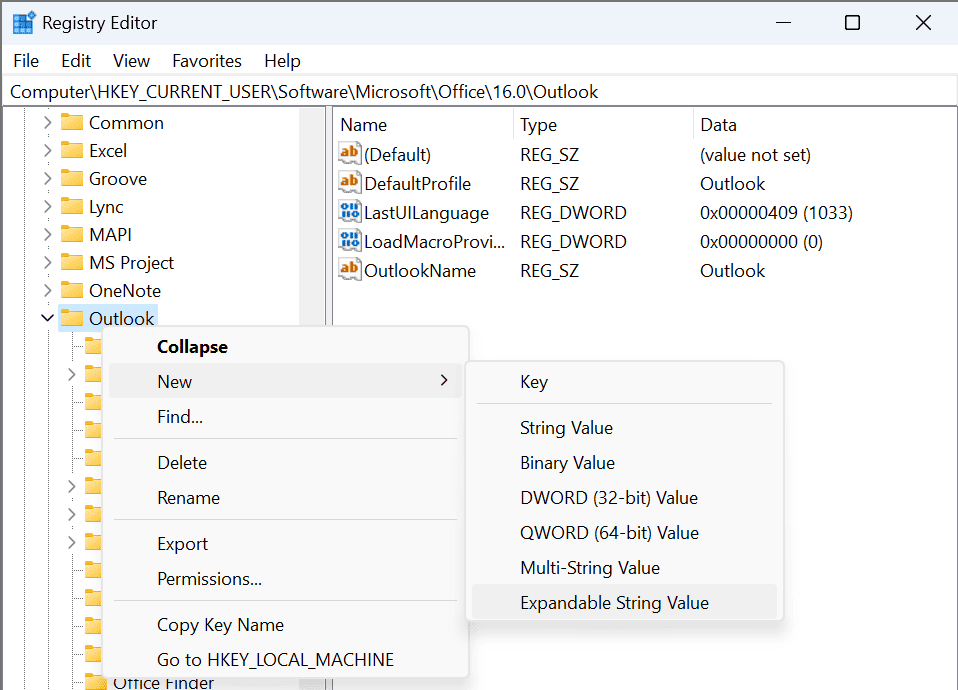
- Set the name for the new registry file as ForcePSTPath.
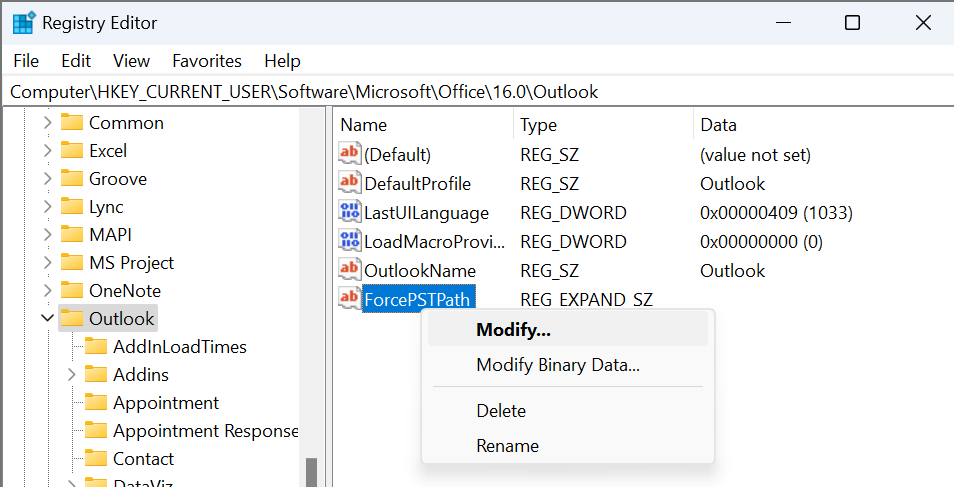
- Right-click on ForcePSTPath and click on Modify.
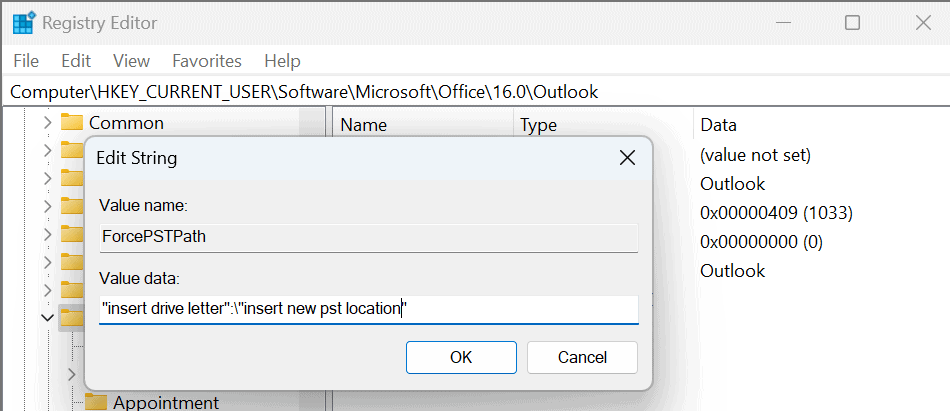
- In the Value data field, enter the new PST location path. Ensure it’s in the format – “drive letter”:\” New PST file location.”
- Click on OK.
- Close the Registry Editor and restart the system.
4. Change Outlook data file location using Remo Outlook Backup and Migrate
If the other methods seem complicated or you need help transferring your OST or PST files to a new file location, I recommend using an Outlook migration tool. Outlook migration tools simplify the process of moving Outlook data from one location to another, from one computer to the next, or from a folder to another. For this demonstration, I will be using Remo Outlook Backup and Migrate.
Note: Before you proceed, use the Backup option of the Remo Outlook software to create an Outlook backup file. If you plan to transfer Outlook to a new computer, then you must install the software in both systems.
- Open the Remo Backup and Migrate Software.
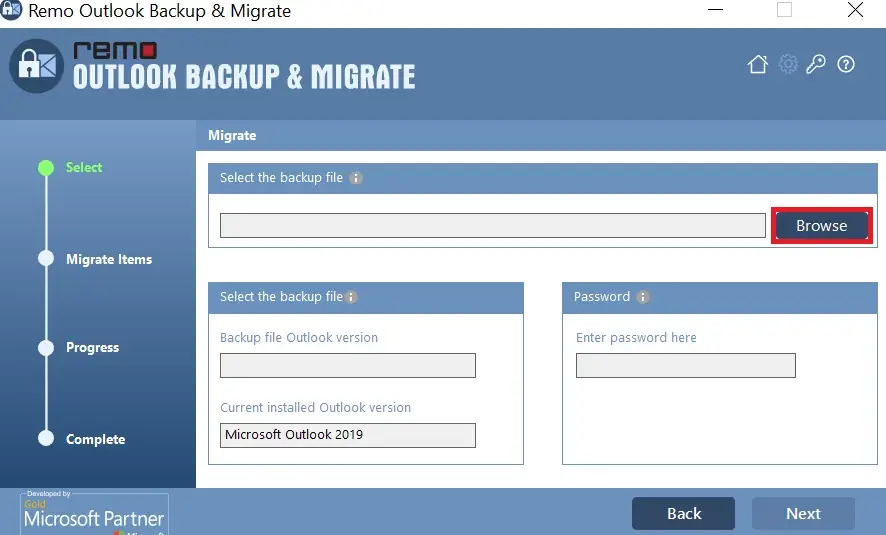
Migrate Outlook Data File
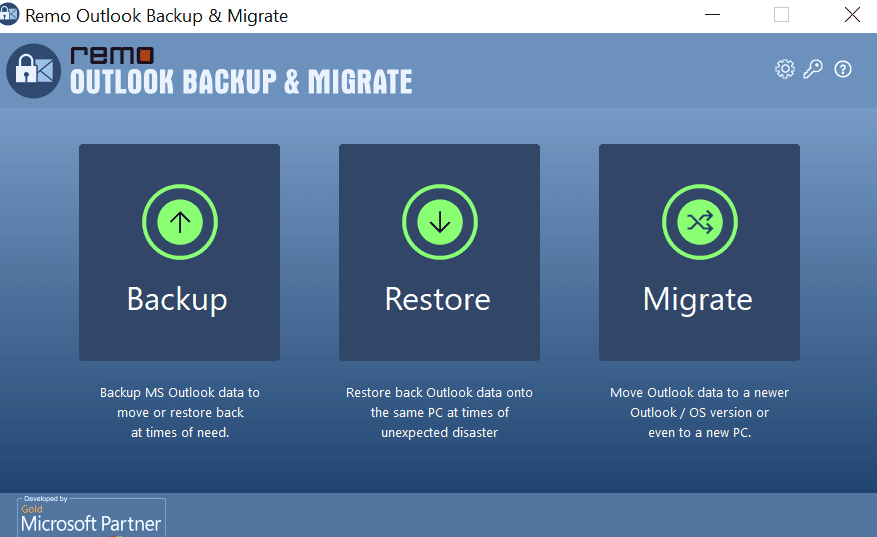
- Select the Migrate option.
- Locate the Outlook data file backup created earlier using the Browse option and click on Next.
- Select all the Outlook Items and attributes and click Next.

- click on Finish.
(Click on View Report to verify migrated data)
Conclusion
Changing your Outlook data file’s location is fairly straightforward but may get a little complicated if you have an OST file. To avoid risking your data in the long run, I suggest that you regularly update the technology you use to avoid falling behind. Over time, our current tools and software will become outdated, causing us issues in the 11th hour. I hope that this article was able to help you navigate through this issue.
Read our disclosure page to find out how can you help MSPoweruser sustain the editorial team Read more


Improve this guide


User forum
0 messages