"Cannot Update the Appointment Because the Corresponding..." Error Fix
5 min. read
Published on
Read our disclosure page to find out how can you help MSPoweruser sustain the editorial team Read more
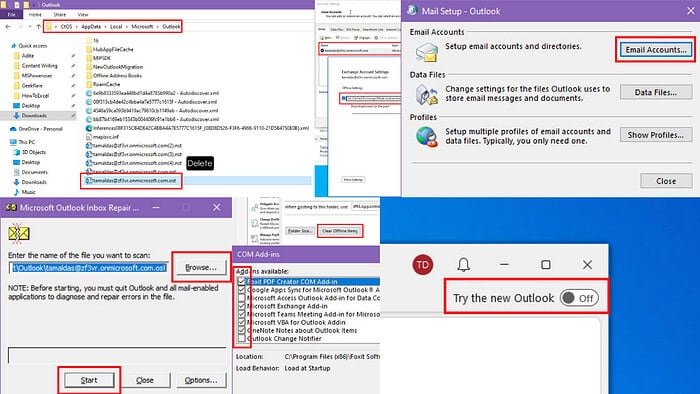
Check out the proven fixes for the Outlook error: “Cannot update the appointment because the corresponding…”
The calendar update error usually occurs due to sync conflicts between the Outlook desktop app and Microsoft Exchange Server, or any calendar-sharing services, like Google or iCloud.
Here’s the full error message:
- Cannot update the appointment because the corresponding item you sync does not match, to resolve the conflicts, click on Open.
Usually, you should click on the Open button so Outlook shows both the local and server copy of the calendar event. You can delete one and keep the other. However, that often fails because of a known Conflict Message dialog bug.
Follow these tried and tested fixes to get around the issue and continue your work:
Update the Outlook App
As of 10:00 PM PST on 7/11/24, Microsoft has fixed this service issue by deploying a worldwide update. As a user, you don’t need to do anything if you’re using any of the following Outlook standalone app builds:
- 15.20.7741.xx
- 15.20.7762.xx
- 15.20.7784.xx
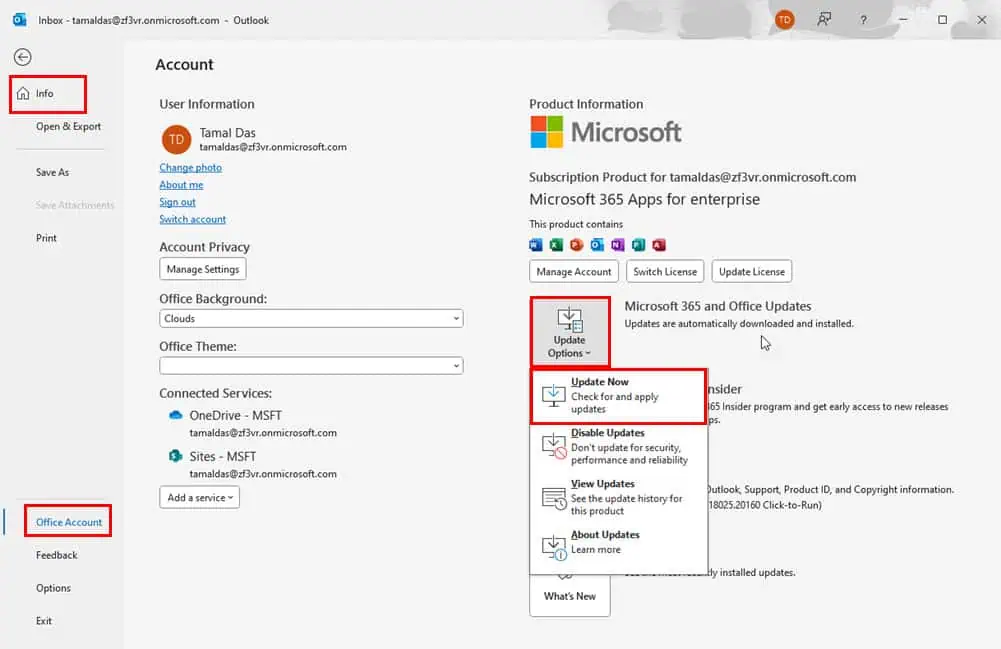
To update your copy, do the following now:
- Open the desktop app and click on the File tab.
- Click on the Office Account option at the bottom left corner.
- Select the Update Options drop-down menu and click on the Update Now button.
Delete the Outlook Offline Cache
- Close Outlook completely to ensure no files are in use.
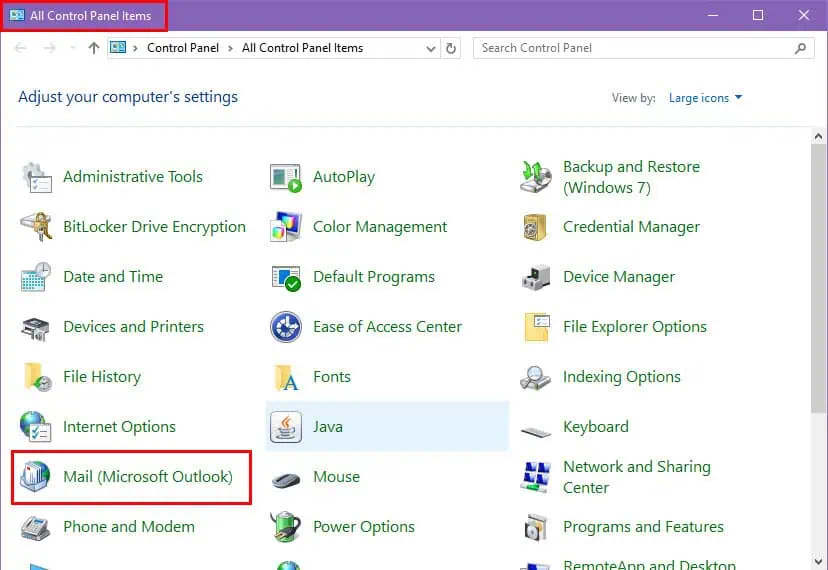
- Open the Control Panel from the Start menu, and select Mail or Mail (Microsoft Outlook).
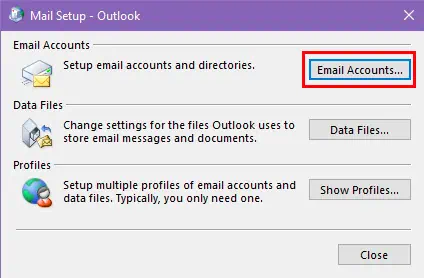
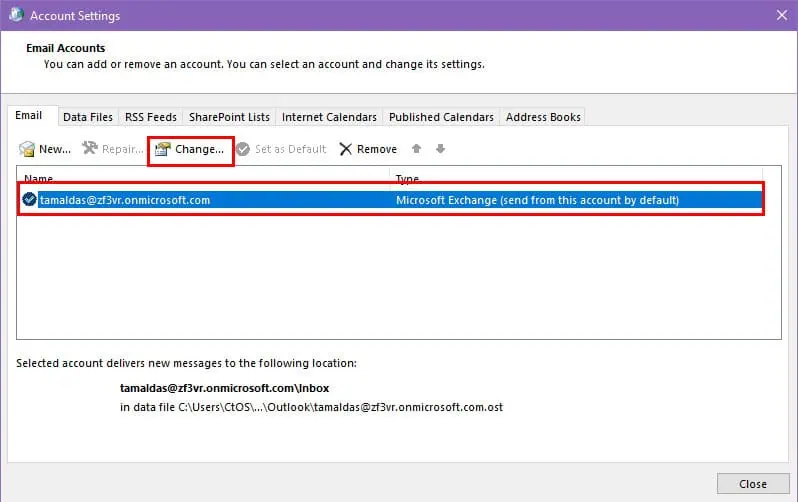
- Click Email Accounts, and select your account.
- Click on the Change button above the email address.
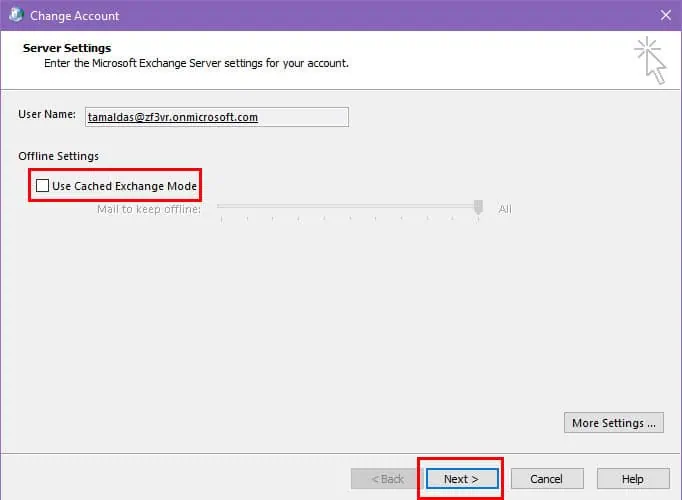
- Uncheck Use Cached Exchange Mode and click Next.
- Click on the Finish button.
- You can now close the account settings dialog to save the changes.
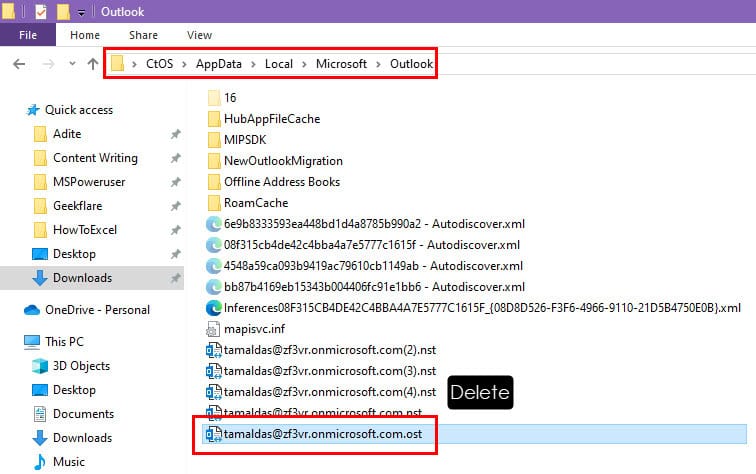
- Navigate to the following folder:
C:\Users\YourUsername\AppData\Local\Microsoft\Outlook- Find and delete the OST file associated with your Microsoft Outlook email account.
- Reopen Outlook, return to the Account Settings section from the File tab, and select Account Settings again.
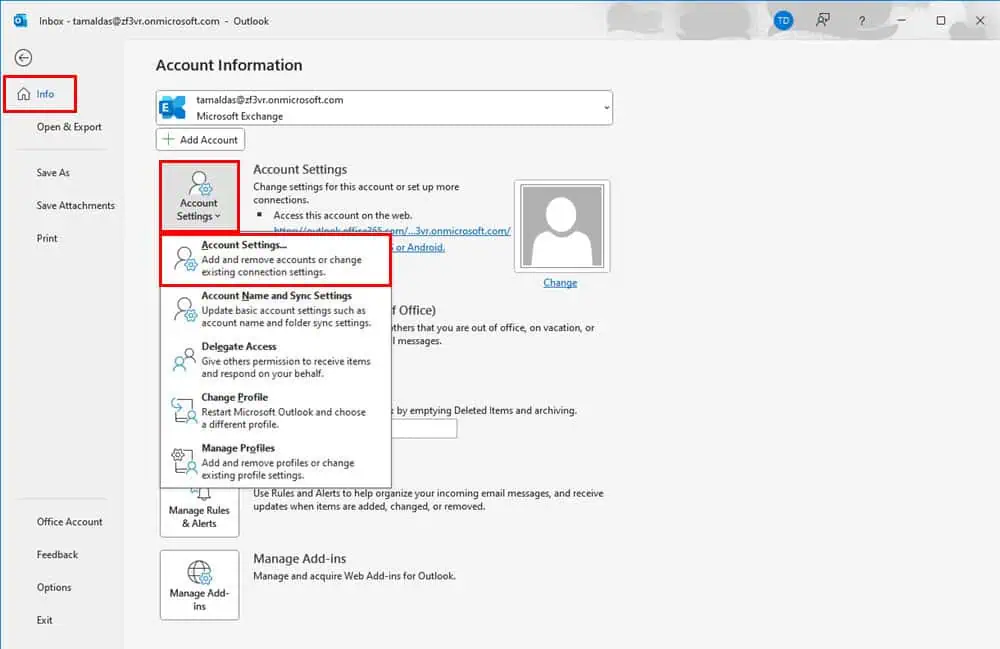
- Select your Microsoft 365 domain email address, and hit Change. You can now re-enable the Use Cached Exchange Mode on the Offline Settings dialog box. Click Next and choose Done on the next dialog.
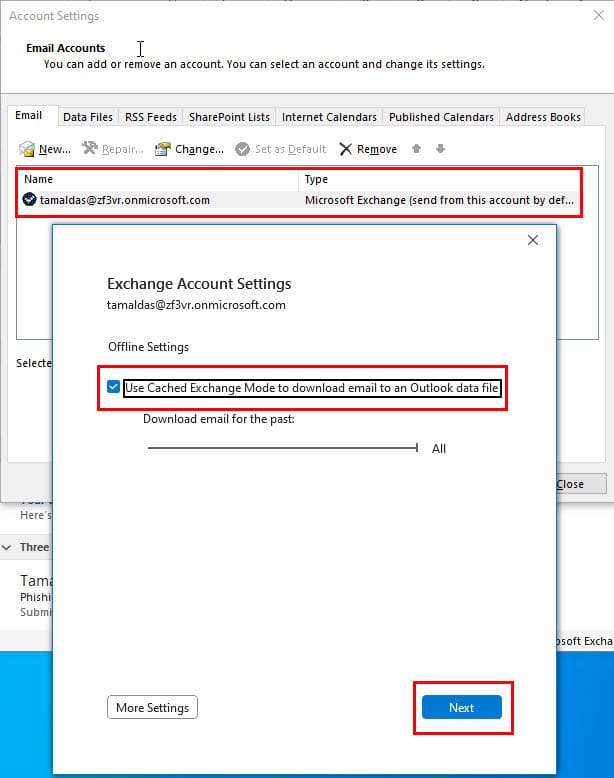
- Restart Outlook to allow it to rebuild the offline cache automatically.
Disable Add-Ins
Unsupported third-party apps and add-ins often interfere with Outlook’s routine operations. On top of that, there could be buggy Microsoft extensions as well. Here’s how to disable them:
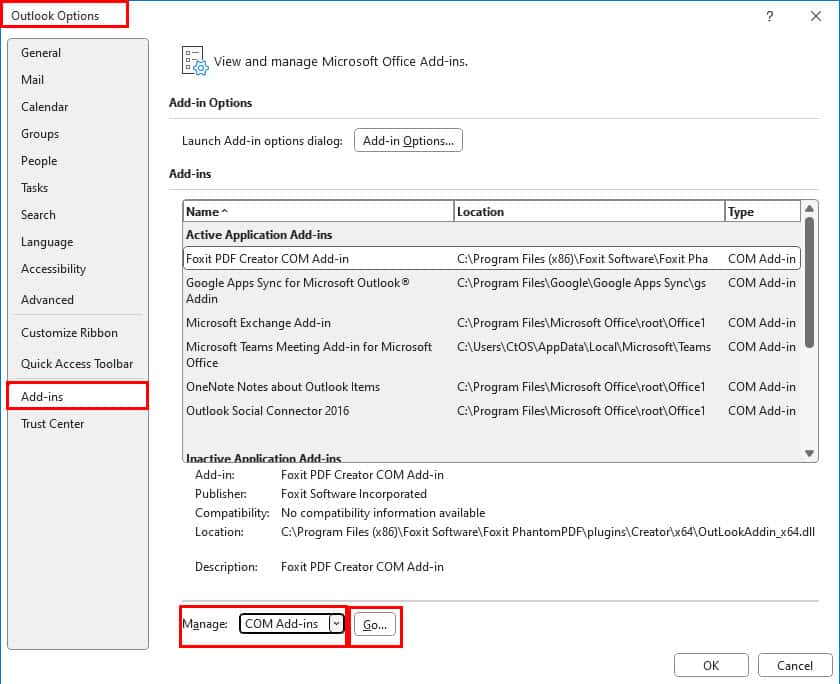
- Press the Alt + F + T keys to open the Outlook Options dialog.
- Click on the Add-ins category in the left-side navigation panel.
- Select the Manage drop-down arrow at the bottom left corner and choose COM Add-ins.
- Click Go.
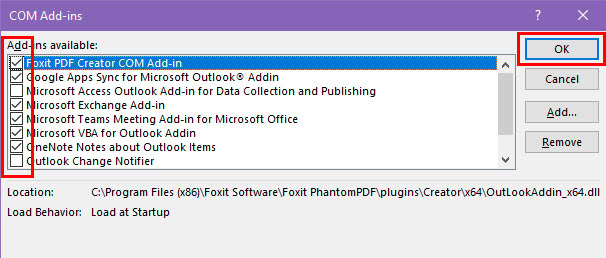
- The COM Add-ins dialog will open. Uncheck all the extensions in that list.
- Click OK to save.
- Now, go back to the Outlook Home tab.
- Click on the More Apps icon in the left-side navigation panel.
- Select Add Apps from the context menu.
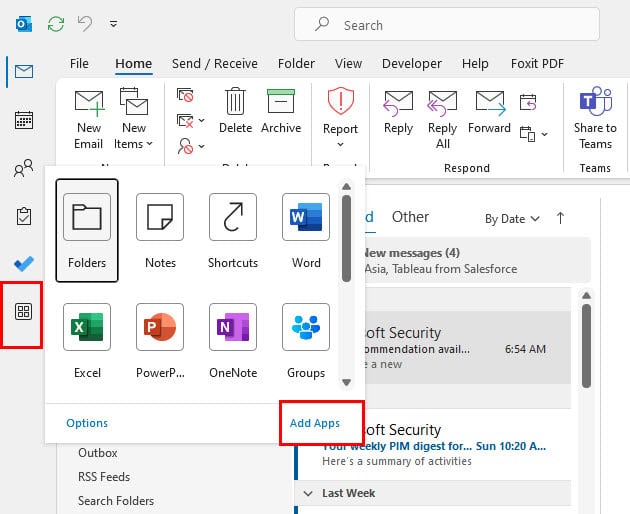
- On the next screen, select Manage your apps.
- You’ll see a list of apps.
- Find an app related to Outlook, click on the three dots menu, and select Remove.
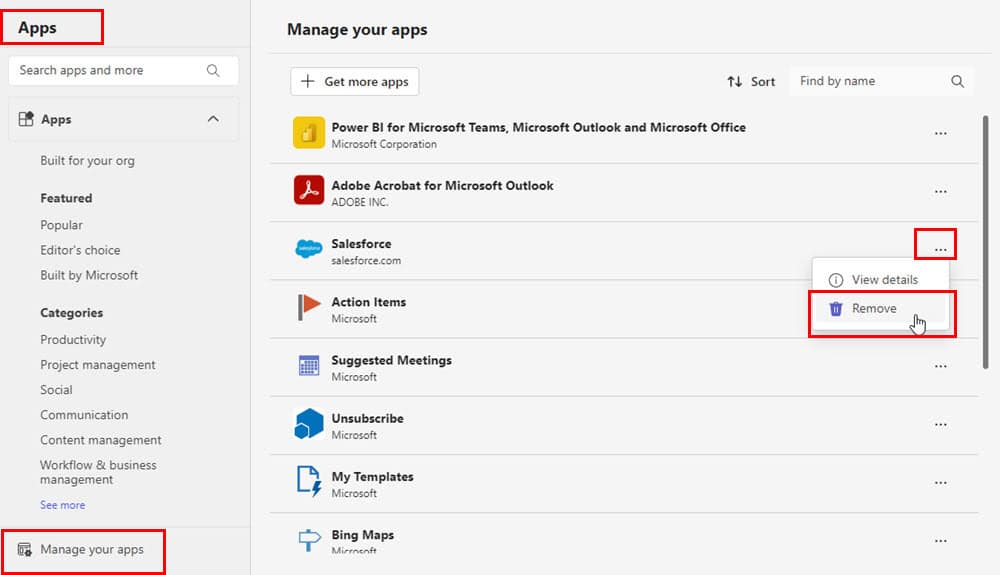
- Repeat the process for other extensions.
- Restart Outlook.
Switch to the New Outlook
- Open the Classic Outlook app.
- Click the Try the new Outlook toggle button in the top-right corner.
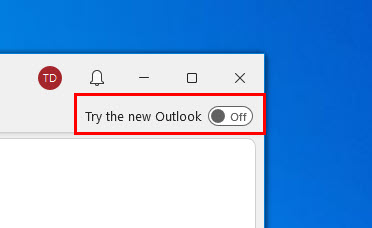
The software will restart and open the new user interface.
Update Meeting on Outlook Web Access (OWA)
This is a workaround for the “Cannot update the appointment because the corresponding…” error on Outlook. Try these steps:
- Close the desktop app.
- Log in to your Outlook web account using the same credentials you use on the standalone app.
- Select the Calendar module from the left-side navigation panel.
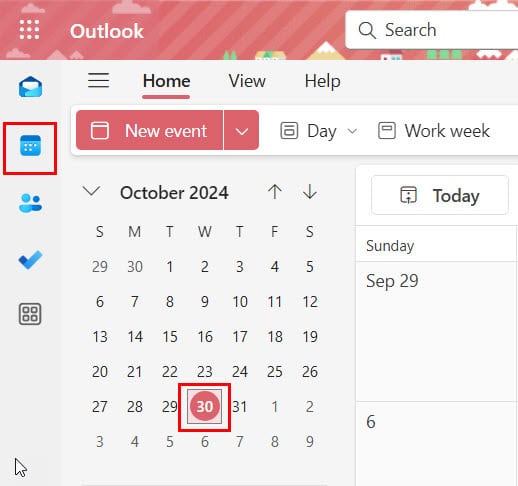
- Click on a calendar event and update it.
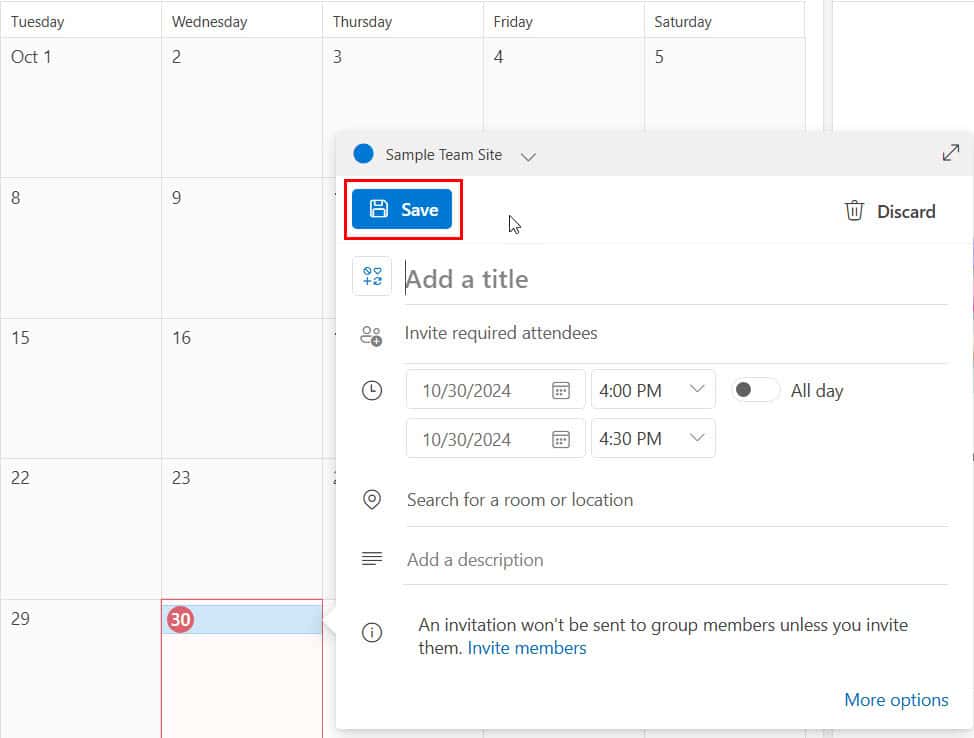
- Now, open the Outlook desktop app.
- It should now show the updated event.
Clear the Calendar Items in the Outlook Store (OST)
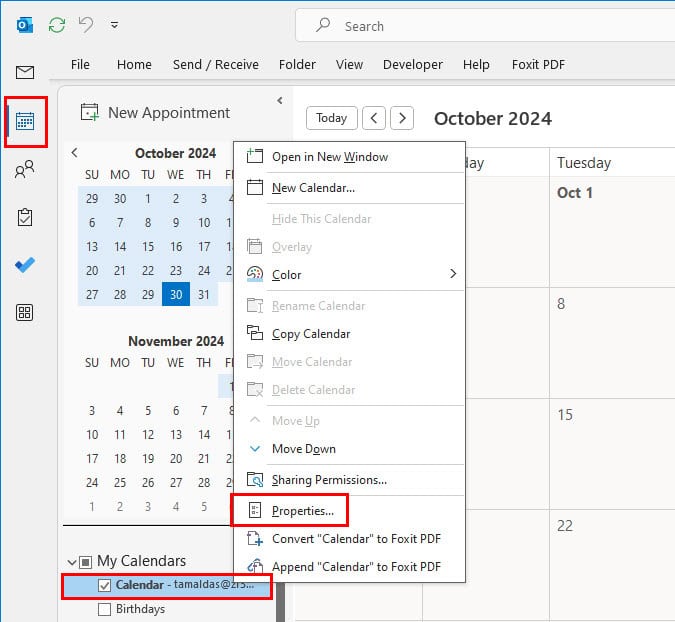
- Navigate to the Outlook Calendar pane.
- Right-click on the Calendar checkbox below the My Calendars section.
- Select Properties from the context menu.
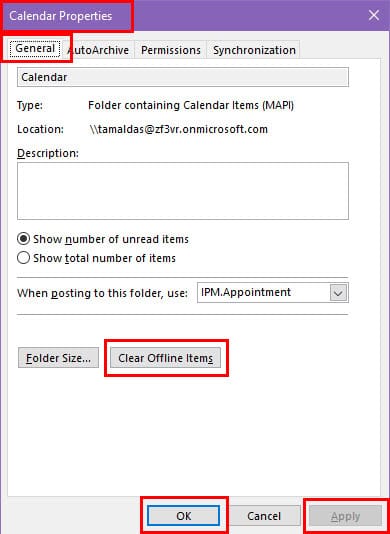
- Click on the Clear Offline Items button in the Calendar Properties dialog box.
- Select Apply and click OK to save the changes.
Repair Outlook Data Files
- Close all Microsoft 365 apps and services.
- Navigate to the following PC directory:
C:\Program Files\Microsoft Office\root\Office16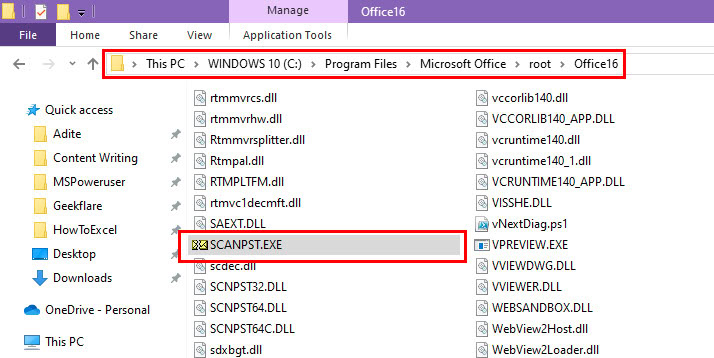
- Locate and double-click on the SCANPST.EXE app package to run it.
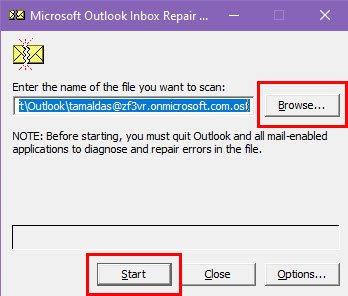
- It should automatically select the default OST file.
- If it’s a different one, click Browse and select the target file.
- Click Start.
- Once the scan is complete, you’ll see a summary.
- If there are any errors, checkmark the box for Make a backup of scanned file before repairing.
- Click Repair to begin fixing the file.
- Once it’s done, open Outlook and check if the issue is resolved.
So, now you know how to resolve the “Cannot update the appointment because the corresponding…” error on your Outlook desktop app.
Comment below if you find this troubleshooting guide helpful or if you want to share suggestions. Moreover, if your Outlook reminder window is too small or you keep encountering ShareFile for Outlook has fired an exception, we can help out.



User forum
0 messages