Camera Not Showing in Device Manager Windows 10 - Top 8 Fixes
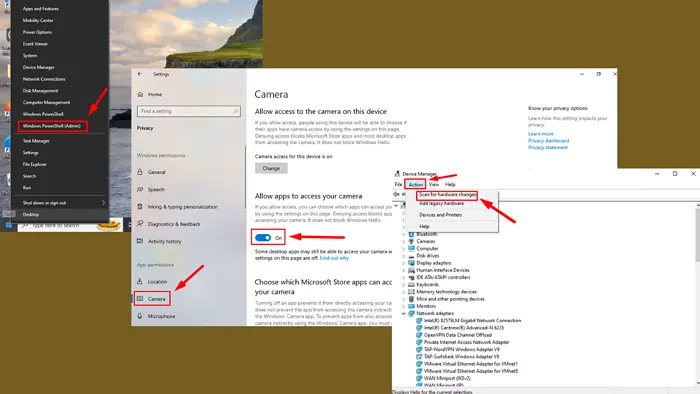
Is your camera not showing in Device Manager on Windows 10? In my experience, this issue usually occurs due to incorrect settings or faulty drivers. Luckily, there are several methods you can try to restore the functionality of your camera.
Let me show you how:
Allow Your Device to Access Your Camera
Ensure that your computer is allowing apps and services to access your camera. Windows 10 has privacy settings that may block it, and this could prevent it from showing up or functioning correctly. Follow the steps below:
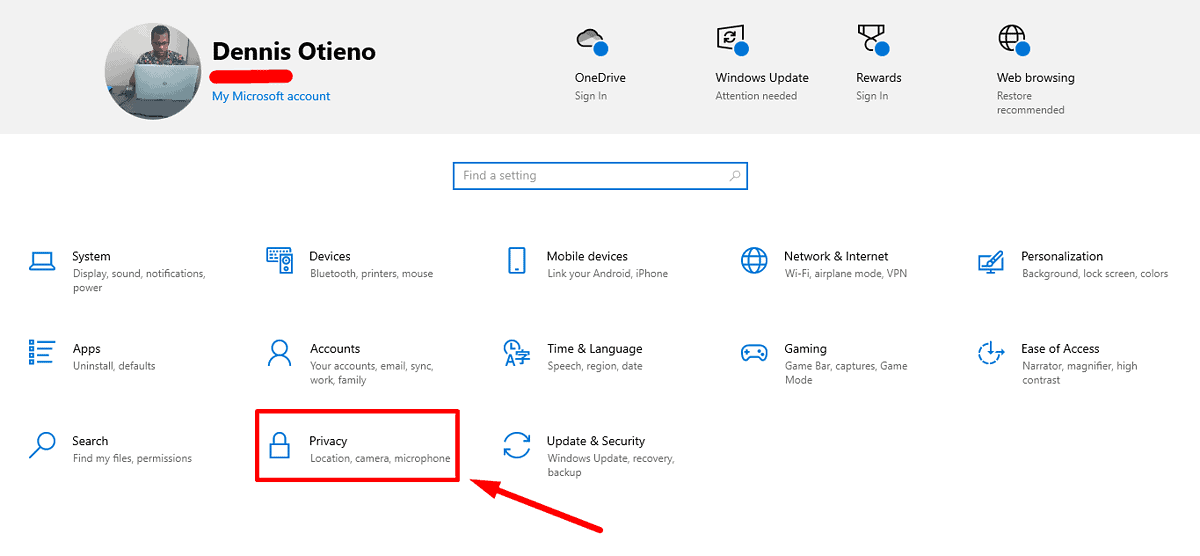
- Press the Windows Key + I to open the Settings and click Privacy.
- Scroll down, select Camera from the left-hand sidebar, and ensure the toggle for Allow apps to access your camera is turned on.
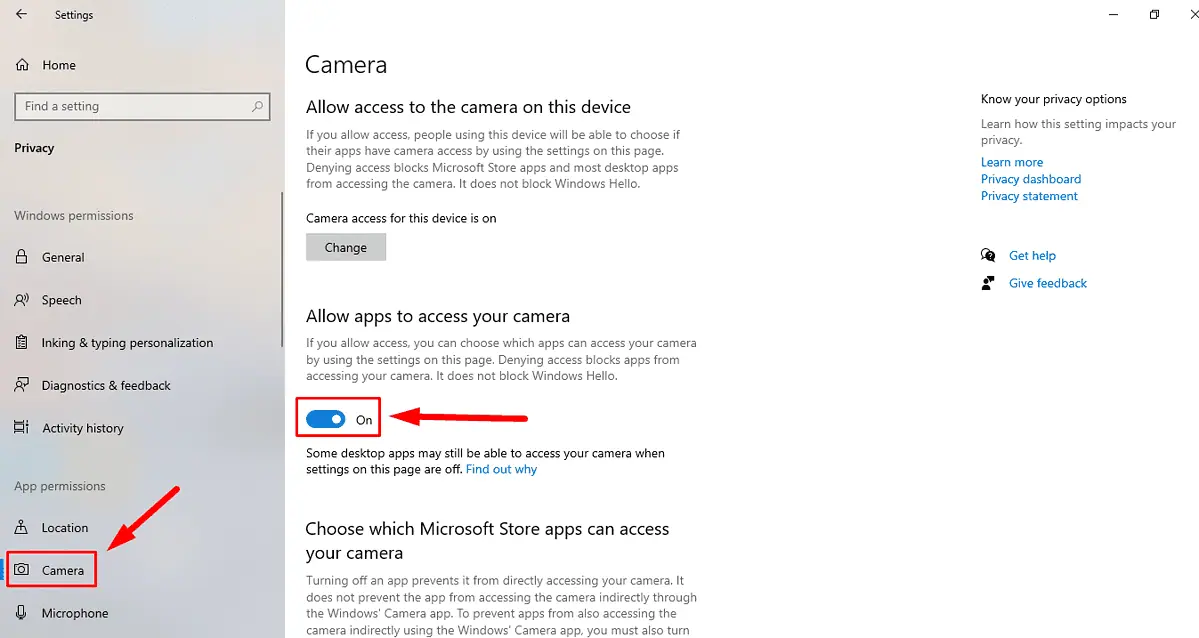
Check your device manager to confirm if you can now see the camera. If not, move to the next fix.
Scan for Hardware Changes in the Device Manager
Sometimes, you need to remind Windows 10 of the hardware connected to your device. You can prompt it to re-scan for hardware changes in Device Manager, which may help detect the camera if it’s not showing up. Here’s how to do it:
- Right-click on the Start button and select Device Manager from the menu.
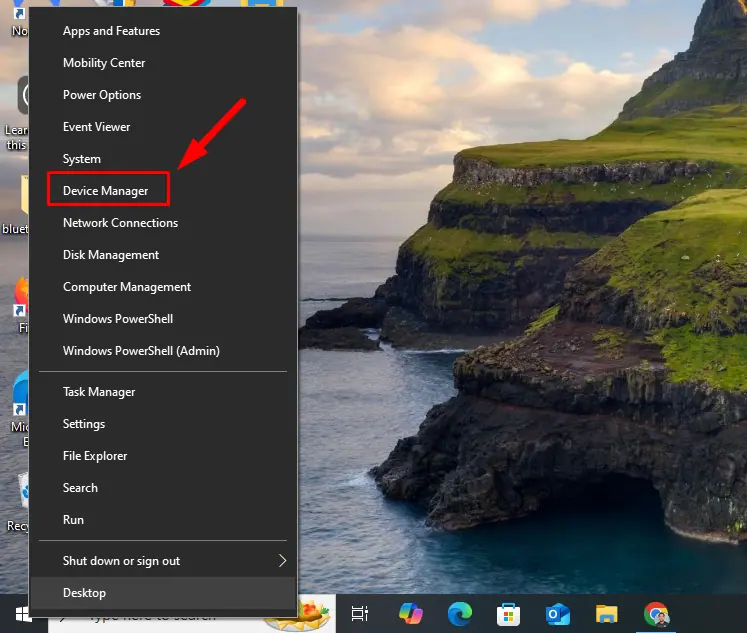
- In the Device Manager window, click on the Action tab at the top and select Scan for hardware changes. This will allow Windows to search for new devices, including your camera.
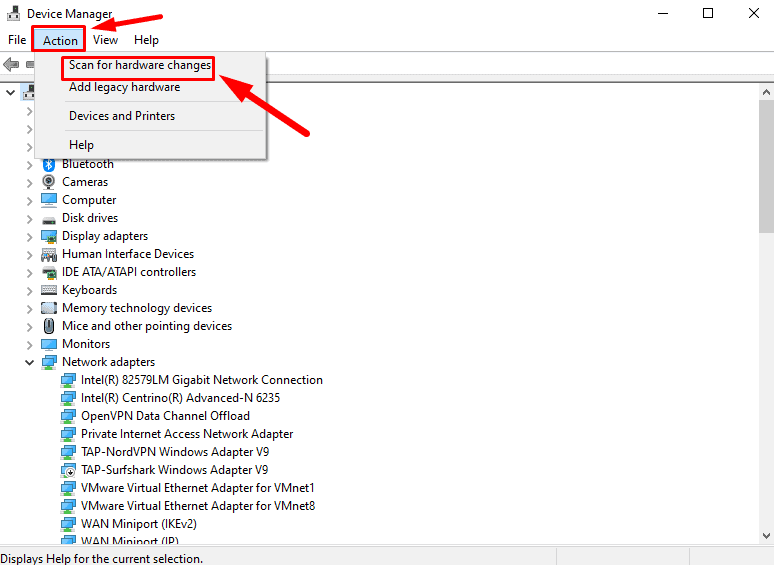
If the camera was previously undetected due to a glitch, it might now appear in Device Manager.
Download and Install the Camera Drivers
One of the most common causes for a camera not showing up in Device Manager is missing or outdated drivers. Downloading it manually from the official website will help you fix the issue:
- Go to the driver download page for your PC manufacturer. I’ll use the HP website for this example.
- Search for the camera driver, download it, run the installer, and follow the on-screen instructions.
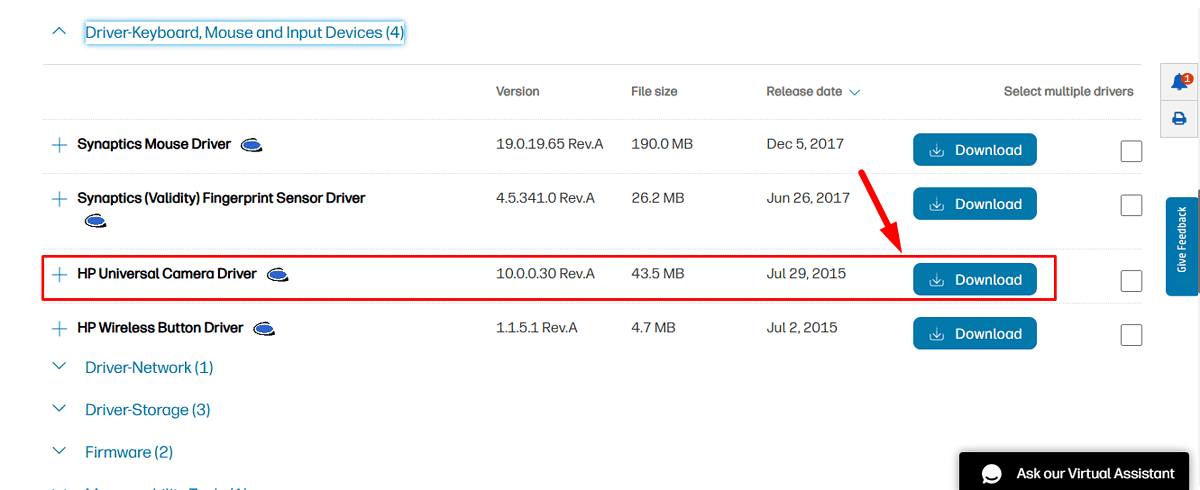
If you prefer a quicker and easier option, you can use PC HelpSoft Driver Updater to automatically update your drivers without any manual effort.
Run the Hardware Troubleshooter
Windows 10 includes a built-in diagnostic tool that can help identify and fix hardware issues, including problems with your camera. Here’s how to run it:
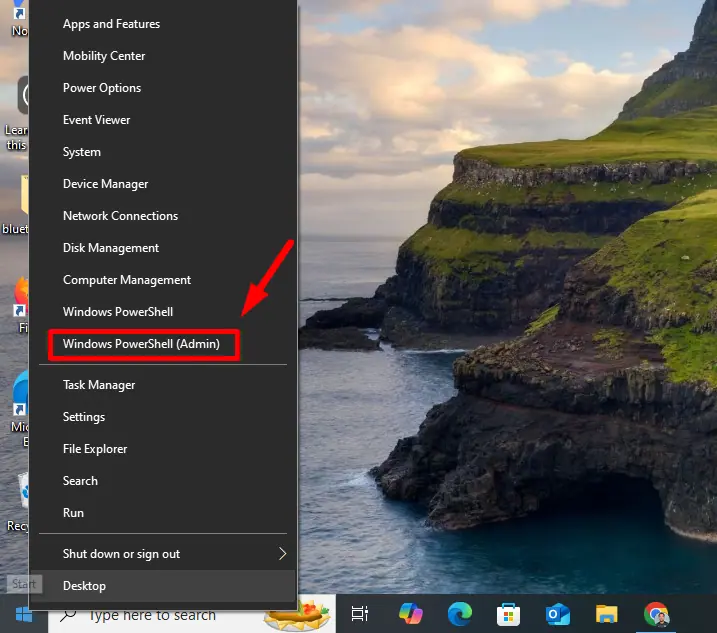
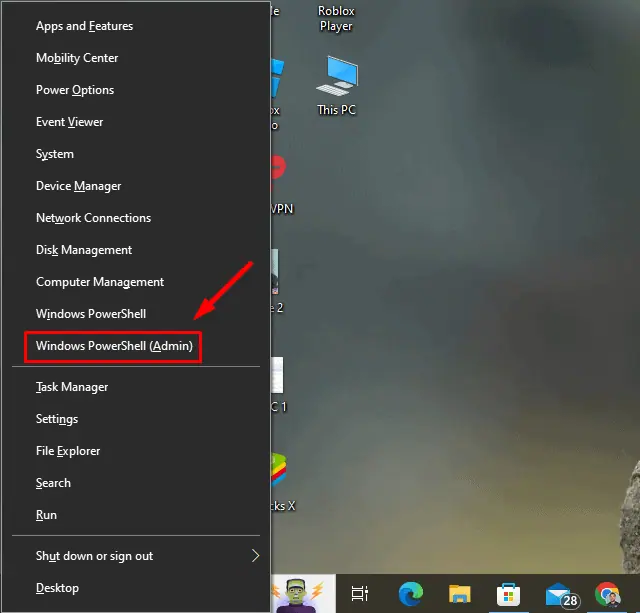
- Press the Windows Key + X, then tap Windows PowerShell (Admin).
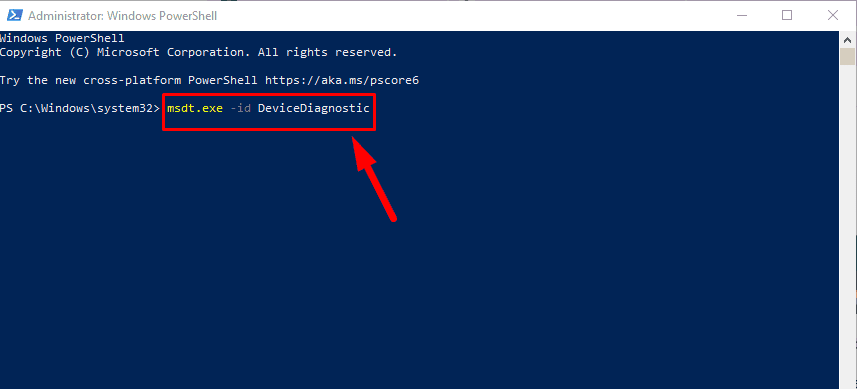
- Type msdt.exe -id DeviceDiagnostic and press Enter to launch the Hardware and Devices Troubleshooter.
- Once the troubleshooter opens, click Next to begin scanning for hardware issues.
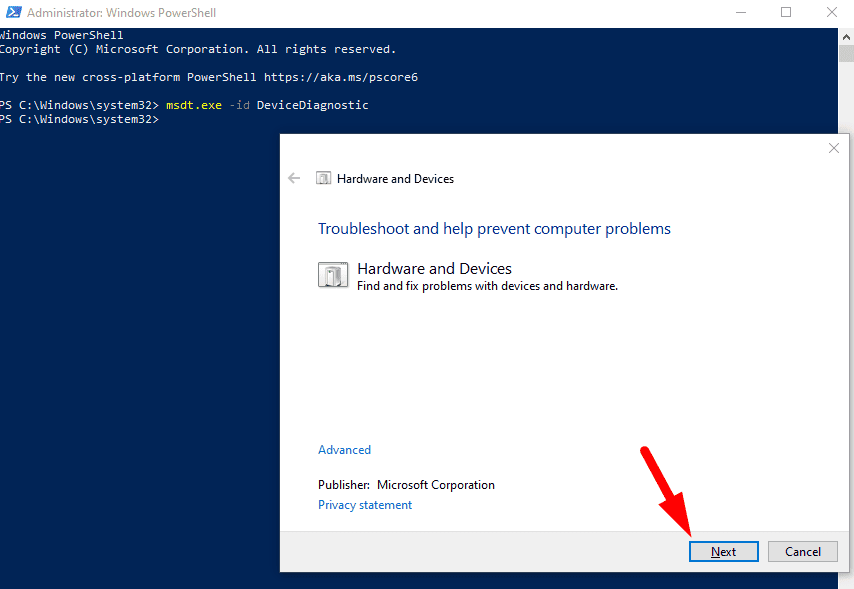
- If the troubleshooter finds any issues, it’ll provide a fix. Click Apply this fix to resolve the problem.
You may need to restart your computer for the changes to take effect.
Run the System File Checker (SFC)
Corrupted system files can sometimes cause your camera to stop working. The System File Checker (SFC) is designed to scan and repair corrupted Windows system files. Here’s what to do:
- Press the Windows Icon + X, then select Windows PowerShell (Admin).
- Type sfc /scannow and press Enter.
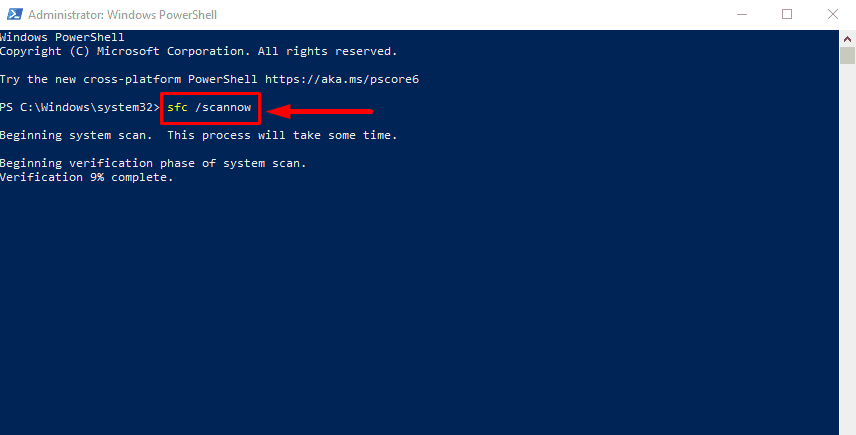
Wait for the process to complete. Then, restart your computer and check if the camera appears in Device Manager.
Run DISM (Deployment Imaging Service and Management Tool)
If running SFC didn’t fix the problem, the Deployment Imaging Service and Management Tool (DISM) can help. Follow the below steps:
- Right-click the Start button, then select Windows PowerShell (Admin).

- Type DISM /Online /Cleanup-Image /RestoreHealth and hit Enter. Wait for the tool to finish scanning and repairing your system. This process may take several minutes.
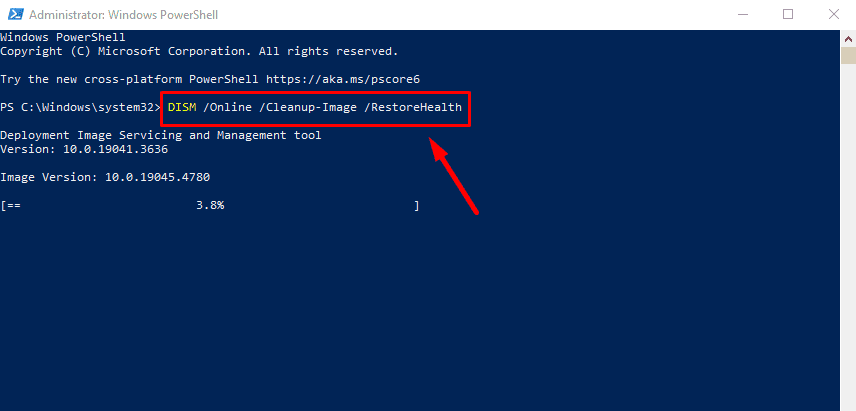
Once complete, restart your computer and check if your camera is now detected.
Run CHKDSK (Check Disk Utility)
A corrupt or failing hard drive can cause various hardware detection problems, including issues with your camera. Running CHKDSK can help identify and fix disk errors.
- Right-click the start button, then select Windows PowerShell (Admin).

- Type chkdsk /f /r and hit Enter.
- You’ll be asked to schedule the check the next time your computer restarts. Type Y and press Enter.
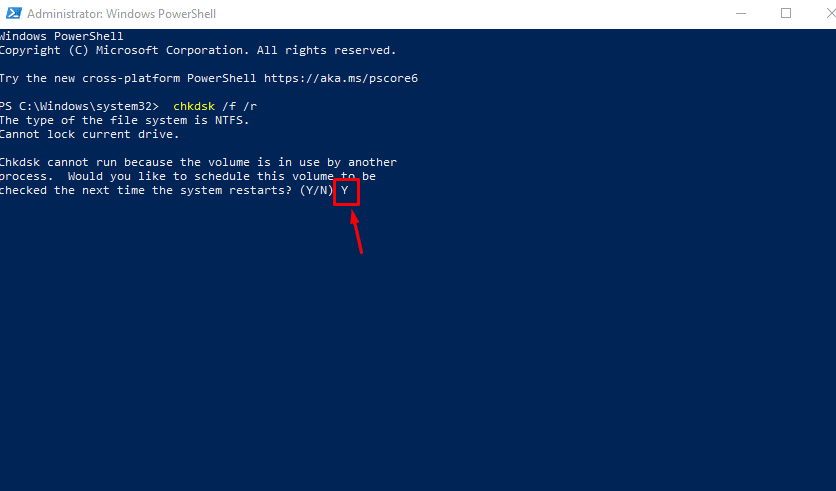
Allow CHKDSK to run during startup. Once it finishes, check if the camera appears in Device Manager.
Add Legacy Hardware in Device Manager
If your camera is still not showing up, it’s possible that Windows isn’t recognizing it as a modern device. You can try adding it manually as legacy hardware in Device Manager. Follow the steps below:
- Right-click the Start menu and tap Device Manager.
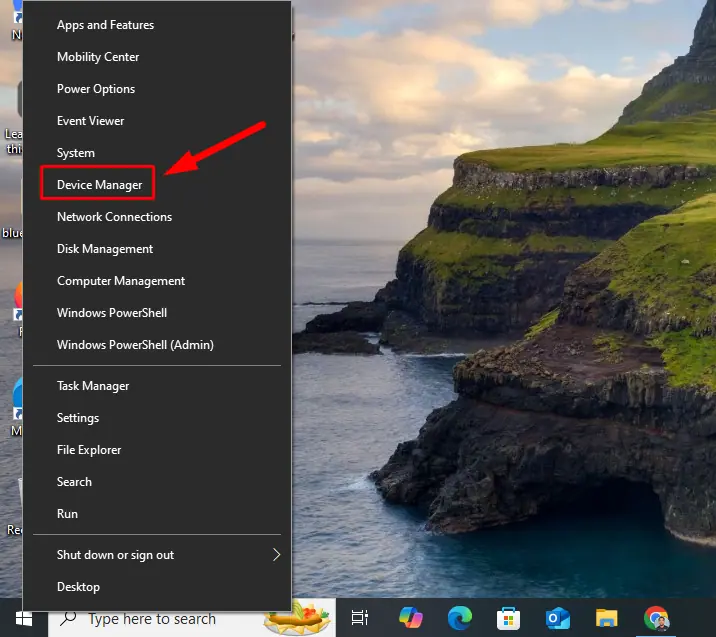
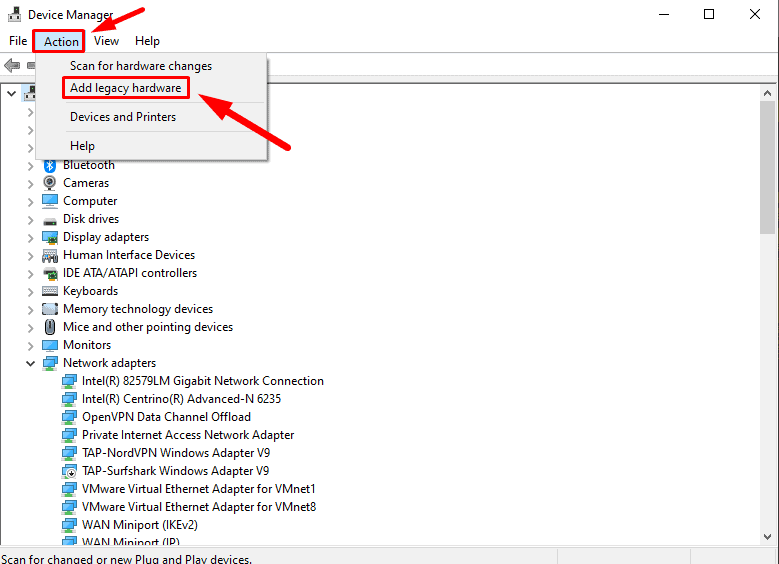
- Click Action in the top menu, and select Add legacy hardware.
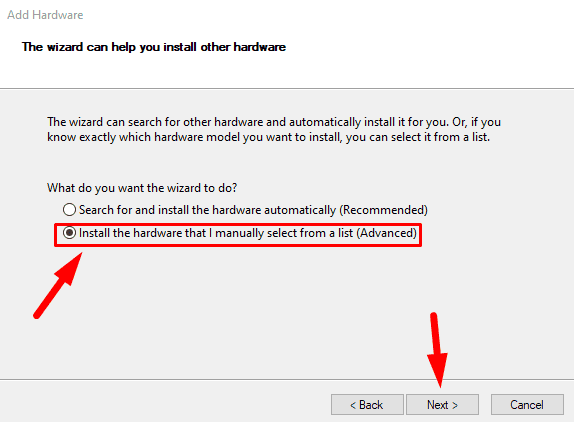
- Tap Next, select Install the hardware that I manually select from a list (Advanced), then click Next.
- Choose Cameras and click Next.
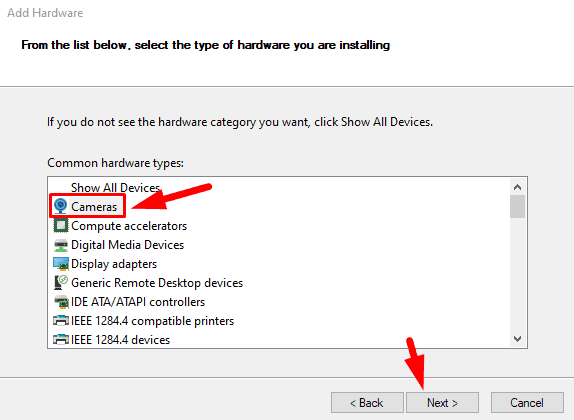
- If your camera is listed, select it and complete the installation. Alternatively, click Have Disk if you have downloaded a driver.
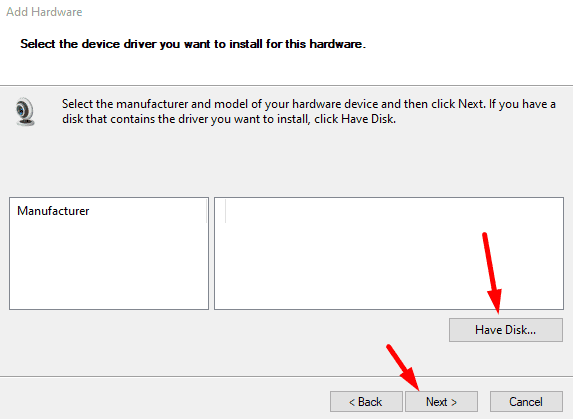
After adding the device, restart your PC and confirm you can see the driver.
So, now you know what to do if your camera is not showing in Device Manager on Windows 10. With a little patience and the right solutions, your camera should be detected and functioning properly again.
You can also learn to fix a camera that doesn’t scan QR codes and the Microsoft Teams camera if it’s not working.
Read our disclosure page to find out how can you help MSPoweruser sustain the editorial team Read more


User forum
0 messages