How To Turn Off Mouse Acceleration in Windows 10 [Easily]
3 min. read
Updated on
Read our disclosure page to find out how can you help MSPoweruser sustain the editorial team Read more
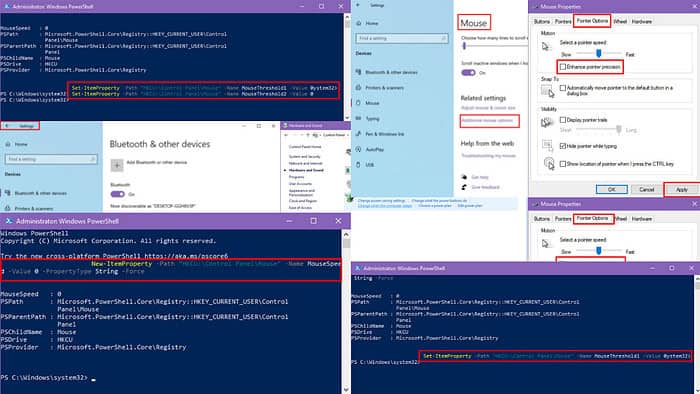
Knowing how to turn off mouse acceleration in Windows 10 is a simple tweak that can dramatically improve your mouse navigation experience.
You might need to disable this option for increased accuracy during PC gaming, better mouse pointer control, or improved muscle memory. Whatever the reason, the following techniques are tried-and-tested solutions to this problem.
How To Turn Off Mouse Acceleration in Windows 10
I’ve organized the methods by complexity. Let’s get started!
From the Control Panel App
- Click the Start button or press the Windows key, and then type Control Panel.
- Select the Control Panel app below the Best match section.
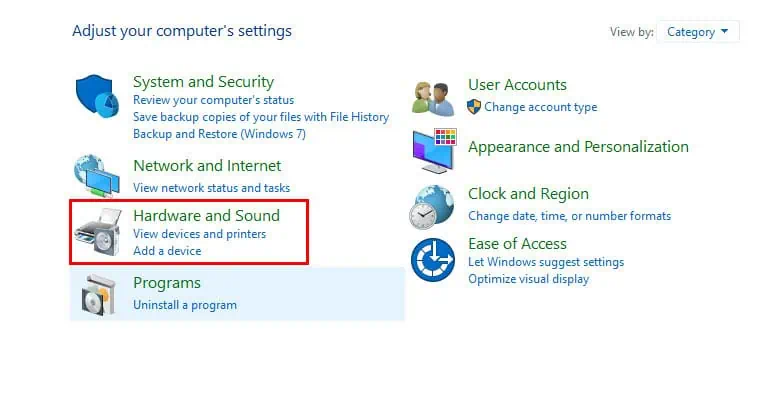
- Go to the Hardware and Sound menu.
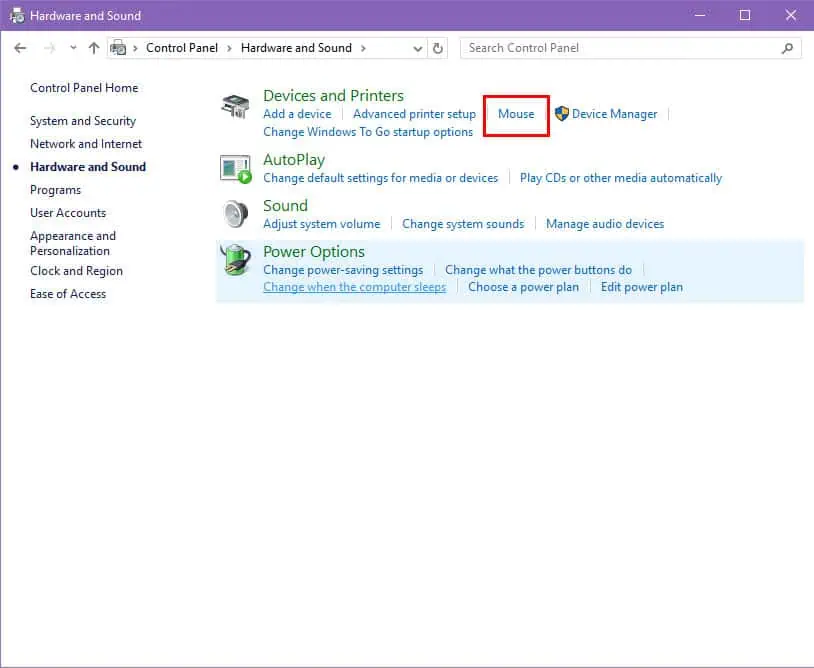
- Now, click Mouse under the Devices and Printers in the Control Panel.
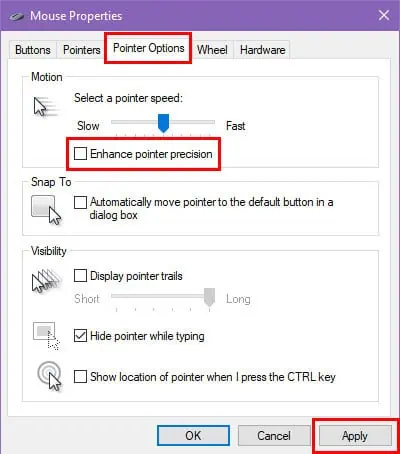
- In the Mouse Properties window, switch to the Pointer Options tab.
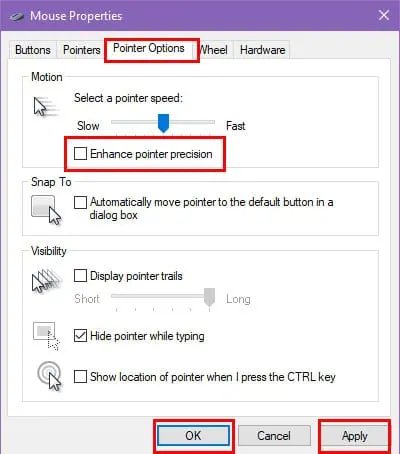
- Uncheck the box for the Enhance pointer precision option to disable mouse acceleration.
- Click Apply and then OK to save your changes and close the window.
Using the Settings App
- Start by clicking on the Start button in the bottom-left corner of your screen.
- From the menu, click on the Settings icon—it looks like a little gear—or just type Settings in the search bar.
- In the Settings window, select Devices.
- On the left-hand side, click Mouse from the list of options.
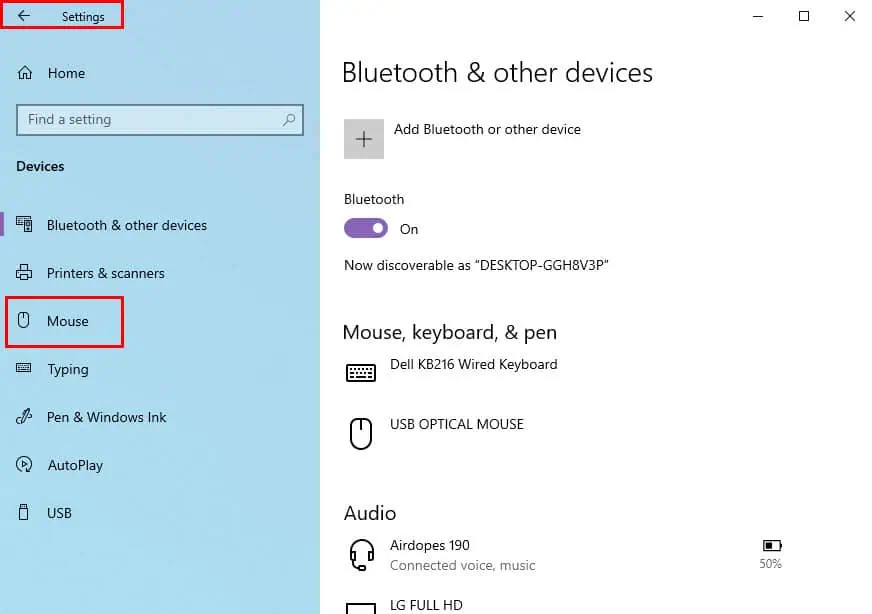
- Look for a link that says Additional mouse options under the Related settings section.
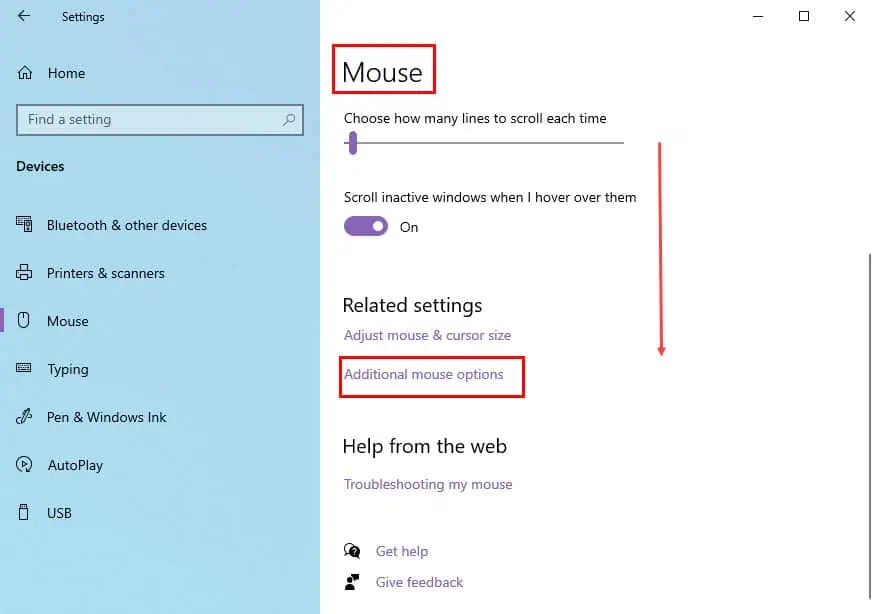
- A new window called Mouse Properties will pop up. Switch to the Pointer Options tab.
- Find the section labeled Motion and uncheck the box that says Enhance pointer precision.
- After making the change, click Apply to save it, and then hit OK.
From a PowerShell Terminal
- Right-click on the Windows flag or Start button to bring up the Power User menu.
- Click on the Windows PowerShell (Admin) option.
- You should now see the PowerShell terminal.
- Copy the following code and paste it into the terminal window:
New-ItemProperty -Path "HKCU:\Control Panel\Mouse" -Name MouseSpeed -Value 0 -PropertyType String -Force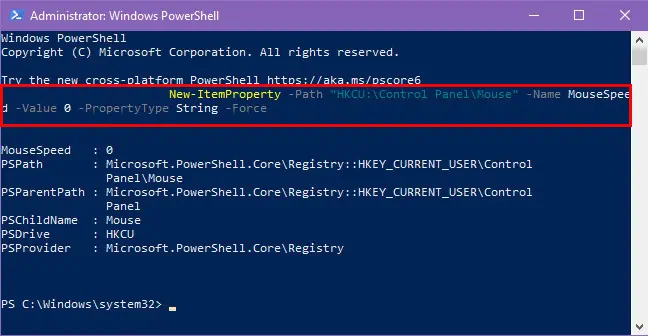
- Hit Enter to execute the script.
- Now, type in the following PowerShell script and hit Enter again to run this code:
Set-ItemProperty -Path "HKCU:\Control Panel\Mouse" -Name MouseThreshold1 -Value 0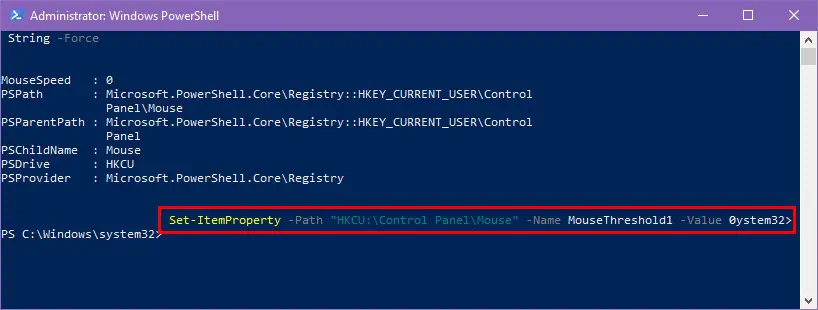
- Finally, copy and paste the following script and press the Enter key to execute:
Set-ItemProperty -Path "HKCU:\Control Panel\Mouse" -Name MouseThreshold2 -Value 0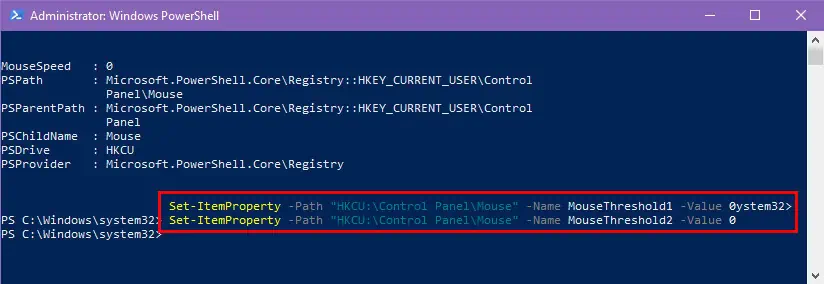
The first PowerShell script will only show an outcome. The rest of the codes will run and won’t generate any results, as intended.
If you’re here, congratulations! You’ve learned how to turn off mouse acceleration in Windows 10.
The Control Panel and Settings are suitable if you’re a basic Windows 10 user and happy with the manual methods.
However, if you love to automate processes using scripts, you should go for the PowerShell-based approach. Moreover, if you’re having problems with your mouse not locking to your game or not showing up, we can help out.


User forum
0 messages