How to customize your mouse pointer and cursor in Windows 10

For people with visual impairments, Microsoft recognises that it may be a little harder to use the default Windows mouse pointer. It scales with your screen resolution, and while some may be fine with relatively small text, the pointer may be where they draw the line.
In an upcoming update to Windows 10, currently known as 19H1, Microsoft is making it easier to use the mouse and customize it for users who are visually impaired. You’ll no longer need to alter your scaling or neuter your resolution but instead be able to change the size and colour of the pointer via various sliders the firm is implementing.
How to customize the mouse pointer in Windows 10 19H1+
- Open Summon Ease of Access with the Windows key + U keyboard shortcut.
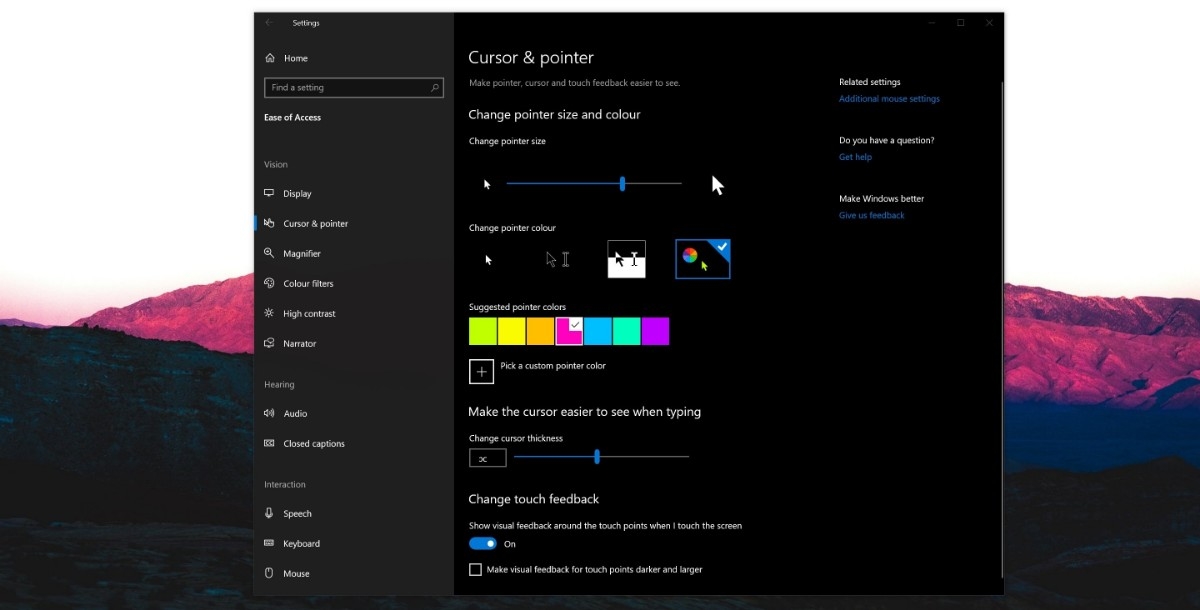
- Look for ‘Cursor and Pointer.’There are a few options, and we’ll run through them.
- Change pointer size: You can change the pointer size from its relatively petite figure to a much larger one by dragging the slider until it is at an acceptable size
- Change the pointer colour: Microsoft lets you choose between white, black and multicoloured. You can choose from a selection of default colours, or make up a custom one if your favourite colour isn’t represented.
- Change Cursor thickness: You can also dabble with the cursor here and change it to a thicc one with the slider.
For Windows 10 1809 and below
- Open Ease of Access with Windows + U
- Navigate to ‘Mouse.’
- Select your preferred size. Microsoft offers three sizes: small, medium and large.
Read our disclosure page to find out how can you help MSPoweruser sustain the editorial team Read more


Improve this guide


User forum
0 messages