How To Import a GPX File Into Google Maps [Step-by-Step]
Are you looking for an easy way to import a GPX file into Google Maps? You’re in the right place.
The process isn’t obvious at first, but I took the time to research it. Now all you need to do is follow along:
How To Import a GPX File Into Google Maps
- Prepare your GPX file and ensure it’s readily accessible on your device.
- Open your web browser and navigate to Google Maps. Make sure you’re signed into your account.
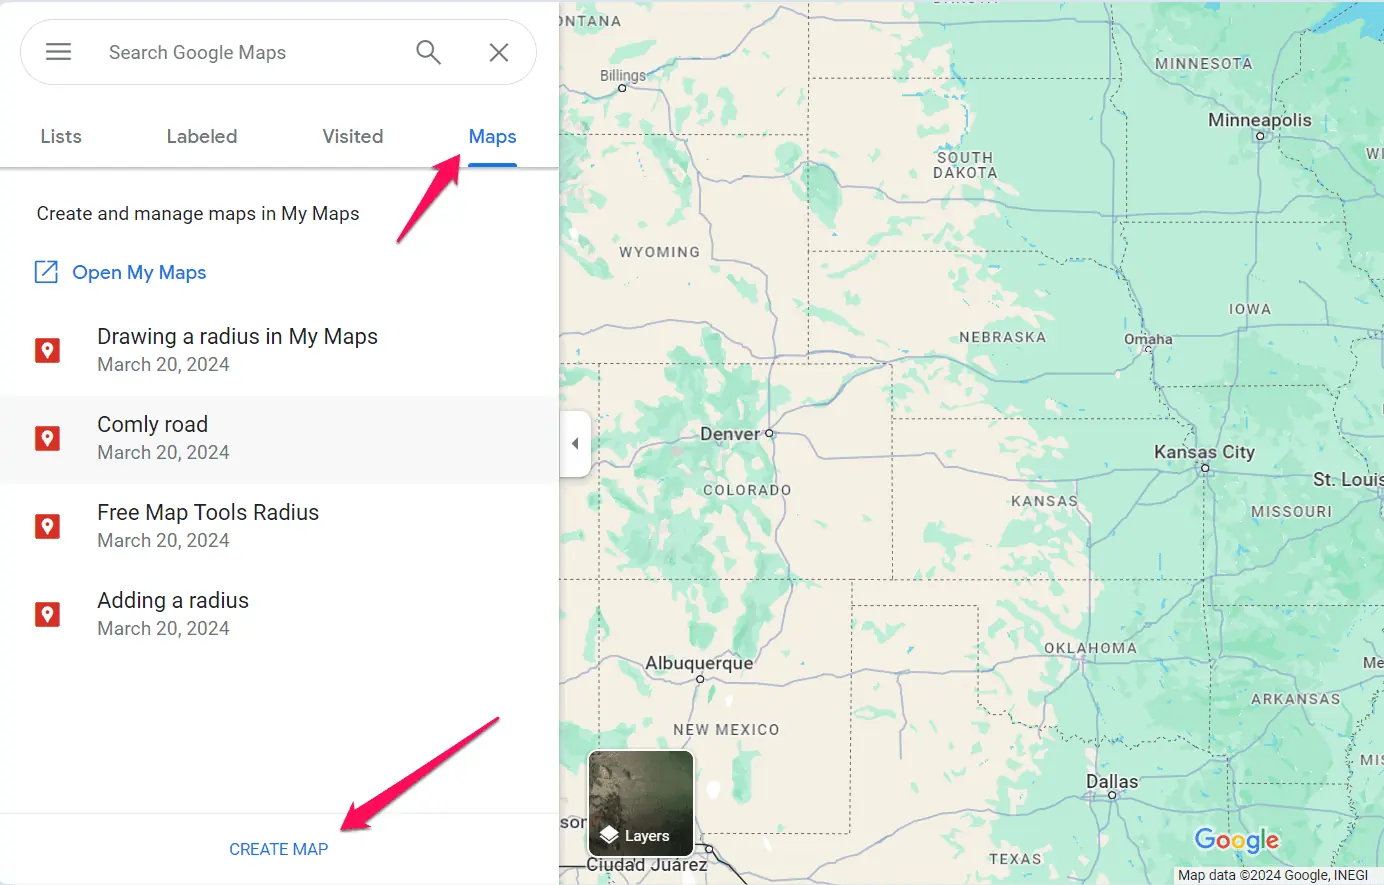
- Click on the menu icon (three horizontal lines) in the top-left corner.
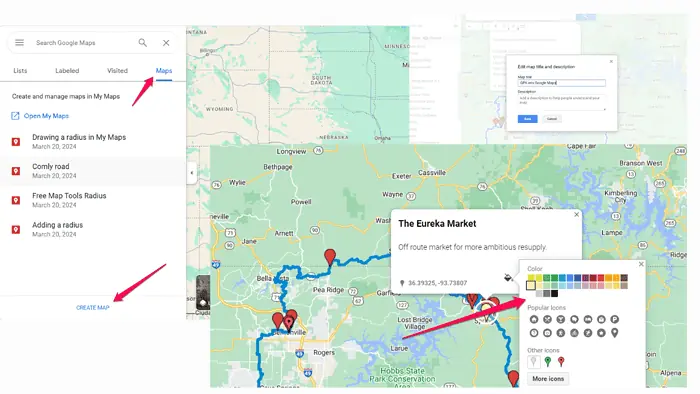
- Select Saved, then, on the Maps tab, click the Create Map button to start a new project.
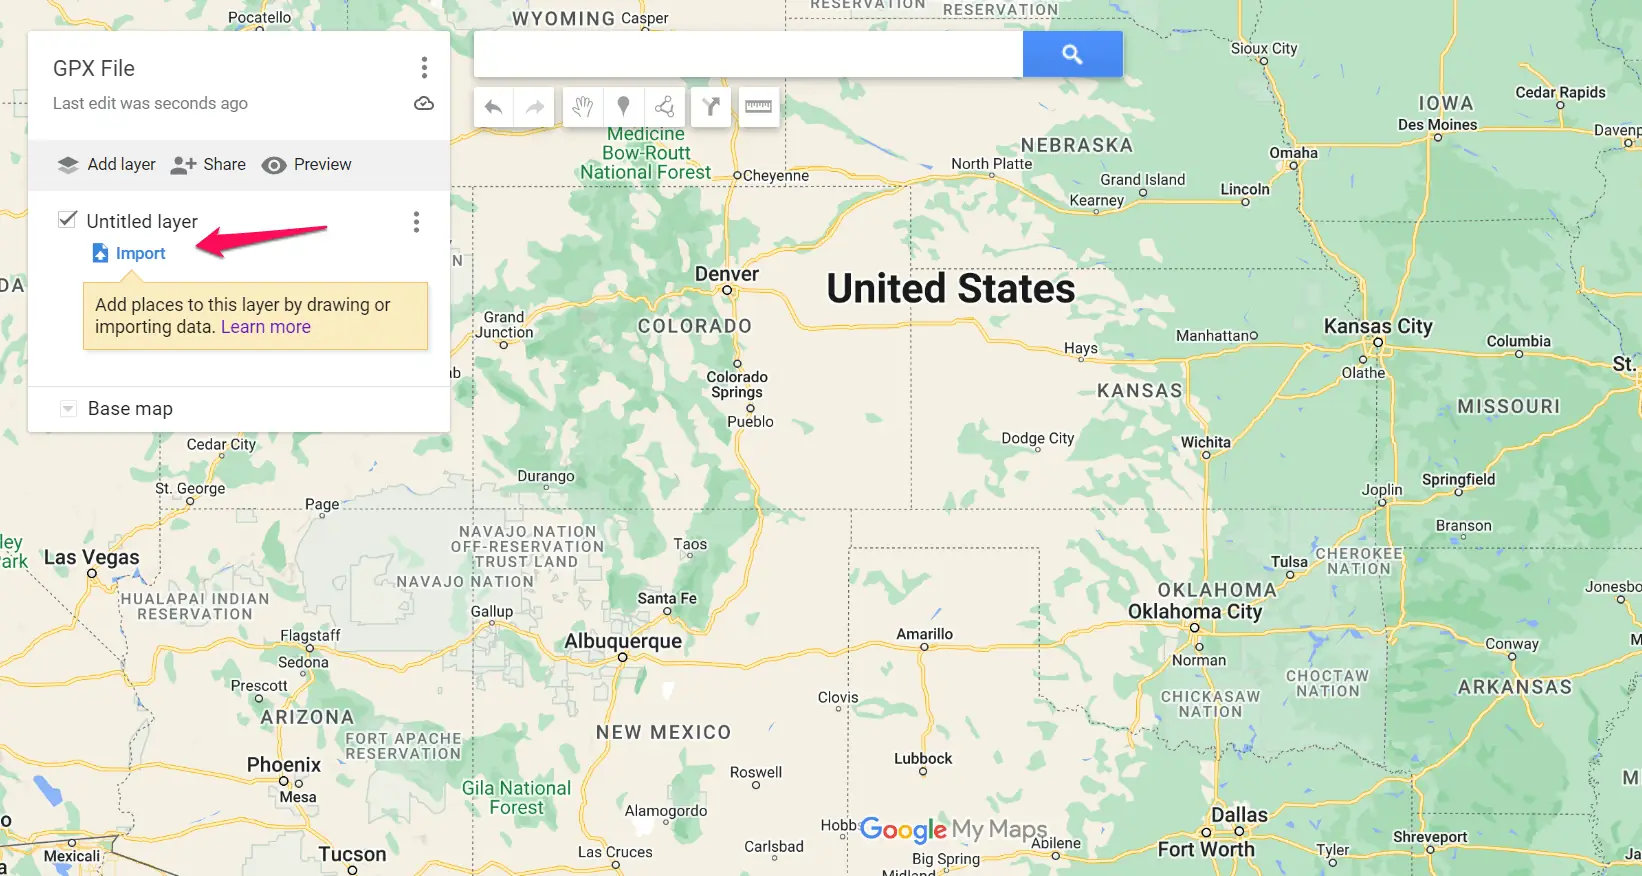
- In the new map interface, click Import. Choose the desired GPX file from your computer’s storage and hit Open to import it into Maps.
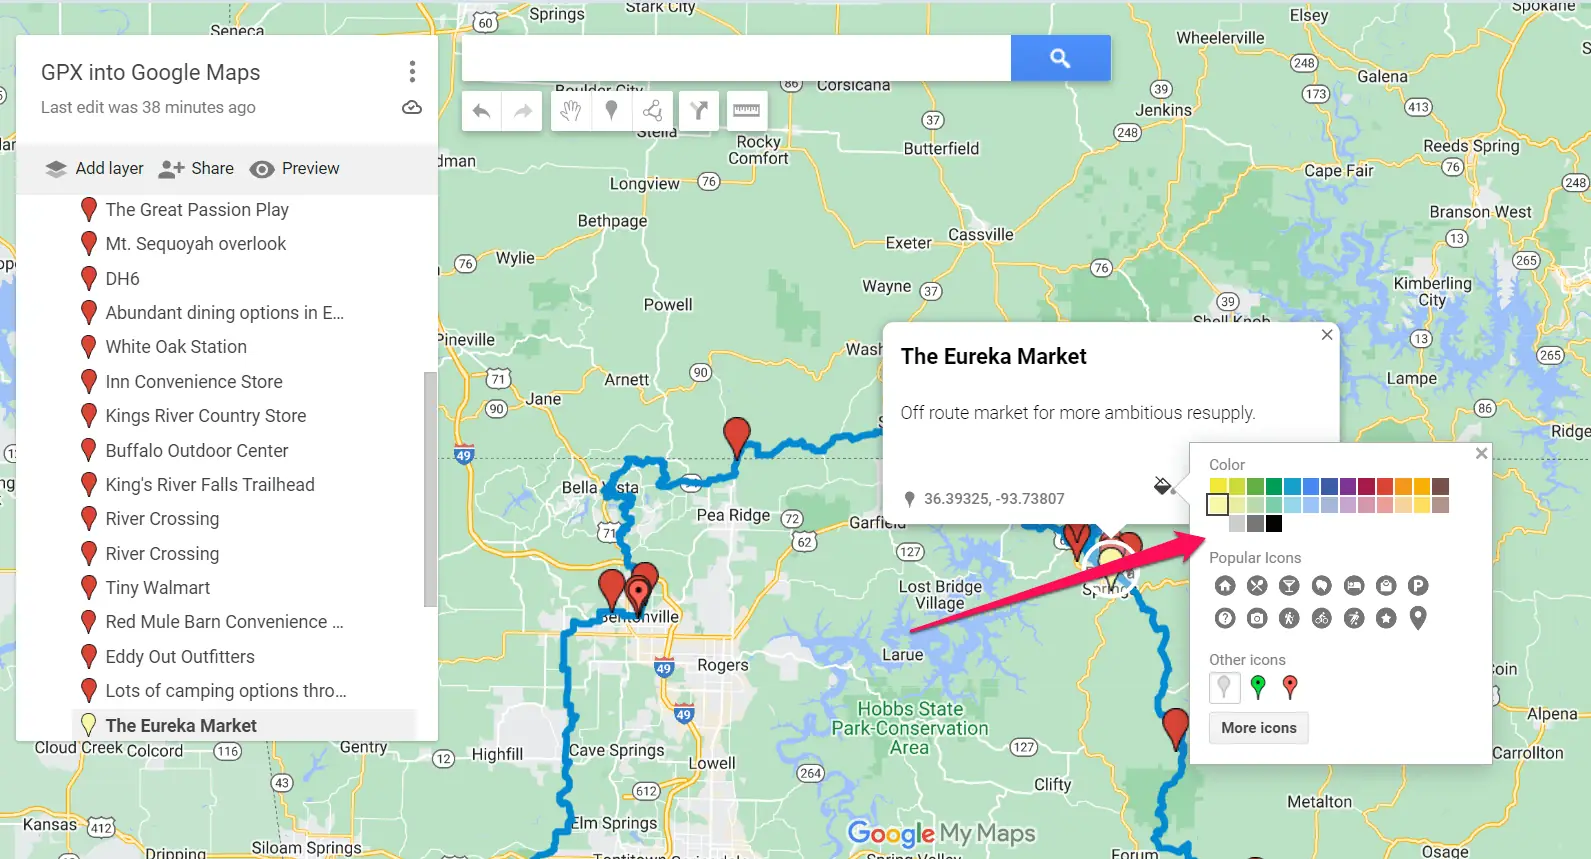
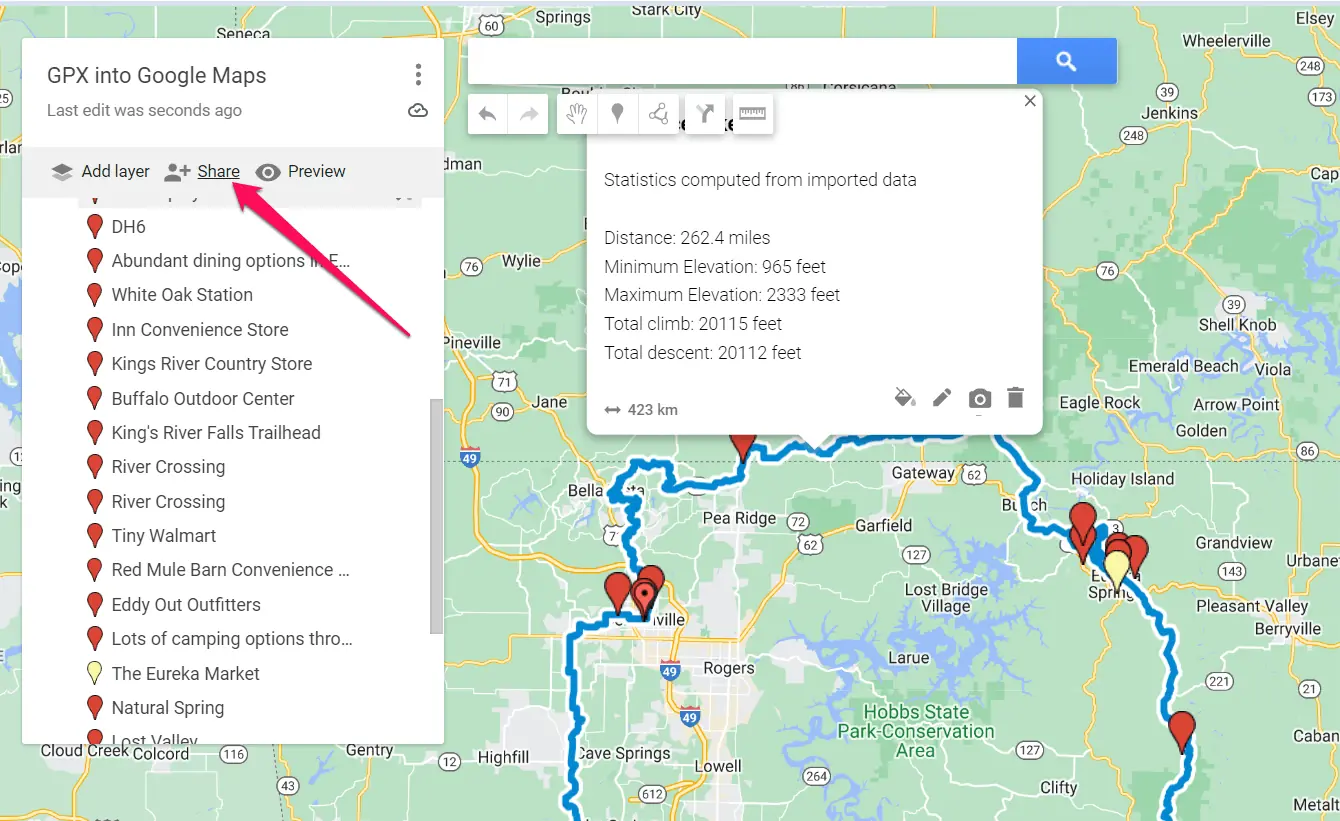
- Once imported, your GPX data will appear as a new layer on the map. You can customize the appearance and style of the GPX layer using the provided options. Add markers, labels, or shapes to enhance the map’s clarity and functionality.
- Share your map with others by clicking on the Share button. This will generate a link that you can send to friends, coworkers, etc.
By following the steps above, you can seamlessly import GPX into Google Maps, customize your maps according to your needs, and share them with ease.
Readers help support MSpoweruser. We may get a commission if you buy through our links.

Read our disclosure page to find out how can you help MSPoweruser sustain the editorial team Read more


Improve this guide


User forum
0 messages