No Such Interface Supported: 8 Simple Fixes To Try
5 min. read
Updated on
Read our disclosure page to find out how can you help MSPoweruser sustain the editorial team Read more
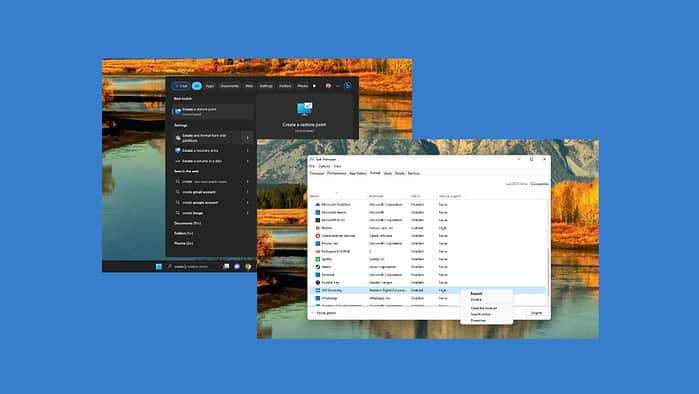
Facing the “No such interface supported” error in Windows and wondering how to fix it?
This problem can occur when trying to use functions from a host that restricts WMI requests or when a firewall is present between hosts. It’s commonly triggered by the local Windows Management Instrumentation (WMI) Service.
In this blog post, I’ll guide you through various step-by-step methods to fix this error and get your PC back to working normally.
Verifying the Error
Before trying to fix the “No such interface supported” error, it’s worth verifying it.
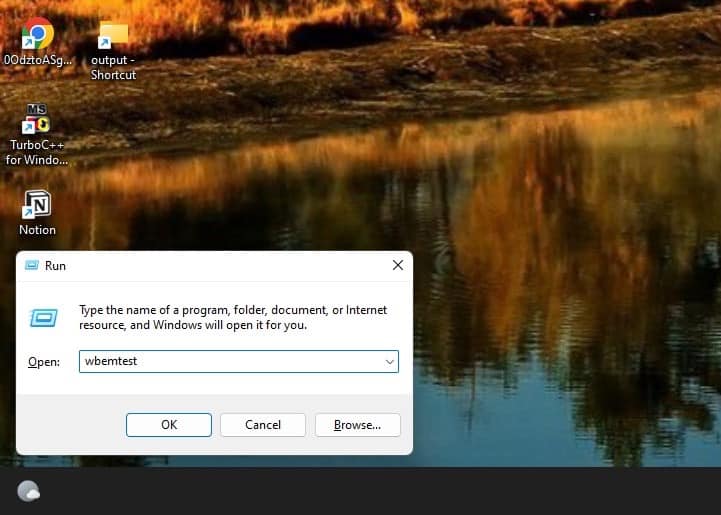
To do that, access the Windows Start Menu and open Run.
Enter ‘wbemtest’ and select OK to view the Windows Management Instrumentation Tester.
Select Connect and in the Namespace field, enter \\<HOSTNAME>\root\cimv2 .
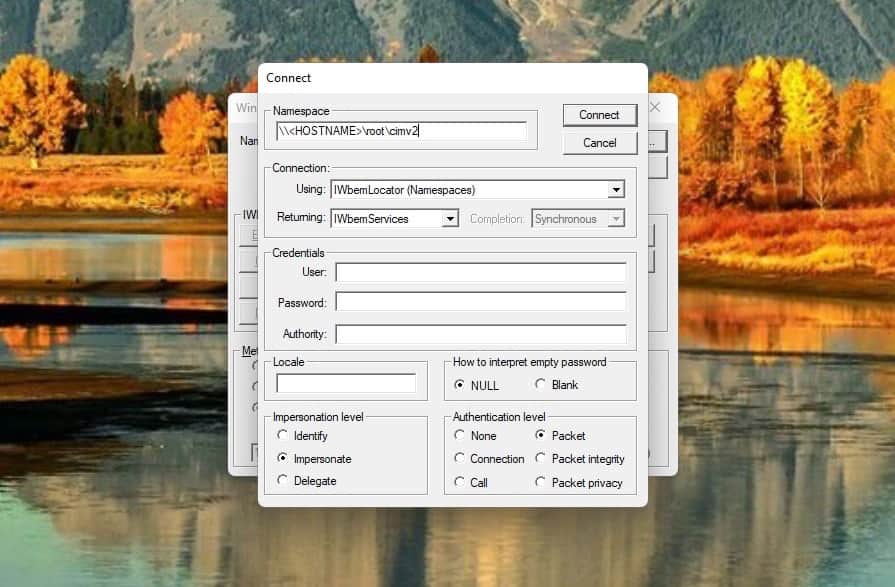
Click Connect again and if the “No such interface supported” error appears, it means the WMI access is restricted. In this case, move on to the preliminary steps to fix this issue.
Preliminary Steps
- Restart your PC – Restarting helps reset system configurations and often resolves the issue related to the WMI Service.
- Move the File to the Desktop – Relocate the file you’re opening to your desktop.
- Open the File this way – Try opening the file by right-clicking, selecting “Open with” from the context menu, and choosing the desired app. If the error persists, double-click on the file directly.
If none of the above fixes worked, move on to the next steps:
1. Run SFC and DISM Scans
These scans repair missing or corrupted system files and the Windows image.
Carry out these steps to run an SFC scan:
- Launch Command Prompt or PowerShell with administrator privileges.
- Enter “sfc /scannow” and hit Enter.
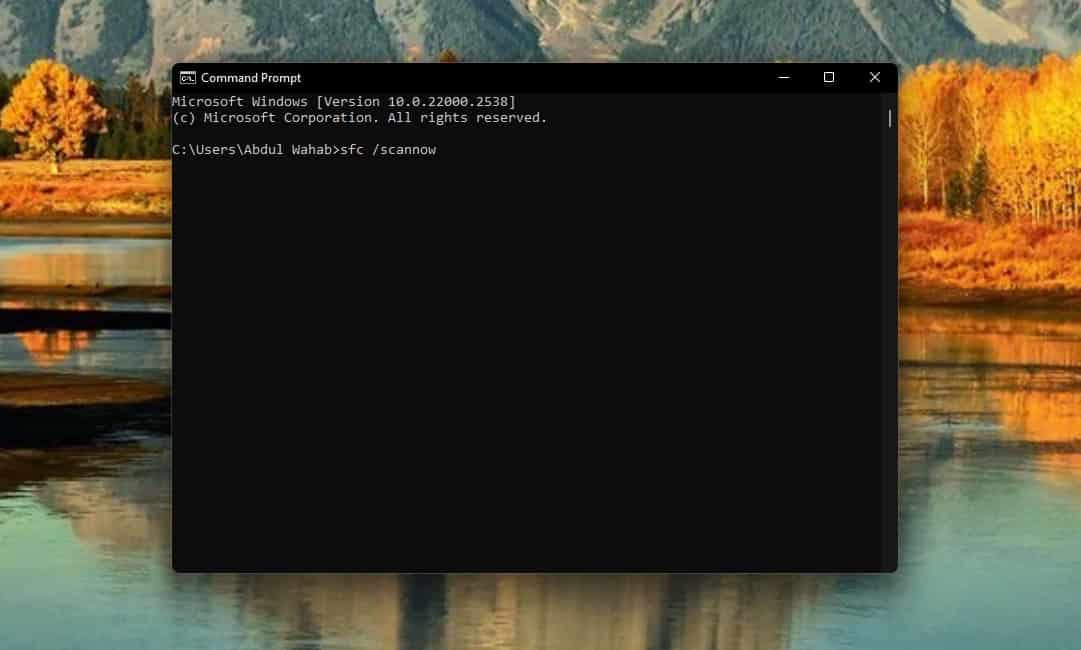
- This will examine vital system files and swap any damaged ones with a stored copy in a compressed folder at %WinDir%.
- Keep the Command Prompt open until the verification reaches 100%.
- Once done, the scan results will be displayed.
To run a DISM scan, follow these steps:
- Ensure you have an active internet connection.
- Enter “DISM /Online /Cleanup-Image /RestoreHealth” in the Command Prompt or PowerShell with administrator privileges and hit Enter.
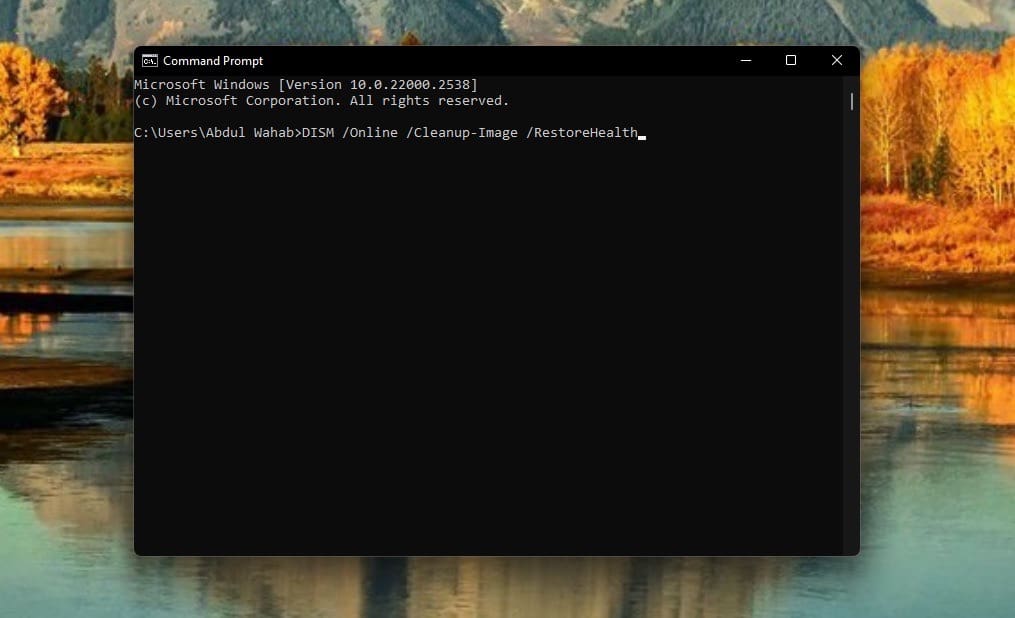
- This process will mend the Windows image, containing the essential components of the operating system.
Once you’ve run these scans, try opening the file that was giving the “No such interface supported” error and see if it’s resolved.
2. Disable Extra Startup Programs
To disable unnecessary startup programs, do this:
- Right-click the taskbar and select “Task Manager.”
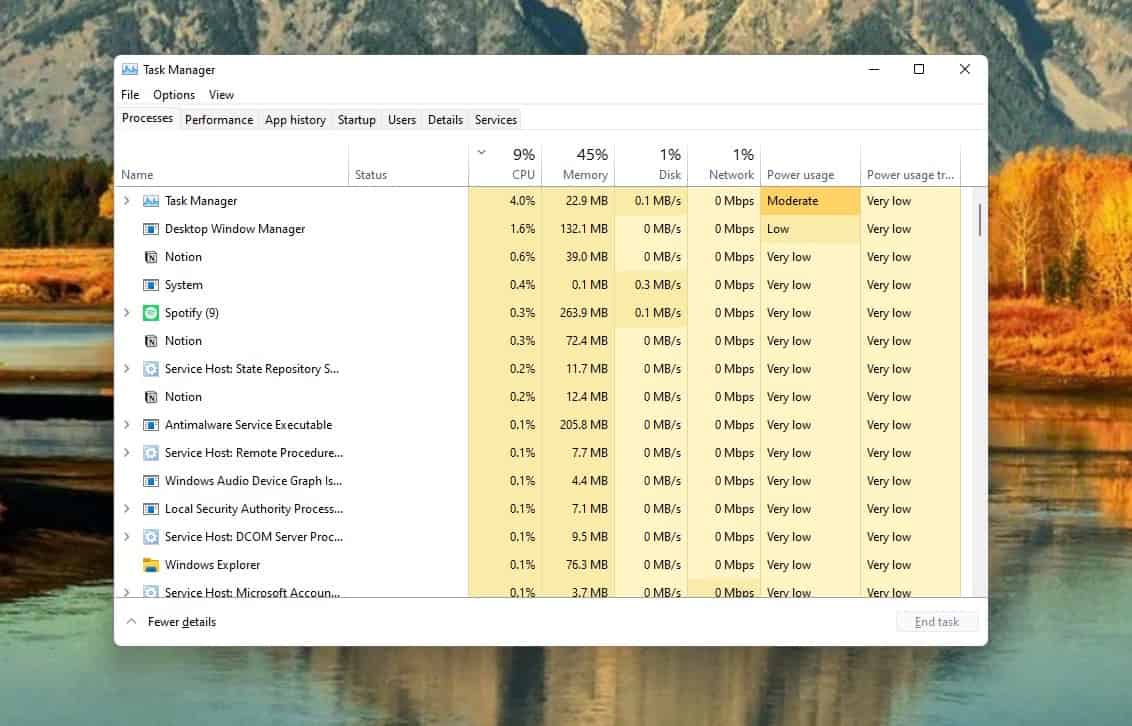
- Go to the “Startup” tab.
- Look for non-essential programs.
- Right-click and choose “Disable” for each.
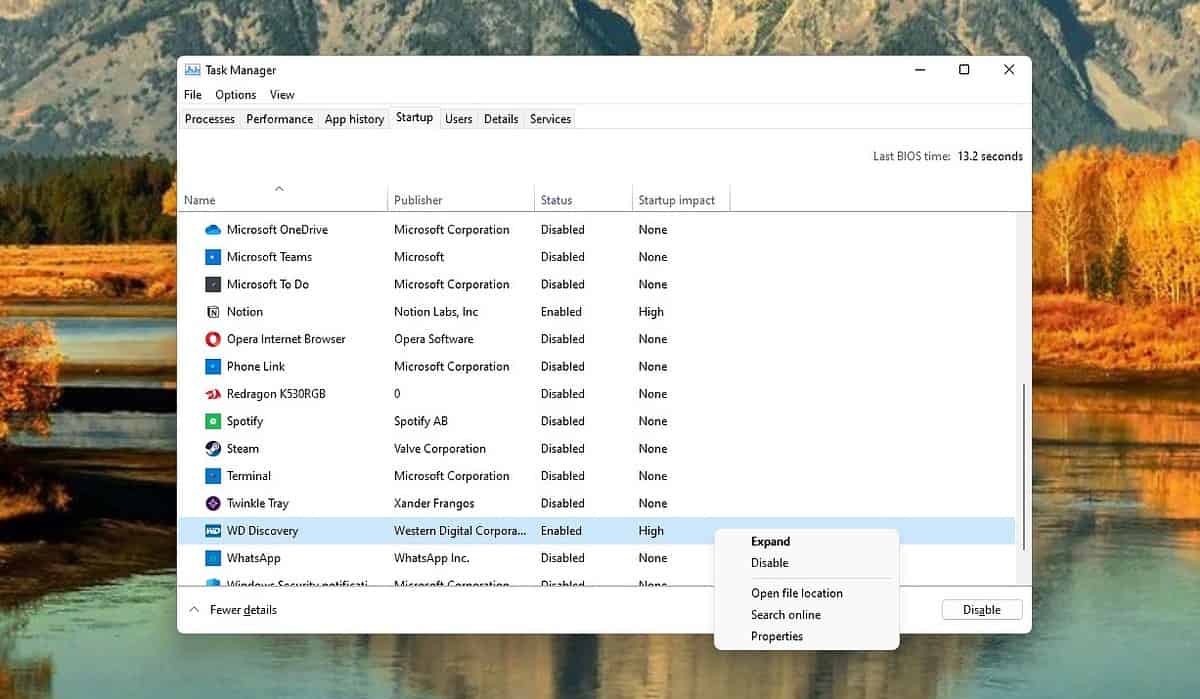
- Restart your computer.
3. Re-Register DLL Files
A lot of times, issues with DLL files lead to the “No such interface supported” error.
- Open Command Prompt as administrator.
- Type “regsvr32 /u filename.dll” and press Enter to unregister the DLL.
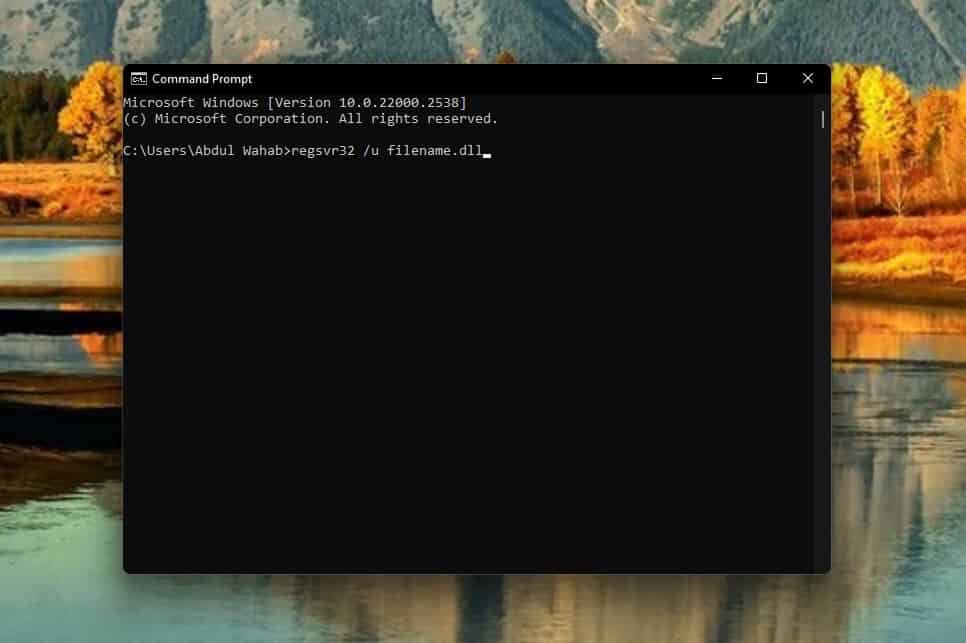
- Then, type “regsvr32 filename.dll” and press Enter to re-register it.
- Replace “filename.dll” with the actual DLL file name.
- Confirm the registration message.
4. Create a New User Account
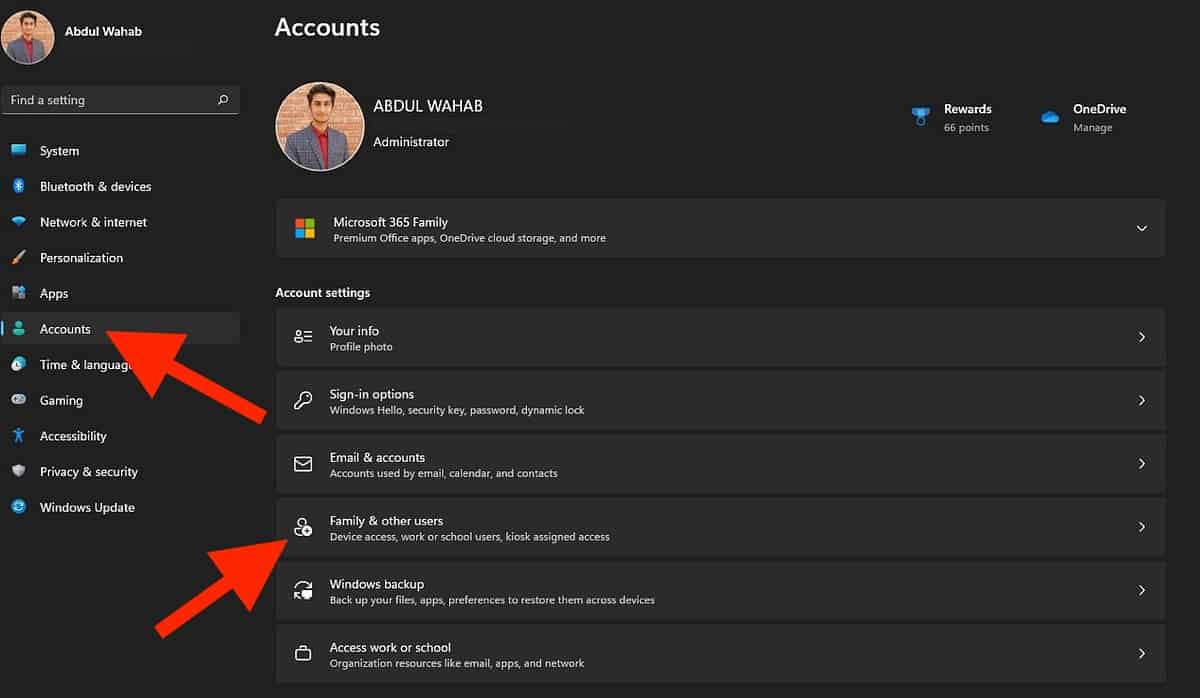
- Open Settings.
- Go to “Accounts” and select “Family & other users.”
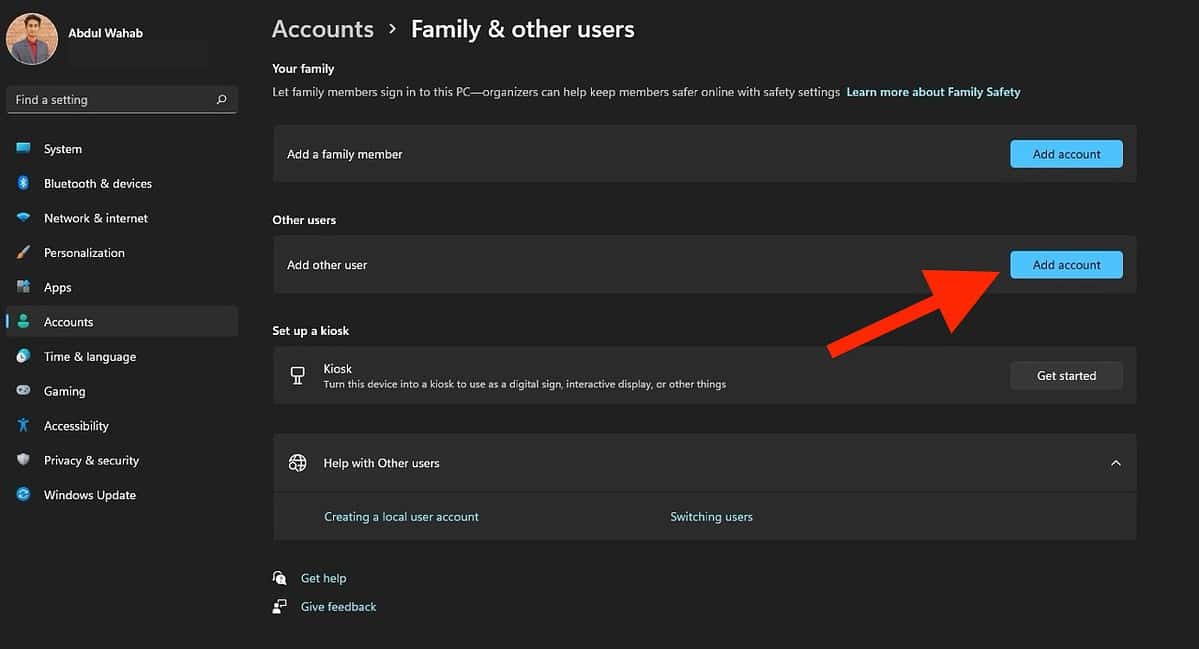
- Click on “Add account” next to “Add other user.”
- Choose “I don’t have this person’s sign-in information.”
- Select “Add a user without a Microsoft account.“
- Enter the username and password.
- Click “Next” and then “Finish.”
5. Fix Issues with the Affected App
Try repairing the affected program before re-opening it:
- Open “Control Panel” on your computer.
- Navigate to “Programs” and then “Programs and Features.“
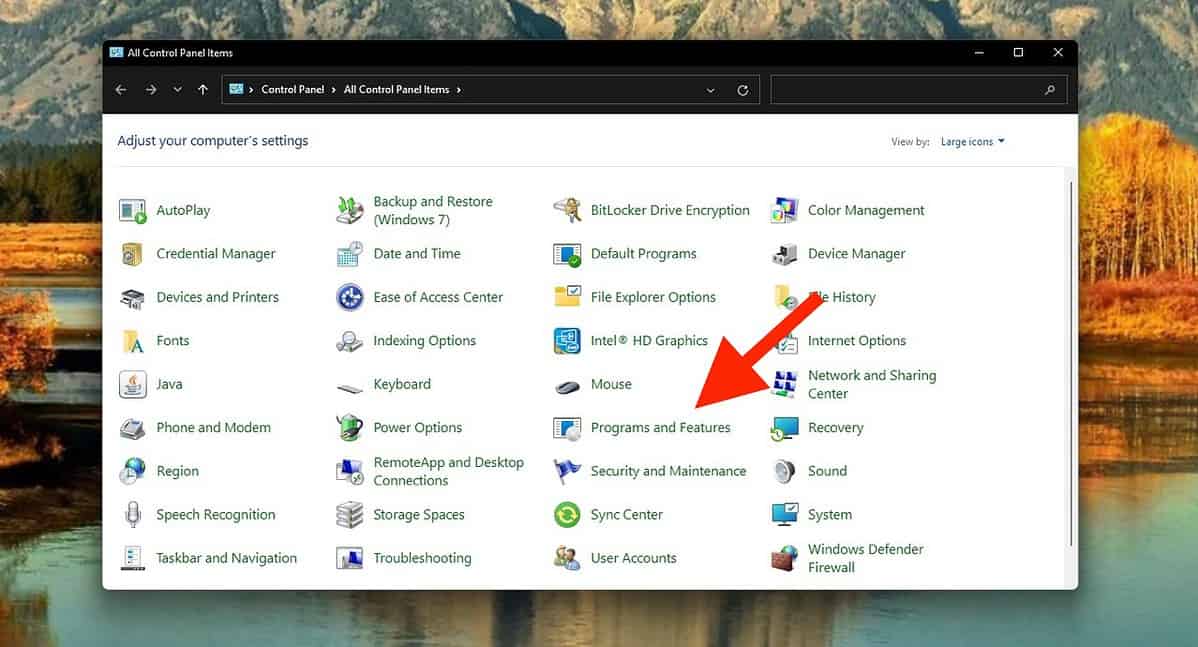
- Find the problematic app in the list.
- Right-click on it and choose “Repair” or “Modify.”
- Follow the on-screen instructions to complete the repair process.
6. Reinstall the Affected App
If you’re still facing issues with a problematic app after attempting repairs, consider reinstalling it.
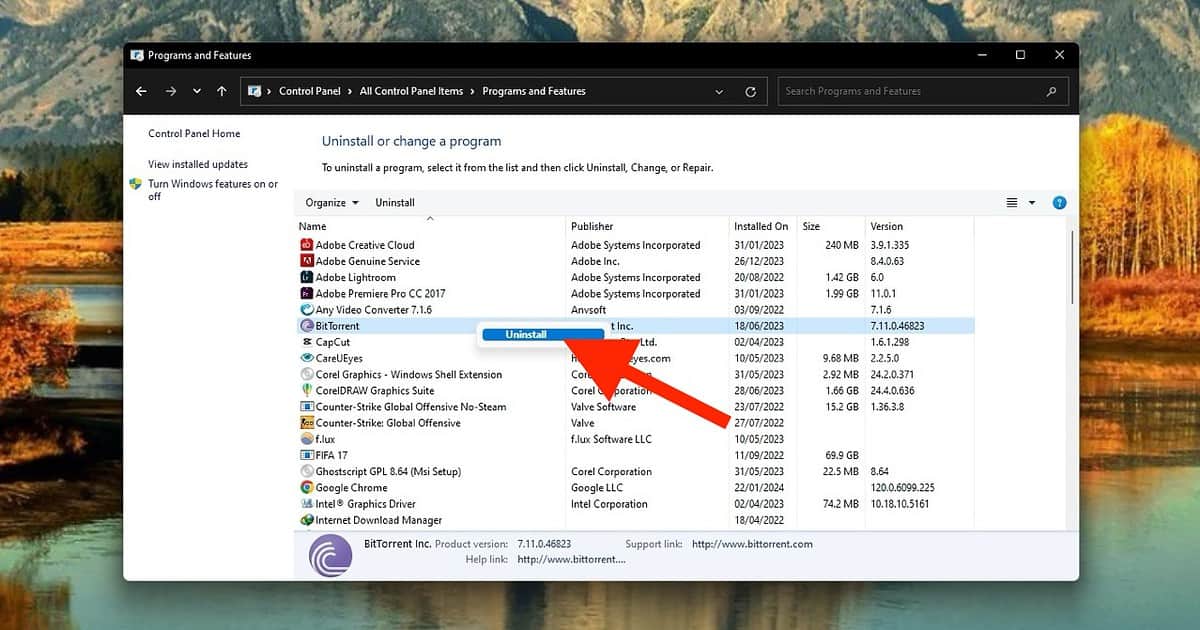
- Open “Control Panel” and go to “Programs.”
- Click “Programs and Features“, find the app, right-click, and choose “Uninstall.“
- Next, visit the official website or app store to download the most recent version of the app.
- Run the installer and follow the instructions.
- After installation, restart your computer to ensure the changes take effect.
7. Update the Problematic App
- Open the Microsoft Store or visit the official website of the app’s developer.
- Search for the app in the store or locate the download page on the website.
- In the Microsoft Store, click on the three dots in the upper-right corner and select “Downloads and updates.” On the website, look for a dedicated “Updates” section.
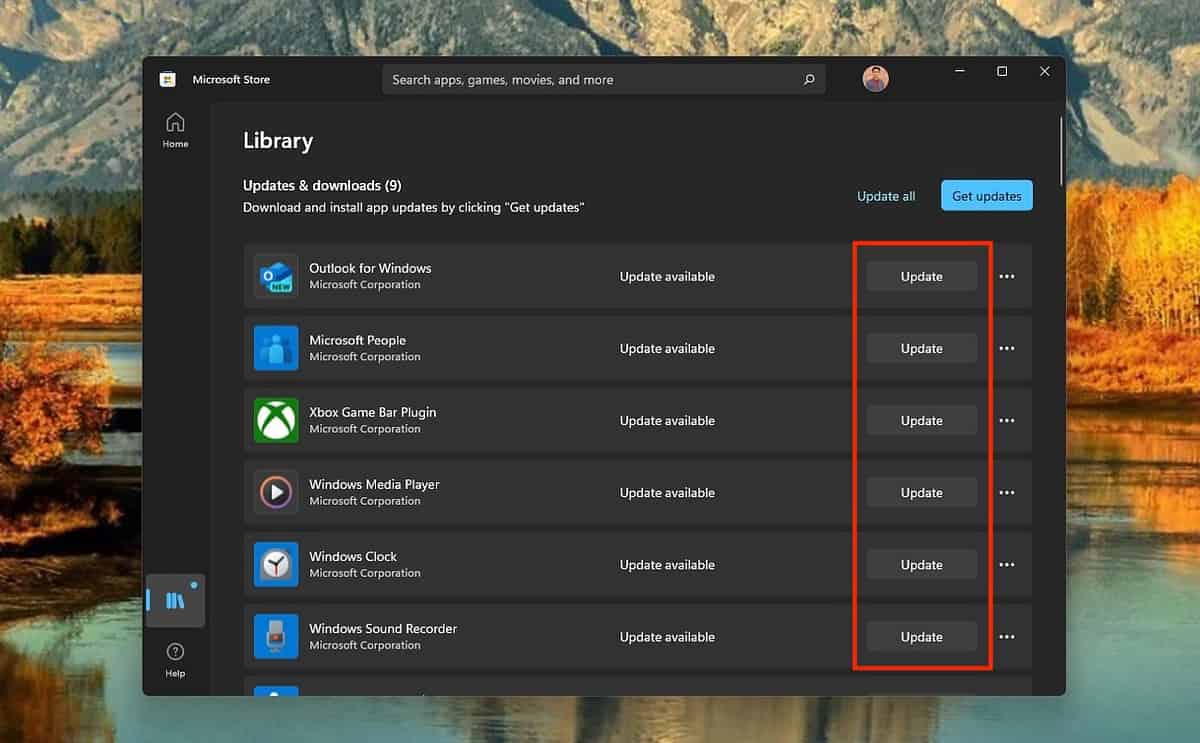
- If an update is available, click “Update” or follow the provided instructions to download and install the latest version.
- Restart the app after updating to apply the changes.
8. Revert Windows
If none of the above fixes work, reverting your system to a previous state should do the trick.
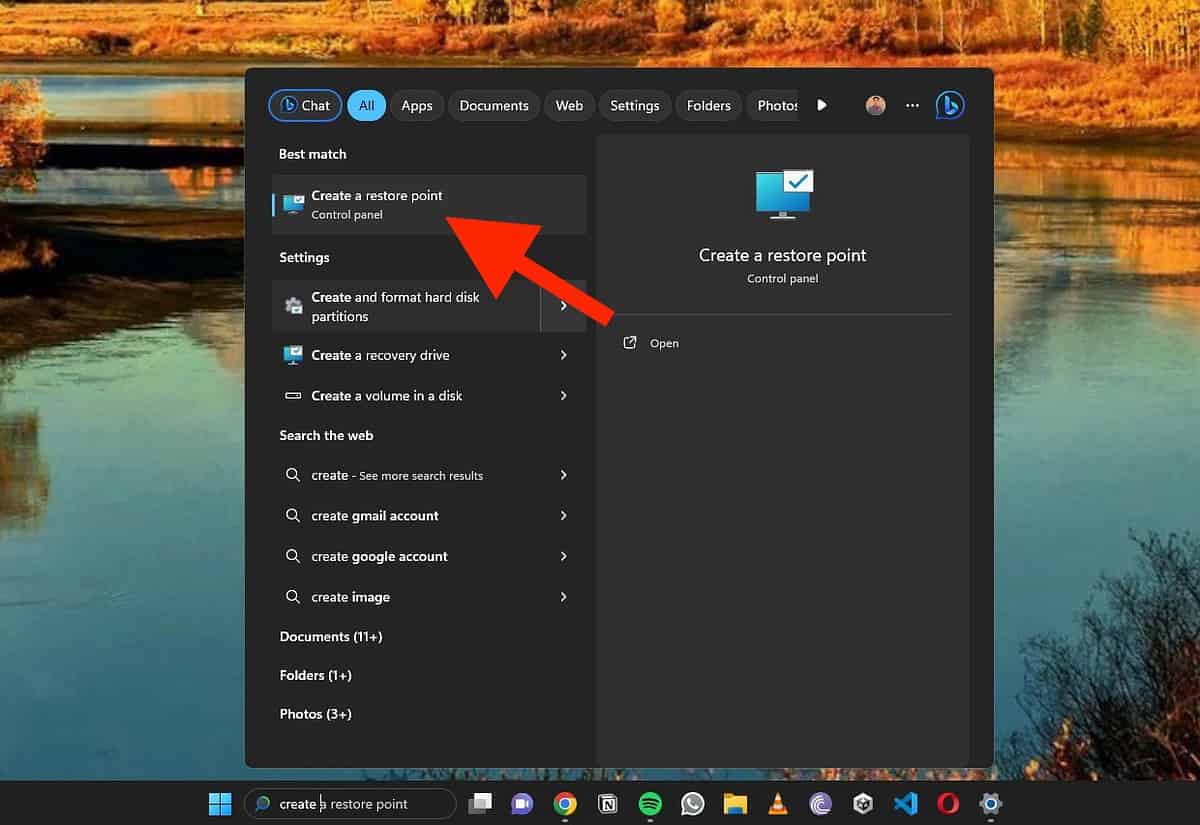
- Type “create a restore point” in the Windows search bar and select the corresponding result.
- In the System Properties window, click on the “System Restore” button.
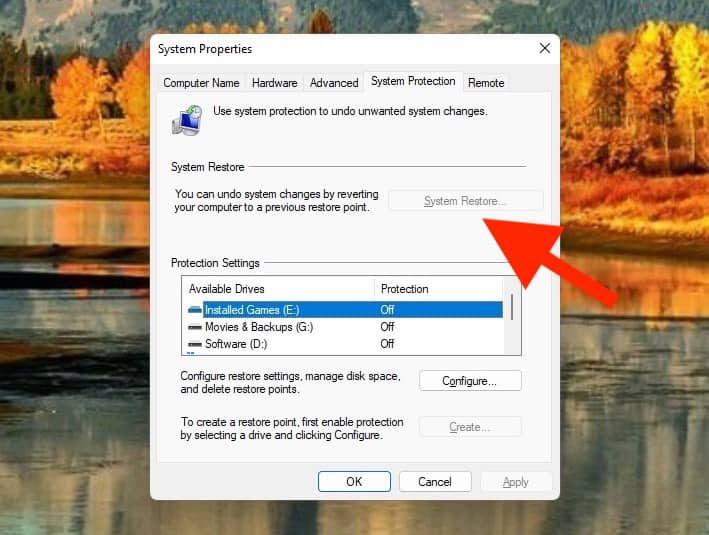
- Select “Choose a different restore point” and click “Next.”
- Pick a restore point before the error occurred and click “Next.”
- Confirm your selection and click “Finish.”
- Click “Yes” to start the restoration process.
- Your system will restart, and the process will take some time.
That’s it! The above fixes should be able to help you get over the “No such interface supported” error on your PC.
You might also be interested in:
Which method will you try first?





User forum
0 messages